This step-by-step tutorial showcases the seamless deployment and rapid file analysis capabilities of MetaDefender Aether. Explore how our integrated solutions facilitate an efficient and straightforward process.
When you first setup Filescan, you should perform some important configuration steps. These steps will increase the security and usability of your sandbox and will give you a solid foundation for rapidly detecting threats.
Why MetaDefender Aether?
Many sandbox solutions, while comprehensive, can be complex. MetaDefender Aether stands out by being both fast and user-friendly.
Seamless Integrations
The swiftly deployable and efficient sandbox solution distinguishes itself by seamlessly integrating with OPSWAT products, as well as third-party SIEM and SOAR solutions. Unlike many comprehensive yet complex sandbox solutions, our platform is not only robust but also fast and user-friendly, ensuring a streamlined experience for effective threat analysis.
See all integrations here: https://www.opswat.com/docs/filescan/integrations
On-Premise Deployment
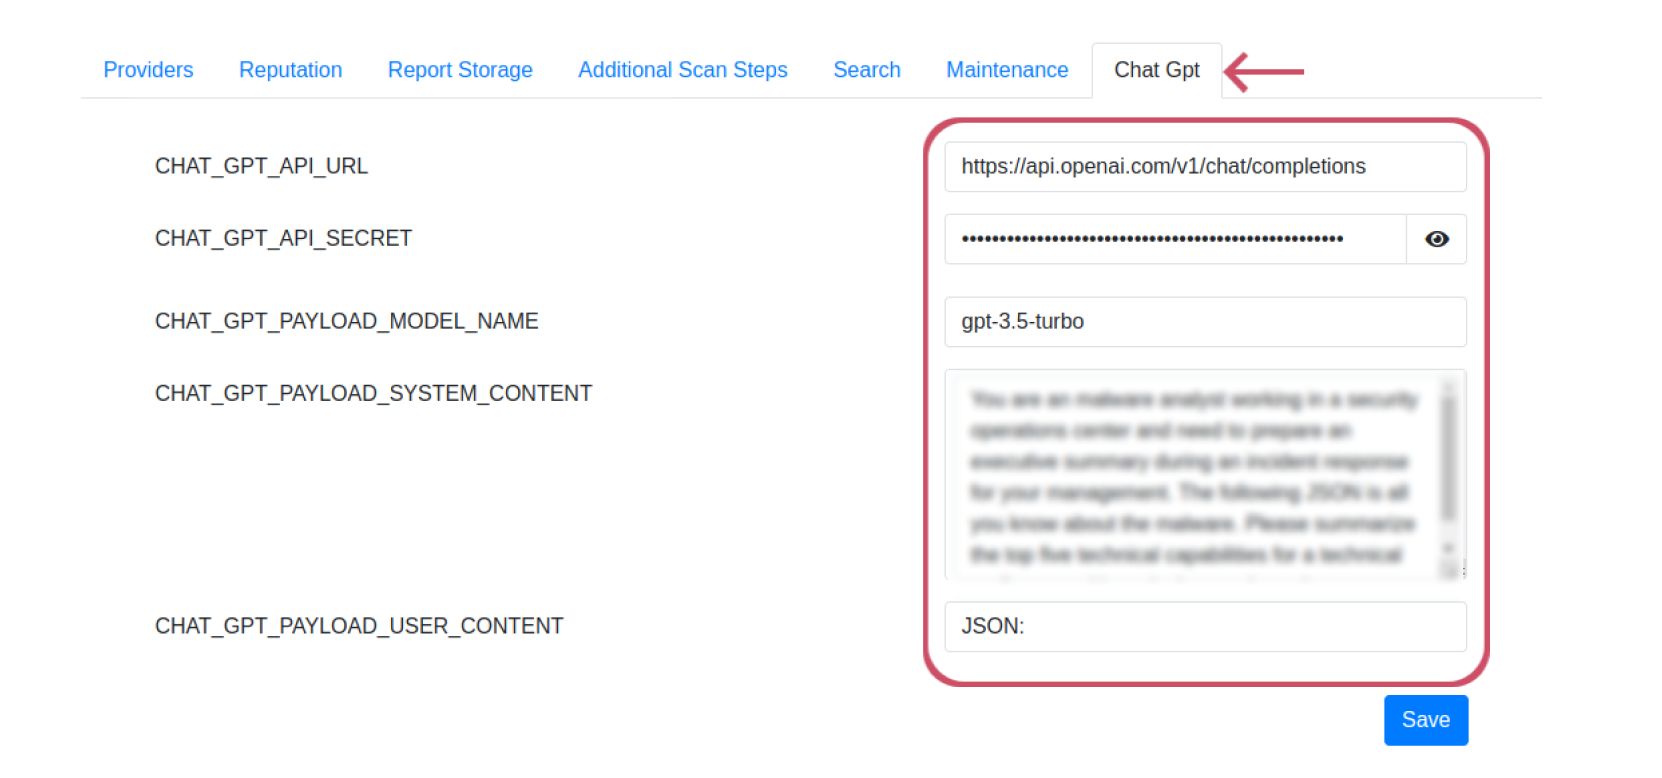
Unlike other sandboxes, our Filescan Sandbox offers flexibility of on-premises deployment, providing maximum security. Additionally, benefit from customizable admin options in the backend for a tailored and robust security solution. Such as our latest integration with OpenAI Chat GPT empowers admins to customize the backend prompt, tailoring it to their specific requirements, whether for technical details or a non-technical executive summary.
Before we start,
- Ensure your system meets the minimum technical requirements.
- Familiarize yourself with basic Linux commands.
- Download the test files, here.
Step 1 – Create User
Use the adduser command to add a new user called filescanio to your system:

Step 2 - Download & Unpack the Release
Next, update your package index files and install 7zip.

Download Filescan from the MY OPSWAT portal. Unpack using the default password provided by your sales representative. Replace x.y.z with the version you downloaded.

Step 3 – Format Installation Scripts
Use the adduser command to add a new user called filescanio to your system:
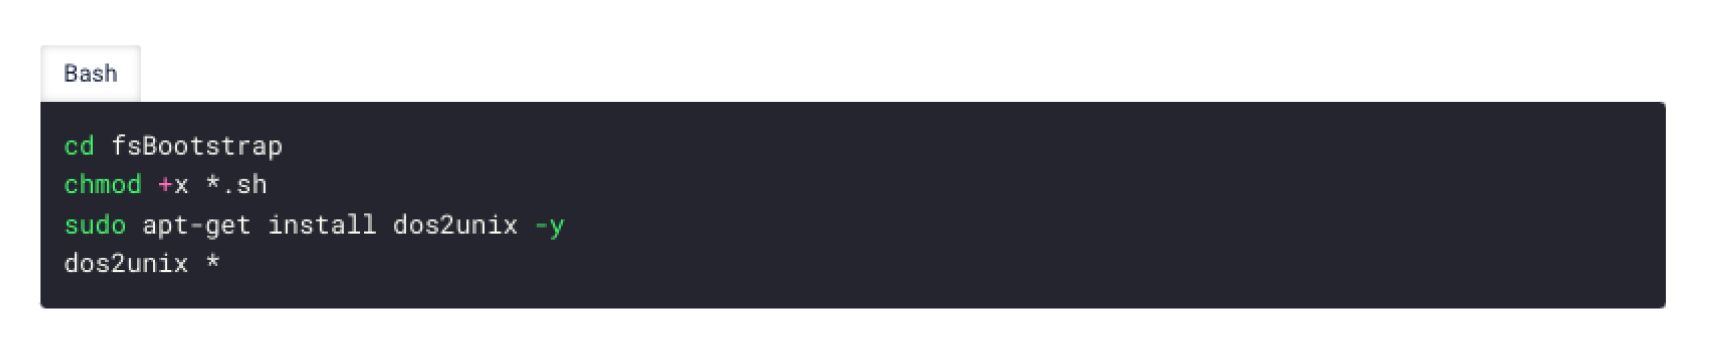
Ensure that the Here’s a breakdown of what these commands do:
1. cd fsBootstrap: change directory.
2. chmod +x *.sh:
This command adds executable permissions (+x) to all files with a .sh extension in the current directory. This means any shell script (files ending in .sh) will become executable, allowing them to be run as scripts.
3. sudo apt-get install dos2unix -y:
This command installs the dos2unix utility. The -y option automatically answers 'yes' to the prompt, making the installation process non-interactive. It won't ask for user confirmation.
The utility dos2unix is used to convert text files written in DOS/Windows format to the Unix format.
4. dos2unix *:
Dos2unix converts text files from DOS format to Unix format. This command applies the dos2unix conversion to every file in the current directory (as indicated by the * wildcard). It ensures that all text files in the directory are in the Unix format, which can prevent potential issues when running or reading these files on a Unix-based system.embedded installation scripts are executable and have the Unix format:
Step 4 - Enable Optional Features
Edit bootstrap.cfg to enable features needed to run test files (e.g. S3 bucket storage, E-Mail).
Open your text editor,
<code>ima bsh cmd *</code>
Here’s a breakdown:
cool optional feature we all need
another cool optional feature we all need
Step 5 – Move the fileScanIO.zip archive
Move the FileScanIO.zip archive into the current folder (fsBootstrap)

Step 6 – Run the Bootstrap Shell Code
This is a long running operation that can take 20-30 minutes, depending on network bandwidth.

Step 7 – Optimizations
Are we walking them through some optimizations? Maybe we can highlight how x feature improves speed or workflow.
Optimize your transform and broker components if needed. More information: Sandbox Engine Options.
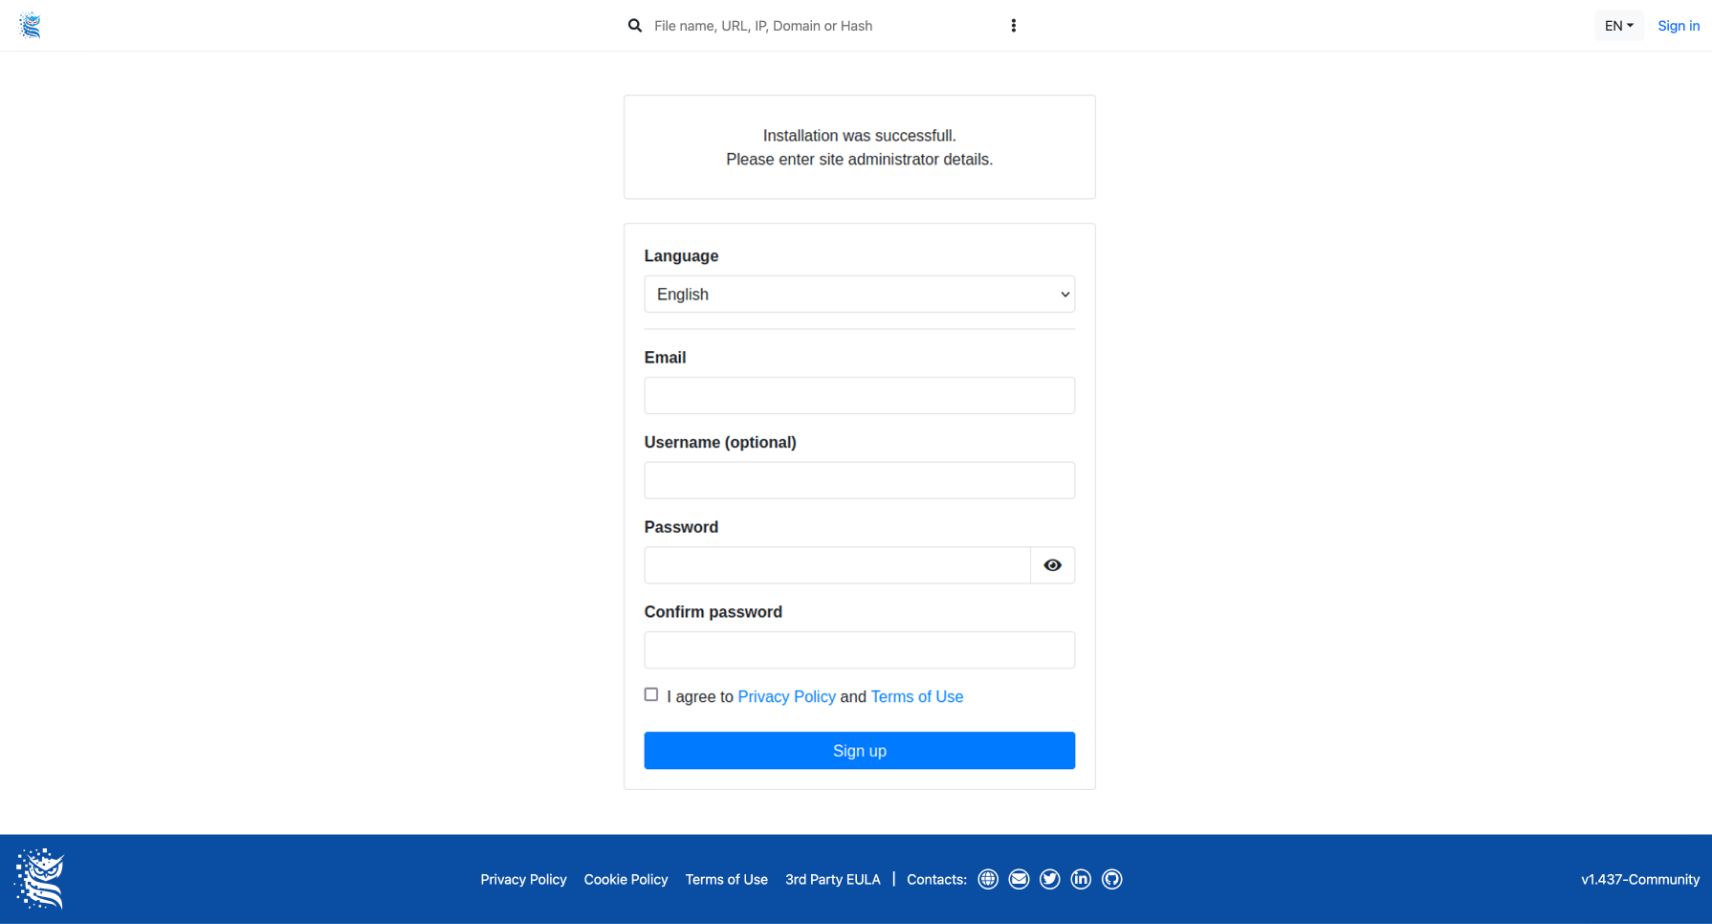
Step 8 – Set up the initial Admin user
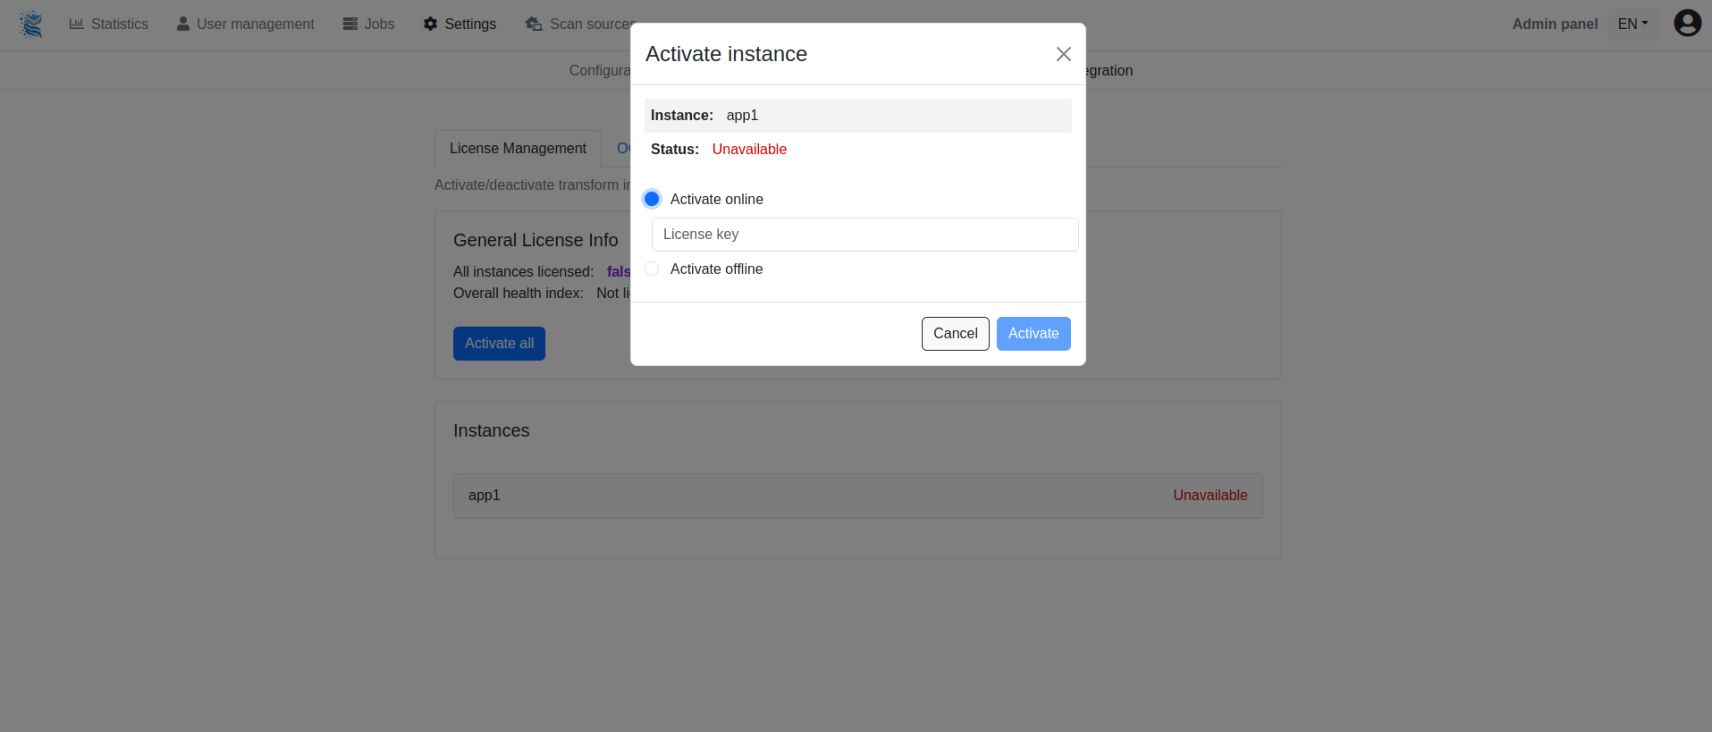
Step 9 – Add your Activation Key
The system will not be able to generate reports yet (and eventually gracefully exit), as a valid Activation Key is required.
Please use the Activation Key that you received from your OPSWAT Sales Representative, and follow the instructions on the License Activation page.
If you use the default installation location, then you can create and copy the licence.yml file like this:
Step 10 - Start Services
If not already running, start the desired services.

Step 11 - Verify Initialization
Check the application logs to ensure that the initialization succeeded. To initialize the newly created bash aliases, please run this command:

After you’ve created bash aliases, fsiolog and fsiologbroker command aliases will be available to the filescanio user (see bootstrap.cfg) and the user who performed the installation:

Get started with Filescan Sandbox.
Did you find this guide helpful? Let us know!