A few weeks ago we published a post on how to create a bootable USB thumb drive for scanning endpoints to help organizations that need to scan computers from external systems rather than from the computer itself. The solution we published utilizes MetaDefender Endpoint (embedded on the bootable USB thumb drive) to scan the computer, given that the computer is connected via LAN to a network hosting a Metascan server.
However, some organizations may not have a network they can connect the computer to, and the embedded MetaDefender Endpoint is not able to scan the computer without a connection to Metascan, which cannot be run on Windows PE, the operating system used on the thumb drive. So we would like to share another solution for scanning computers that have no network connection: the direct-connect solution. This solution is based on two features native to most Windows operated computers:
- Two computers directly connected to each other by a network cable recognize each other through TCP/IP by machine name
- Modern network interface cards can support this connection through a standard Ethernet cable (while older network interface cards require a crossover cable)
The complete direct-connect Metascan solution consists of the bootable thumb drive, a dedicated laptop running Windows, and an Ethernet cable. It requires the computer to be scanned (hereafter referred to as the stand-alone computer or SA) to have Ethernet capability (i.e. a physical Ethernet port and a network interface card*), but the SA operating system itself does not need to be configured for any network connectivity. By following the steps outlined below, you can configure these components to create a portable Metascan solution that connects to the SA computer and its file system.
- The first step is to install Metascan on your laptop running Windows. Details to install and use Metascan are available at https://my.opswat.com/hc/en-us/categories/200161610-Metascan.
- You will need to change the Computer Name of the laptop to MetascanServer. Change this in the My Computer -> Properties window.
- You will need to create a Firewall rule to allow Metascan requests from the client
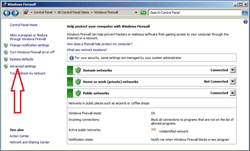
- Navigate to Windows Firewall (Windows offers many ways to access this center, including via the Control Panel) and choose Advanced Settings
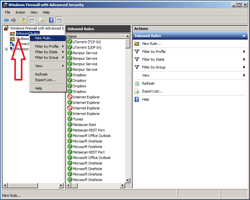
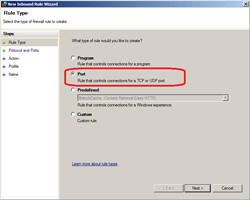
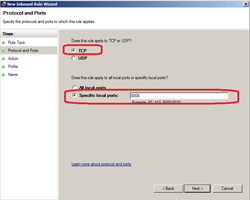
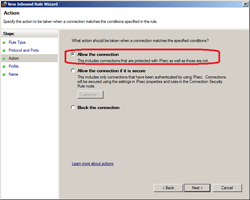
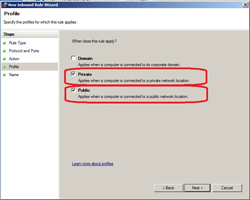
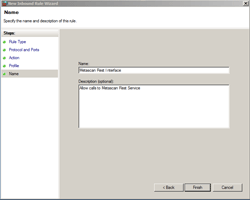
- Right click on "Inbound Rules" to create a new Inbound rule called "Metascan REST Interface" which allows inbound TCP on port 8008
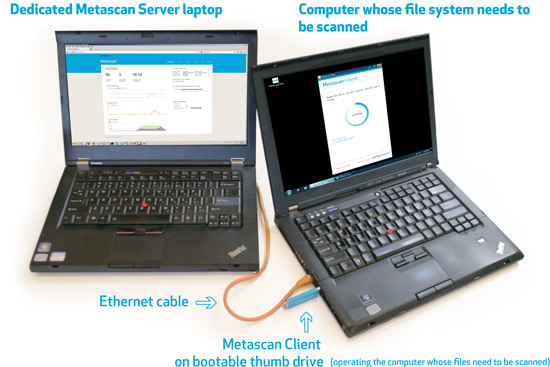
- Once you have these configurations set you are ready to run your direct-connect Metascan solution. Connect your MetascanServer laptop and your SA computer with the Ethernet cable. Insert your bootable thumb drive with MetaDefender Endpoint into the SA computer. Boot the SA computer with the thumb drive. The MetaDefender Endpoint on the thumb drive will connect to the MetascanServer laptop to scan the file system on the SA computer.
- Navigate to Windows Firewall (Windows offers many ways to access this center, including via the Control Panel) and choose Advanced Settings


The instructions above should result in a setup similar to what is shown in the image below:
* Note: Most modern network cards can be connected to each other through standard Ethernet cables. However, some older network cards require cross-over cables (they look similar to straight Ethernet cables, but are wired internally with cross-overs).
Dan Lanir
Director, Professional Services & Support
OPSWAT