MetaDefender™ TeamCity Plugin
Protect your reputation by checking your TeamCity builds for malware and false positive anti-virus alerts before releasing to the public. With the MetaDefender plugin you can quickly scan your build with 30+ leading anti-malware engines, not only to detect possible malware, but also to alert you if any anti-virus engines are incorrectly flagging your software or application as malicious, potentially causing harm to your reputation.
Instructions For Implementing MetaDefender TeamCity Plugin
Follow the next steps to start using the OPSWAT MetaDefender plugin:
Install The Plugin
To install the plugin, in TeamCity go to Server Administration > Plugins List. Click on the ‘Upload Plugin Zip’ button and choose the metadefender-plugin.zip file. Now restart the TeamCity service. You will see ‘OPSWAT MetaDefender’ in the Plugins List.

Configure The Plugin And Global Settings
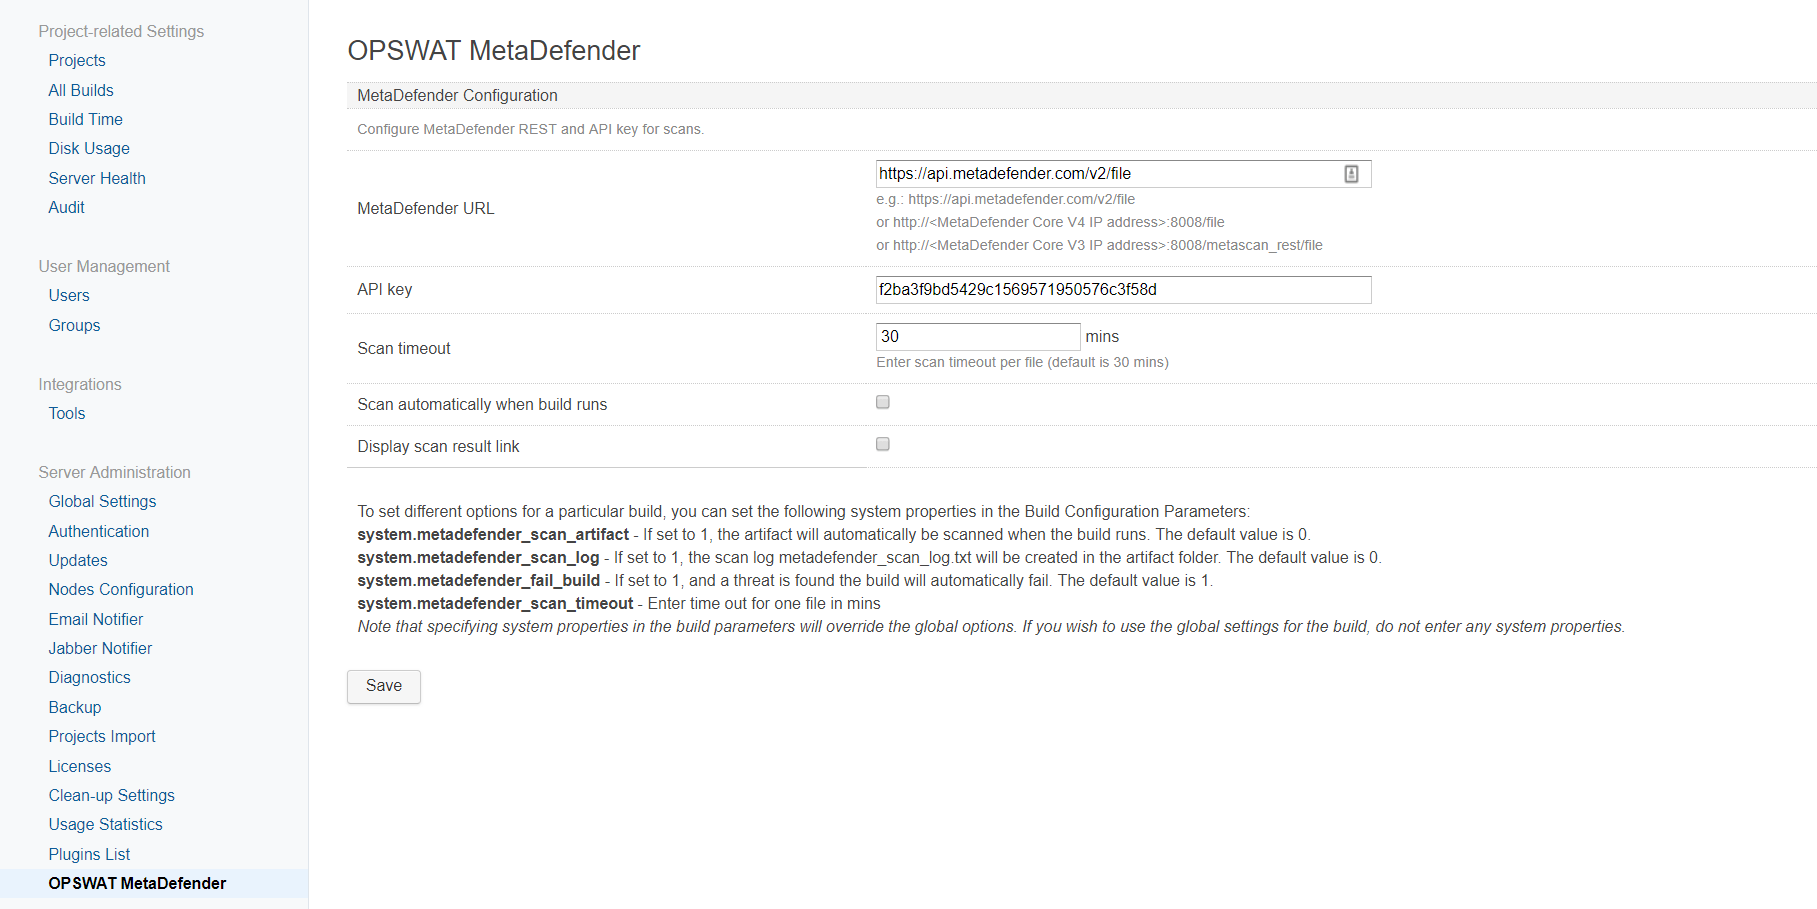
First, you must configure the MetaDefender plugin. Under Server Administration go to ‘OPSWAT MetaDefender’. The following options are available:
- Enter the MetaDefender URL. If you are using MetaDefender Cloud, enter https://api.metadefender.com/v4/file. If you have an on-premises MetaDefender Core v4 installation, enter http://<MetaDefender Core IP address>:8008/file.
- Enter the MetaDefender API key. (Note that free MetaDefender API keys offer usage up to certain limits. If you are interested in using a commercial version, please view our enterprise licensing options.)
- MetaDefender Cloud: To request your free MetaDefender Cloud key, you must create an account on metadefender.com. After you have created your account, click on your name in the top right corner and select ‘Account Information’. Your MetaDefender Cloud API key will be listed.
- MetaDefender on-premises: To request your 15-day MetaDefender on-premises key, download and install MetaDefender from the OPSWAT portal. After installation, sign in to the MetaDefender web console and go to Settings > License. Click on the ‘Activate’ button. Your API key will be emailed to you.
A number of global options can be configured which will be applied to every build, unless you change the system properties in the build parameters (see step 3). The following options are available:
- In ‘Scan timeout’, enter the number of minutes after which the MetaDefender file scan should automatically time out. The default is 30 minutes.
- Enable ‘Display scan result link’ to display a link to the MetaDefender scan result details to see which anti-malware engines detected a threat.
- Enable the ‘Scan automatically when build runs’ option to automatically scan the artifact when the build runs.

Configure Build Settings
Note: You only need to configure build settings if you wish to override the global options
If you wish to set different options for a particular build, you can set any of the following system properties by going to Build Configuration > Parameters > Add new parameter (Select System Property in ‘Kind’):
| System property name | Description |
|---|---|
system.metadefender_scan_artifact
|
If set to 1, the artifact will automatically be scanned when the build runs. The default value is 0. |
system.metadefender_scan_log
|
If set to 1, the scan log metadefender_scan_log.txt will be created in the artifact folder. The default value is 0. |
system.metadefender_fail_build
|
If set to 1, and a threat is found, the build will automatically fail. The default value is 1. |
system.metadefender_scan_timeout
|
Enter number of minutes after which a file should time out.
|
Note that specifying system properties in the build parameters will override the global options. If you wish to use the global settings for the build, do not enter any system properties.
Run Your Build And Check Scan Results
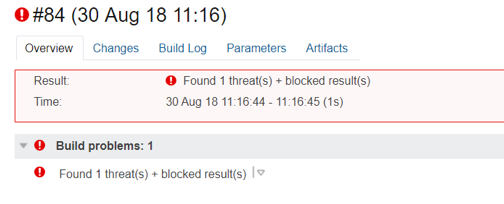
After running your build, if MetaDefender detected a threat the build will fail and display Found x threat(s) + blocked result(s).

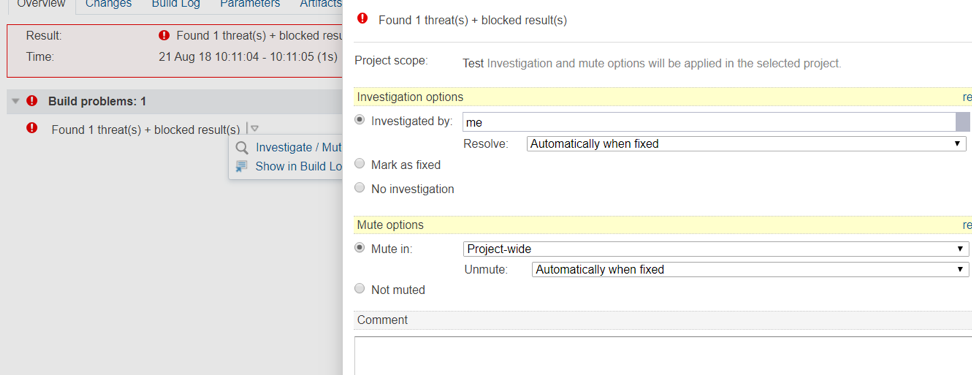
Click on Found x threat(s) + blocked result(s) to see the scan results:

If the build is successful, you can check the MetaDefender scan results in your Build Log. If a threat was found, it will be listed in the following format: <file name> process result: Blocked | Infected. To check which anti-malware engines detected a threat, go to the link in the scan results.

If no issues were found, no messages will be displayed in the log file.

To Uninstall The Plugin
Go to the TeamCity data folder e.g.: C:\ProgramData\JetBrains\TeamCity\plugins, delete metadefender-plugin.zip and .unpacked\metadefender-plugin. Restart the TeamCity service.
What to do in case of a false positive
If MetaDefender has detected a threat in your build, however you know that it is a false positive, follow the next steps:
- Submit the false positive case to AV vendors by following these instructions: https://www.opswat.com/docs/mdcore/reputation-engine/reporting-false-detection
- Meanwhile, mute the issue in TeamCity by selecting ‘Mute in’.

- The build will now pass when you run it again. In case there is a change in the scan result, for instance if the blocked files have changed or the number of engines that detected the threat is different, it will raise a new error. To override, you can mute the issue again.
