In order to integrate Microsoft OneDrive service with MetaDefender Storage Security you will be required to create an application registration, assign the necessary permissions and then generate a secret key. Please follow these steps:
When the upload process takes more than a few seconds, OneDrive creates a temporary file having the same name as your uploading file and the size of 0 bytes. By default, we will discover that file and show it into the list of discovered files. Once the upload is complete, we will discover the original uploaded file and process it accordingly. To skip the discovery of the temporary empty file created, please follow these instructions: How to handle empty objects in Discovery?
From the left side menu, navigate to Storage units, click on Add Storage Unit and choose OneDrive
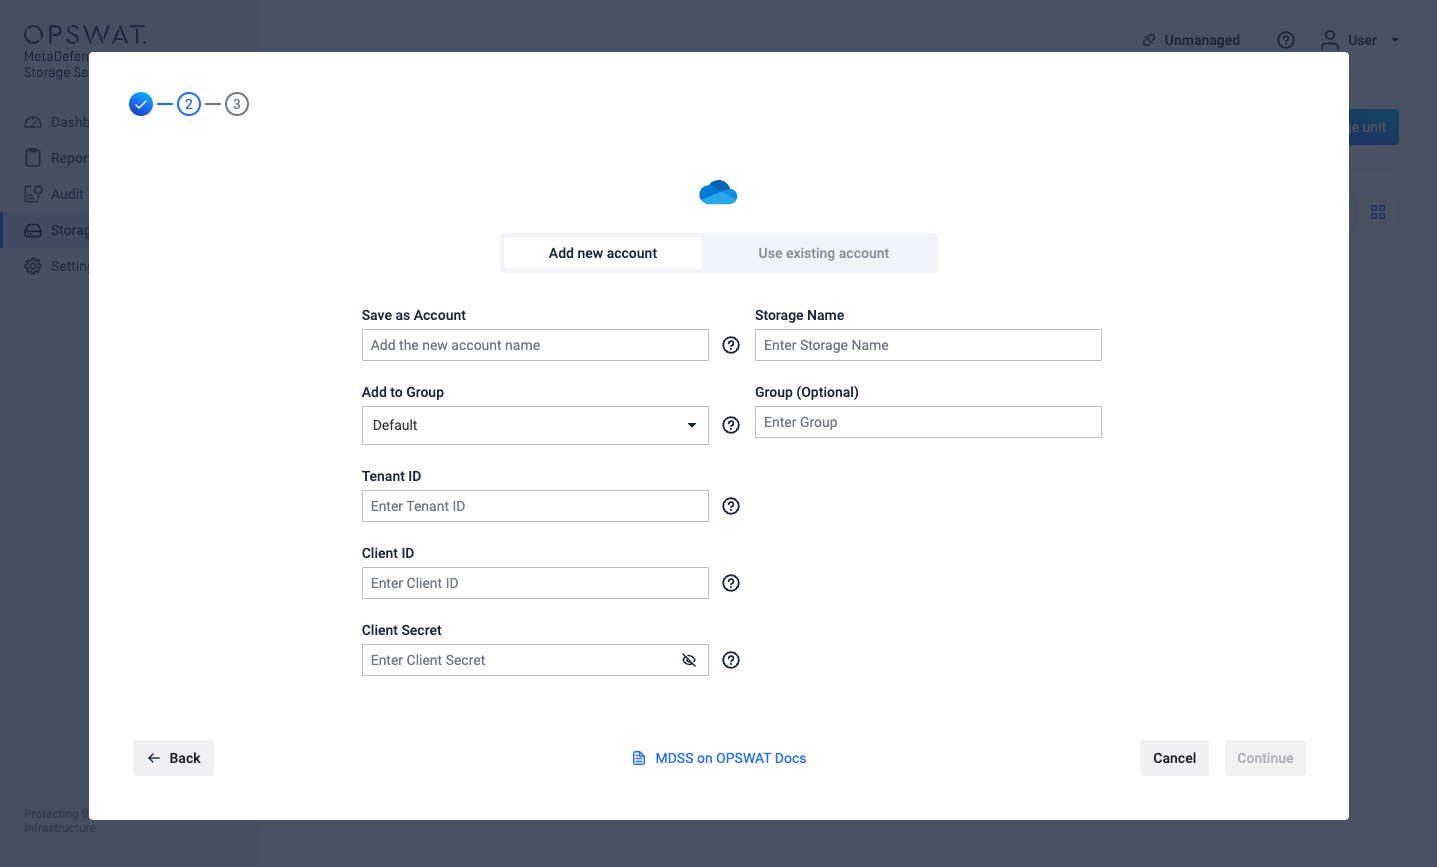
Give your account a name so you can easily identify it later
Give your storage a name so you can easily identify it later
Enter your Tenant ID. Scroll to the end of this page for more details.
Enter your Client ID. Scroll to the end of this page for more details.
Enter your Client Secret. Scroll to the end of this page for more details.
Enter the name of a group if you only wish to process files, folders and sites from a particular group. Leave this field empty if you wish to process the entire OneDrive including all groups and sites.
Optionally, enter the UPN of a user from the selected group if you wish to only process files from that specific user. This field will appear only if there is a value inputted in the Group field.
Optionally, enter the name of a folder from the user's files if you wish to only process files from that folder. This field will appear only if there is a value inputted in the User field.
Select Continue in order to finish the process.
How to create a OneDrive application
In order to process your OneDrive files and folders with MetaDefender Storage Security you will be required to add a new app registration in your Microsoft Entra ID Azure Portal.
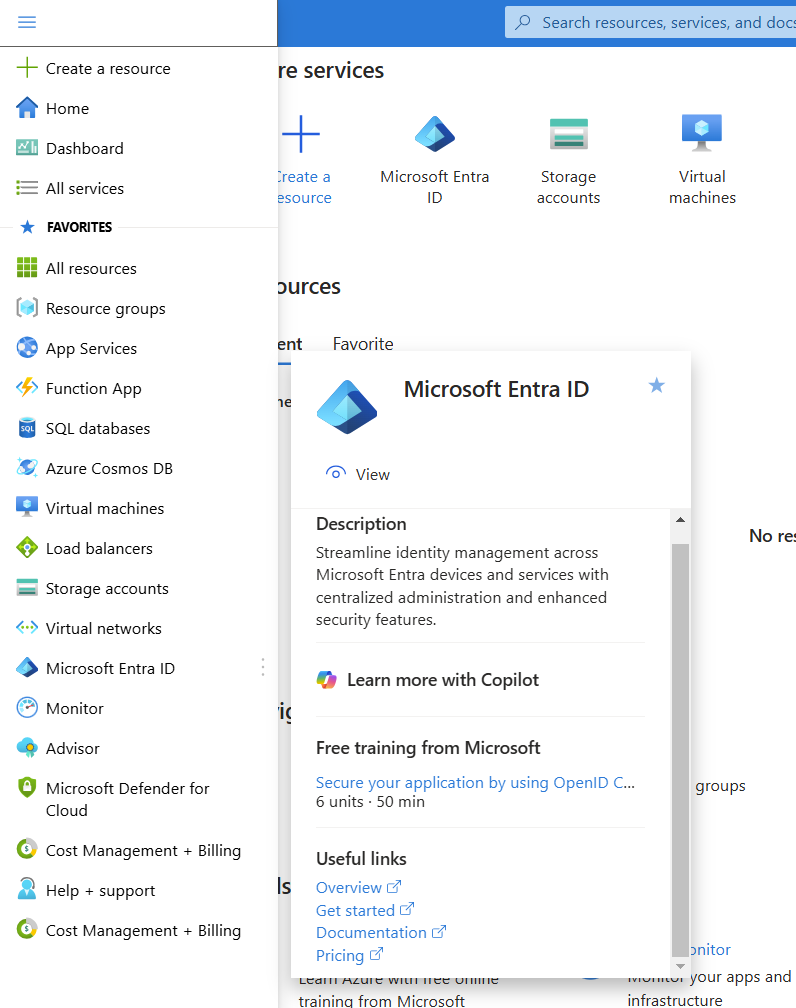
Log in to Azure Portal and from the left navigation menu choose Microsoft Entra ID
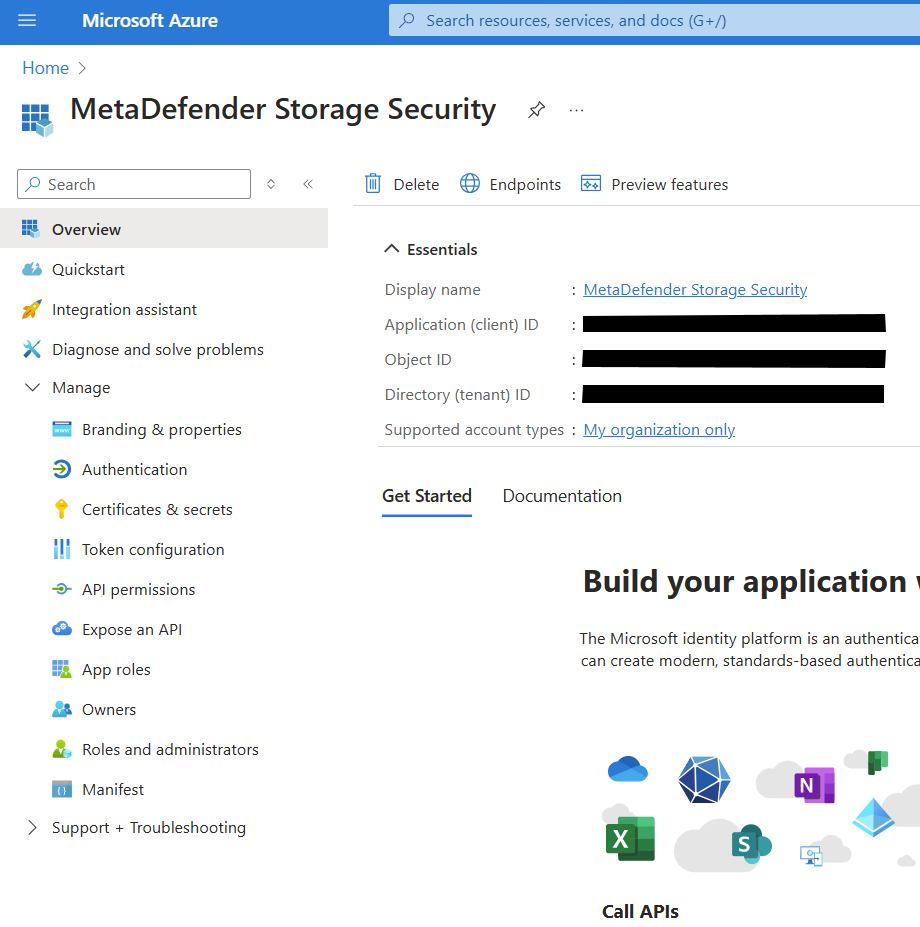
Make a copy of the Tenant ID from the overview page

From the left side menu, choose App registrations
Click New registration
Give your app a name so you can easily identify it
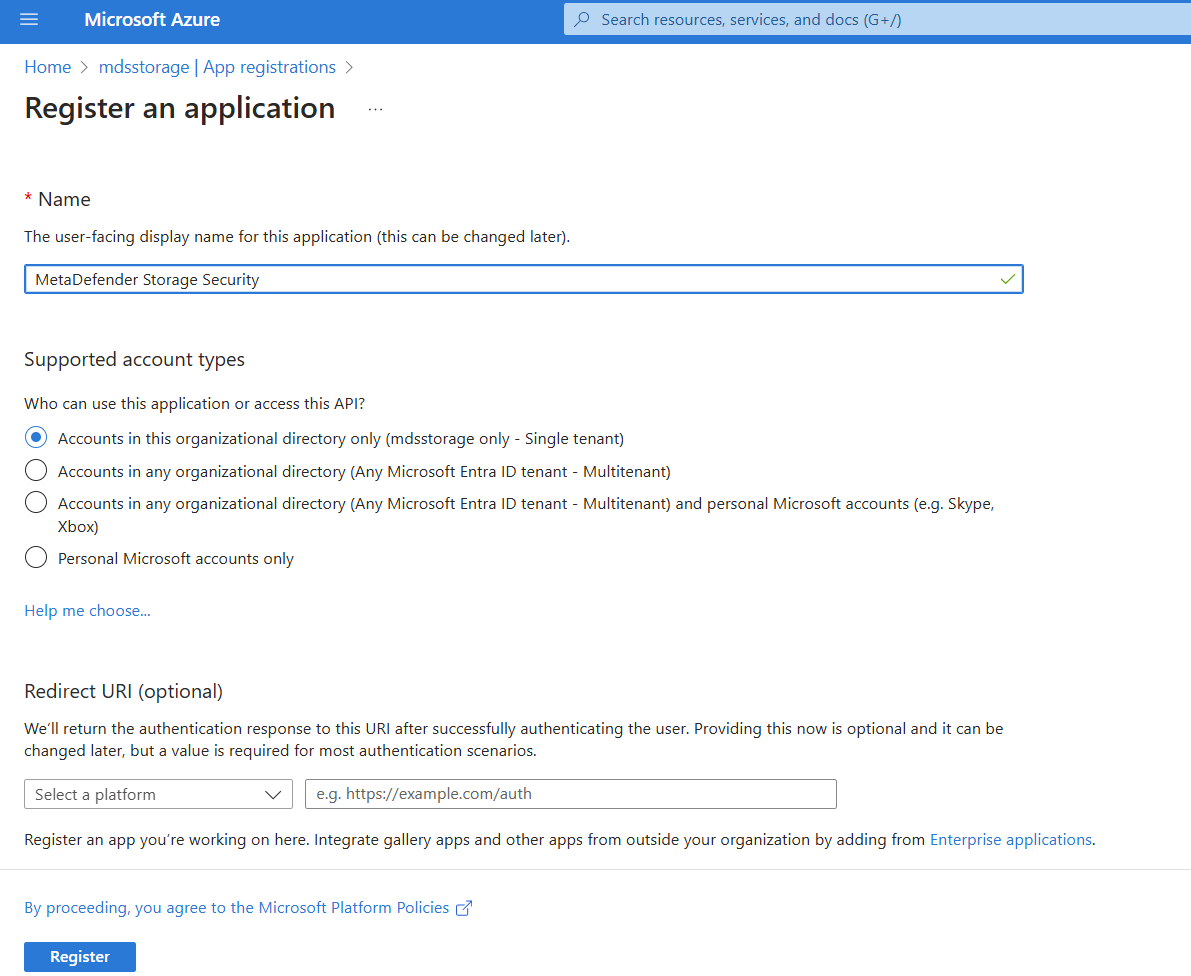
There is no need to modify the other properties. When ready, please click Register
From the Overview page of your newly created application, make a copy of Application (client) ID
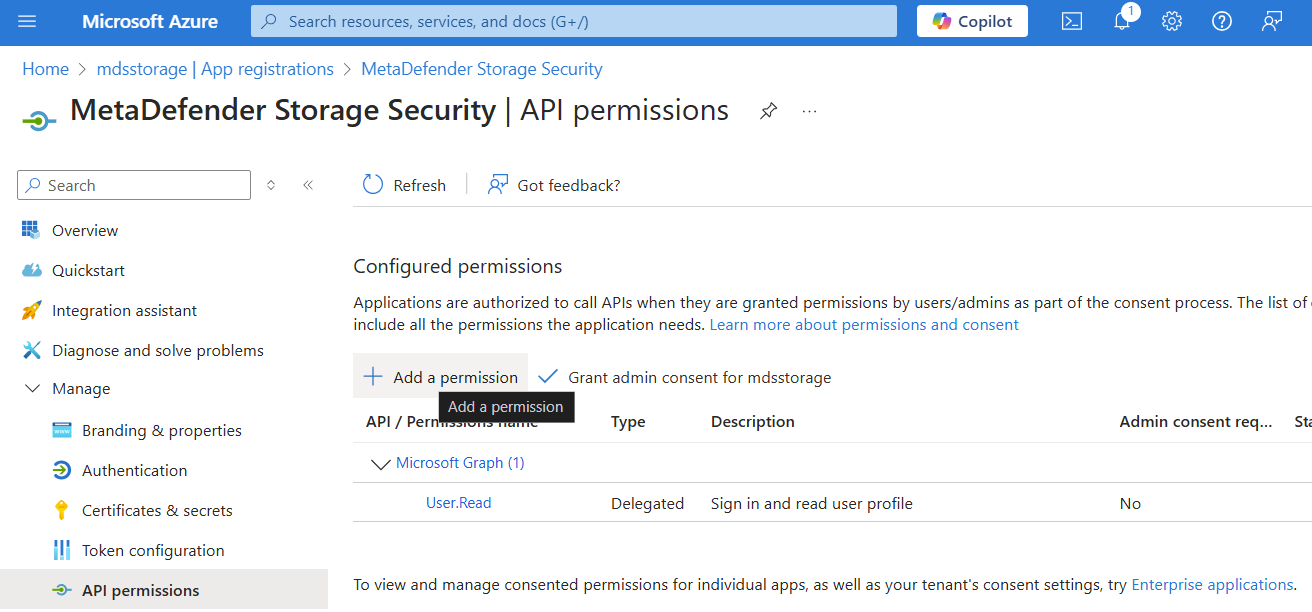
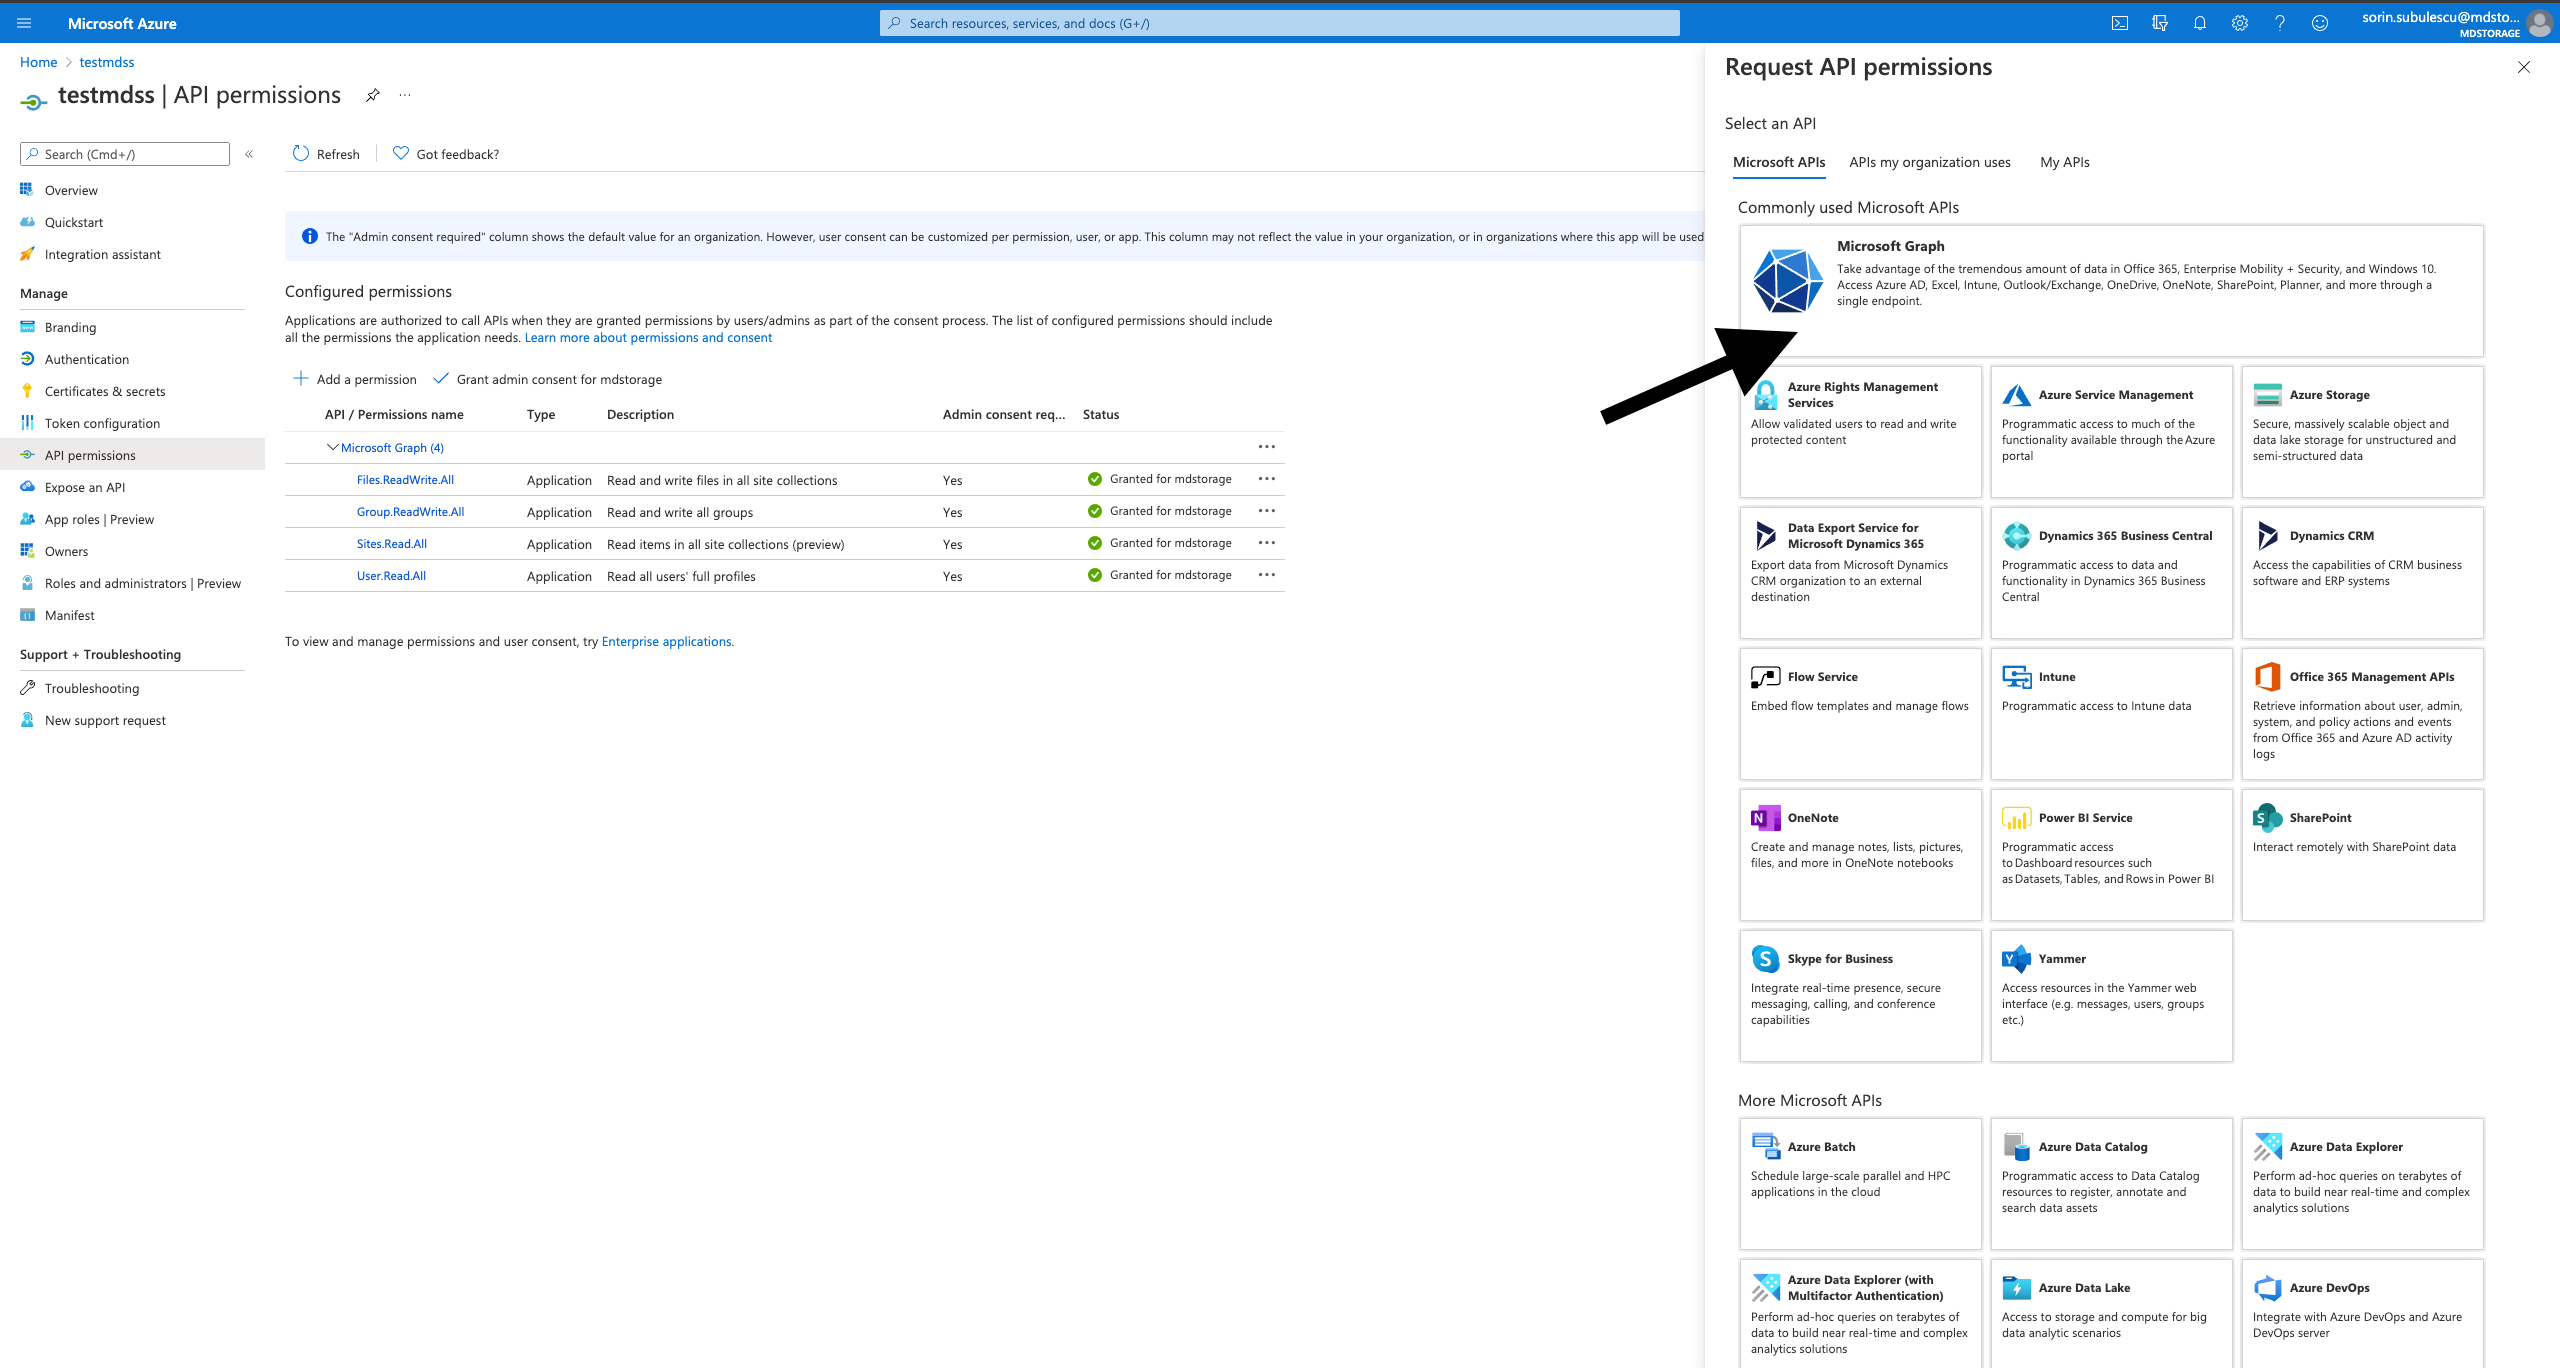
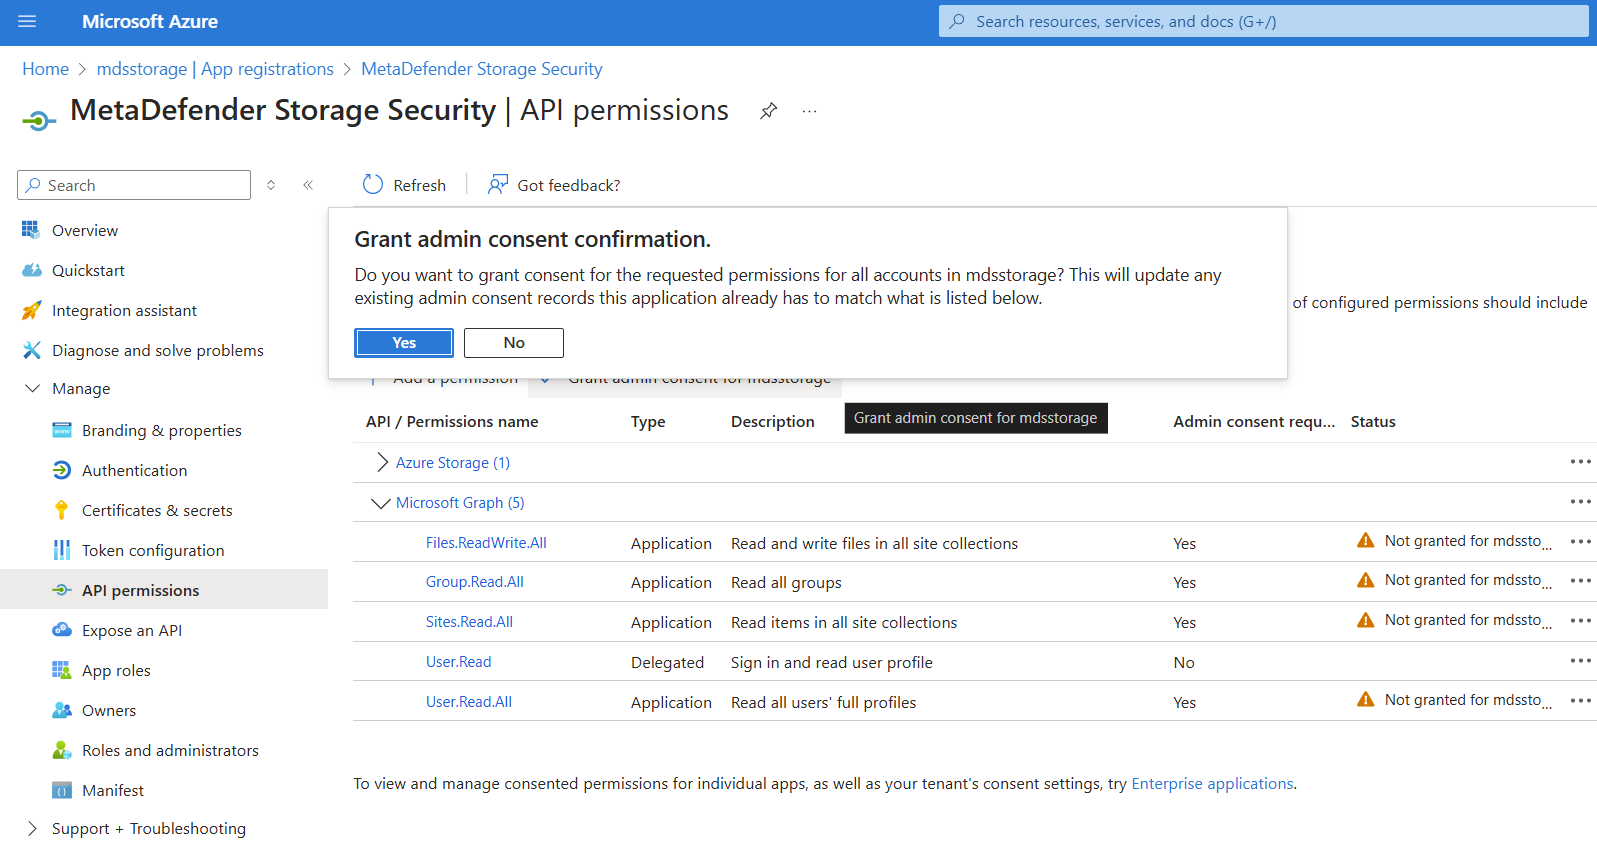
You now need to specify which permissions should the application have. To do this, please navigate to API permissions from the left-side menu
Click Add a permission
Select Microsoft Graph from the right-side menu
Select Application permissions
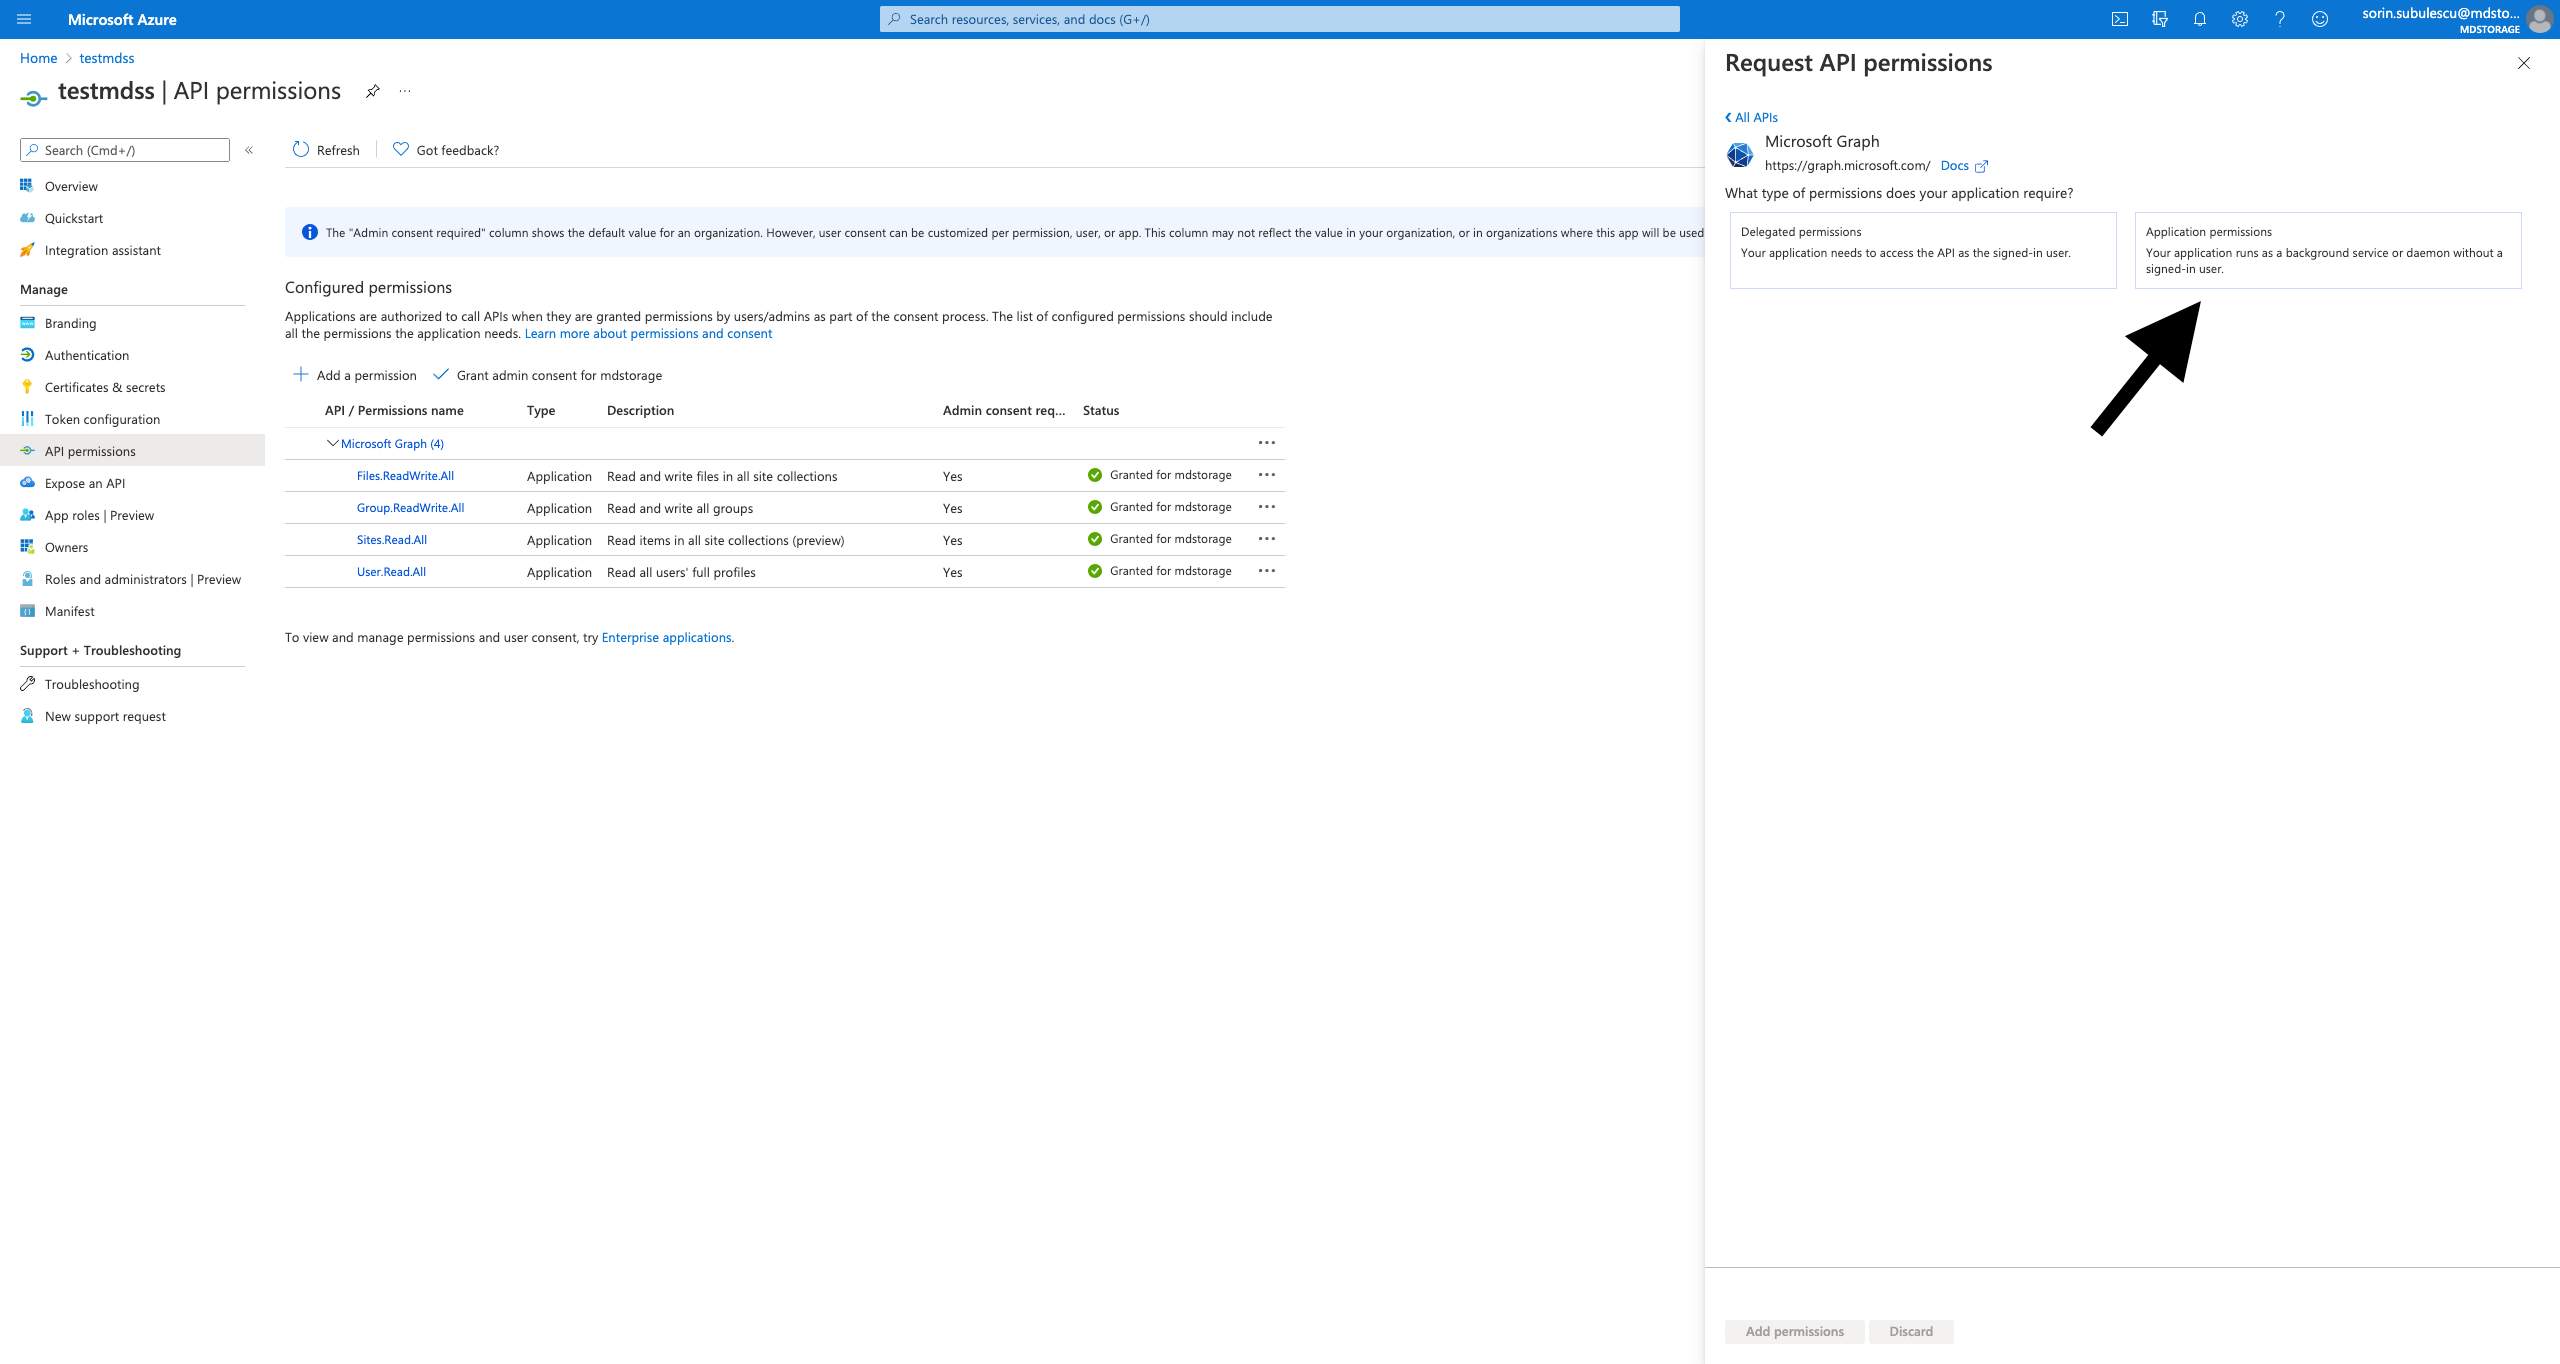
In order for MetaDefender Storage Security to correctly work please add the following permissions:
Files.ReadWrite.All
Group.Read.All
Sites.Read.All
User.Read.All
When ready, click Add permissions
We need to grant admin consent for the added permissions
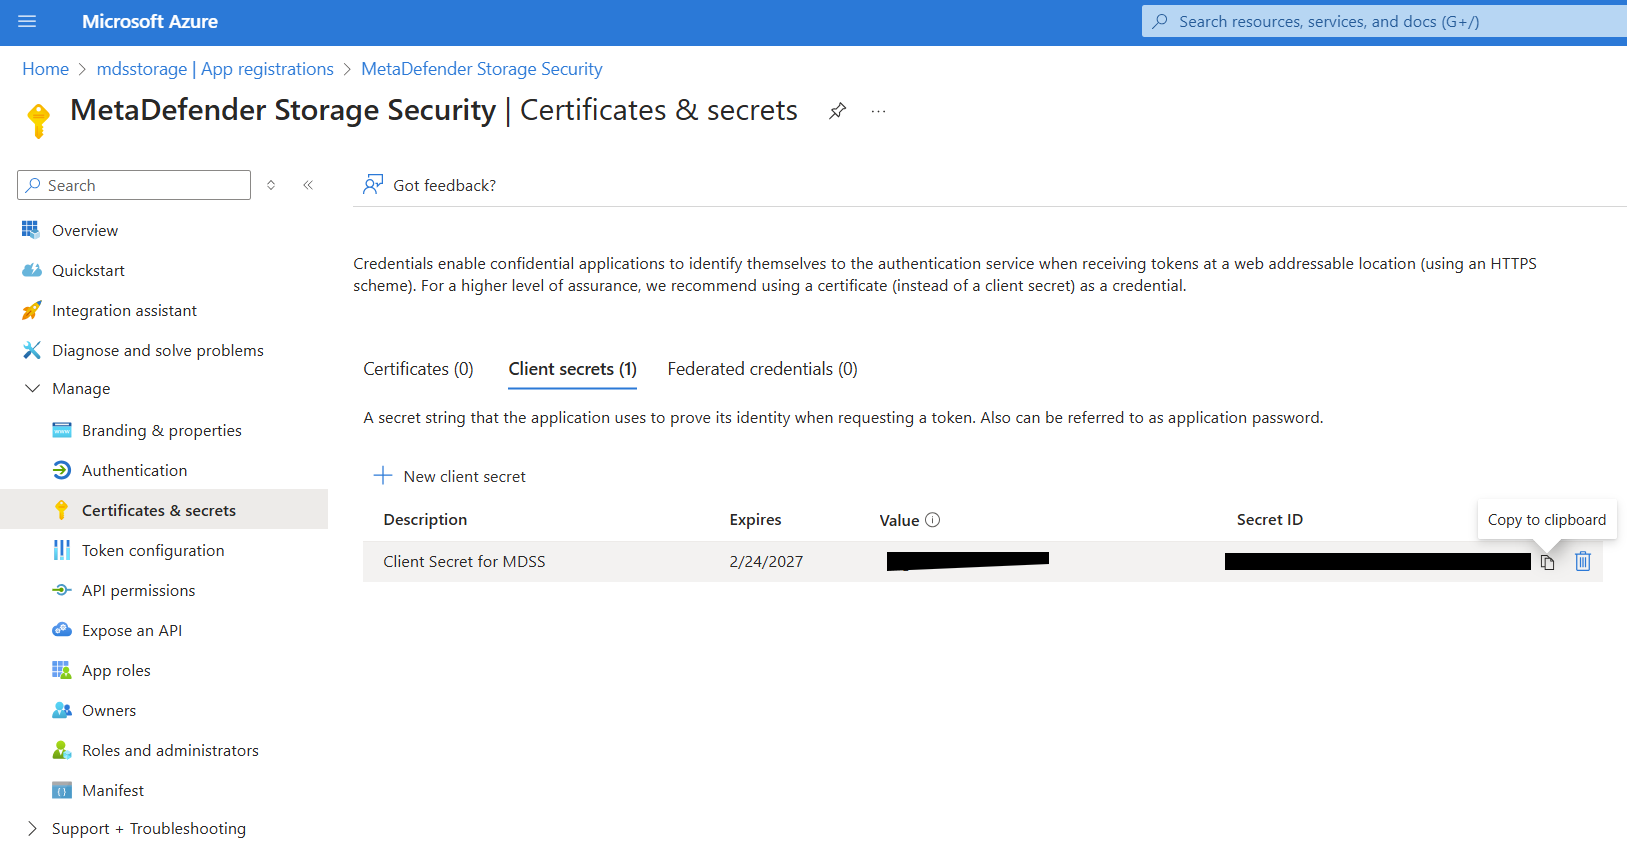
Now that the required permissions are in place, you are ready for the final step. Please navigate to Certificates & secrets from the left-side menu
Click New client secret and choose Expires in 24 months
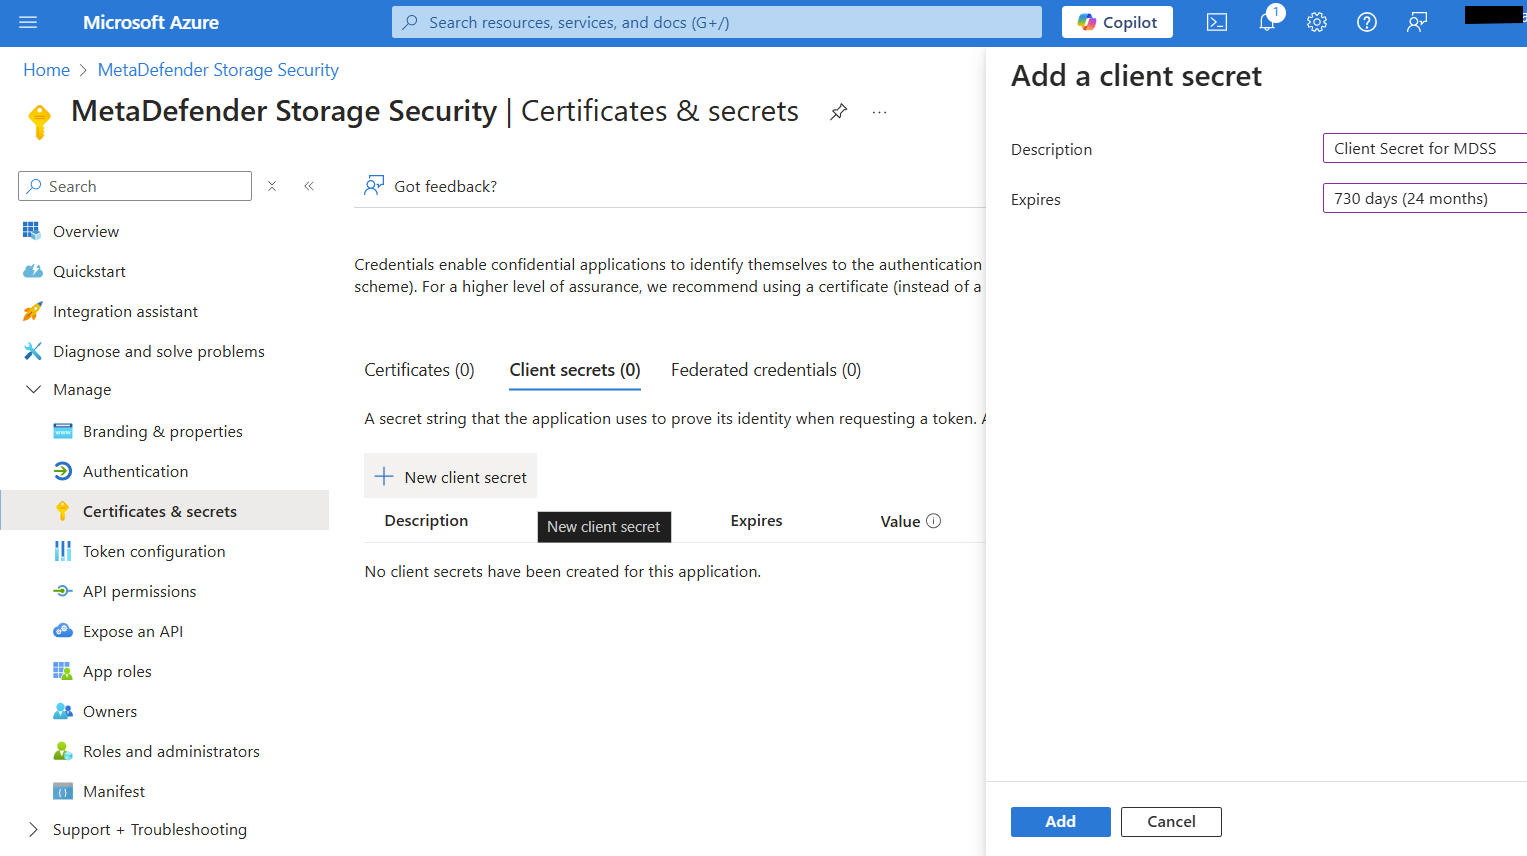
Click Add and then your will need to make a copy of the generated secret key because it will not be available later
Now that you have the Tenant ID, the Client ID and the Client Secret Key you can go back in MetaDefender Storage Security and finish the OneDrive integration. Congratulations!