Summary
This document provides scripts complete the installation of NAC RADIUS Based Enforcement.
NOTE – This integration was completed on the V2110 VM controller running 10.41.02.0014 code.
Controller Configuration
NOTE – NAC be configured to return a VLAN if desired or devices can use the default VLAN
Navigate to VNS and select Authentication. Ensure that MAC Address Format is set to XX:XX:XX:XX:XX:XX. Click new to add a new RADIUS server.
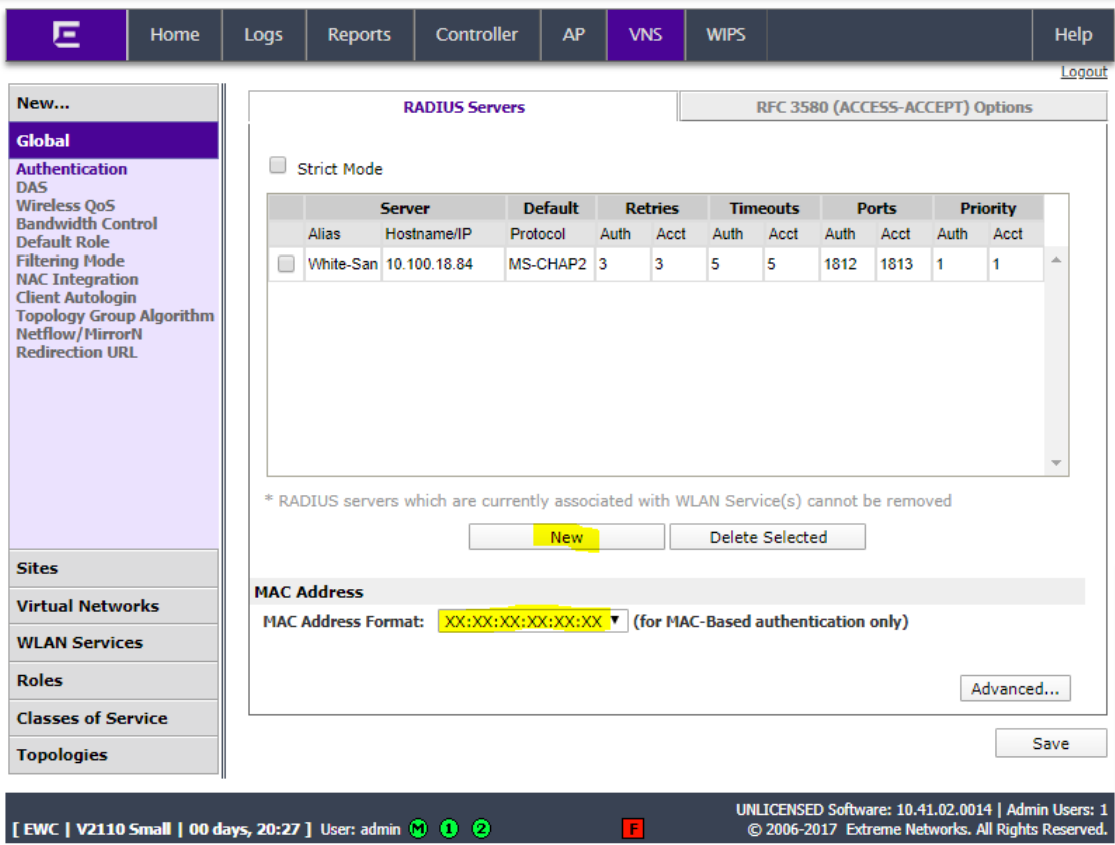
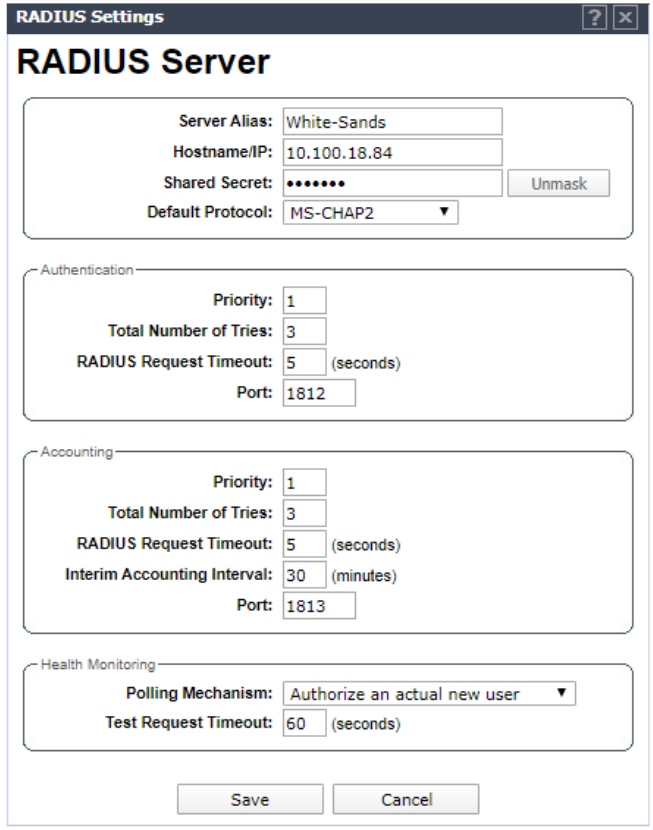
Give the RADIUS server a name, add the NAC appliance IP address and shared secret (remember the shared secret as it will be used to add the controller to NAC). Ensure that the default protocol is set to MS-CHAP2.
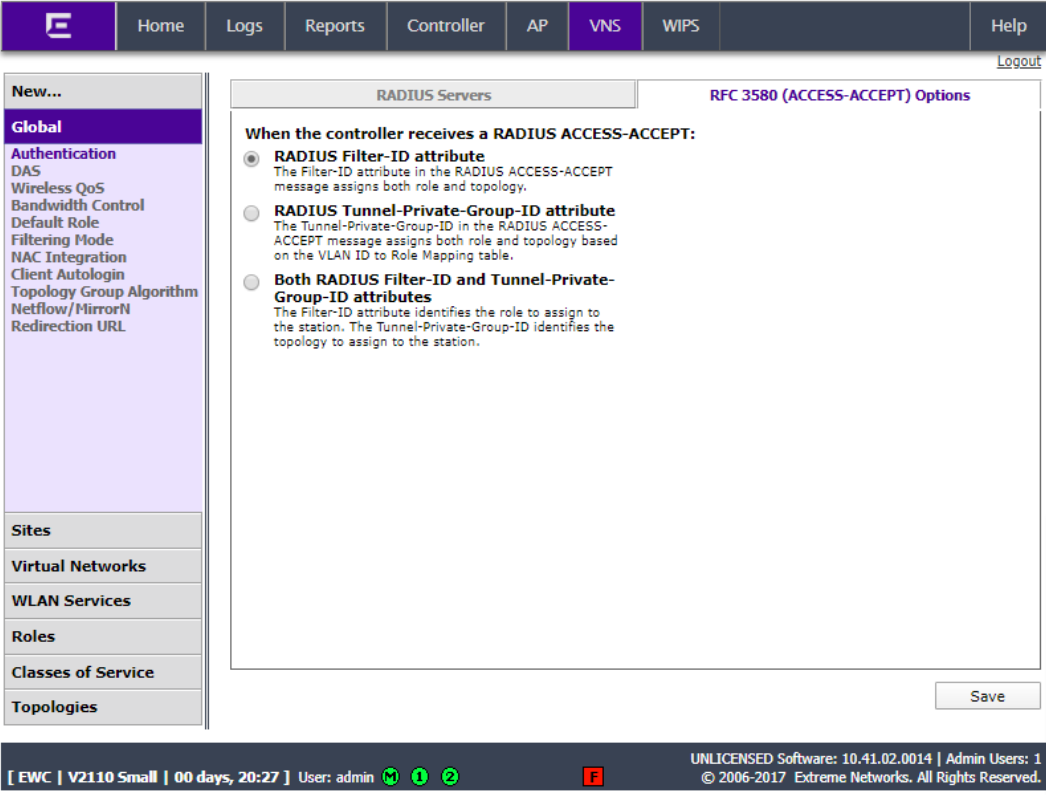
Click on the RFC 3580 tab and ensure that RADIUS Filter-ID attribute is selected.
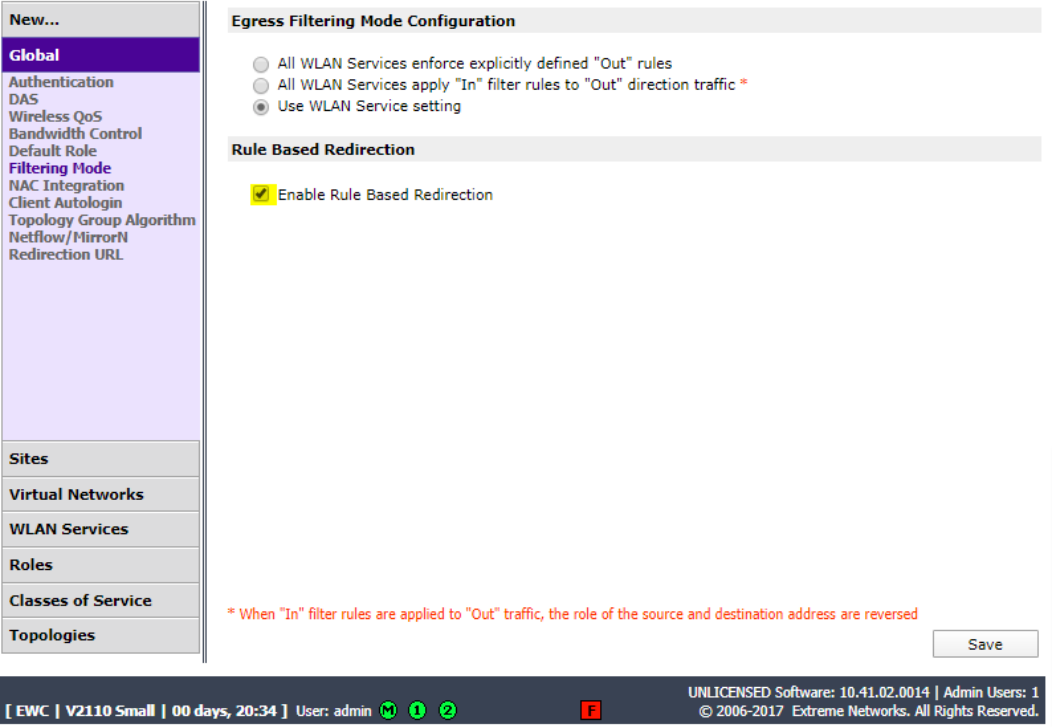
Click Filtering Mode and ensure that “Enable Rule Based Redirection” is selected.
Click Roles and click New.
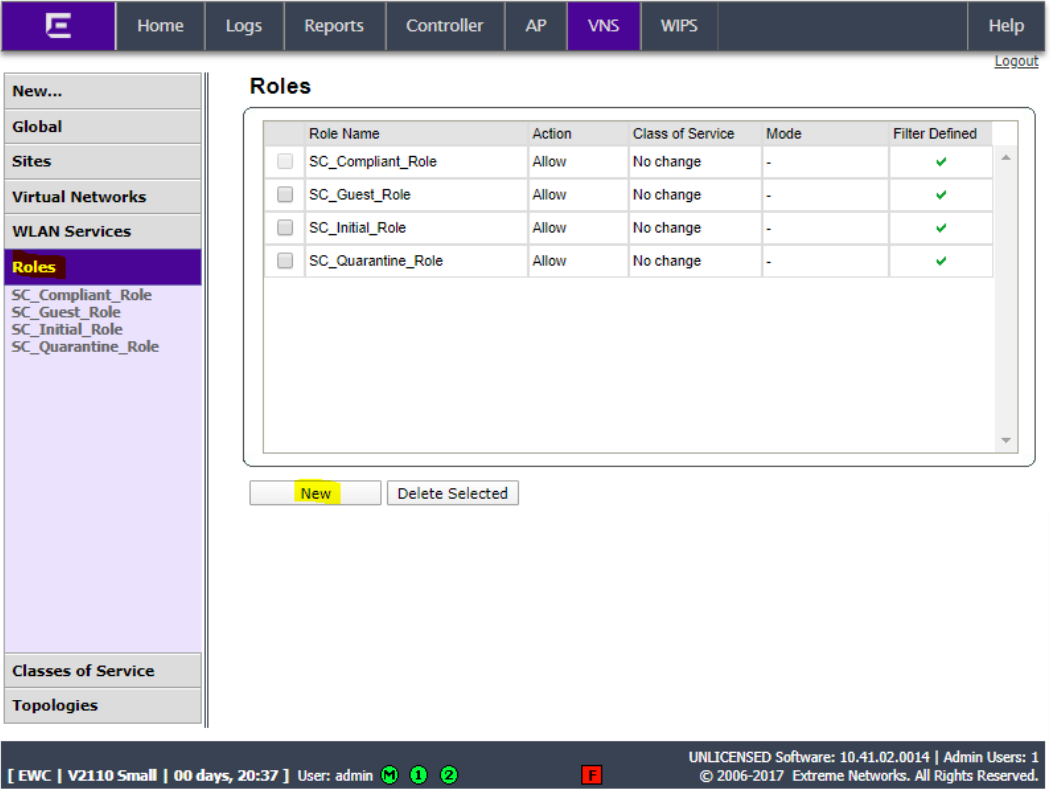
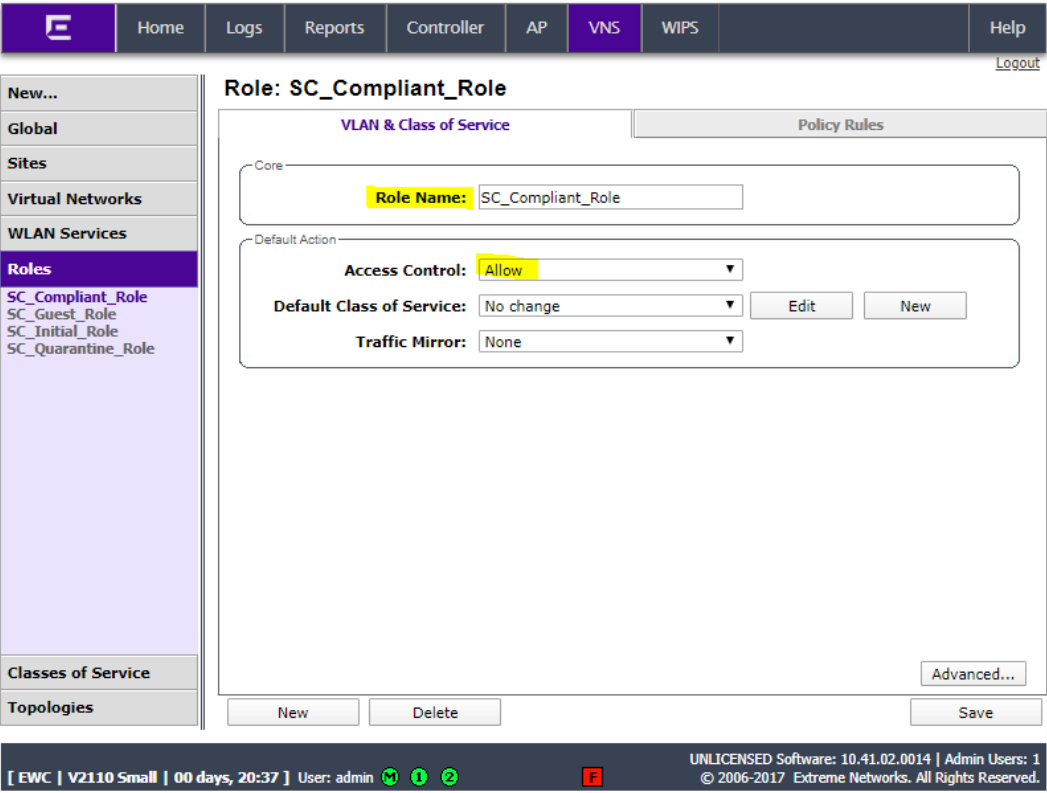
Set the role name to SC_Compliant_ Role and set Access Control to Allow.
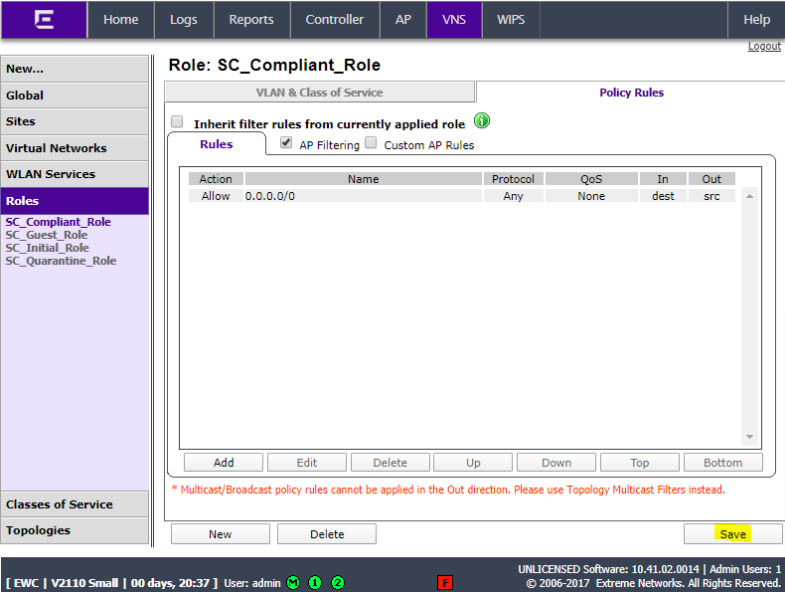
Click Policy Rules and click Add.
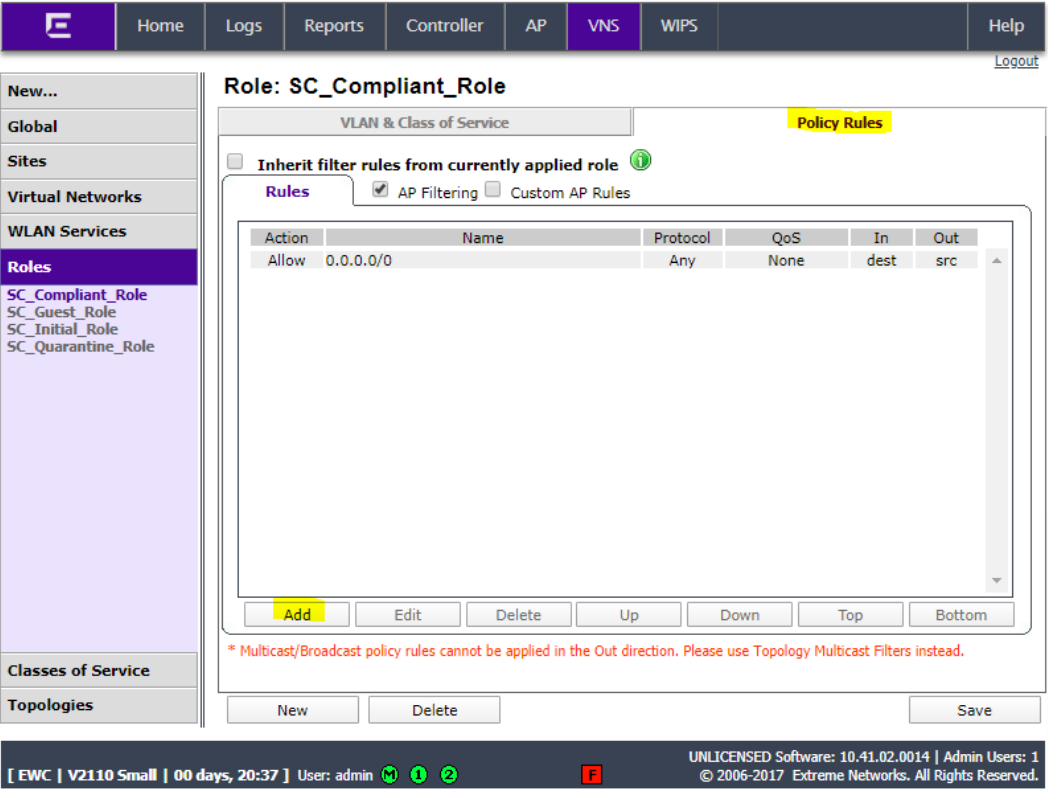
Set IP/subnet to Any, set the port to Any, set the Protocol to Any, and set Access control to Allow. Click Okay.

Click Save.
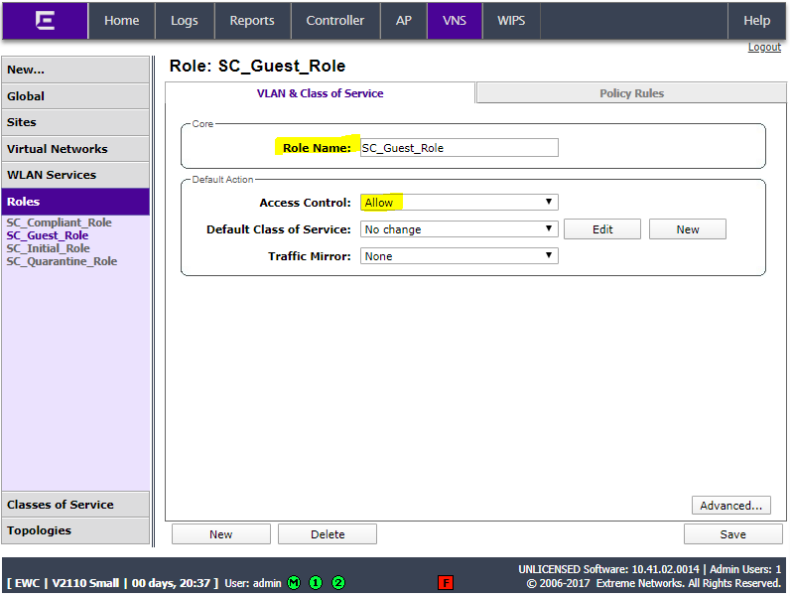
Add another role for SC_Guest_ Role with Access Control set to allow.
Click Policy Rules and click Add.
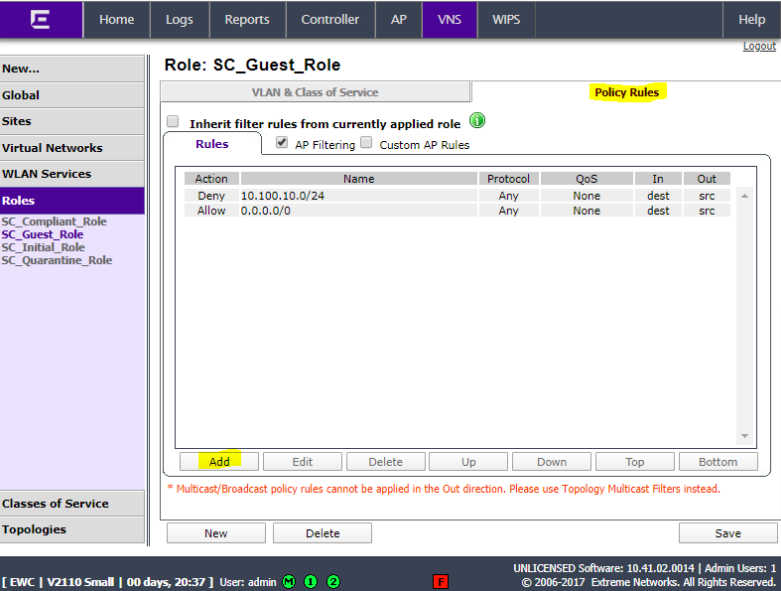
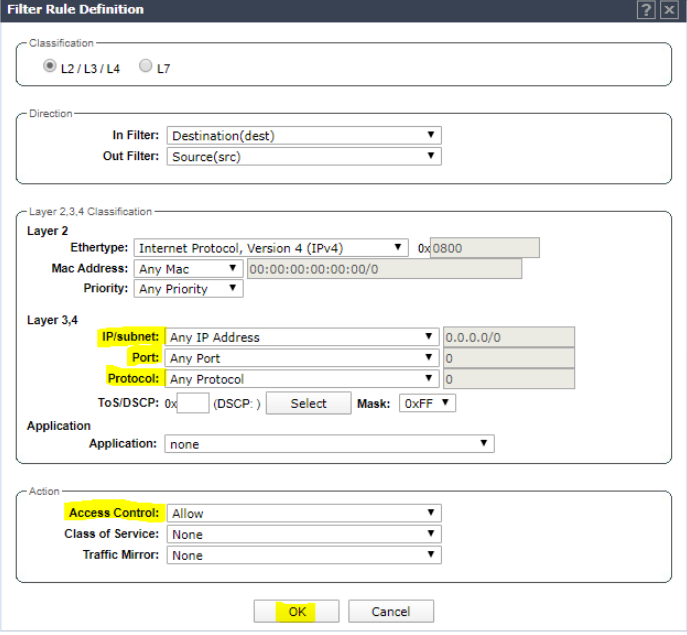
Add a rule for any subnets, etc that Guest users should not have access to and set Access Control to Deny (10.100.10.0/24 in this example). Click OK.

Click Add and add a rule to permit Any so that all other traffic is allowed. Click OK.
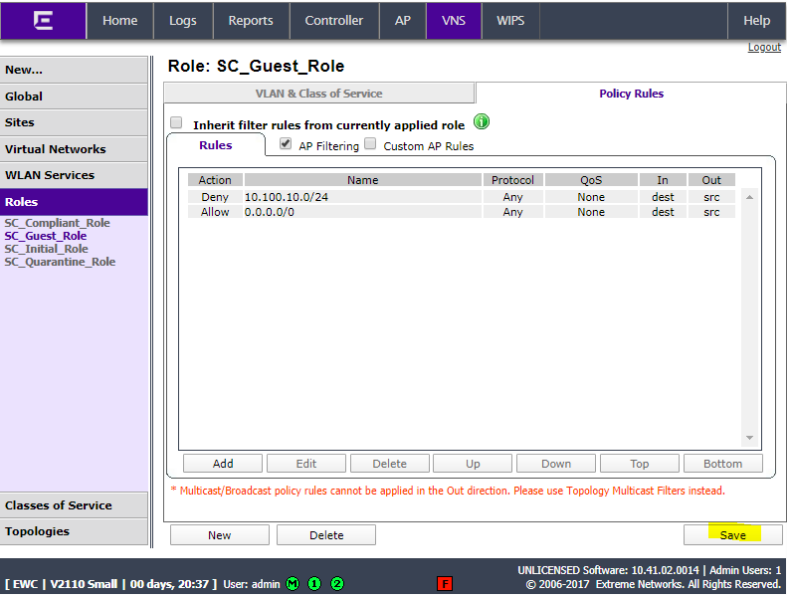
Click Save.
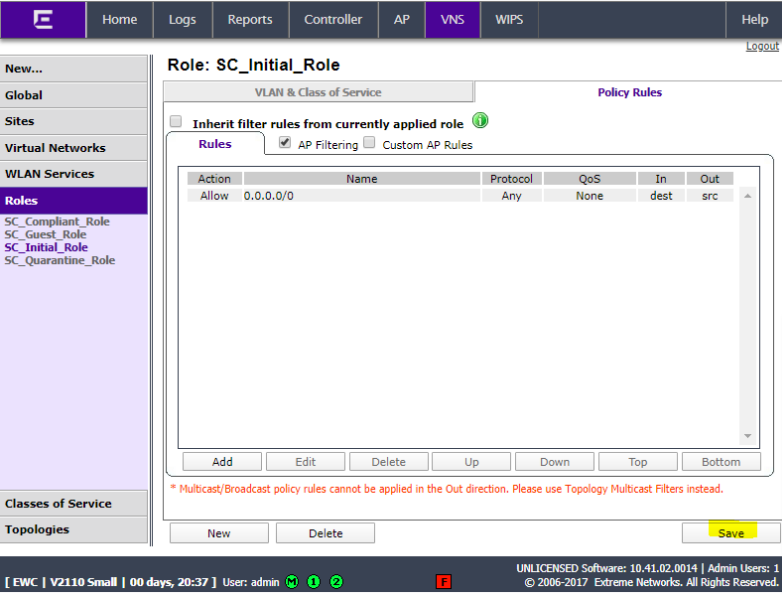
Add another role for SC_Initial_ Role with Access Control set to allow.

Click Policy Rules and click Add.

Set IP/subnet to Any, set the port to Any, set the Protocol to Any, and set Access control to Allow. Click OK.
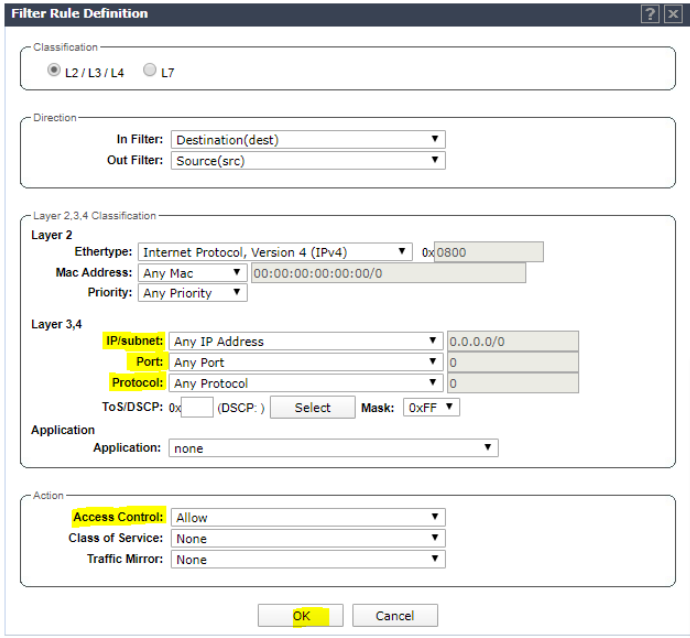
Click Save.
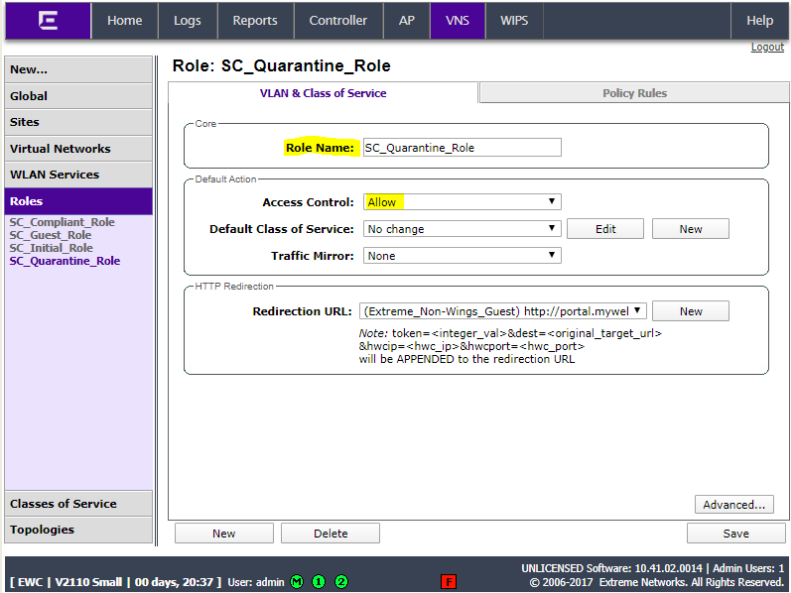
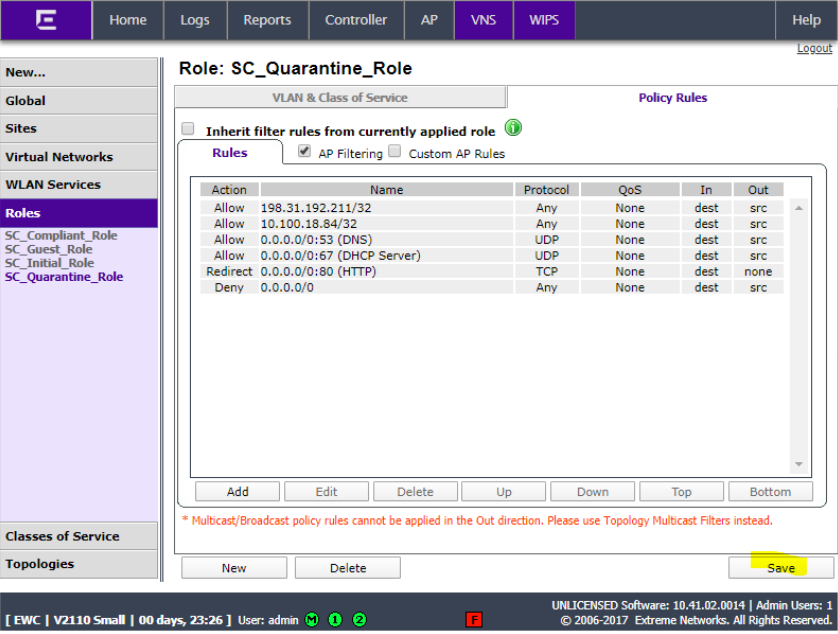
Add another role for SC_Quarantine_ Role with Access Control set to allow.
Click Policy Rules and click Add.

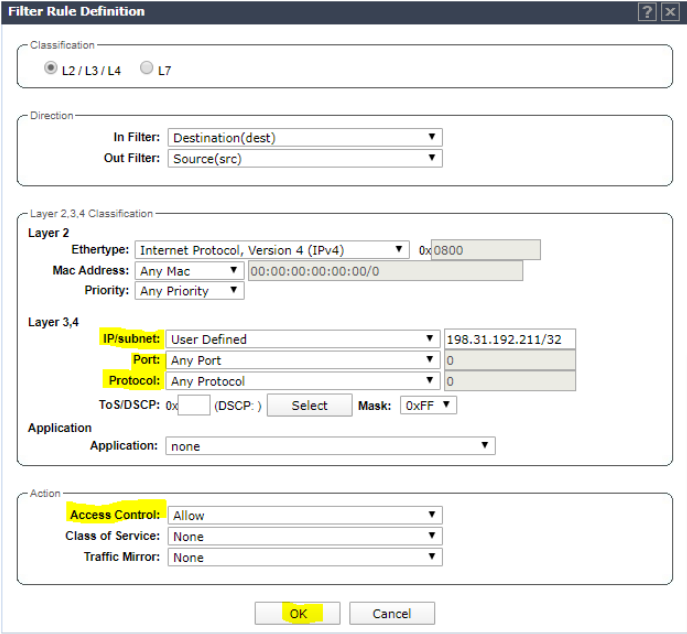
Set rule allow 198.31.193.211 Any Any. Click OK.
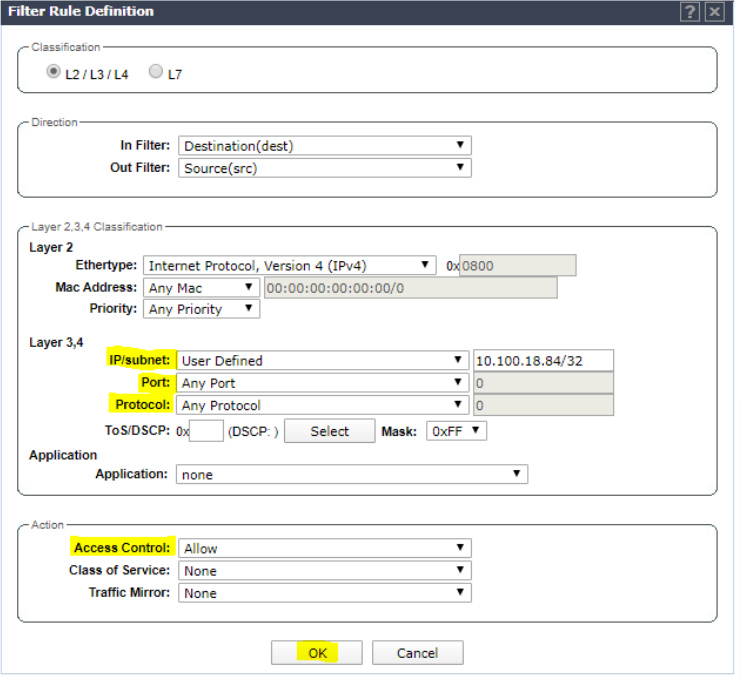
Click add and set rule to allow NAC appliance IP (10.100.18.84 in this example) Any Any. Click OK.
Click Add and set rule to allow DNS traffic. Click OK.

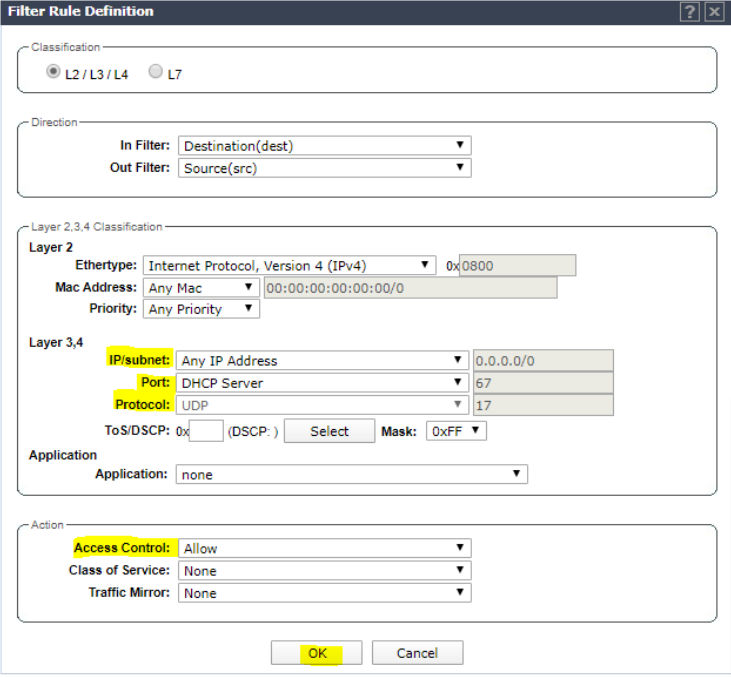
Click Add and set rule to allow DHCP traffic. Click OK.
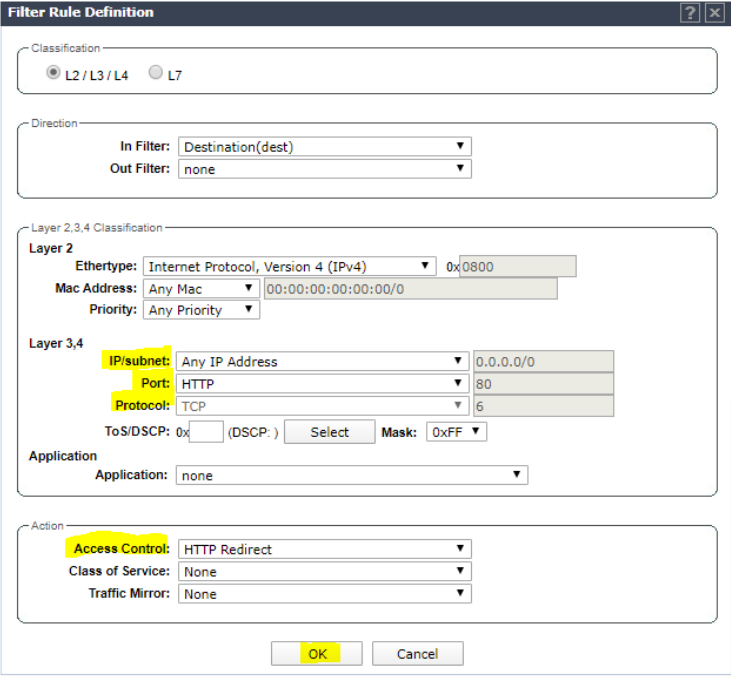
Add rule to redirect all http traffic. Click OK.
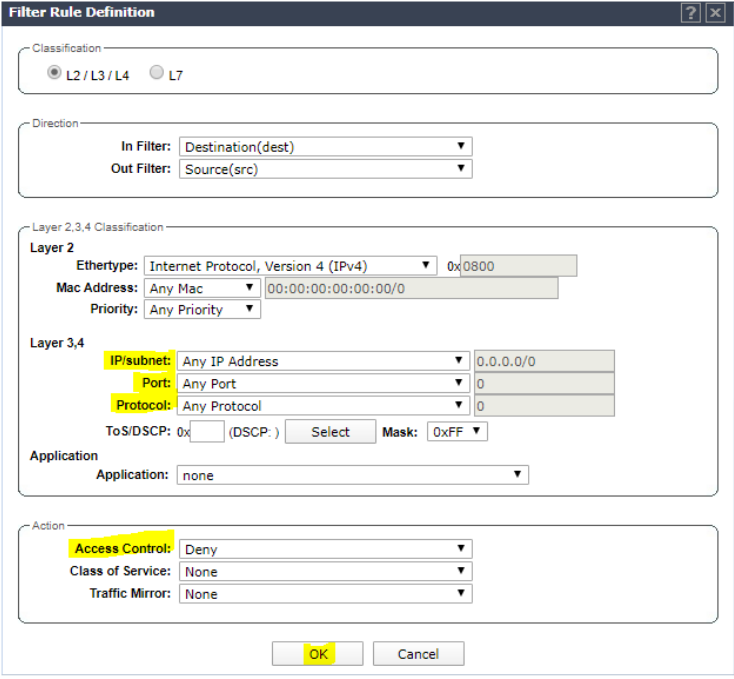
Add rule to deny all traffic. Click OK.
Click Save.
NAC Guest SSID Configuration
Click WLAN Services and click New.
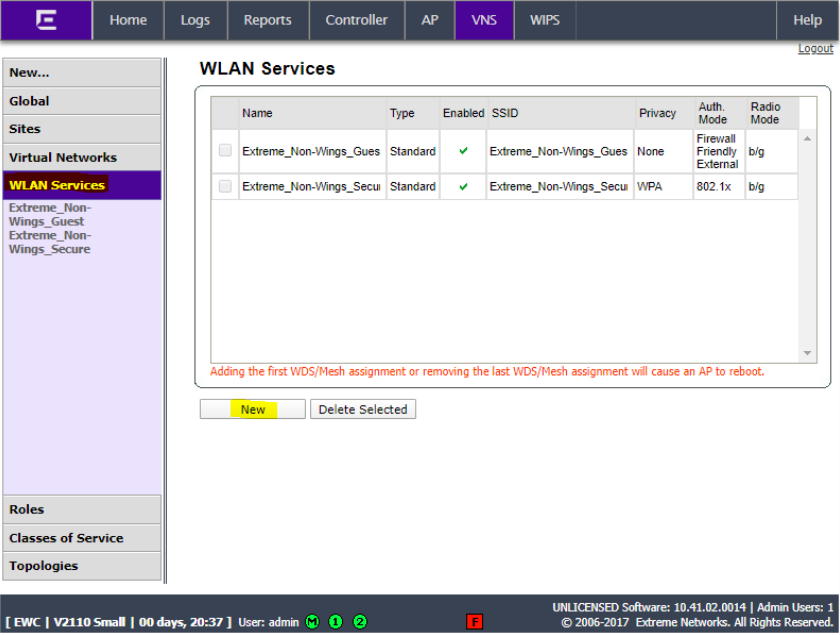
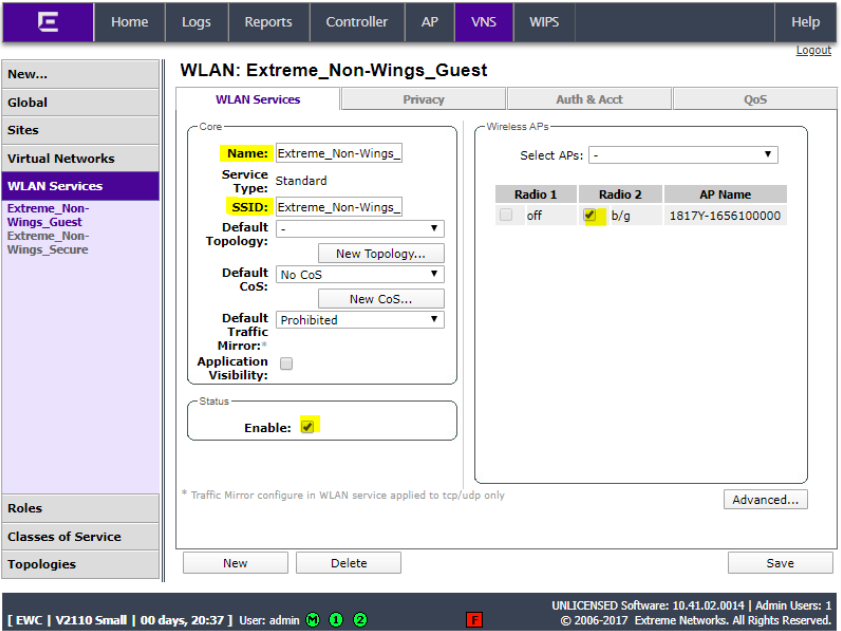
Enter a name for the service, enter a name for the SSID, check the Enable box and select the AP for the WLAN and click Save.
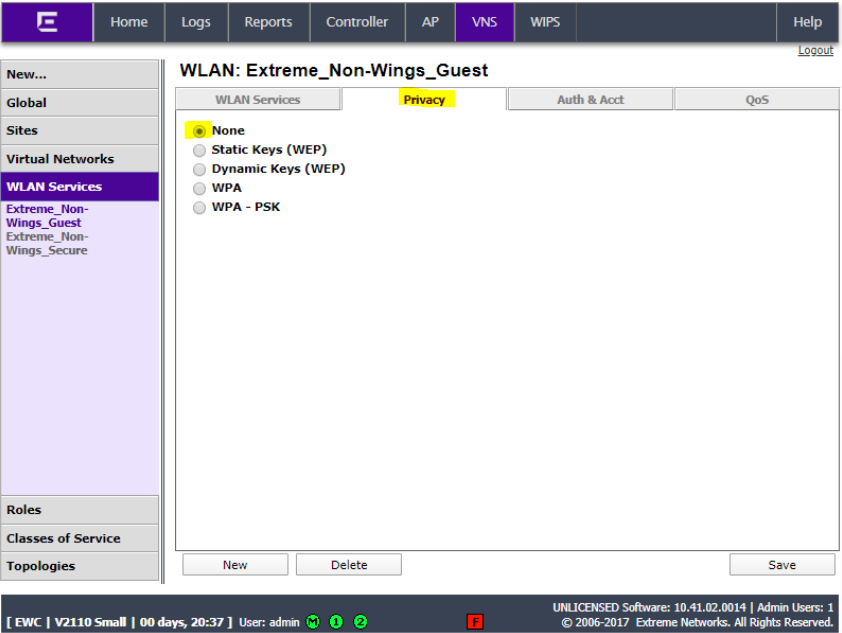
Click the Privacy tab and ensure it is set to None.
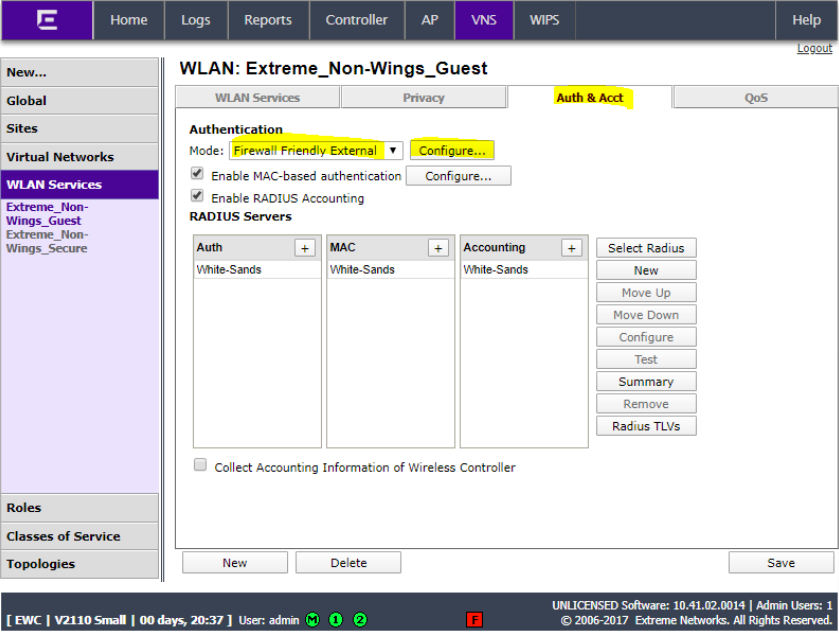
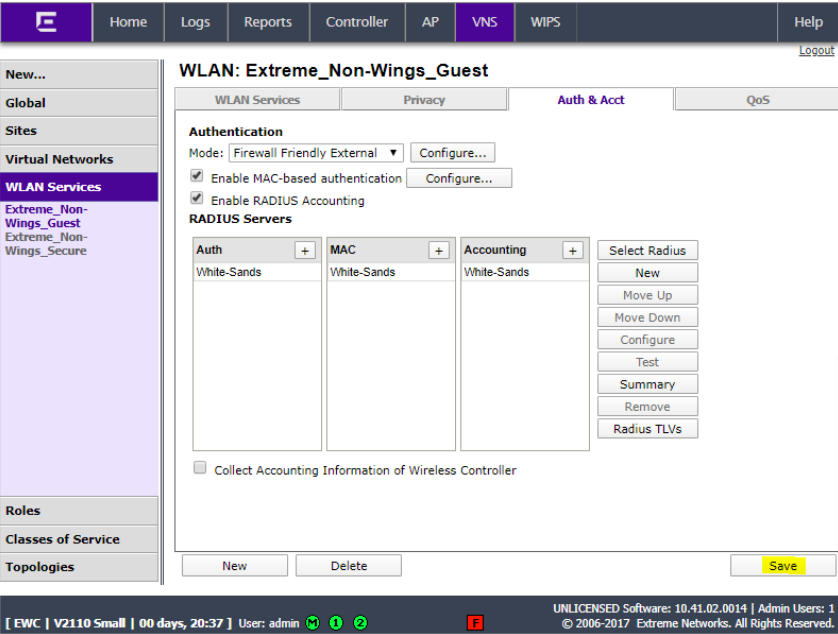
Click Auth & Acct, set the mode to Firewall Friendly External and click Configure…
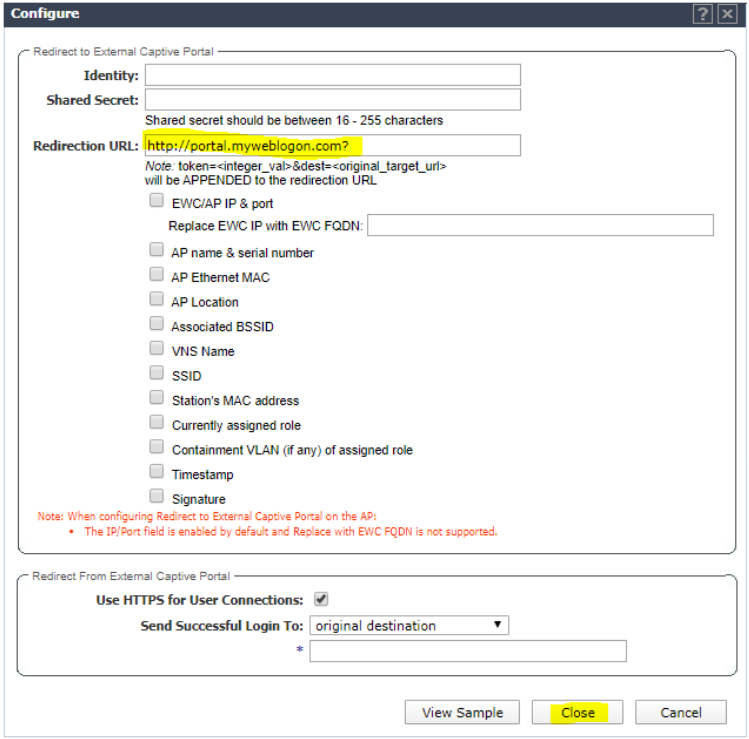
Enter http://portal.myweblogon.com for the redirect URL and click Close.
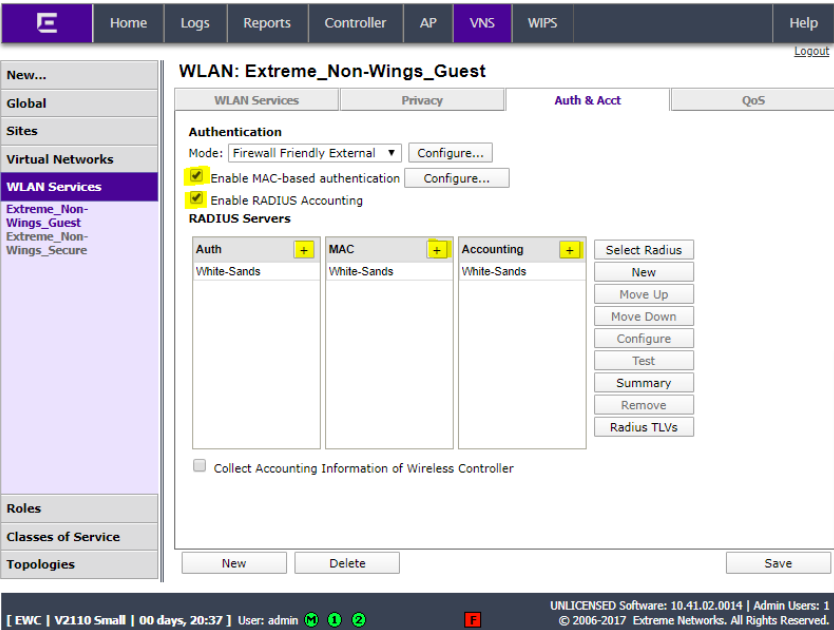
Ensure that Enable MAC-based authentication and Enable RADIUS Accounting are selected. Click the + sign and select the RADIUS server configured previously with the NAC appliance IP.
Click on the RADIUS server and click Configure.
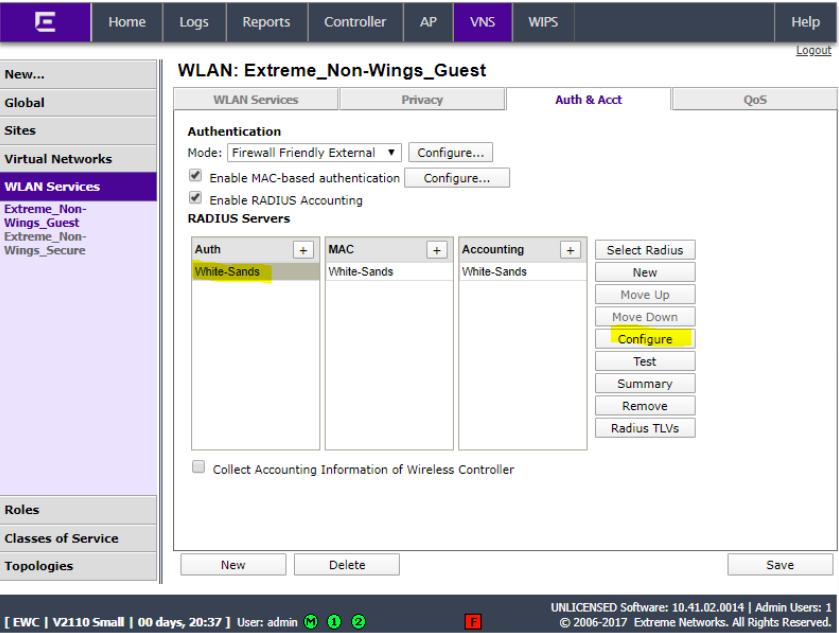
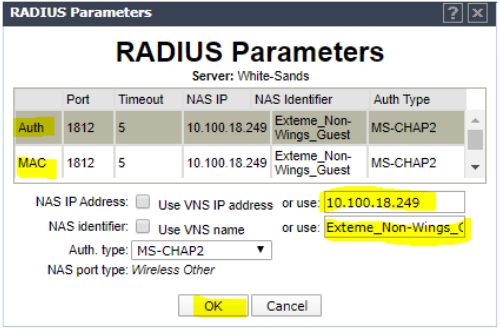
Click the name of all 3 RADIUS entries (Auth, MAC and Acct and type the enforcer IP address as the NAS IP address and the SSID name as the NAS identifier and click OK.
Click Save.
Click Virtual Networks and click New.
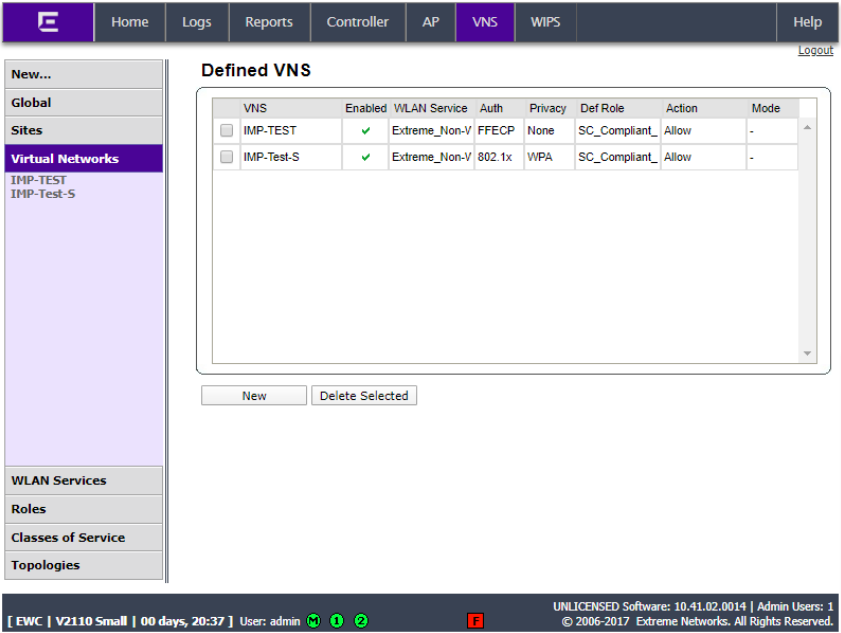
Give the VNS a name, select the WLAN service created in the last step. Set the Non-Authenticated role to SC_Compliant_ Role. Ensure that the Enable box is checked and click Save.

This concludes the configuration integration for a guest SSID.
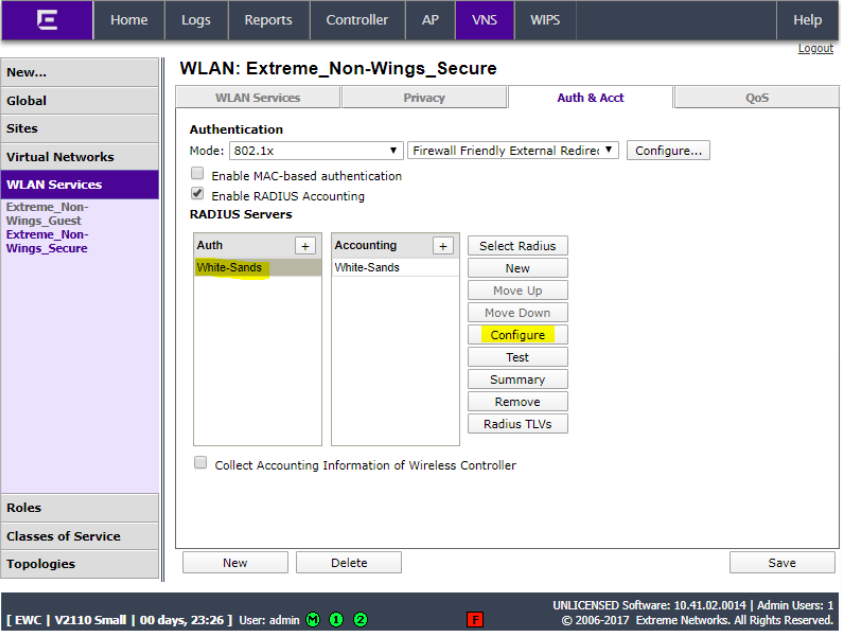
NAC Secure SSID Configuration
Click WLAN Services and click New.

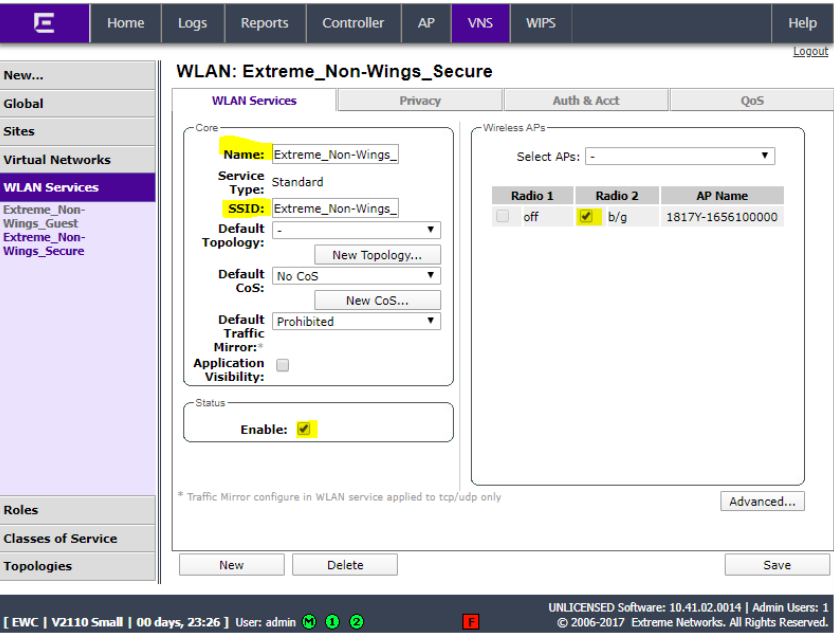
Enter a name for the service, enter a name for the SSID, check the Enable box and select the AP for the WLAN and click Save.
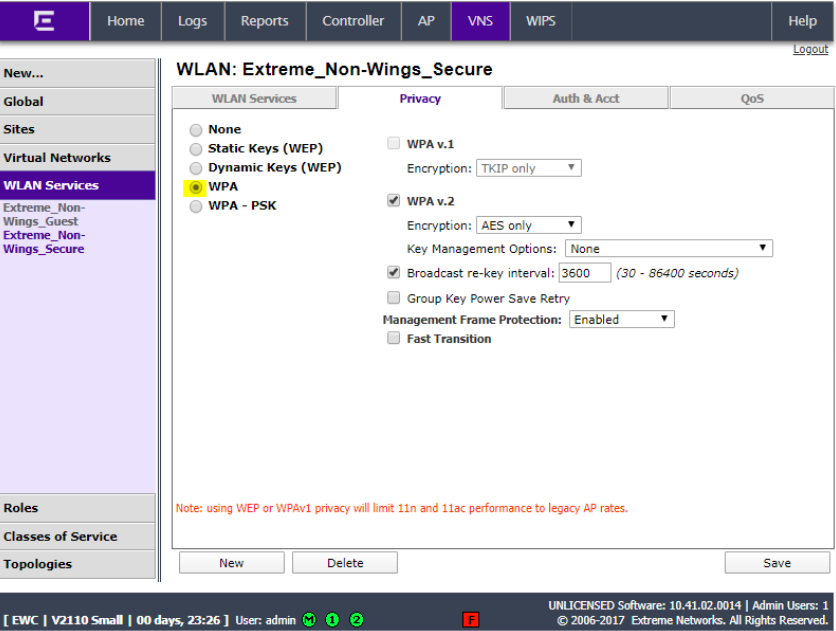
Click the Privacy tab and ensure it is set to WPA.
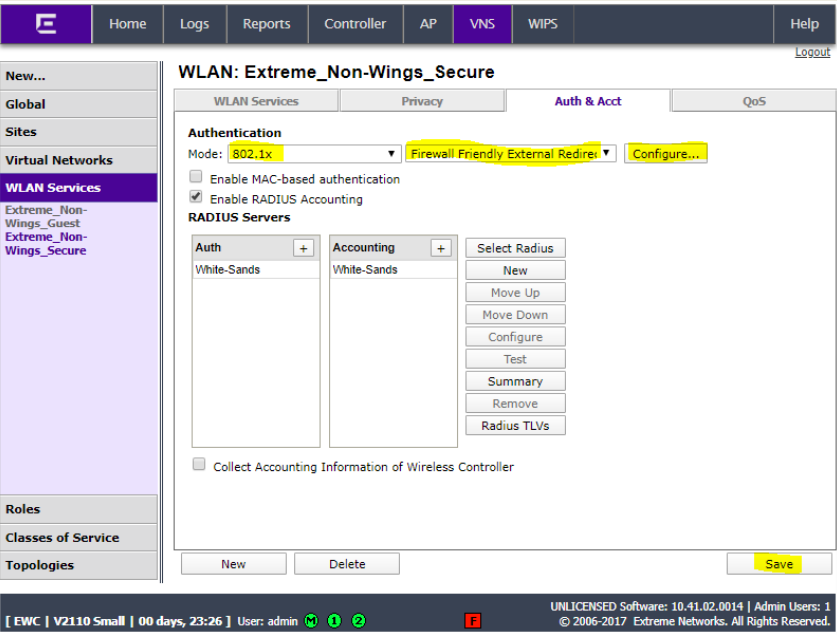
Click Auth & Acct, set the mode to 802.1X and click Save. Add Firewall Friendly External and click Configure…
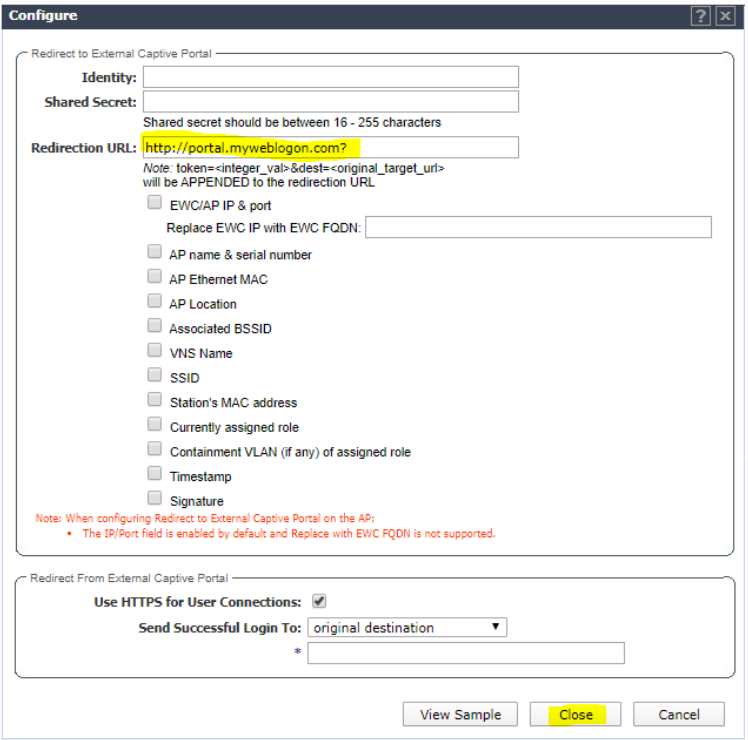
Enter http://portal.myweblogon.com for the redirect URL and click Close.
Ensure that Enable RADIUS Accounting is selected. Click the + sign and select the RADIUS server configured previously with the NAC appliance IP.
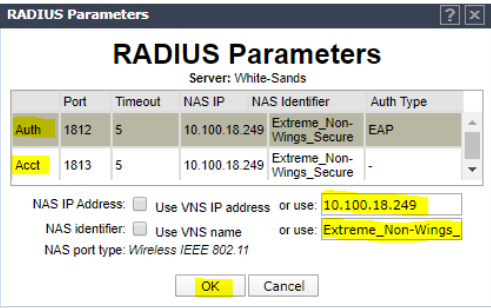
Click on the RADIUS server and click Configure.
Click the name of all 3 RADIUS entries (Auth, MAC and Acct and type the enforcer IP address as the NAS IP address and the SSID name as the NAS identifier and click OK.
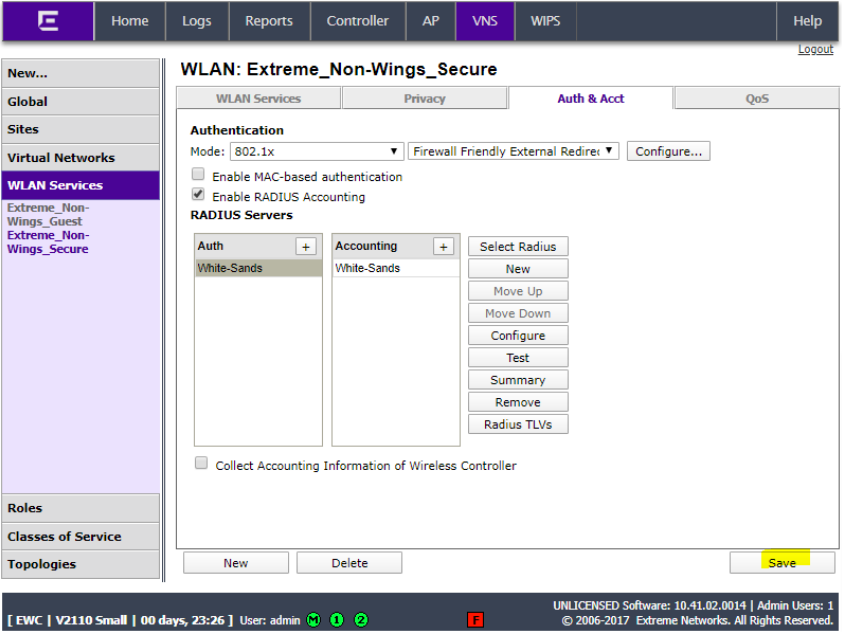
Click Save.
This concludes the configuration integration for a secure SSID.