Includes Installation Instructions for loading NAC into your Hyper-V Gen2 environment from an VHDX file.
Overview
This document is intended to be used as a guide to install a Virtual Machine (VM) version of the NAC Policy Enforcer appliance within a Hyper-V virtual environment. You should be familiar with the Hyper-V Manager Console prior to attempting this task. If technical support is required during the installation, please use the contact information below for assistance.
Installation
The OPSWAT NAC VM image requires 16Gig of memory of dedicated memory with 300GB thin provisioned storage partition and 2 shared quad core CPUs (2-3Ghz). This configuration allows for up to 25,000 concurrent connections.
To add the new machine to your inventory, launch your Hyper-V Manager Console. The image uses Hyper-V Generation 2.

Click New > Virtual Machine

Specify Name and Location:
Enter a name for your NAC virtual machine and a storage location, if applicable.
Specify Generation:
Select Generation 2 as the version
Assign Memory:
Assign Memory to 16000 MB
Configure Network:
Select the Connection type from the Connection drop down
Connect Virtual Hard Disk:
Select Use an existing virtual hard disk and browse to your NAC vhdx.
Click Next
When finished you may then click: “ Finish ” to close the dialogue window.
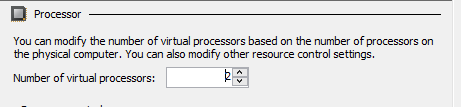
Once VM is created you will need to,
verify 2 virtual processors are assigned to the VM. You can do this by right clicking on the virtual machine and selecting Processor. Under ‘Number of virtual processors’ ensure there are 2.
verify Secure Boot is disabled.
Once complete click OK and start the NAC virtual machine.
The Impulse Policy Enforcer Hyper-V Template is now successfully deployed within your virtual environment.
IP Reconfiguration
Once the virtual appliance is powered on, connect to the console and login with the username “admin” and the password “admin”. After logging in, the consoled configuration utility will be launched. The resulting pages will prompt the user to update the admin password, configure the IP address settings, and enter a MetaDefender IT Access license key. An OPSWAT representative will need enable the NAC feature for the associated MetaDefender IT Access account prior to the activation step. If you are not sure your account has this feature enabled, please contact opswat-support@opswat.com.
NAC VMs are typically placed in a network management or dedicated subnet. This subnet must be directly connected to any Layer 3 device (router/L3 switch) NAC will be integrated with. This subnet cannot be a user device subnet. NOTE – If the NAC VM is placed in a subnet that is not directly connected to a Layer 3 device that is part of the integration, Policy-Based Routing (PBR) will not function.
Reset Admin Password
Configure Appliance Network Settings
Enter License Key
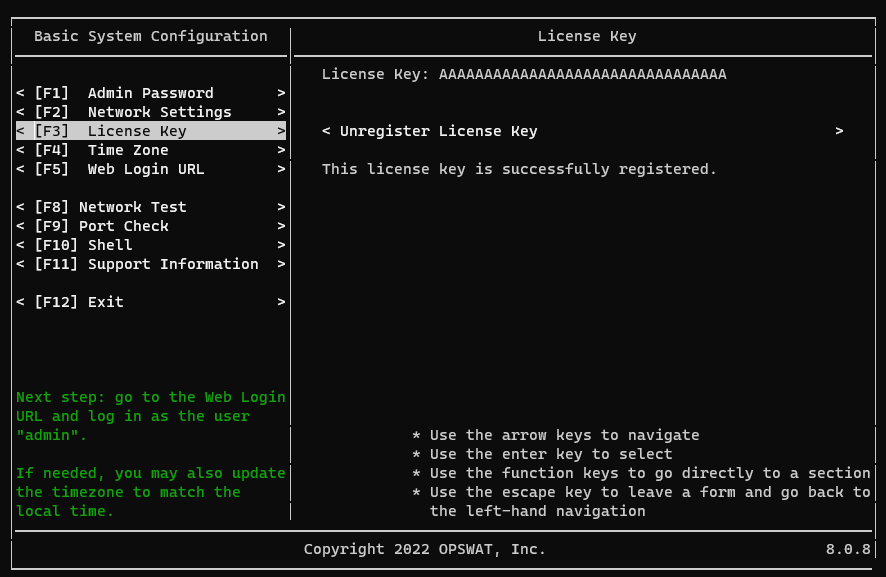
Write down the Web Login URL. The console utility displays formats for the default hostname and the IP address of the appliance. If this is a brand new installation, the IP address format will likely need to be used as DNS may not yet be configured.
Exit Appliance Basic System Configuration. Further configuration can be completed by opening https://portal.myweblogon.com:8443/manage (alternatively https://<appliance_IP>:8443/manage) in your web browser.
Remote Access Requirements
The Access Requirements below are used to facilitate installation, testing, training, support, monitoring, backups and upgrades of your NAC Appliance(s).
Allow outbound SSH (port 22) to below resources from your NAC virtual appliance's private IP:
FQDN: nac-ca1.opswat.com
IP Address: 52.1.227.222
FQDN: nac-ca2.opswat.com
IP Address: 52.4.162.8
FQDN: nac-downloads.opswat.com
IP Address: 34.192.23.191
Allowing outbound TCP/22 connection from the NAC virtual appliance to 52.1.227.222 and 52.4.162.8 will permit it to establish reverse SSH tunnels that allow OPSWAT to gain remote SSH access to your appliance. While OPSWAT will only use this access with regard to an active support case or project (e.g. initial implementation or upgrades), you may wish to remove our ability to access your appliance outside these time frames for security reasons. To do this, simply block outbound TCP/22 connections from your appliance's private IP in your network's firewall.
NOTE - If you opt to block outbound TCP/22 connections from your NAC, it may take up to 1 hour for your NAC to re-establish a reverse SSH tunnel to our remote access servers once these connections are allowed again (e.g. when requesting remote support).
Allow outbound HTTPS (port 443) to below resources from host x.x.x.x (NAC Appliance Private IP):
FQDN: gears.opswat.com
Service Name: Amazon Web Services (Appliance Configuration Backups)
Resources:
52.92.16.0/20
52.216.0.0/15
54.231.0.0/17
Allow outbound for following services from host x.x.x.x (NAC Appliance Private IP):
Services: HTTPS, DNS, NTP
NOTE – Outbound access rules are only applicable if outbound filtering is in place. If DNS, NTP and SMTP are all housed internally, firewall rules should be configured to allow those resources.
If any questions arise please contact your OPSWAT Deployment Engineer or OPSWAT Support.