Overview
The following sample guide covers all Aruba Instant configurations required to integrate the Virtual Controller with NAC to be leveraged as an enforcement device. HP-Aruba Instant access points running 8.5 or later are supported. RADIUS-Based Enforcement (RBE) is supported for Open networks and for Secure networks using WPA2E/802.1x. By configuring your NAC Enforcer as an Authentication and Accounting Server, creating User Roles and leveraging features available in the HP-Aruba Instant access point acting as the Virtual Controller, NAC will be enabled to block, redirect or limit access based on NAC Policy Group definitions.
Network Preparation and Testing
Prior to integration with NAC, please confirm that the WLANs you will be integrating are fully functional. A simple test of successfully associating with the SSID and browsing to a non-cached website should suffice. Add routing statements to ensure authentication URL is routed to NAC. Your NAC appliance comes pre-loaded with an SSL certificate for the URL portal.myweblogin.com. To ensure traffic to this URL routes to your appliance, add the static route below to the Layer 3 routing device upstream of your Aruba Virtual Controller.
Note – If NAC is already integrated with your wired network, applying the “impulse” route-map to the appropriate Layer 3 interfaces on the router is preferred over the static route. Examples below are for Cisco and Brocade platforms. Please contact your Impulse Network Specialist if you require assistance with this task.
Static Route (apply if NAC is not integrated with wired network):
Route-map (apply if NAC is already integrated with wired network):
Once you have this configured, please associate with the SSID and browse to the following URLs. Each should resolve to a login screen successfully.
• https://[ip address of your NAC enforcer]:8443/dashboard.do
• https://portal.myweblogon.com:8443/dashboard.do
General RADIUS settings
NOTE: Ensure test WLANs are used for initial integration testing.
Add NAC Enforcer as a RADIUS Authentication and Accounting Server Globally
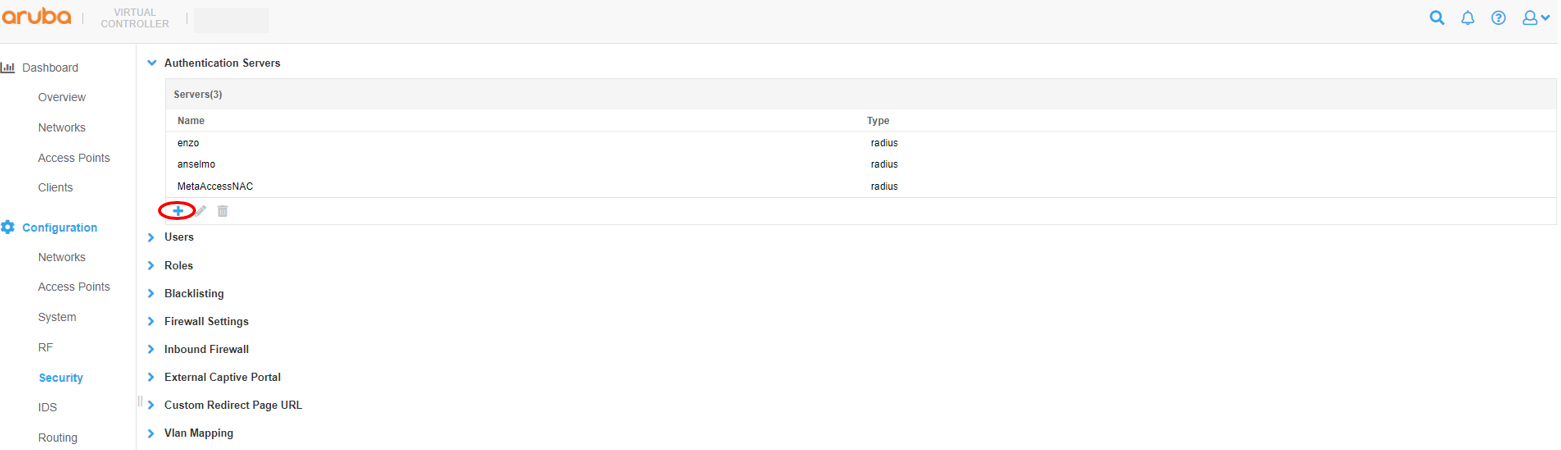
Navigation on Configuration/Security and under the Authentication Servers tab, click + sign
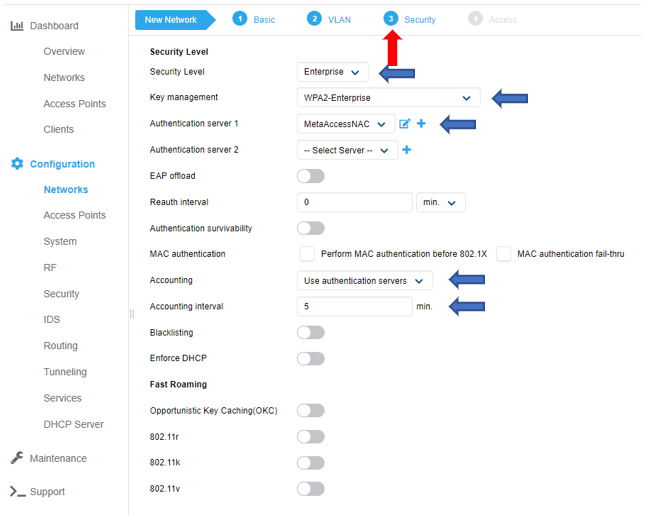
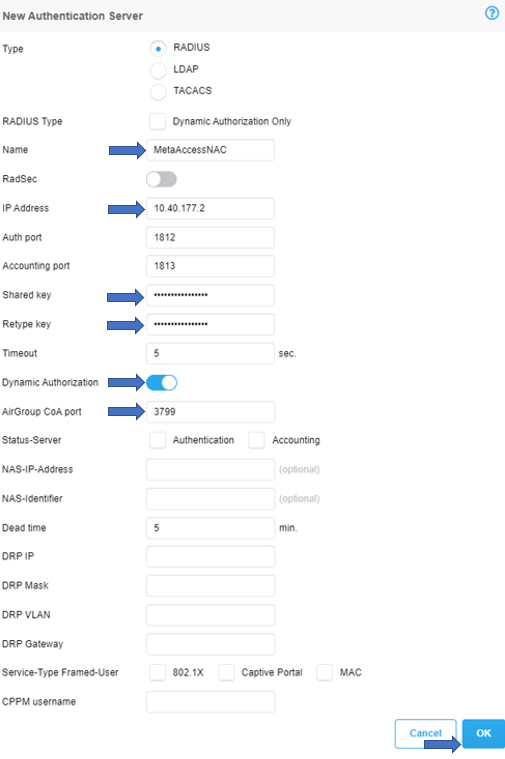
In the following examples, the NAC Enforcer IP is 10.40.177.2*. Make a note of the IP address and shared secret as this information will used later to add the Virtual Controller as a NAS in the NAC RADIUS Server. Use ports 1812 and 1813 for Authentication and Accounting, ensure that ‘RFC 3576’ is set to ‘Enabled’ and ‘Air Group CoA port’ is set to ‘3799’. Click OK to save.
*If you have a separate RBE appliance, that IP should be used here instead of the Enforcer IP
Setup IP Address for Virtual Controller
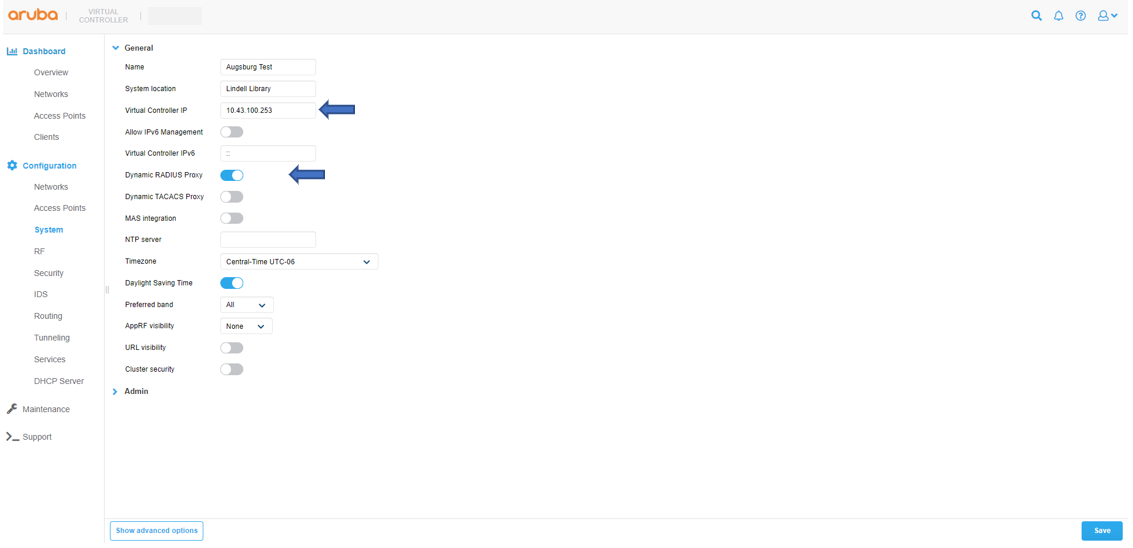
Navigation on Configuration/System, config Virtual Controller IP and Enable Dynamic RADIUS Proxy and click Save
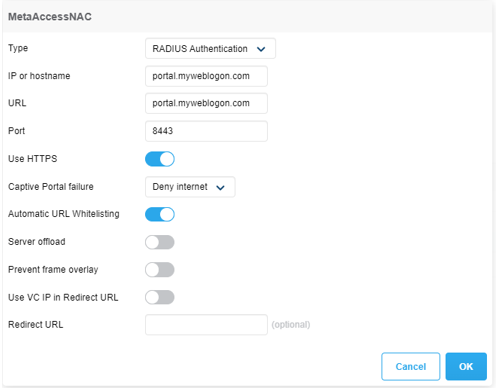
Captive Portal Configuration
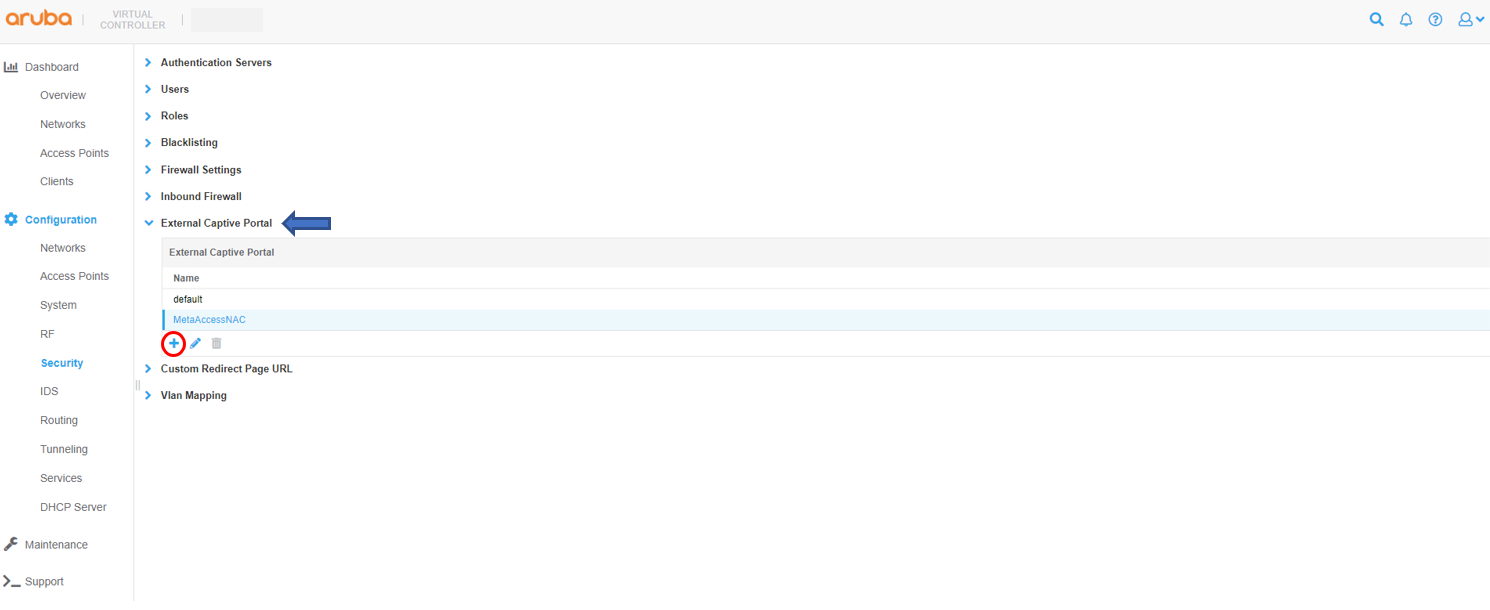
Add the NAC URL as the Captive Portal URL then click OK to save changes.
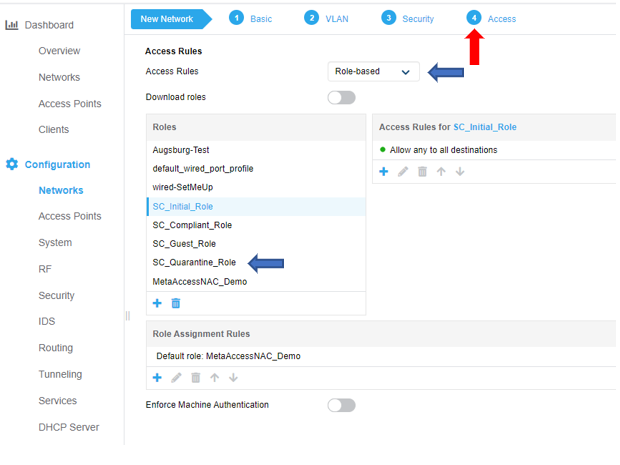
Role Configuration
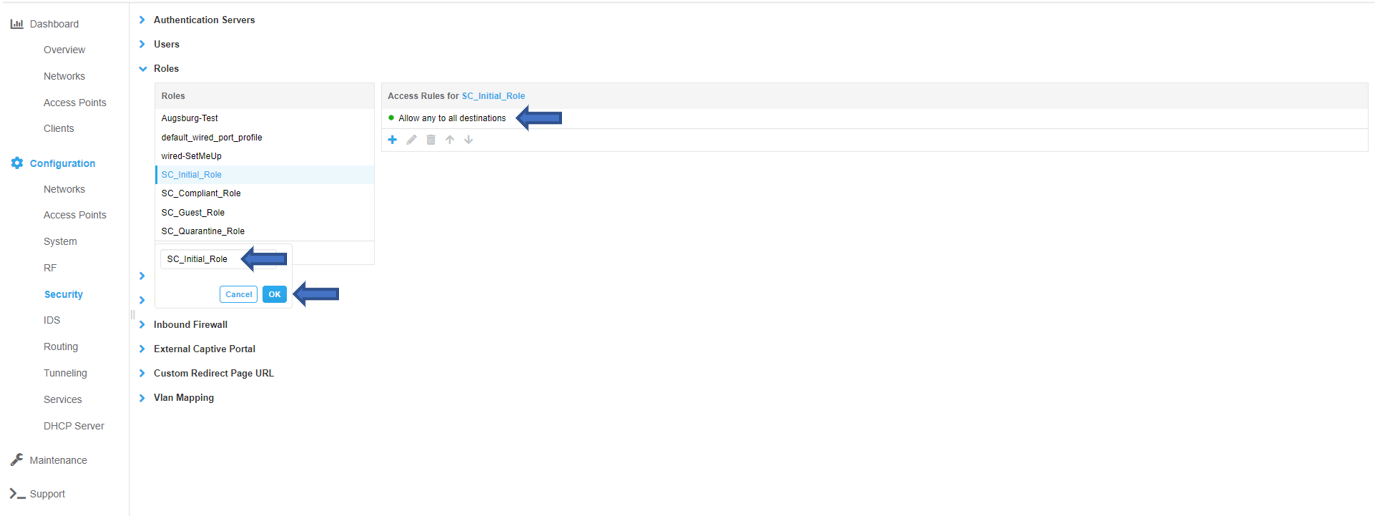
Configure SC_Initial_Role
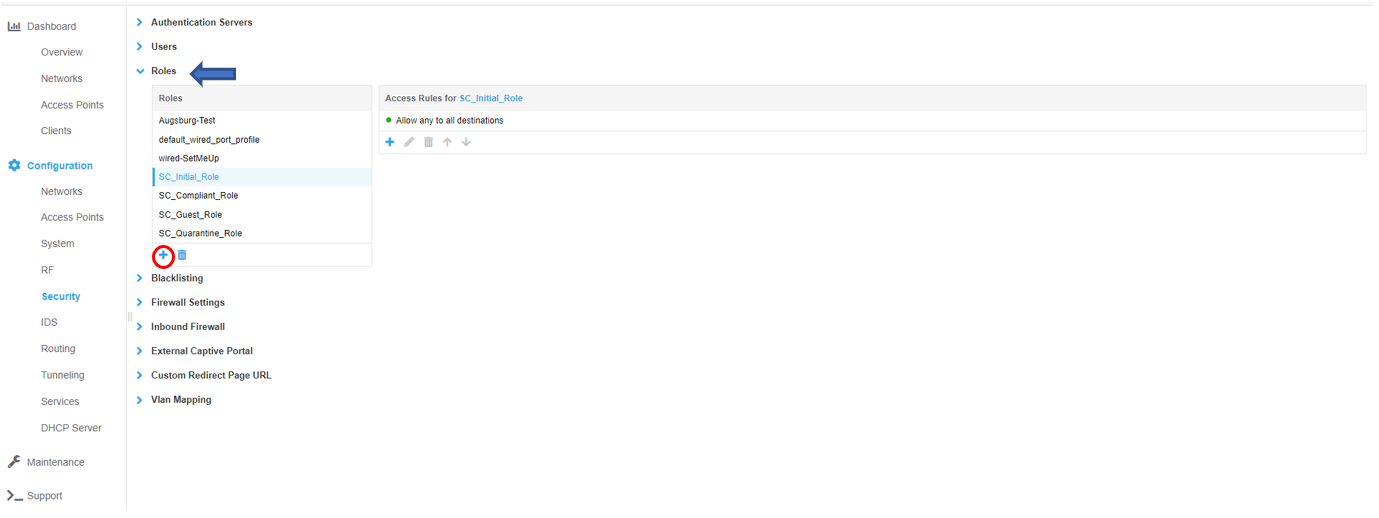
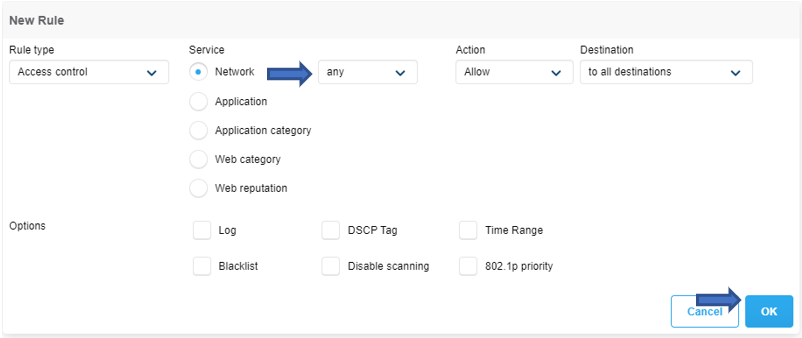
Enter the role name and then click OK. Note – Role names are case sensitive.
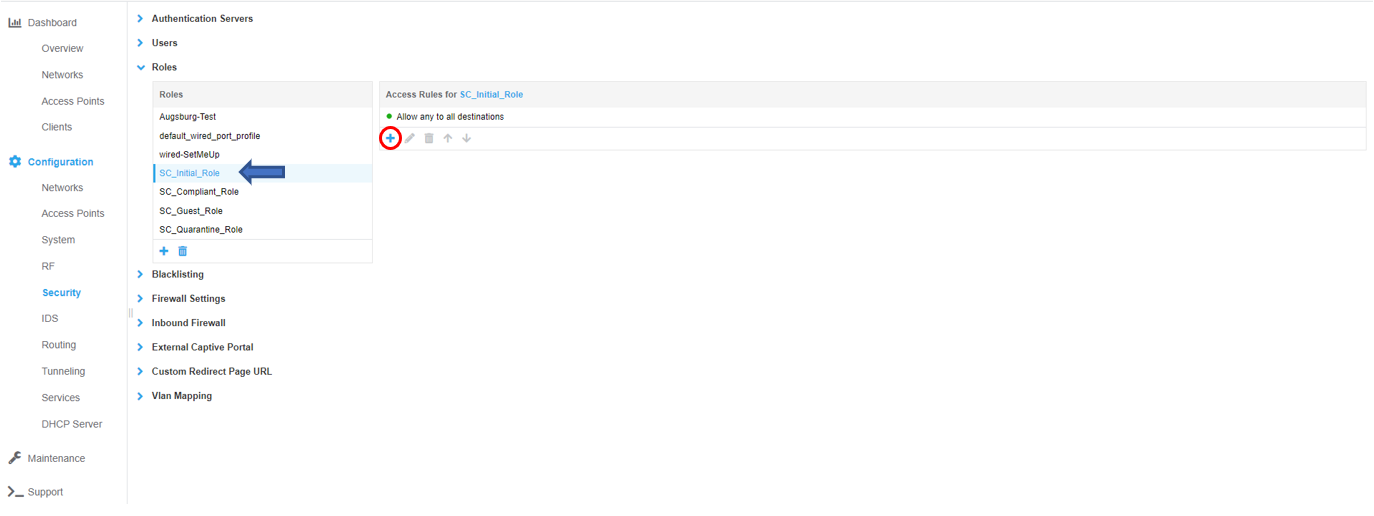
The SC_Initial _Role __defines what access is permitted while an endpoint is being evaluated for policy. To configure access rules for the role click the New button under the Access Rules window and OK when all rules have been entered. In the example below, all access is permitted (the default for a new role) but restricted access may be configured as desired. Note – If the SC_Initial_Role is restricted, ensure DNS, DHCP, traffic for your NAC Enforcer* and 198.31.193.211 are permitted. These are mandatory entries for restricted roles.
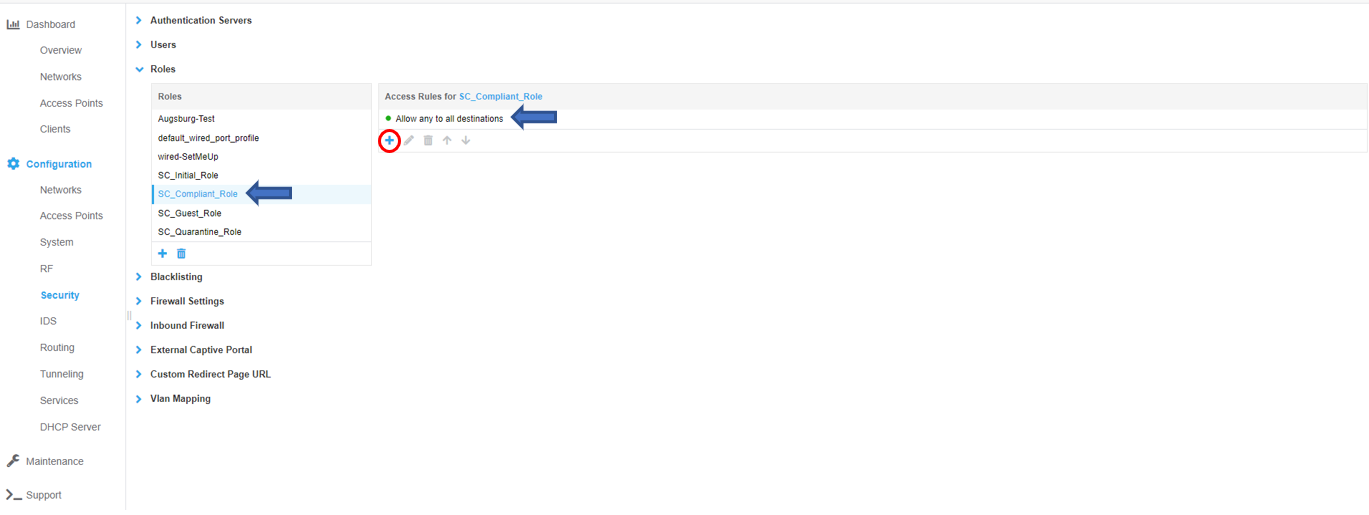
Configure SC_Compliant _Role
The SC_Compliant Role defines what access is allowed after successful authentication. To configure access rules for the role click the New button under the Access Rules window and OK when all rules have been entered. In the example below, all access is permitted (the default for a new role) but restricted access may be configured as desired. Note - If additional different levels of access are to be defined for different roles, names must be unique. Example: “SC_Guest_Compliant_Role”,__“SC_Fac Compliant_Role”_, “_SC_Stu_Compliant_Role”, etc. Note – If the SC_Compliant_Role is restricted, ensure DNS, DHCP, traffic for your NAC Enforcer* and 198.31.193.211 are permitted. These are mandatory entries for restricted roles.
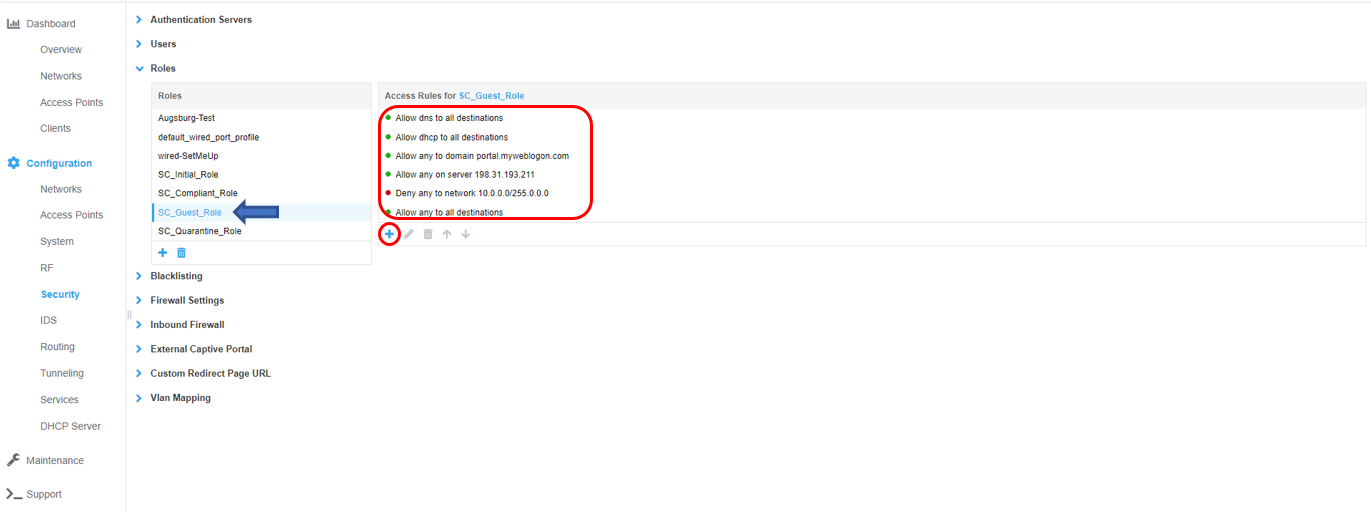
Configure SC_Guest _Role
The SC_Guest_Role defines what access is allowed for compliant guest users after successful authentication. To configure access rules for the role click the New button under the Access Rules window and OK when all rules have been entered. In the example below, all access is permitted except for access to the internal network (10.0.0.0/8 in the example). Note – If the SC_Guest_Role is restricted, ensure DNS, DHCP, traffic for your MetaAccesNAC Enforcer* and 198.31.193.211 are permitted. These are mandatory entries for restricted roles.
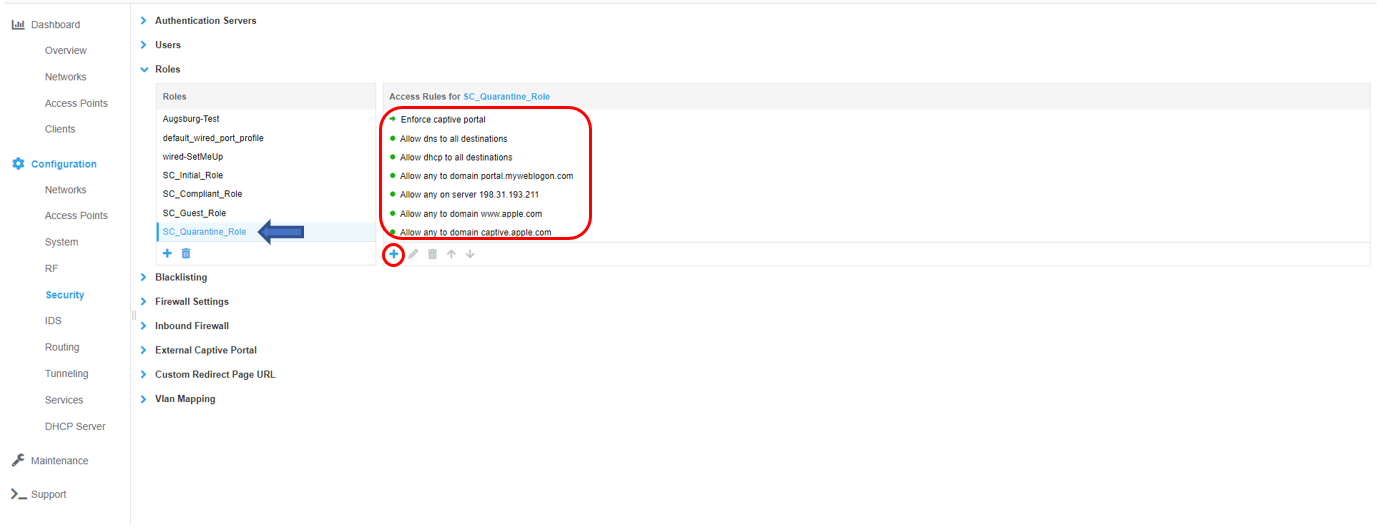
Configure SC_Quarantine_Role
The SC_Quarantine_Role defines what access is allowed while quarantined for a failed policy. To configure access rules for the role click the New button under the Access Rules window and OK when all rules have been entered. The minimum access rules for this role are shown below and are required. Additional access rules may be added as desired. Note - If additional different levels of access are to be defined for different roles, names must be unique. Example: “SC_Guest_Quarantine_Role”, “SC_Fac_Quarantine_Role”, “SC_Stu_Quarantine_Role”, etc
The first rule is a Captive Portal rule. Select External for the Splash page type, select the previously created NAC Captive portal profile then click OK.

Add the remaining rules shown in the two screen shots below. Replace www.portal.myweblogon.com with the landing page for your organization. This is the page users will be redirected to after successfully authenticating.
Secure WPA2E Wireless RBE Configuration
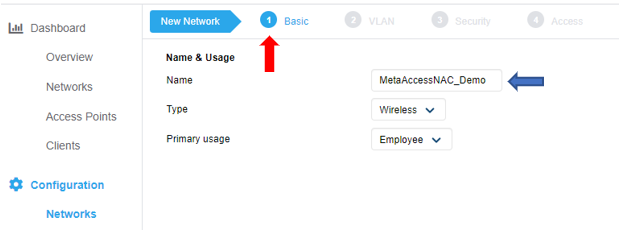
Navigation on Configuration/Network and click on + sign
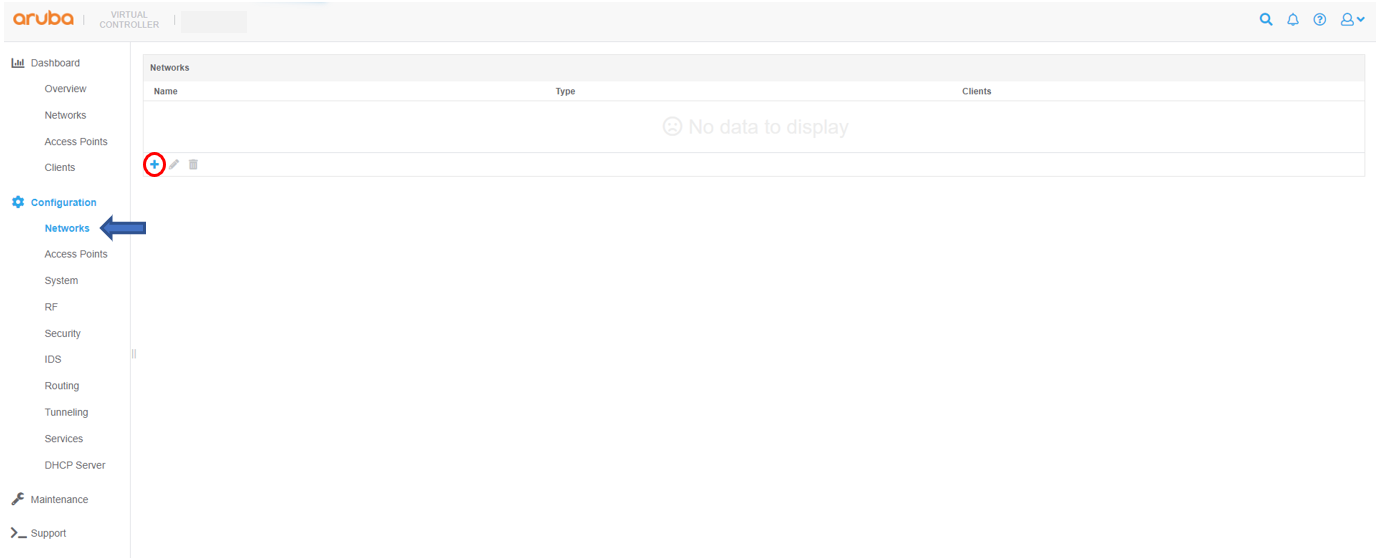
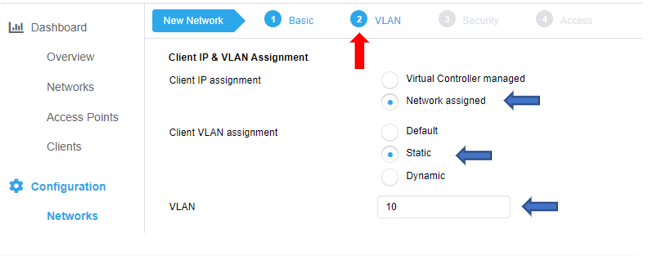
Complete the wizard for create WLAN profile