
In this guide, we'll walk you through step by step on how to roll out application updates for connected product instances from My OPSWAT Central Management.
On This Page
Importing Target Versions : Import or upload target software versions to My OPSWAT Central Management for centralized distribution across your network.
Package Storage & Cleanup: How update packages are stored within My OPSWAT Central Management.
Creating Update Job: Initiate and configure update jobs for one or more instance.
Monitoring Update Job: Track real-time download and installation progress across all selected instances.
To create a rollback job, refer to our dedicated Roll Back Application guideline.
Supported Products
Remote Application Update supports the following products:
MetaDefender Kiosk Windows: Version 4.8.0.xxxx or later.
MetaDefender Kiosk Hardened Image: Version 4.8.3.xxxx or later.
MetaDefender Core: Version 5.20.x or later. Only supports standalone mode.
MetaDefender Industrial Firewall: Version 3.4.1.xxxx or later. The Automatic Application Upgrade setting must be enabled within the individual MetaDefender Industrial Firewall instance.
OPSWAT Industrial OS (x86_64): version 3.4.1.xxxx or later
OPSWAT Industrial OS (ARM64): version 3.5.0.xxxx or later
MetaDefender Industrial Firewall Toolkit: extended options supported
Importing Target Versions
Before you can update any instances, the target versions must be imported to My OPSWAT Central Management.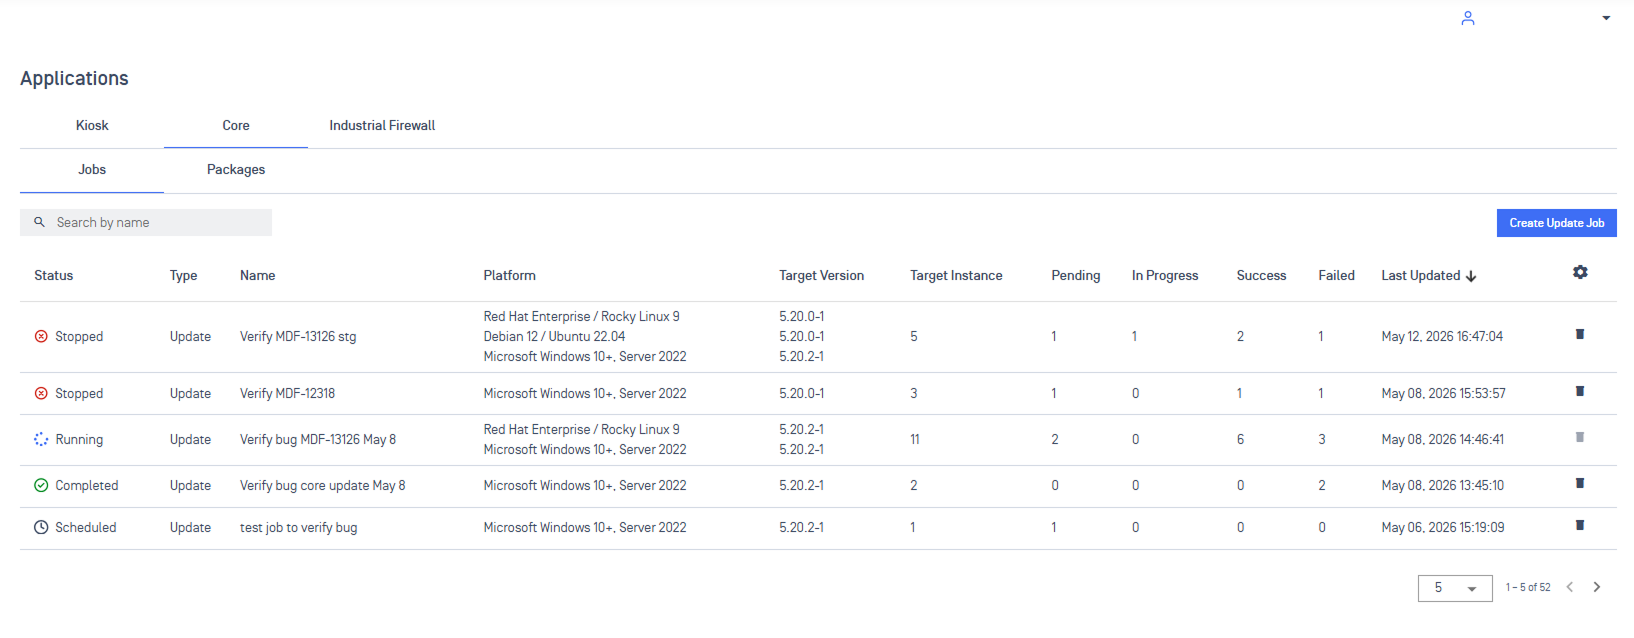
Online Import
To use this method, ensure your environment has internet connectivity.
Navigate to Updates > Software.
Select the product you wish to update and click the Packages tab.
Click Check new versions.
In the dialog, select the target version you need and click Import. The system will automatically download and import the package from My OPSWAT Portal.
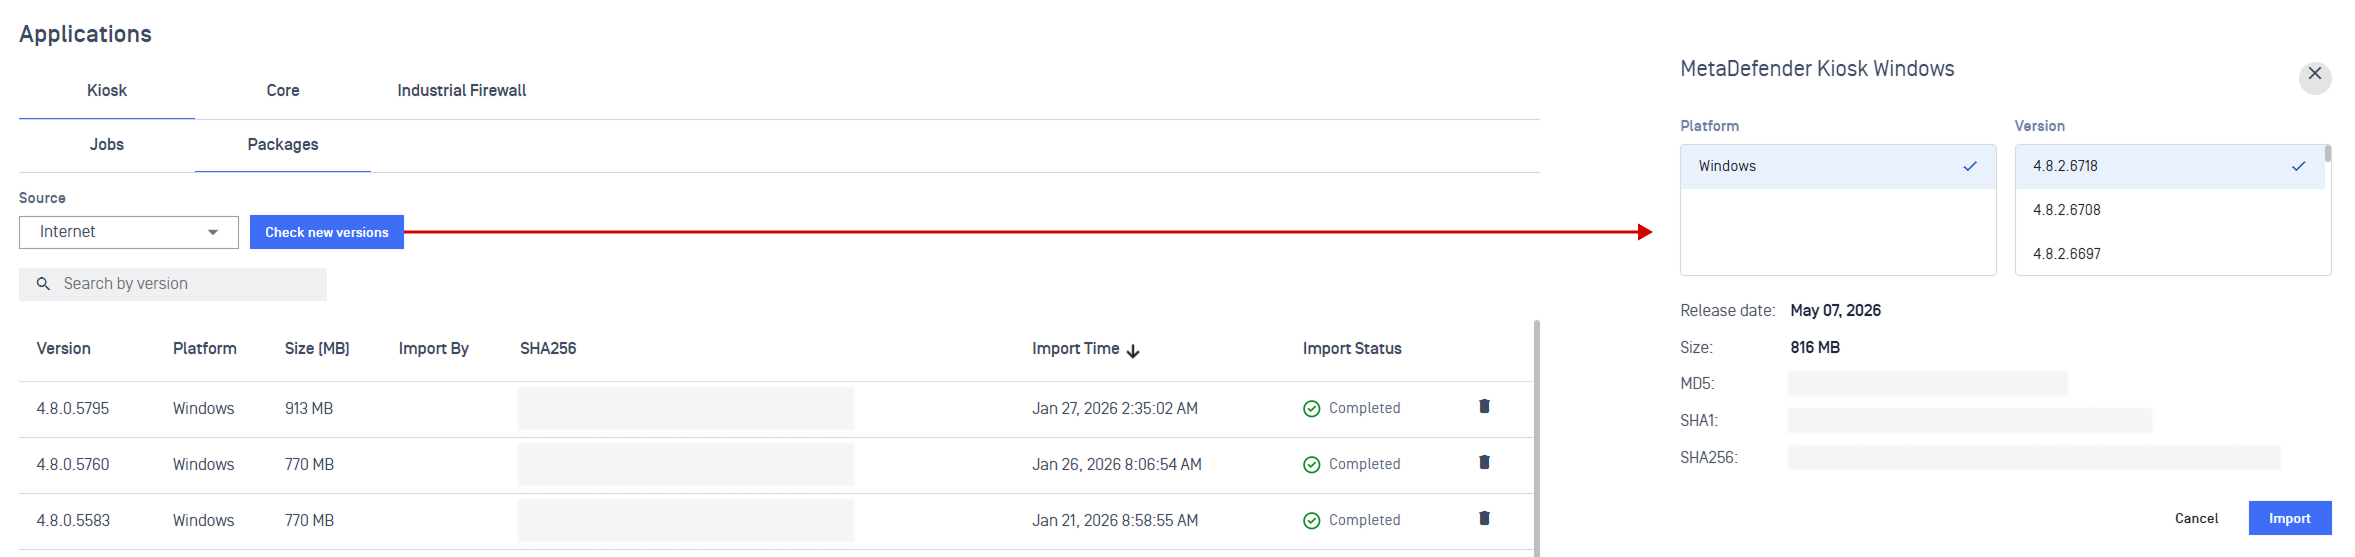
Note You'll receive a real-time notification for application download failures, including failure reasons and suggested actions.
Manual Import
Use this method for air-gapped or isolated environments without internet access.
Step 1: Obtain software packages
You'll need to manually download the target version from My OPSWAT Portal and transfer it into your isolated environment.
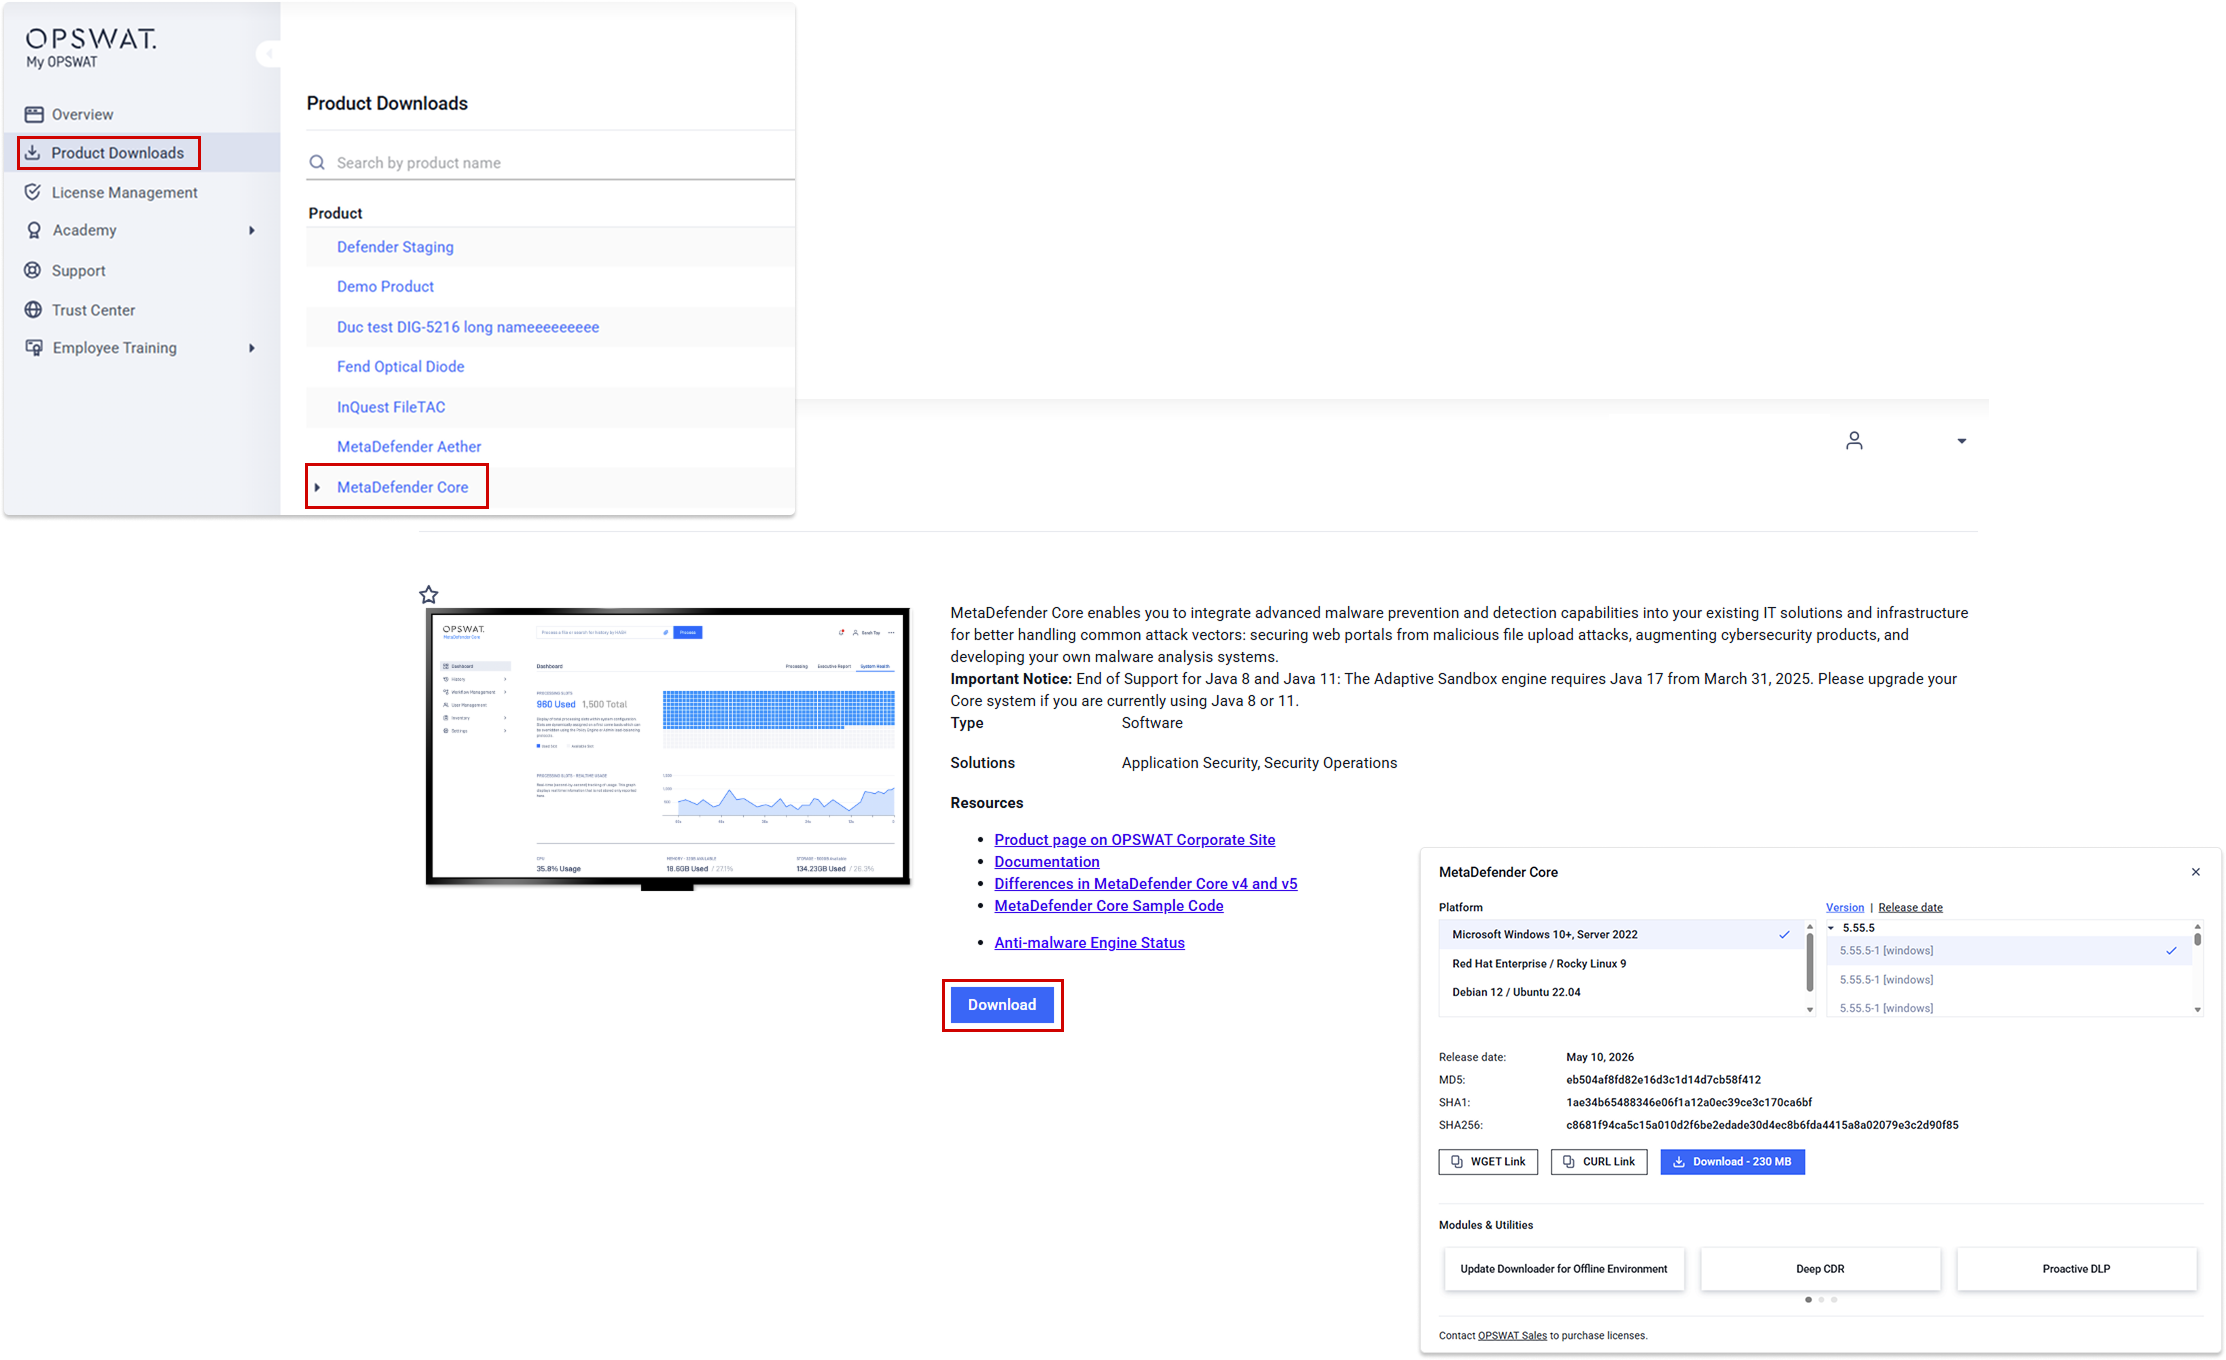
Log into the My OPSWAT Portal.
In the left-side menu, click Product Downloads.
Search or scroll for specific product to open its details page.
Click Download, then select the specific system and version you need.
Step 2: Import target version to My OPSWAT Central Management
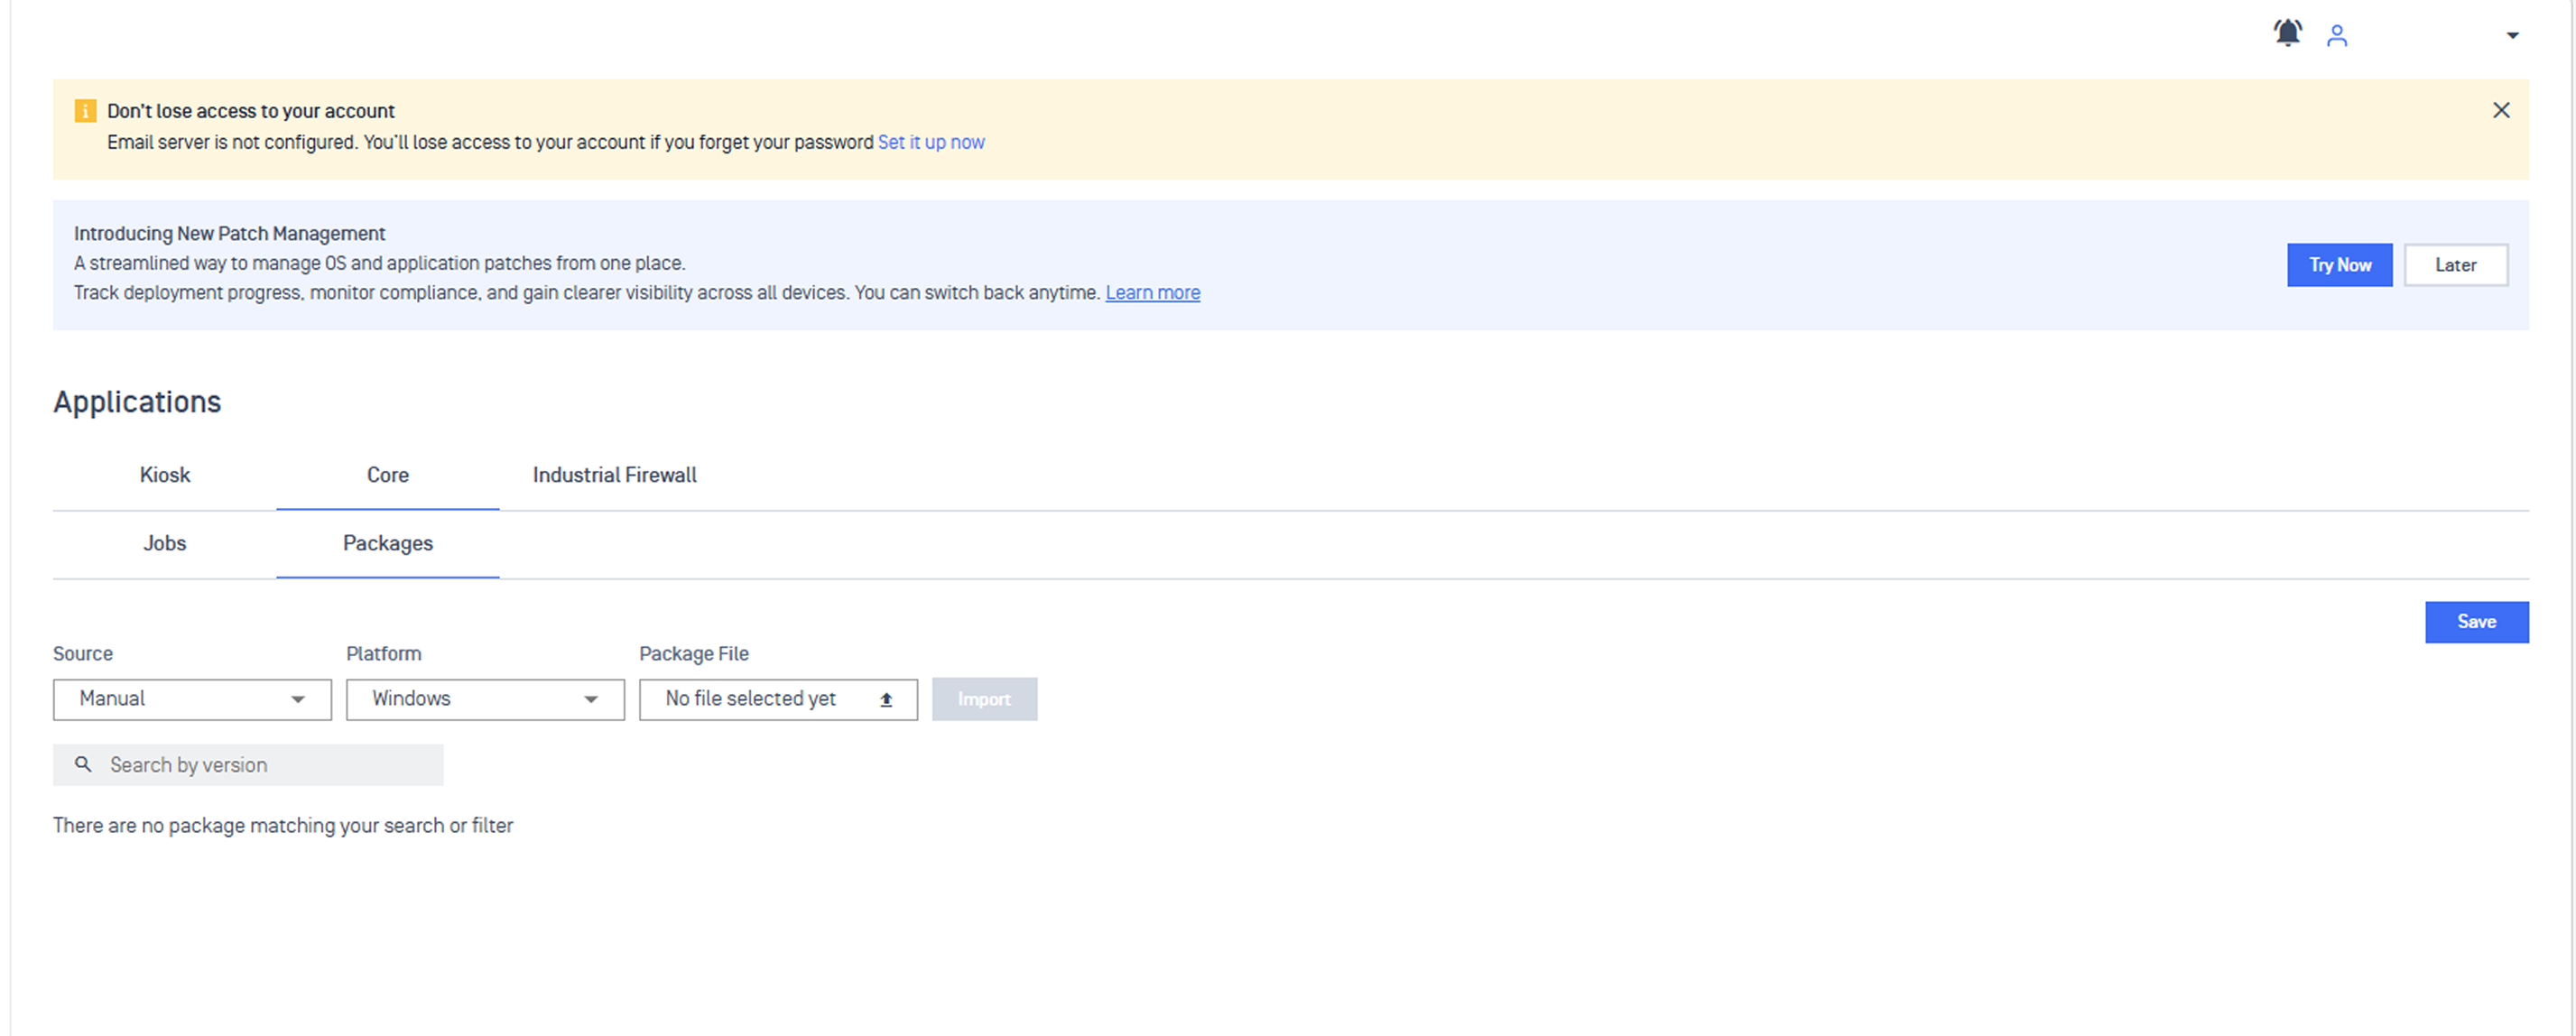
Open My OPSWAT Central Management, navigate to Updates > Software.
In the Package File section, upload the target version and click Import.
Note Please ensure the file size is under 20GB limit.
Package Storage & Cleanup
SaaS deployment: Update packages are not stored within My OPSWAT Central Management.
On-Premises: Update packages are stored on My OPSWAT Central Management server machine after being downloaded or manually uploaded by administrators.
Example Path: C:\Program Files\OPSWAT\MOCM\data-agent\volumes\fusion-updater
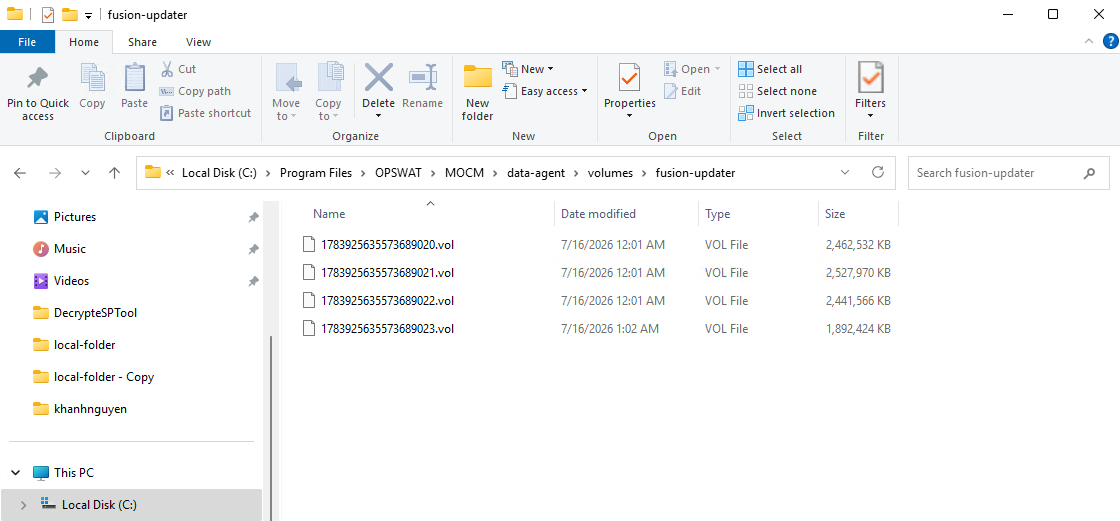
Package retention & cleanup
My OPSWAT Central Management does not automatically delete downloaded update packages. Package retention and cleanup are managed by administrators.
Administrators can remove packages directly from My OPSWAT Central Management when they are no longer needed or to free up disk space.
Please Note Only delete packages after all update jobs have completed successfully or have been stopped. Deleting a package while an update job is running may cause errors.
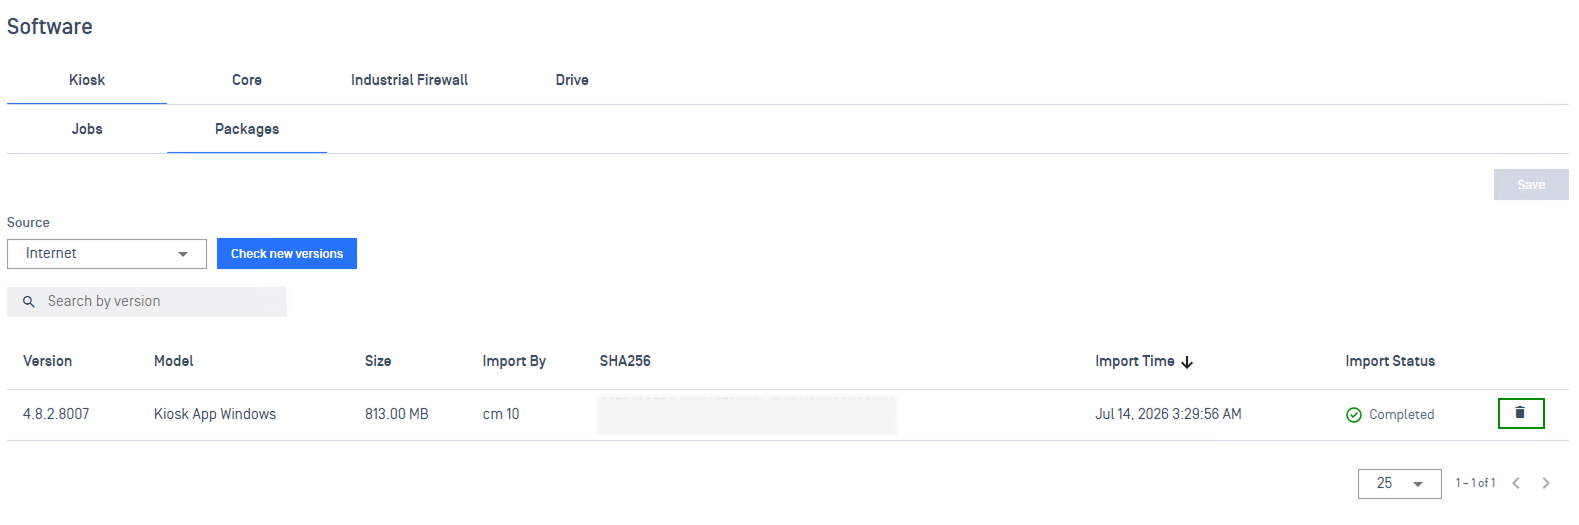
Import Status
The Import Status column reflects whether a target version is ready for use in an update job.
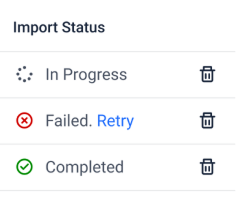
In Progress: The target version is currently being processed. Wait for it to complete before proceeding
Completed: Target version is ready for deployment
Waiting for Review: Administrator confirmation is required before the target version can be used.
Failed: The import encountered an error.
Supported Actions:
Retry: Click Retry on a failed entry to attempt the import again.
Delete: Click the icon to remove the package from the list.
Troubleshooting
If you run into the following issues, try the following solutions:
Import stuck "In Progress": Likely a network timeout. Wait 30 minutes; if it doesn't clear, delete the entry and retry.
Upload fails: Ensure the file size is under the 20GB limit.
Target version missing from Create Update Job: Only target version with a Completed status would appear in update job configuration. Confirm it has finished uploading.
Cannot import target versions: Check your license status. If it has expired, contact OPSWAT Support.
Creating Update Job
An update job defines which instances to update, which target version to deploy, and how the rollout should be scheduled and executed.
Before you begin, confirm that:
All product instances are connected to My OPSWAT Central Management
The target version appears in the Packages tab with a Completed status.
To create an update, navigate to Updates > Software > For Application.
Select the product you wish to update and click the Job tab.
Click Create Update Job.
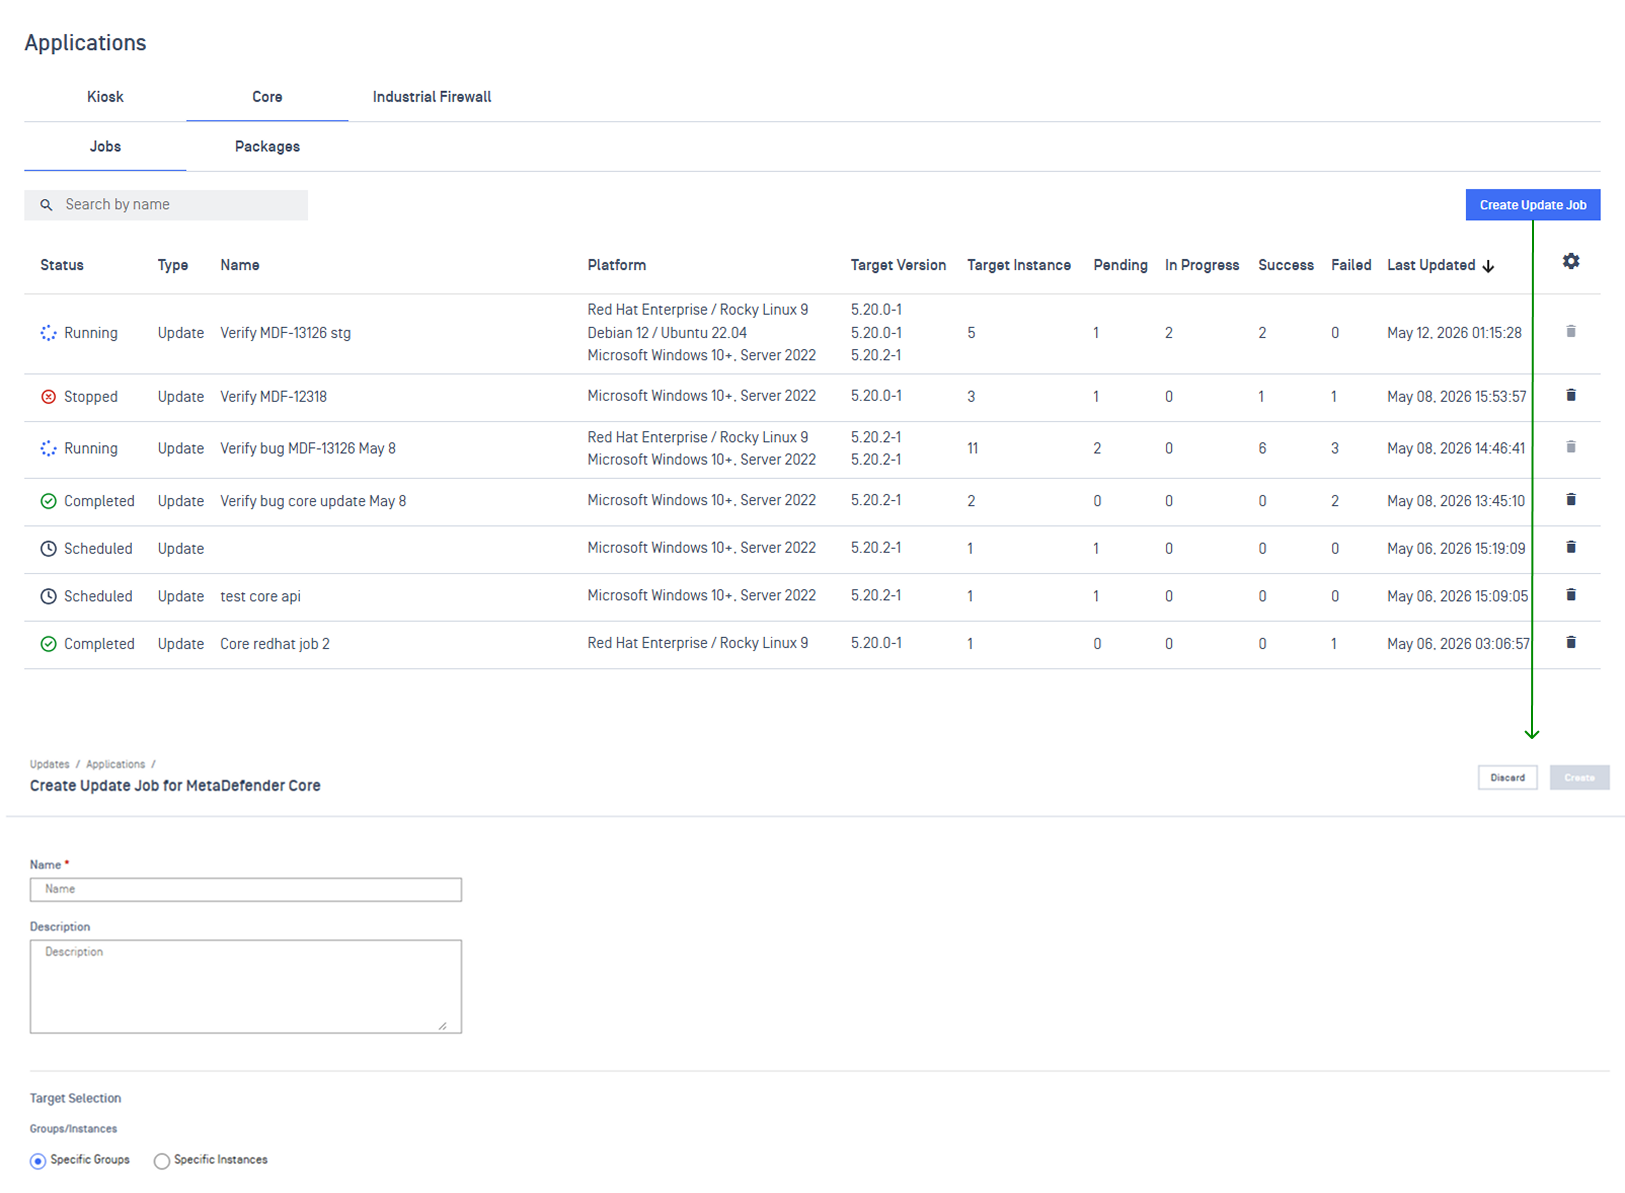
Step 1: Update Job Information
Provide a name and description to identify and track the job.
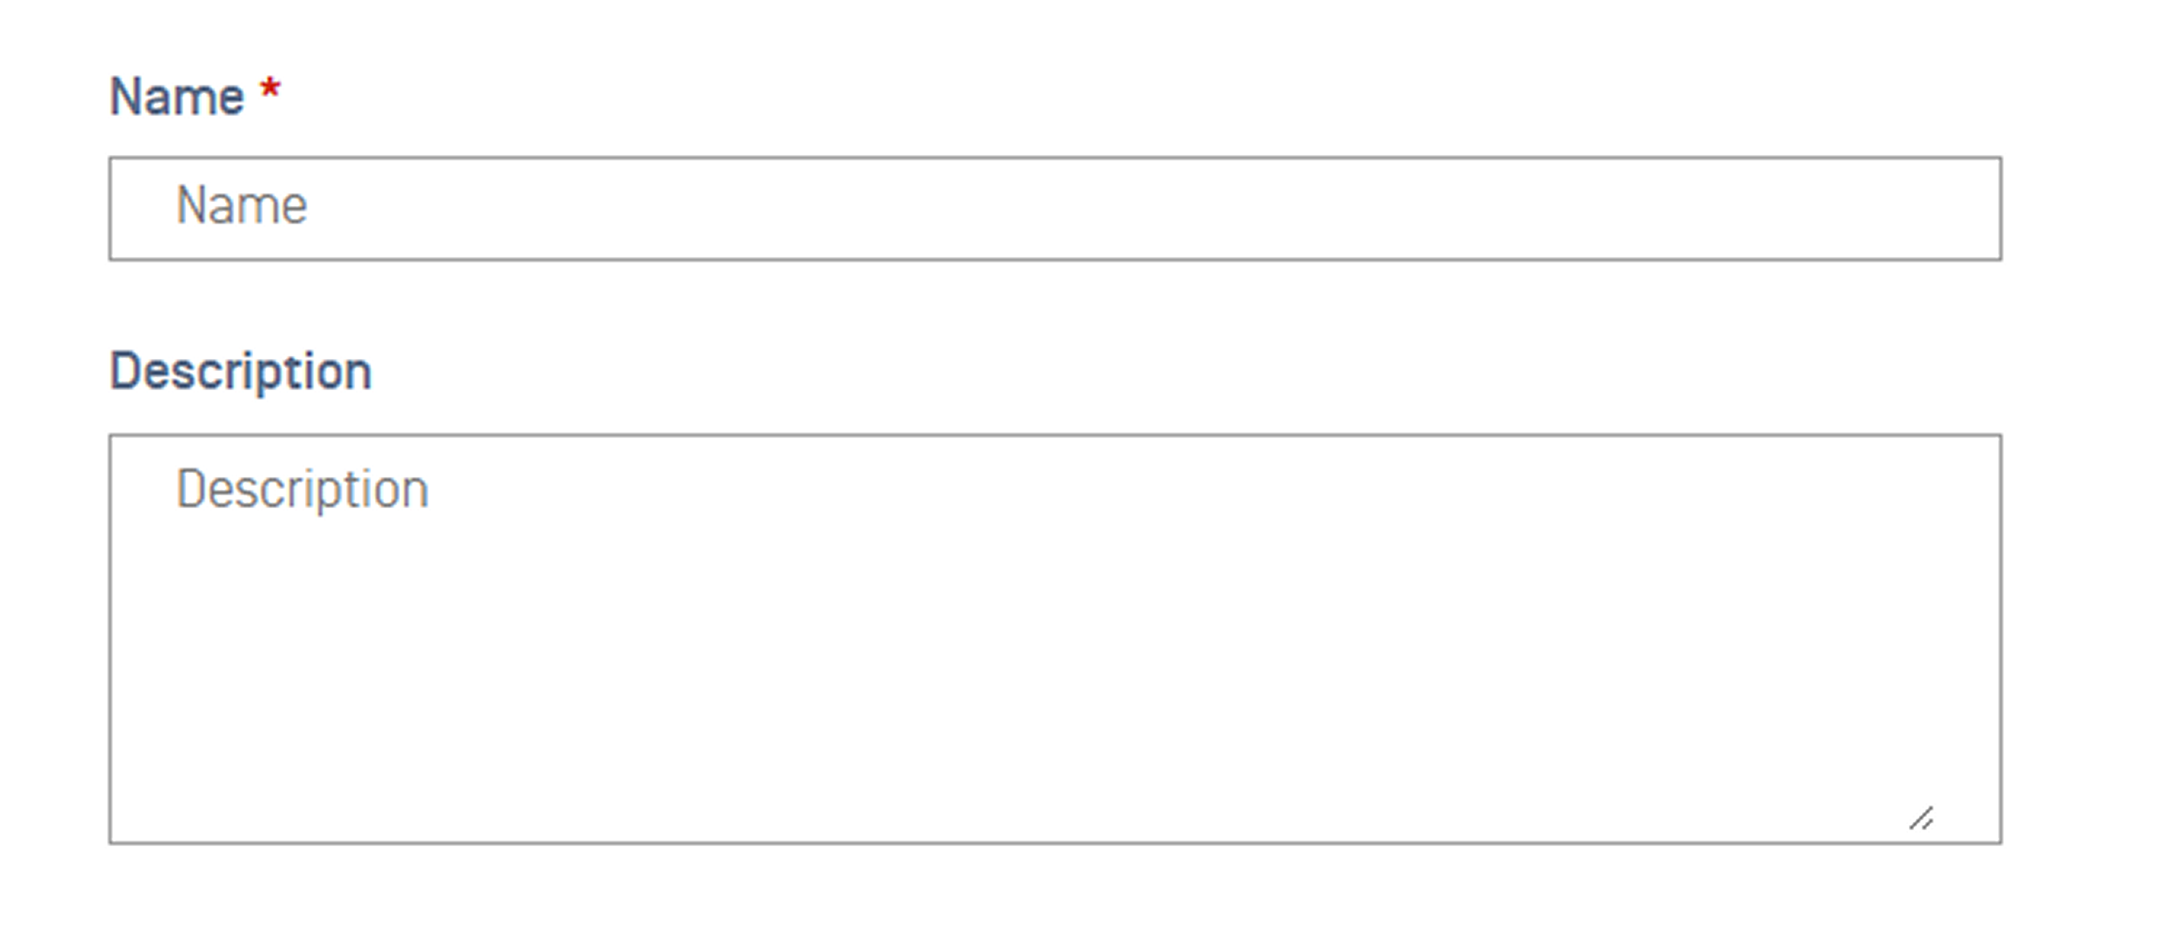
Name: A short, recognizable label for the job,
Description: Briefly note the target instances, purpose, and expected outcome.
Step 2: Target Selection
Group/Instances
Define which instances will receive the update. You can target by group or by individual instance.
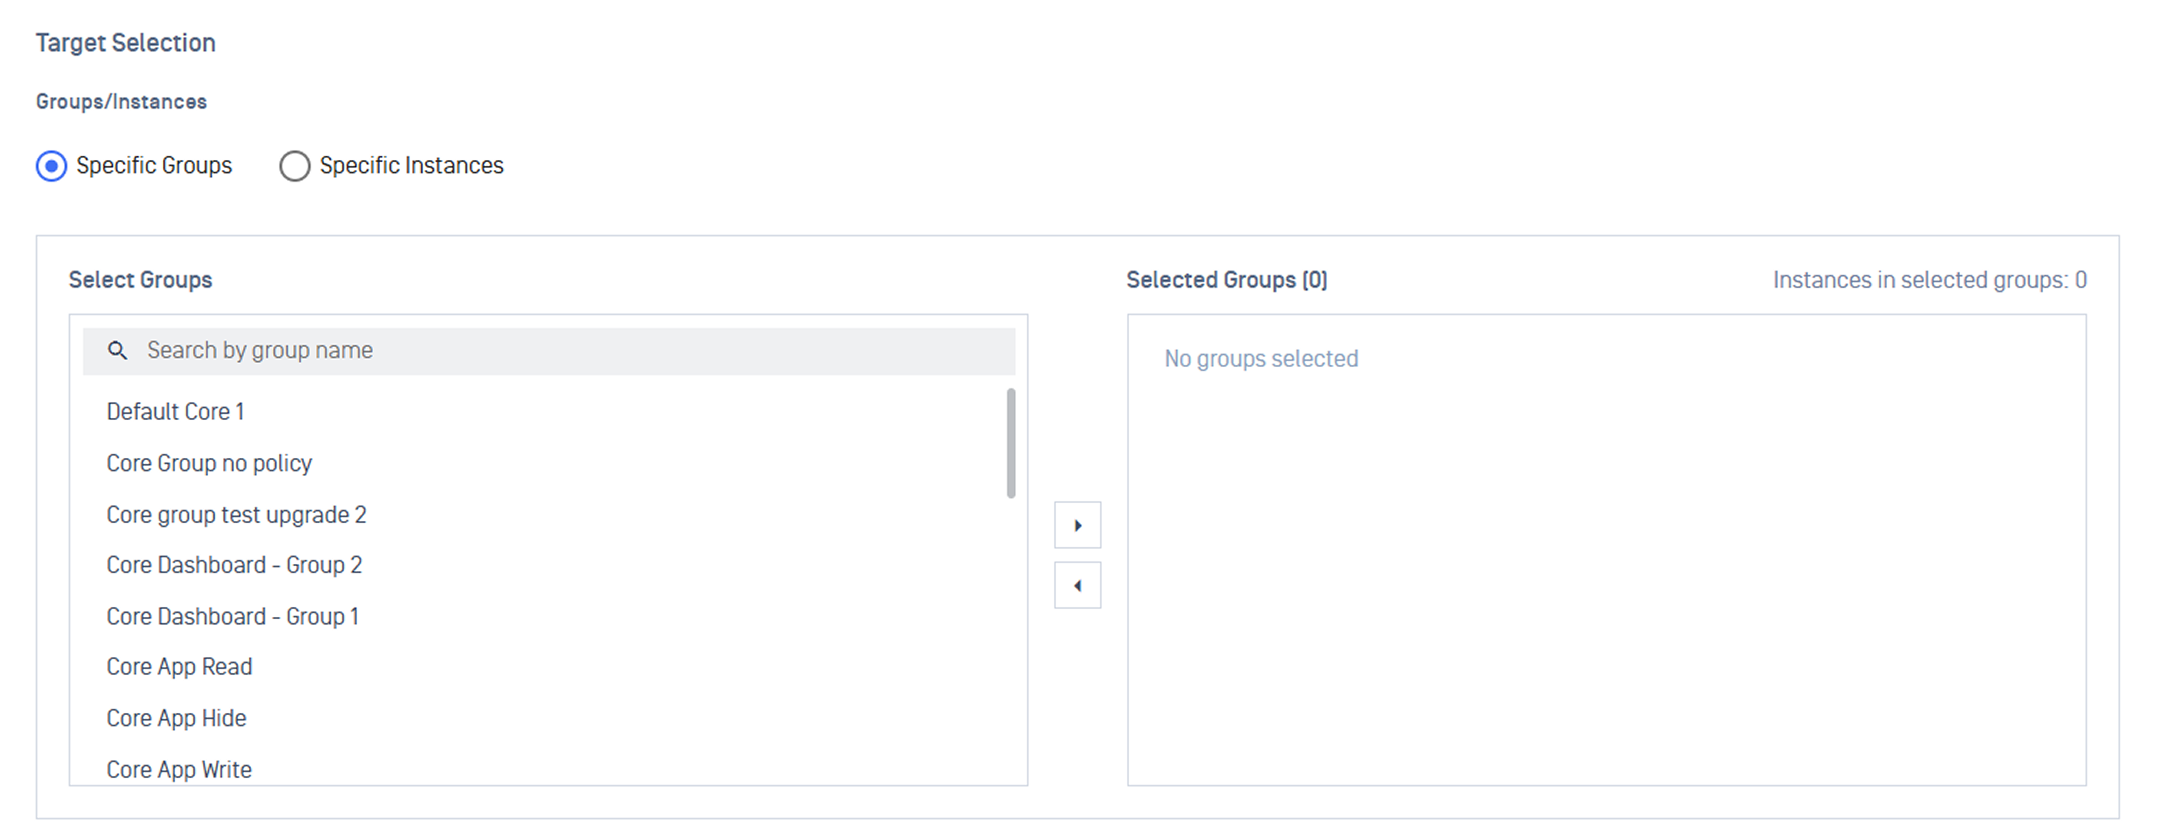
Specific Groups: The update applies to all instances within the selected groups.
Specific Instance: The update applies only to the individually selected instances.
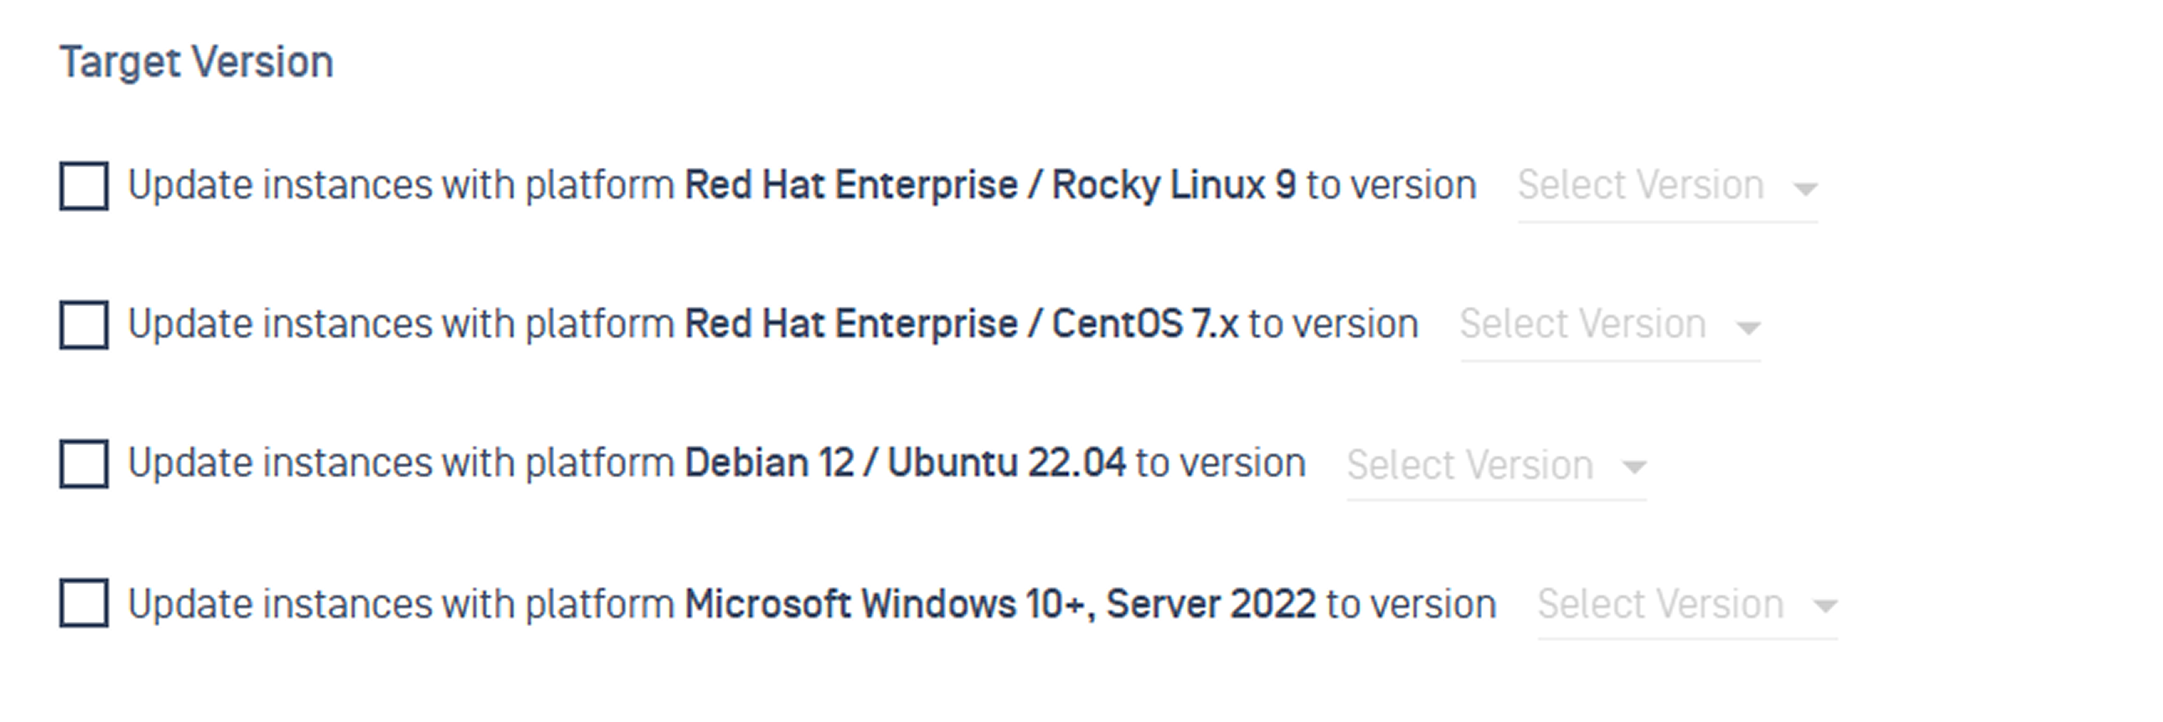
Target Version
Once you've defined the target, select the Target Version from the dropdown.
Step 3: Update Settings
Update jobs are split into two distinct phases: Update Preparation and Maintenance Window. This separation allows large target version to download in the background during normal operations, limiting service interruption to a short, scheduled window.
Update Preparation
Defines when instances begin downloading the target version in the background.
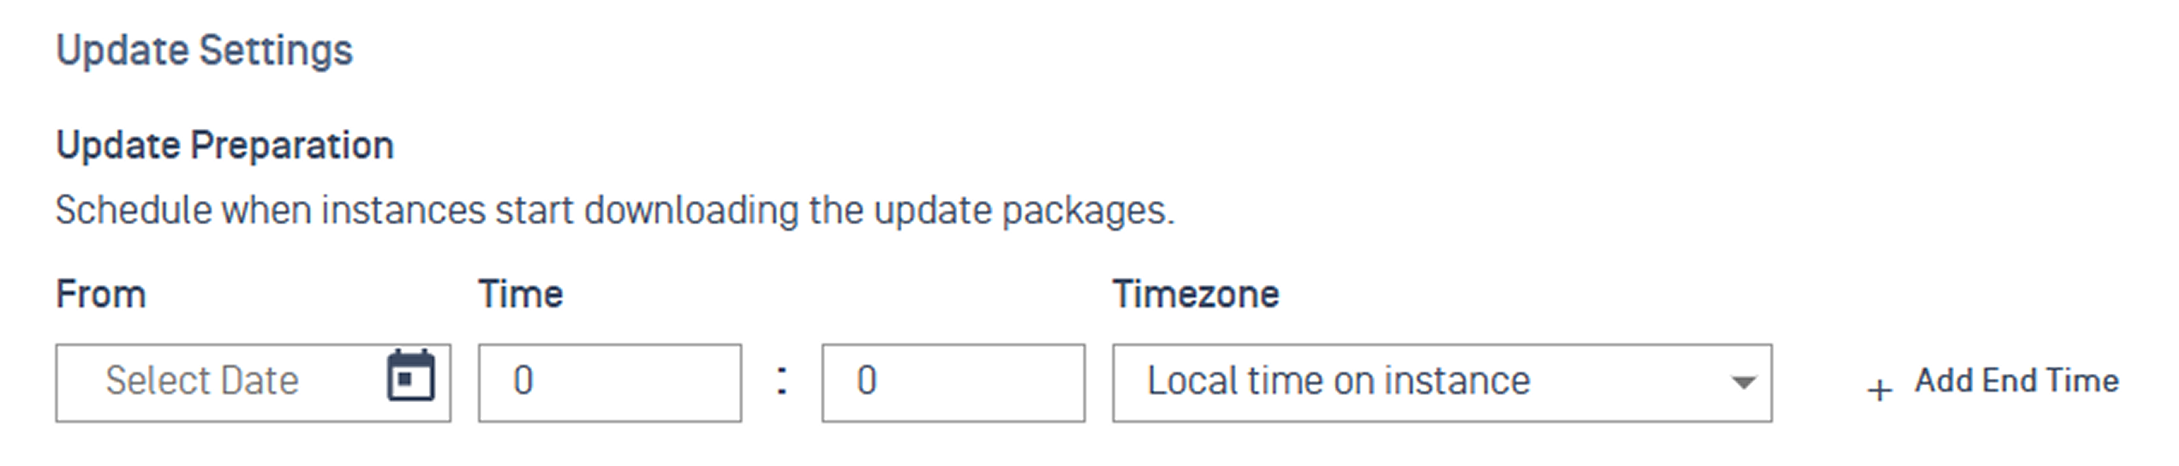
Start Time: When instances begin downloading target version.
End Time (Optional): When the download window closes.
If not set, the window remains open until all instances complete with the download.
Timezone: Choose timezone for update preparation.
Fixed Timezone: All instances download at the same absolute time.
Local Timezone: Each instance uses its own local timezone.
Tips Set a wide preparation window (one to two days) to ensure instances that are temporarily offline still have time to complete their download.
Maintenance Window
Defines when instances execute the actual application update.
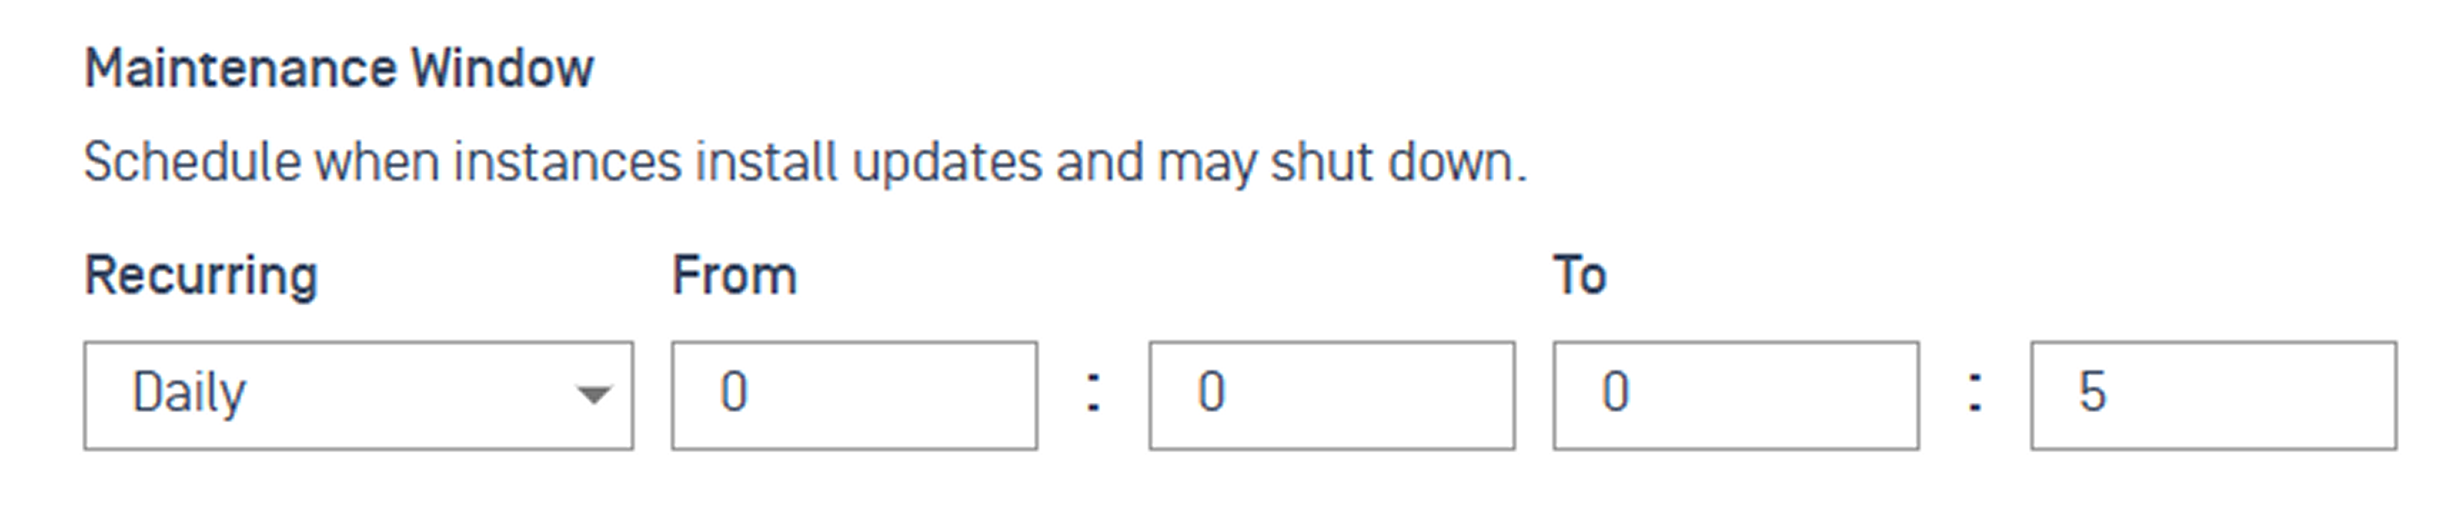
Recurrence: Choose Daily or Weekly.
Daily: Update can occur any day
Weekly: Update only occurs on selected days (e.g., weekends only)
Time Window: Set the specific "From" and "To" times during which update is allowed to execute.
Timezone: Choose timezone for the update.
Fixed timezone: All instances update at the same absolute time.
Local timezone: Each instance uses its own local timezone.
Step 4: Update Options
Fine-tune rollout behavior to maintain network stability and system health.
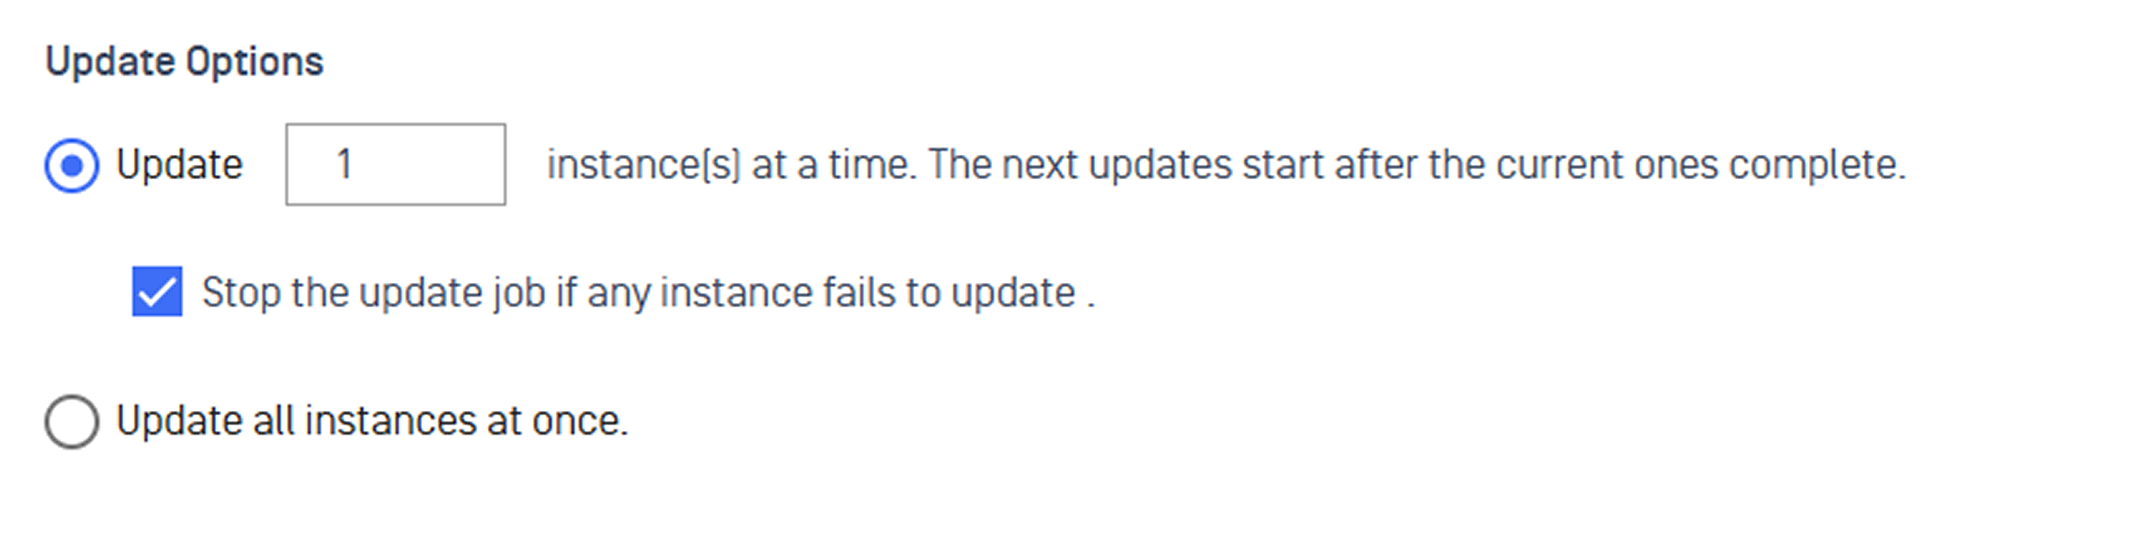
Concurrency: Update all instances simultaneously, or cap the number updated at a time. For fleets of 100 or more, a concurrency limit of 10–20 is recommended to reduce network load.
Stop On Failure: When enabled, the entire job halts if any single instance fails.
Auto Reboot (for Kiosk only): Automatically restarts Kiosk instance after a successful installation.
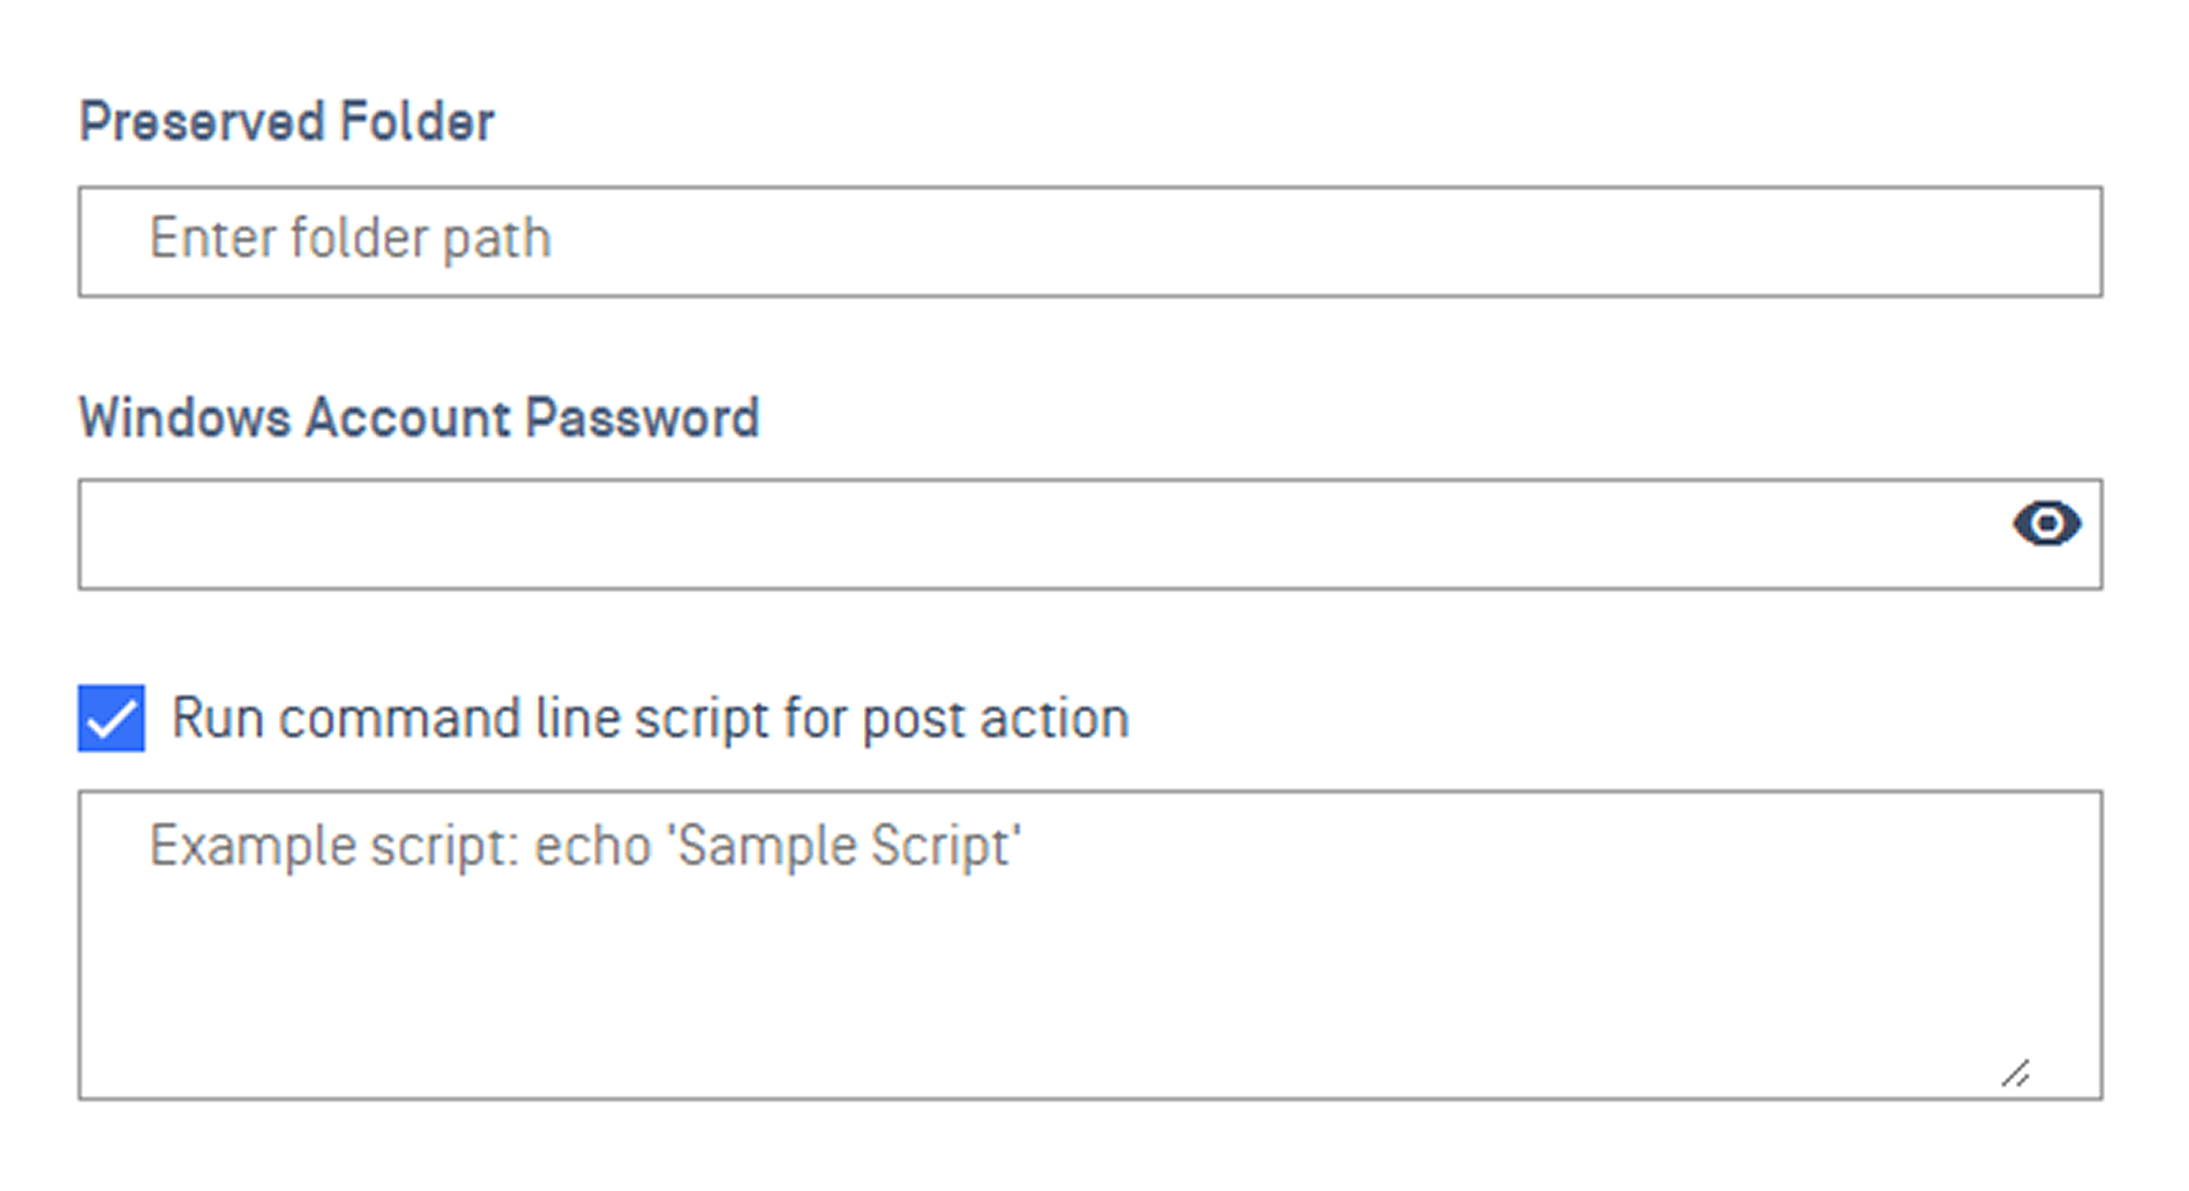
Step 5: Preserved Folder
Please note This step is only applicable for for MetaDefender Kiosk Hardened Image update
Provide your folder path and check the option to "Run command line script" if required for your setup.
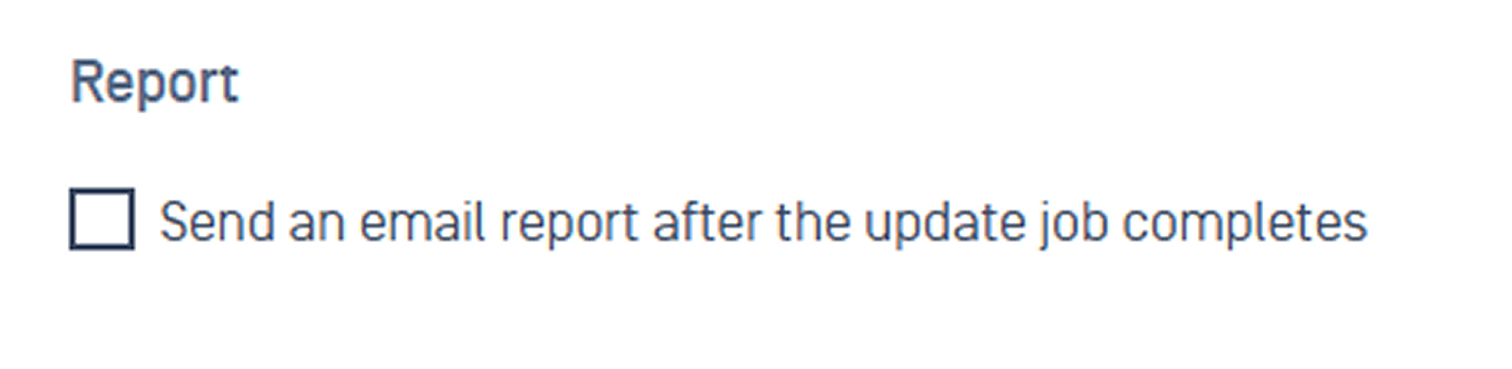
Step 6: Report
Add one or more email addresses to receive automated alerts when:
The job completes.
Any individual instance fails.
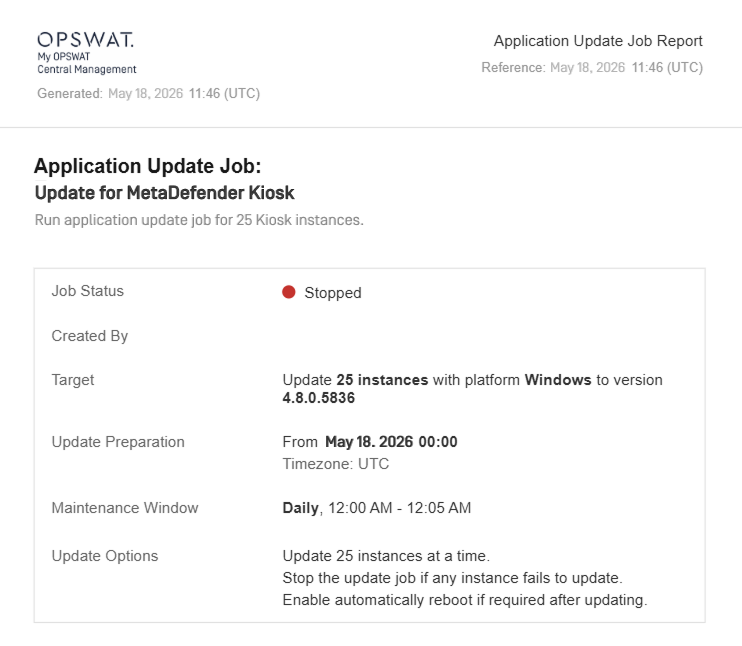
Monitoring Update Job
After creating a job, you can track its progress and manage it from the Jobs tab. To get there, navigate to Updates > Software and select Jobs.
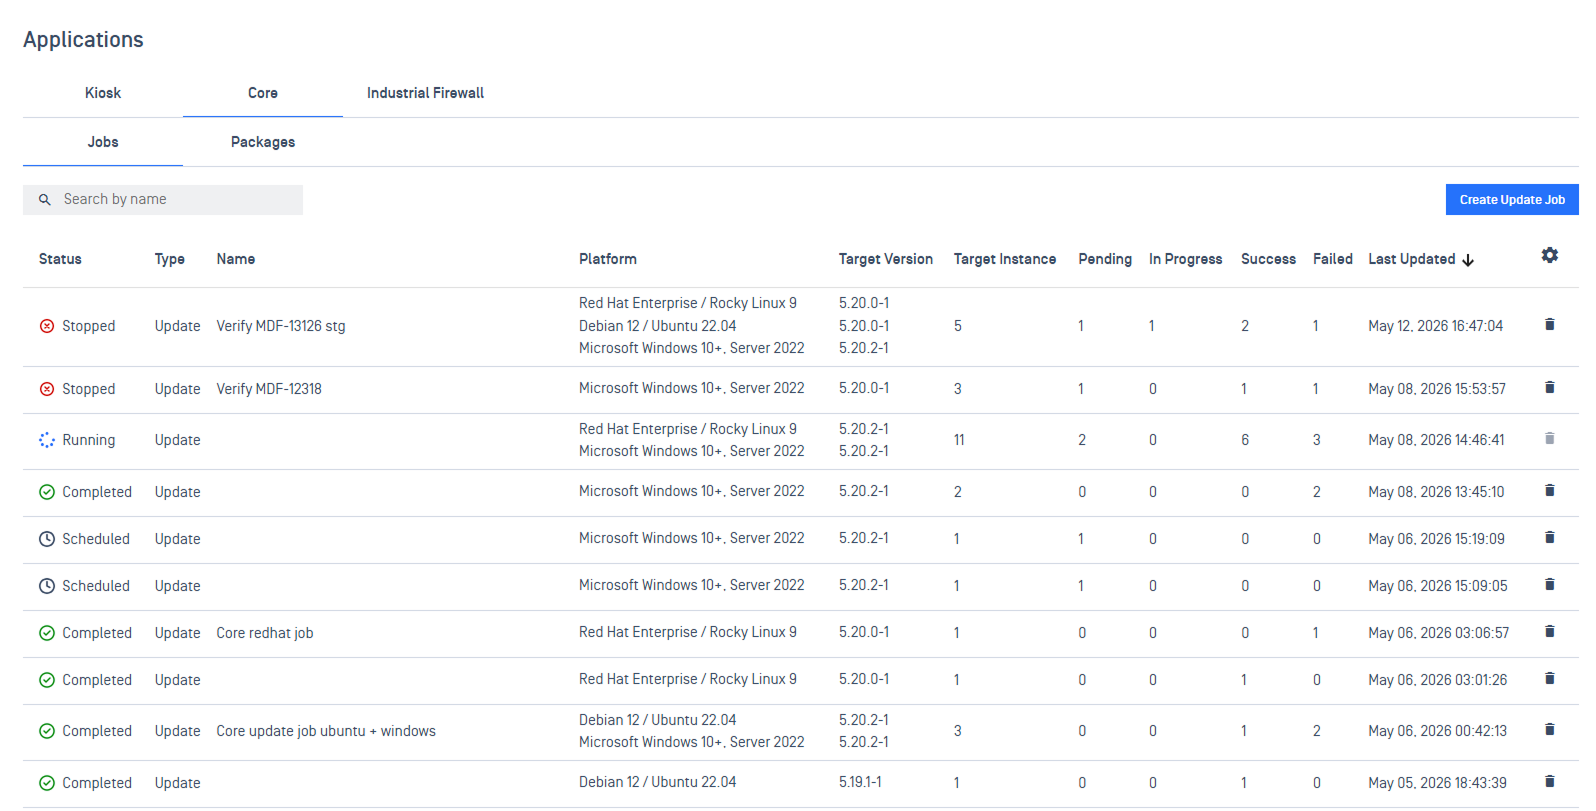
Job Details
Click any update job in the table to open its detailed view.
Summary Panel
The top panel provides a high-level summary of the update job.
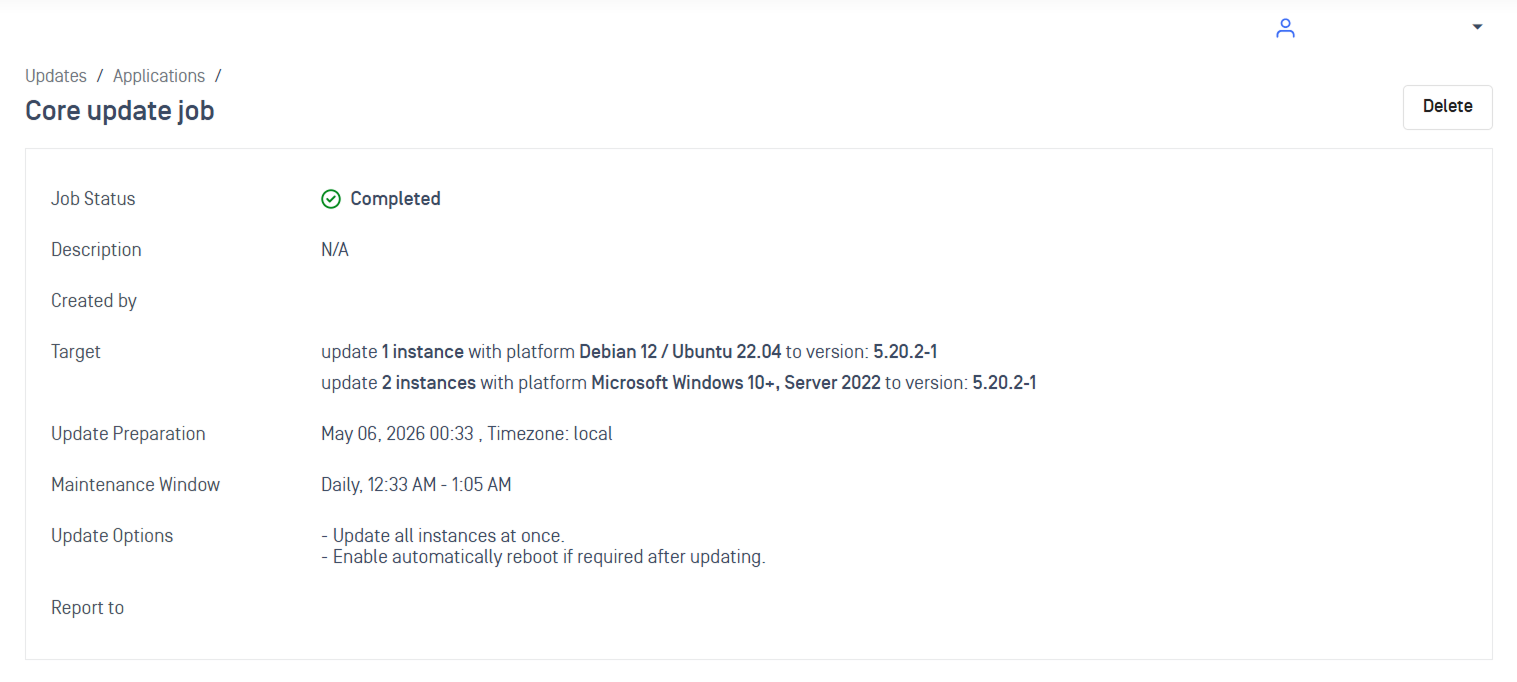
General information including Job Status, Description, Created By, Target, Update Preparation schedule, Maintenance Window, Update Options, and notification recipients.
Job Status:
Scheduled: The job is waiting for the download window to begin.
Running: At least one instance is actively processing.
Completed: All instances have finished processing, whether successfully or with failures.
Stopped: The job was manually stopped or halted due to a failure.
Supported Actions
Delete: Permanently removes a job. Available when the job status is Completed, Stopped, or Scheduled. Click Delete on the job, then click Confirm to proceed.
Update Job Progress
Below the summary panel, you can filter instances by their update status.
Use the tabs to switch between views:
All: Every instance in the job, regardless of status.
Success: Instances that completed the update successfully.
Pending: Instances waiting to start the update job.
In Progress: Instances currently processing the update job.
Failed: Instances where the download or installation failed.
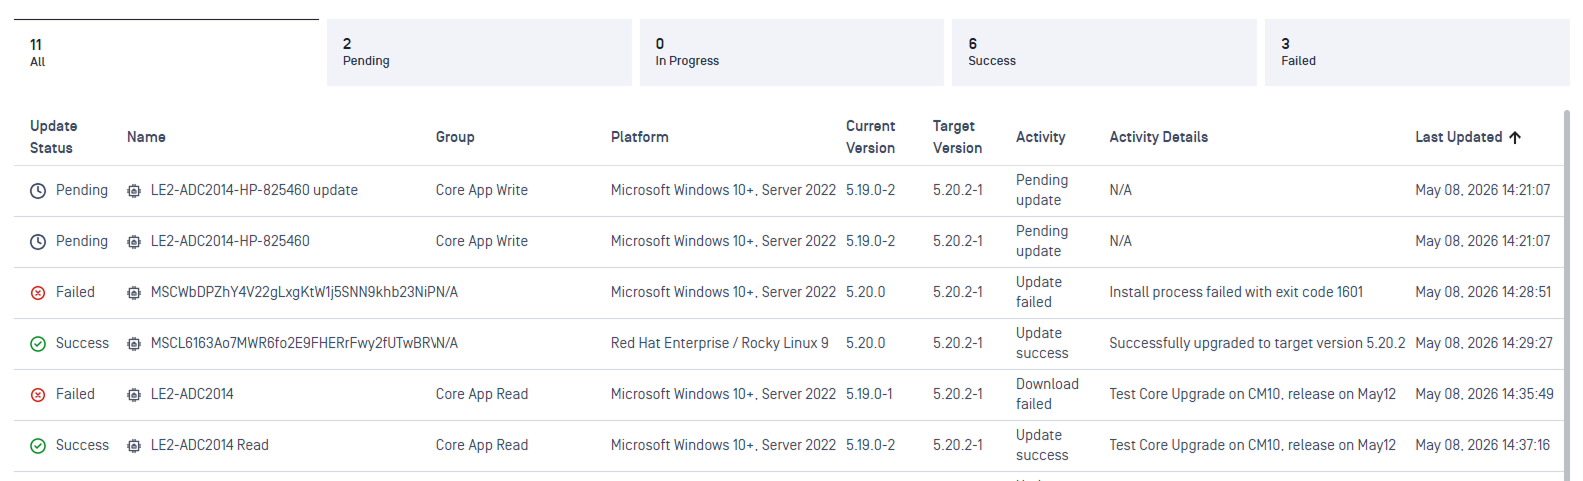
View detailed information like Update Status. Name, Group, Platform, Current Version, Target Version, Activity, Last Update.
Instance Update Status: Each instance has its own granular status that reflects exactly where it is in the update process:
Pending: Waiting to start.
Downloading: Actively downloading the target version.
Waiting for Update: Download complete; waiting for the Maintenance Window.
Updating: Actively installing target version.
Update Success: Installation completed successfully.
Download Failed: Target version could not be downloaded.
Update Failed: Target version could not be installed.