
Staged Module Rollout lets you control how scan engine and module updates are distributed across your organization.
Instead of applying every update to all Core instances at the same time, you can choose:
Which instance groups receive an update
When each group receives the update
Which module versions each group receives
This gives your team a safer way to test updates before making them available to larger or more critical instance groups.
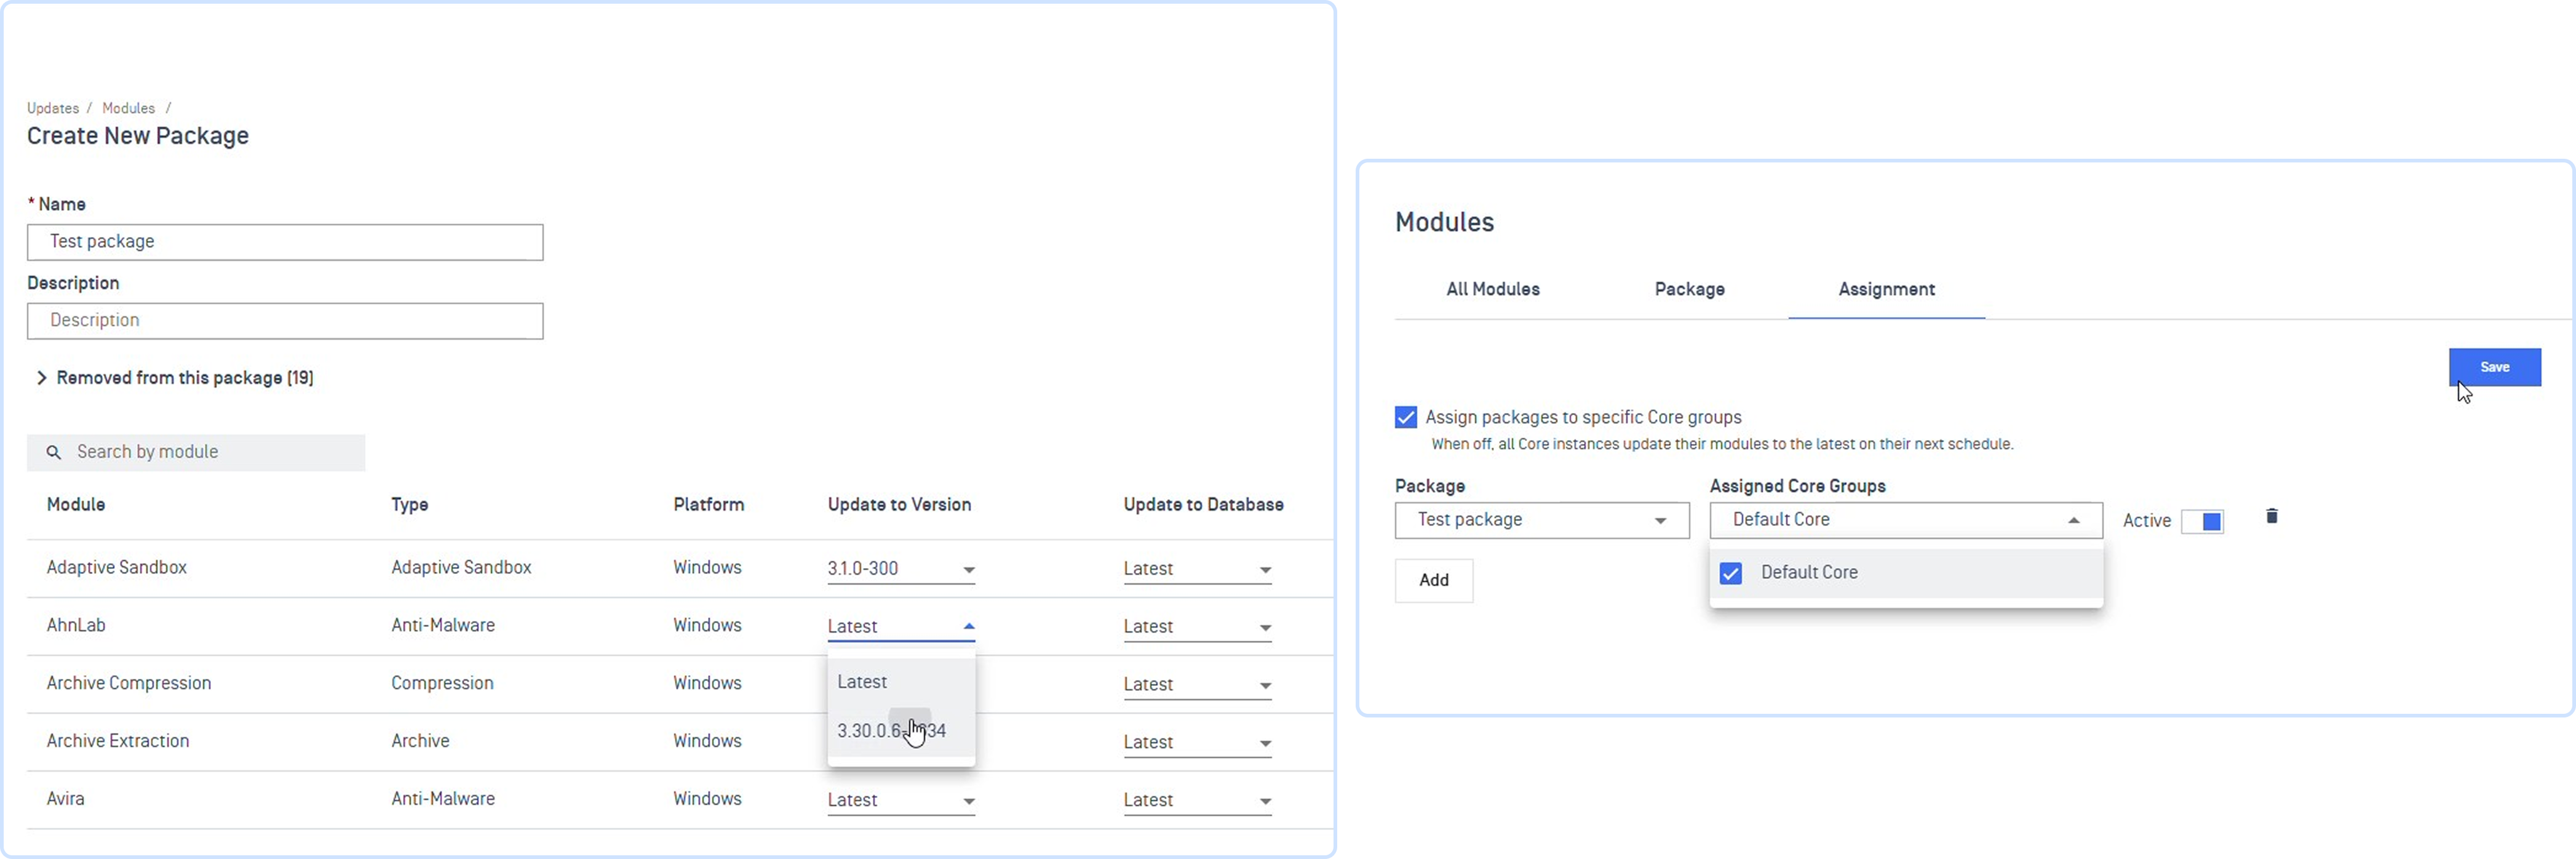
Why Use Staged Module Rollout?
Applying untested updates directly to production instances can create operational risk. A new scan engine or module version may behave differently in your environment and cause disruptions before your team has a chance to review it.
With Staged Module Rollout, you can first apply an update to a small test group. After you confirm that the update works as expected, you can promote it to larger groups, such as pre-production or production.
If an issue occurs, you can deactivate the assignment for the affected group without changing update behavior for other groups.
How it Works
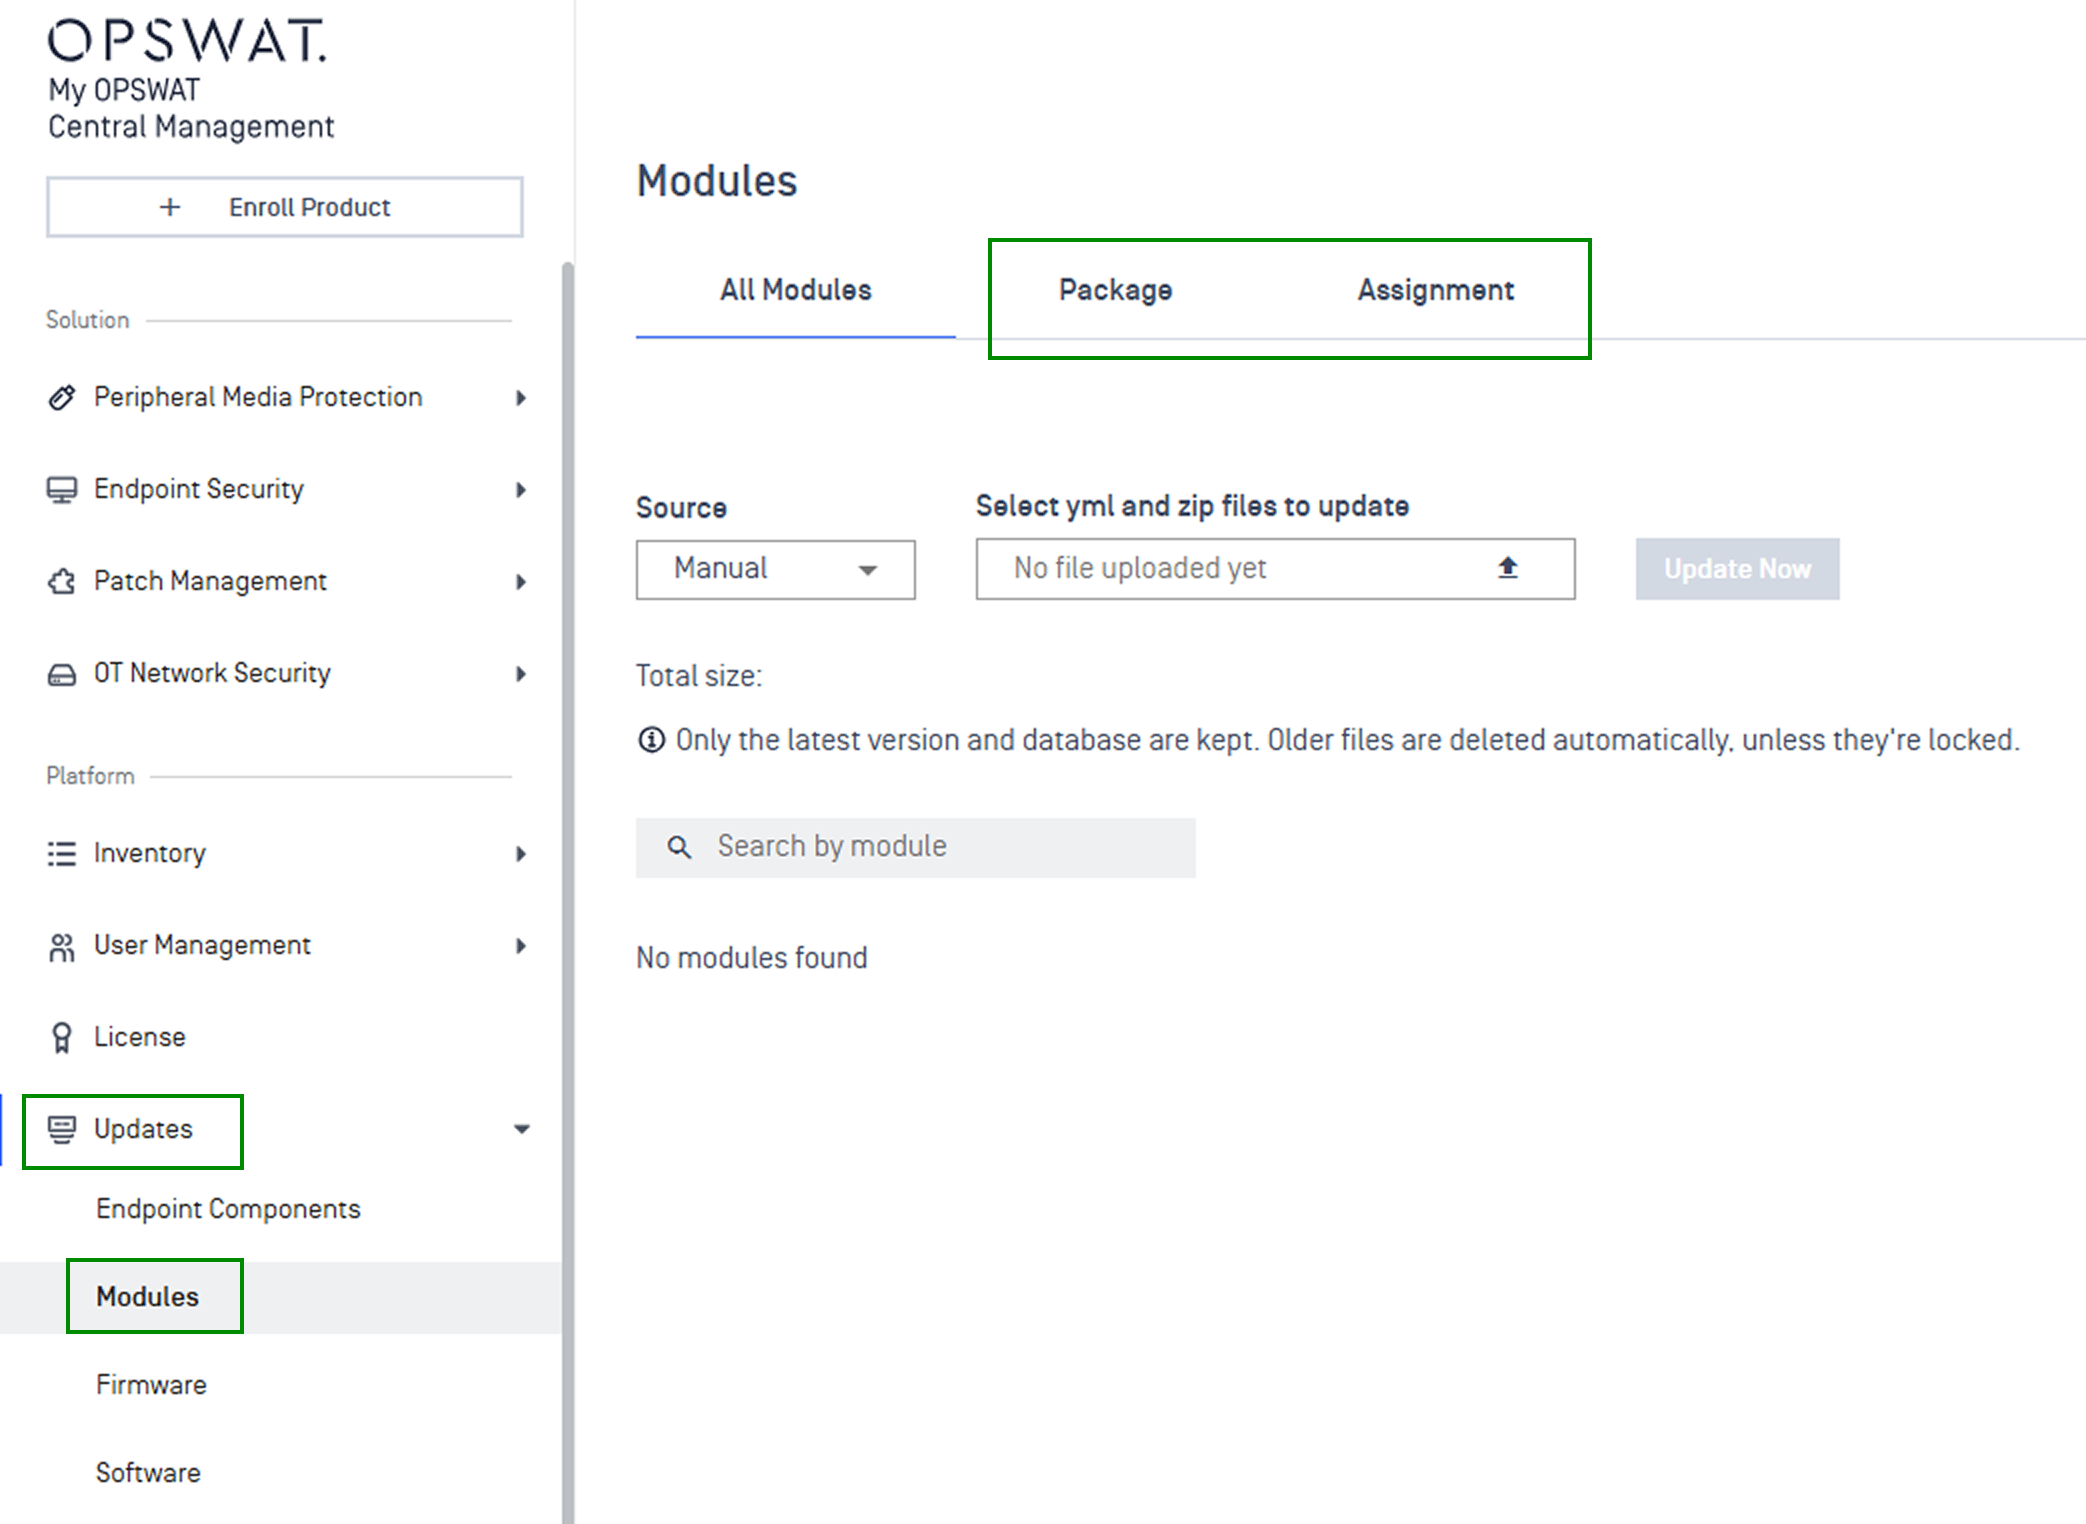
Staged Module Rollout is managed through two components under Updates → Modules in My OPSWAT Central Management console.
Components | Description |
|---|---|
Package | A saved collection of specific module versions. A Package captures the exact versions you want instances to use. |
Assignment | A rule that links a Package to one or more instance groups. When an Assignment is active, every Core instance in the assigned groups receives the Package's pinned versions instead of the global latest update. |
Note Device groups that are not linked to an active Assignment continue to receive the latest globally available module updates.
Setting Up a Staged Rollout
Step 1: Create a Package
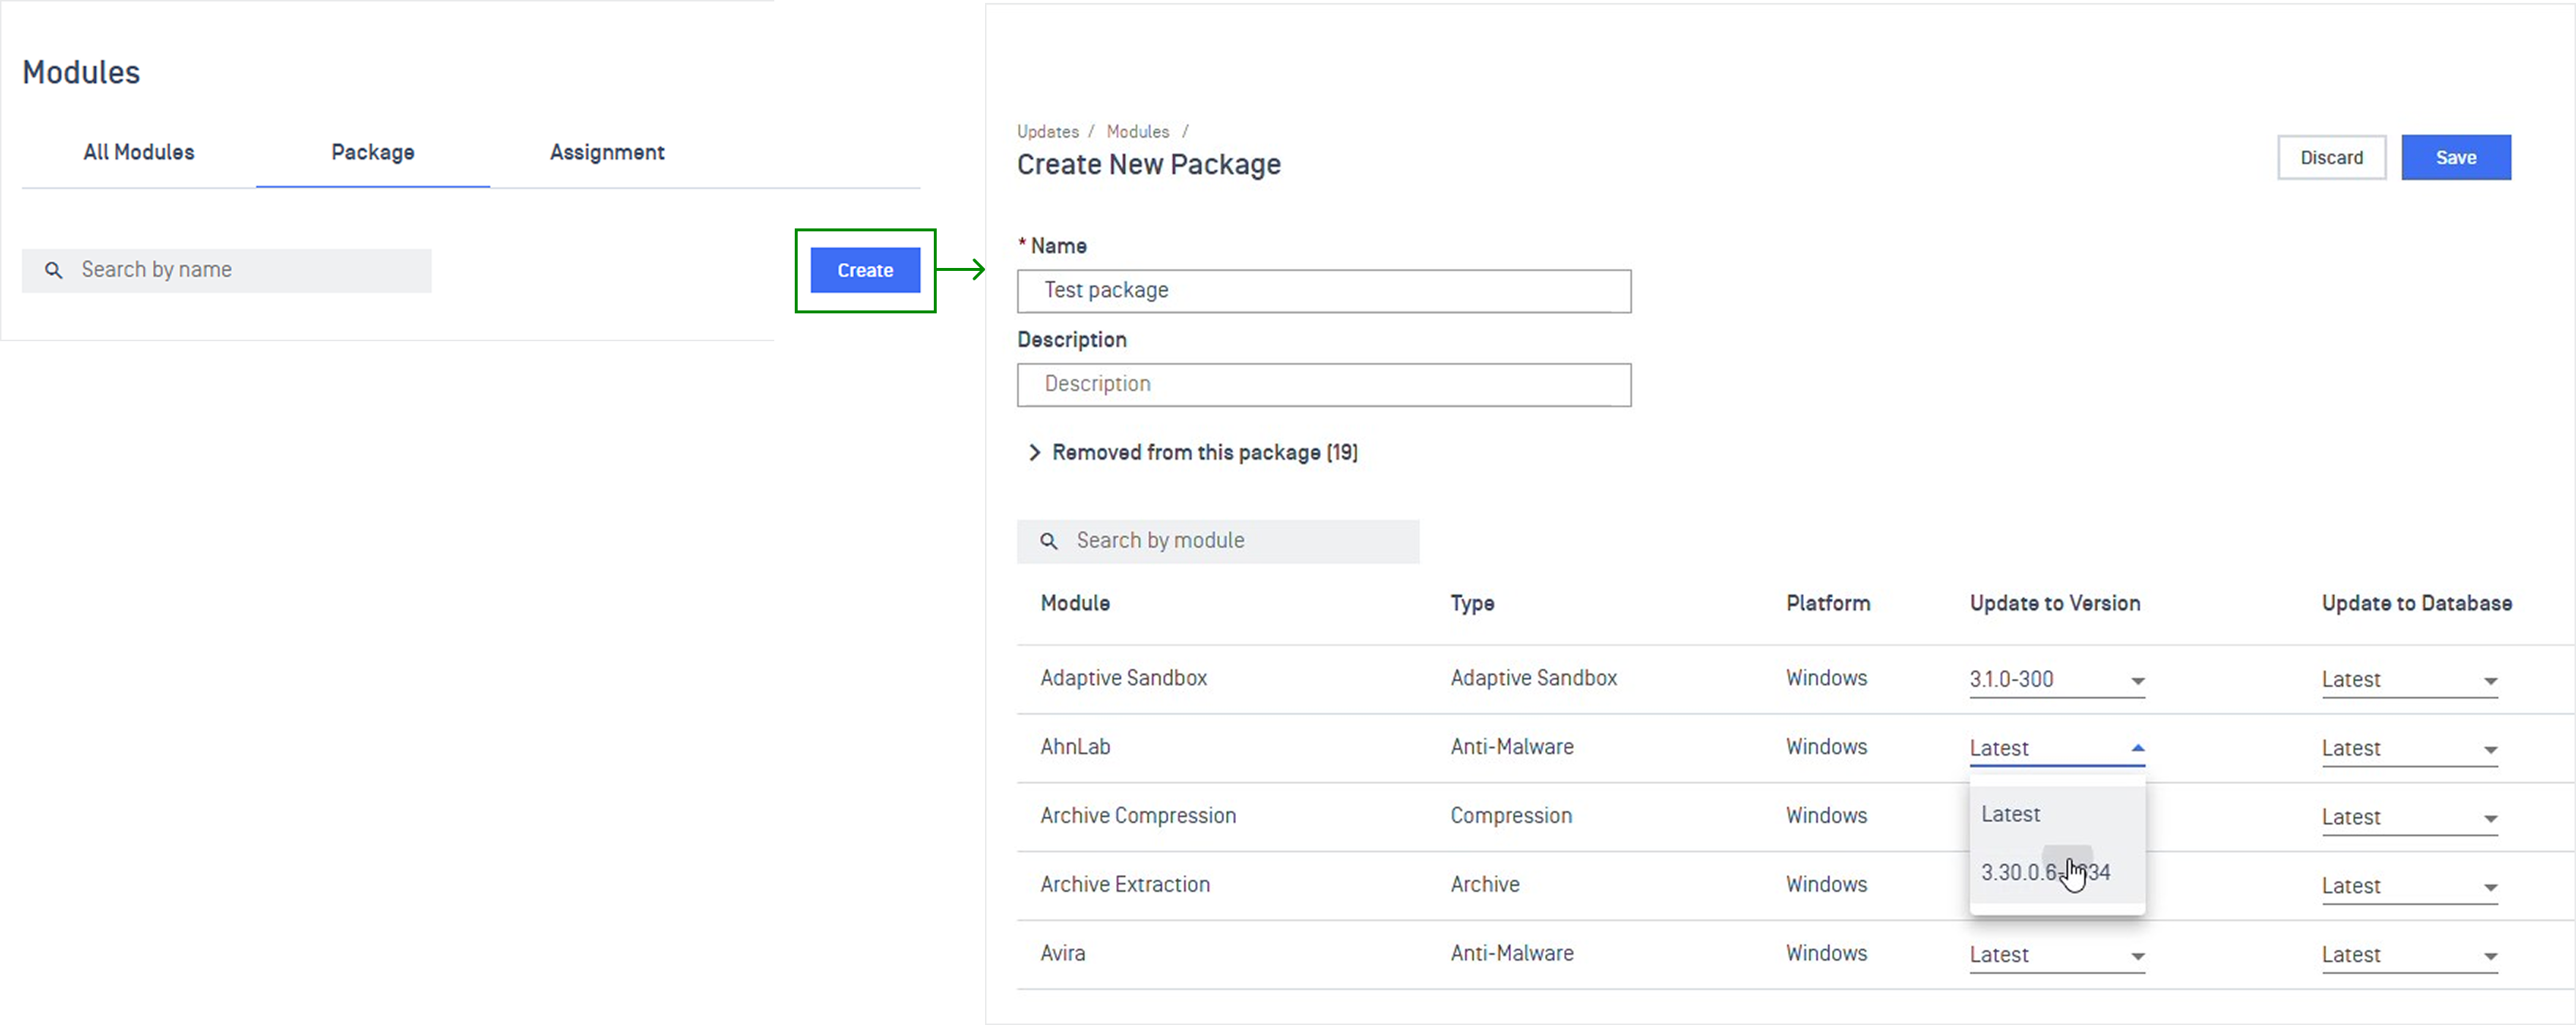
Navigate to Updates → Modules → Package.
Click Create Package.
Enter a unique Package name.
Select the module versions you want to include.
Click Save
Step 2: Enable Group-Based Package Assignments
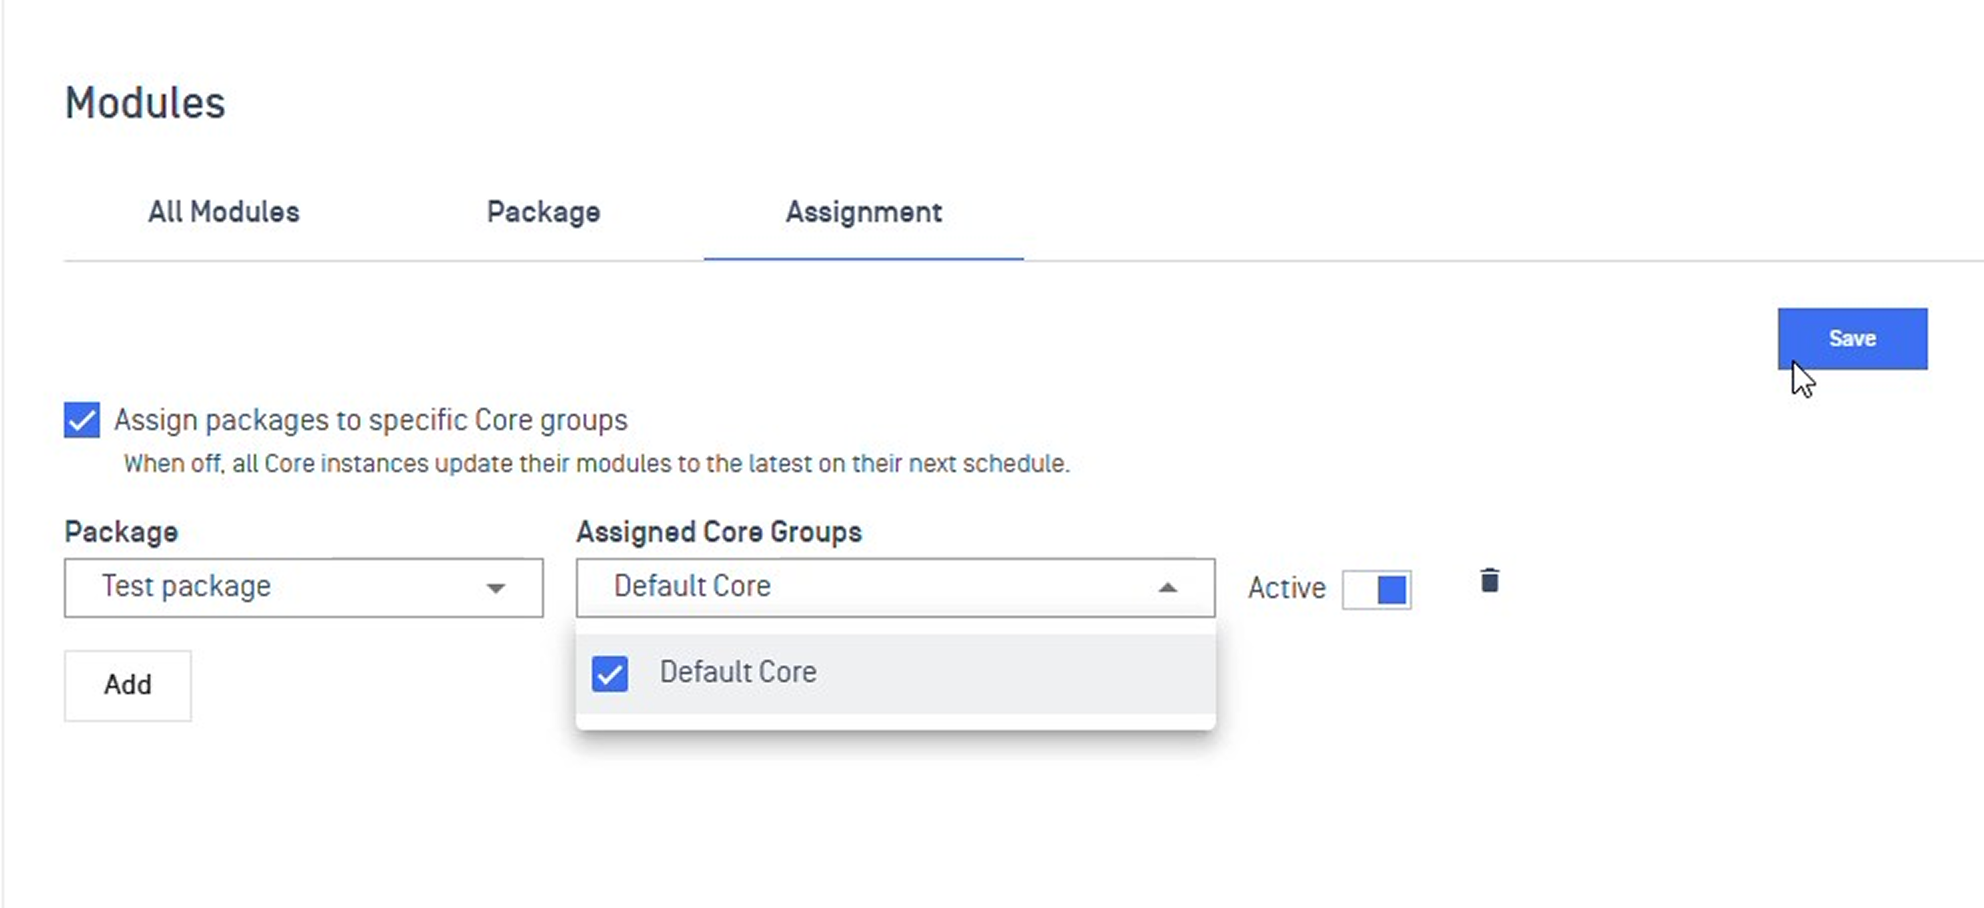
Navigate to Updates → Modules → Assignment.
Enable Assign packages to specific Core groups. When this setting is enabled, devices can receive assigned Package versions instead of the global latest versions.
Click Add, then select one or more Core groups that should receive a Package.
Set the toggle to Active.
Click Save.
Note:
To stop enforcing a Package for a group, toggle its assignment row to Inactive and click Save. The group will return to receiving the latest global module versions during its next update cycle.
Step 3: Validate and Promote the Update
After you validate the update in the first test group, you can continue the rollout in stages.
Create a new assignment for a larger group, such as Pre-Production.
Click Save.
Monitor and validate the update.
Repeat the process for Production groups when validation is complete.
This approach helps reduce deployment risk by allowing updates to be tested before they reach critical device groups.
Managing Packages
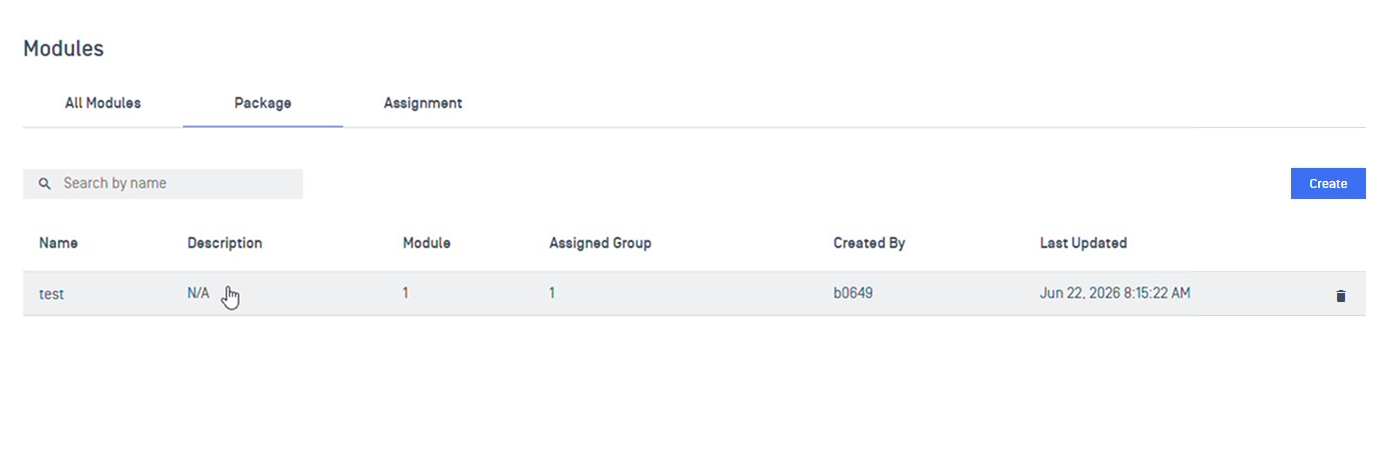
Navigate to Updates → Modules → Package tab.
Action | What it does |
|---|---|
Create | Enter a name and select the module versions to include in the Package. The name must be unique across your active Packages. |
Search | Use the search field to find Packages by name. |
Delete | Remove a Package you no longer need. A Package cannot be deleted while it is referenced by an active assignment. Remove or deactivate the assignment first, save your changes, and then delete the Package. |
Managing Assignments
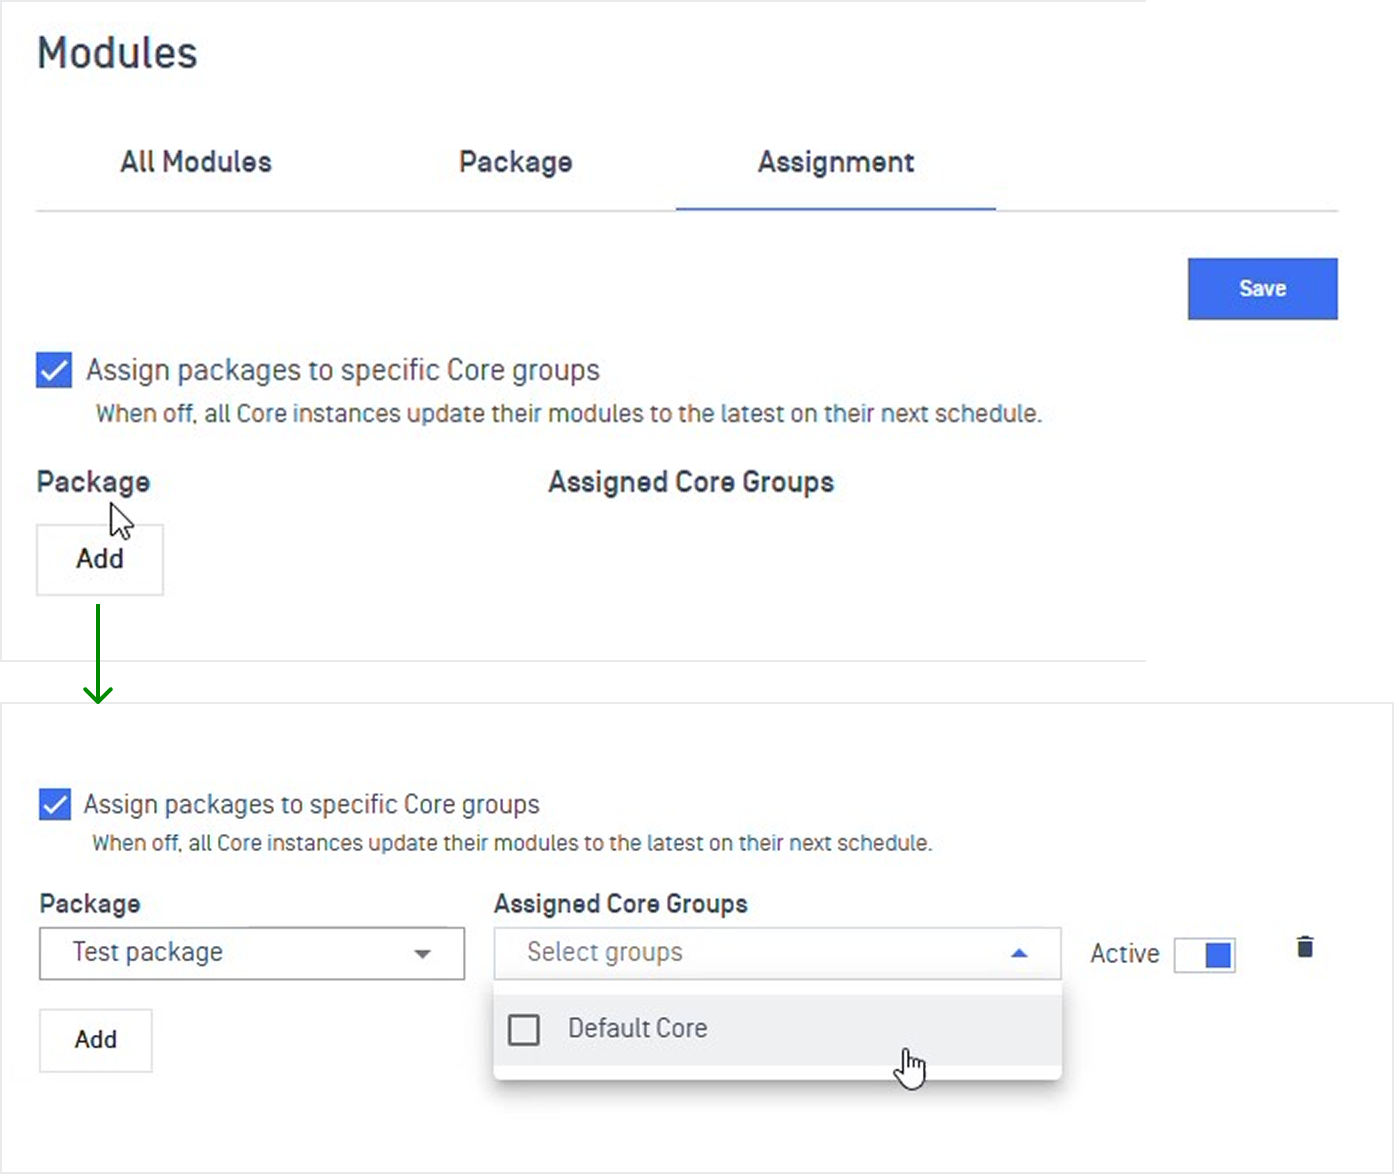
Navigate to Updates → Modules → Assignment tab.
The Assignment tab contains a list of Package-to-group mappings. Each row represents a single assignment.
Note Changes are not applied until you click Save. You can add, edit, or remove multiple assignments before committing your changes.
Action | What it does |
|---|---|
Add a new assignment | Click Add at the bottom of the table. A new row appears. Select a Package, choose the instance groups, and set the status toggle. |
Activate an assignment | Toggle the row to Active and click Save. Devices in the assigned groups will receive the pinned Package versions. |
Deactivate an assignment | Toggle the row to Inactive and click Save. Affected groups revert to the global latest update. |
Remove an assignment | Click the delete icon on the row and click Save. Affected groups revert to the global latest update. |
Important Rules
One assignment per group: Each instance group can appear in only one assignment row at a time. If you assign the same group to two different Packages, the save will be rejected with an error indicating which group is duplicated. Remove the group from one of the rows before saving.
Packages in use cannot be deleted: If a Package is referenced by any assignment row, remove that row and save first, then delete the Package.
The master toggle controls everything: If "Assign packages to specific Core groups" is unchecked, all instances update to the global latest, regardless of any active assignment rows configured in the table.