
An SMTP server is required to send notification emails (for example, workflow email remediations). To configure one, navigate to the Settings menu and open the Network tab.
The SMTP Server for Sending Emails section is at the top of this tab. Below it, the same tab also contains the Third-Party Connections (Jira, Microsoft Teams, and External Loggers).
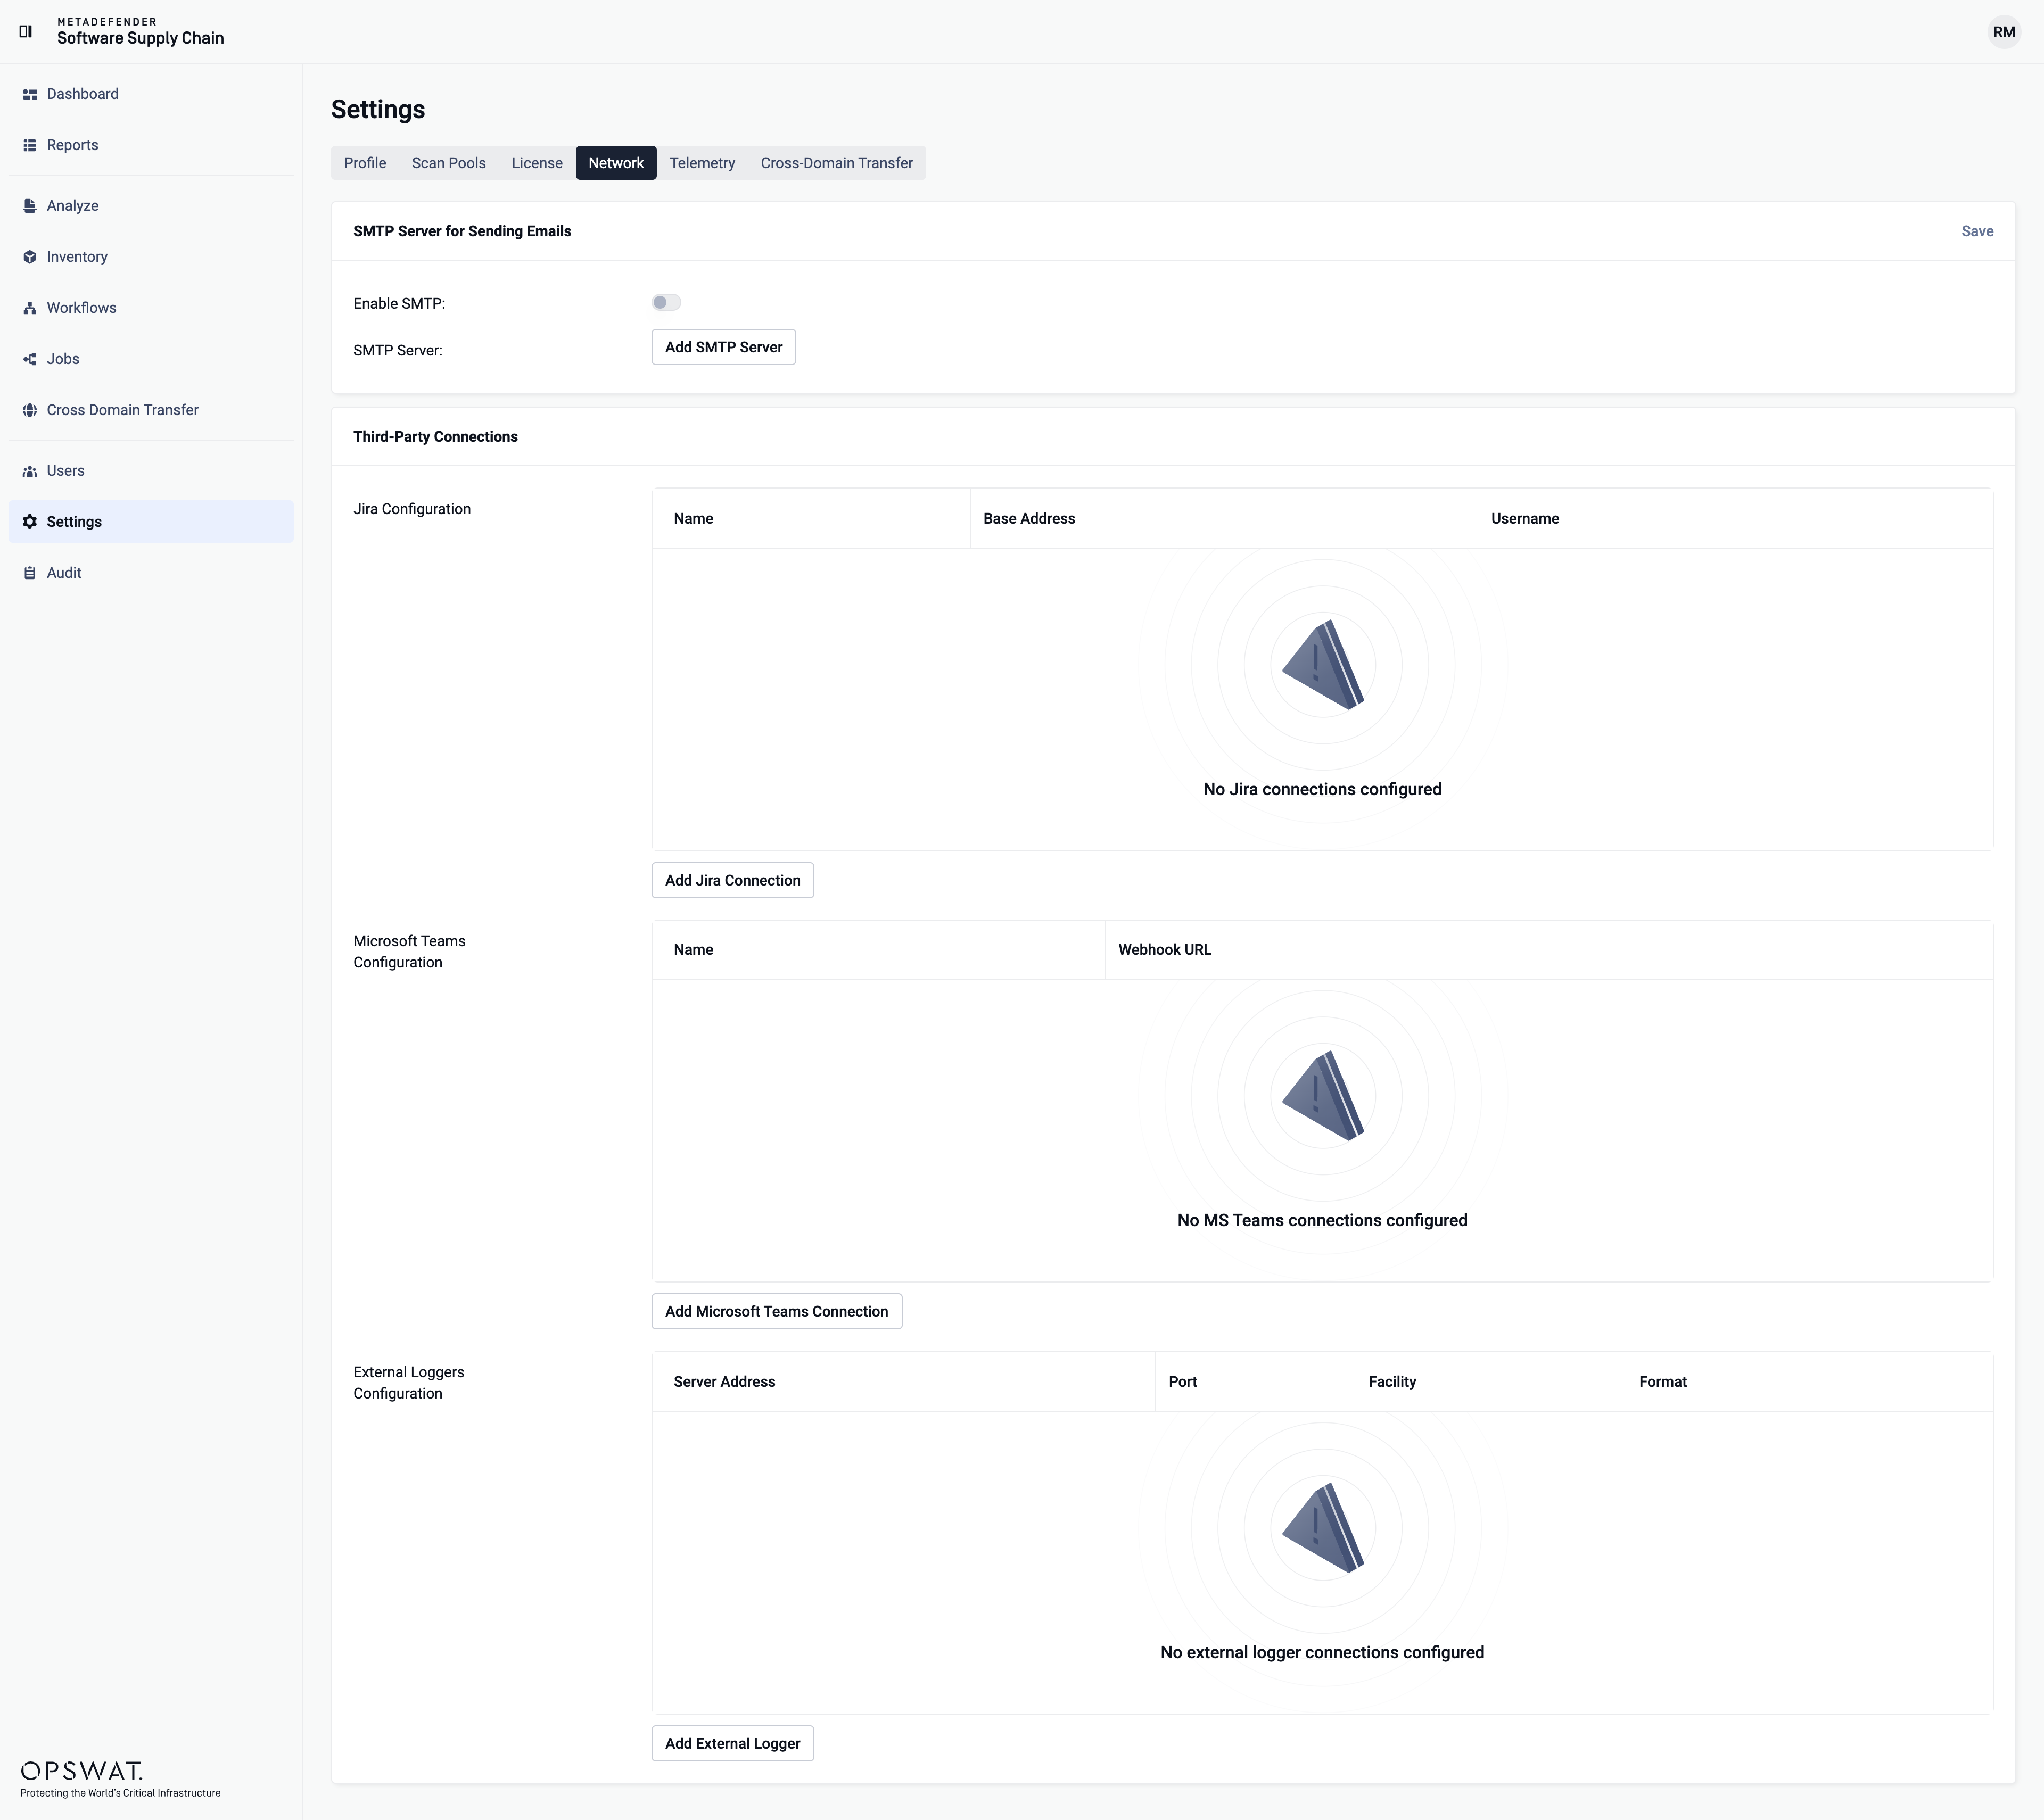
Adding an SMTP server
Click the "Add SMTP Server" button. A side panel opens where you provide the server details:
SMTP Host and Port
Base URL
Domain (optional)
Authentication Method (default: Auto)
Ignore Certificate Warnings (toggle)
Sender Email Address
Sender Display Name
Username (required)
Password (required)
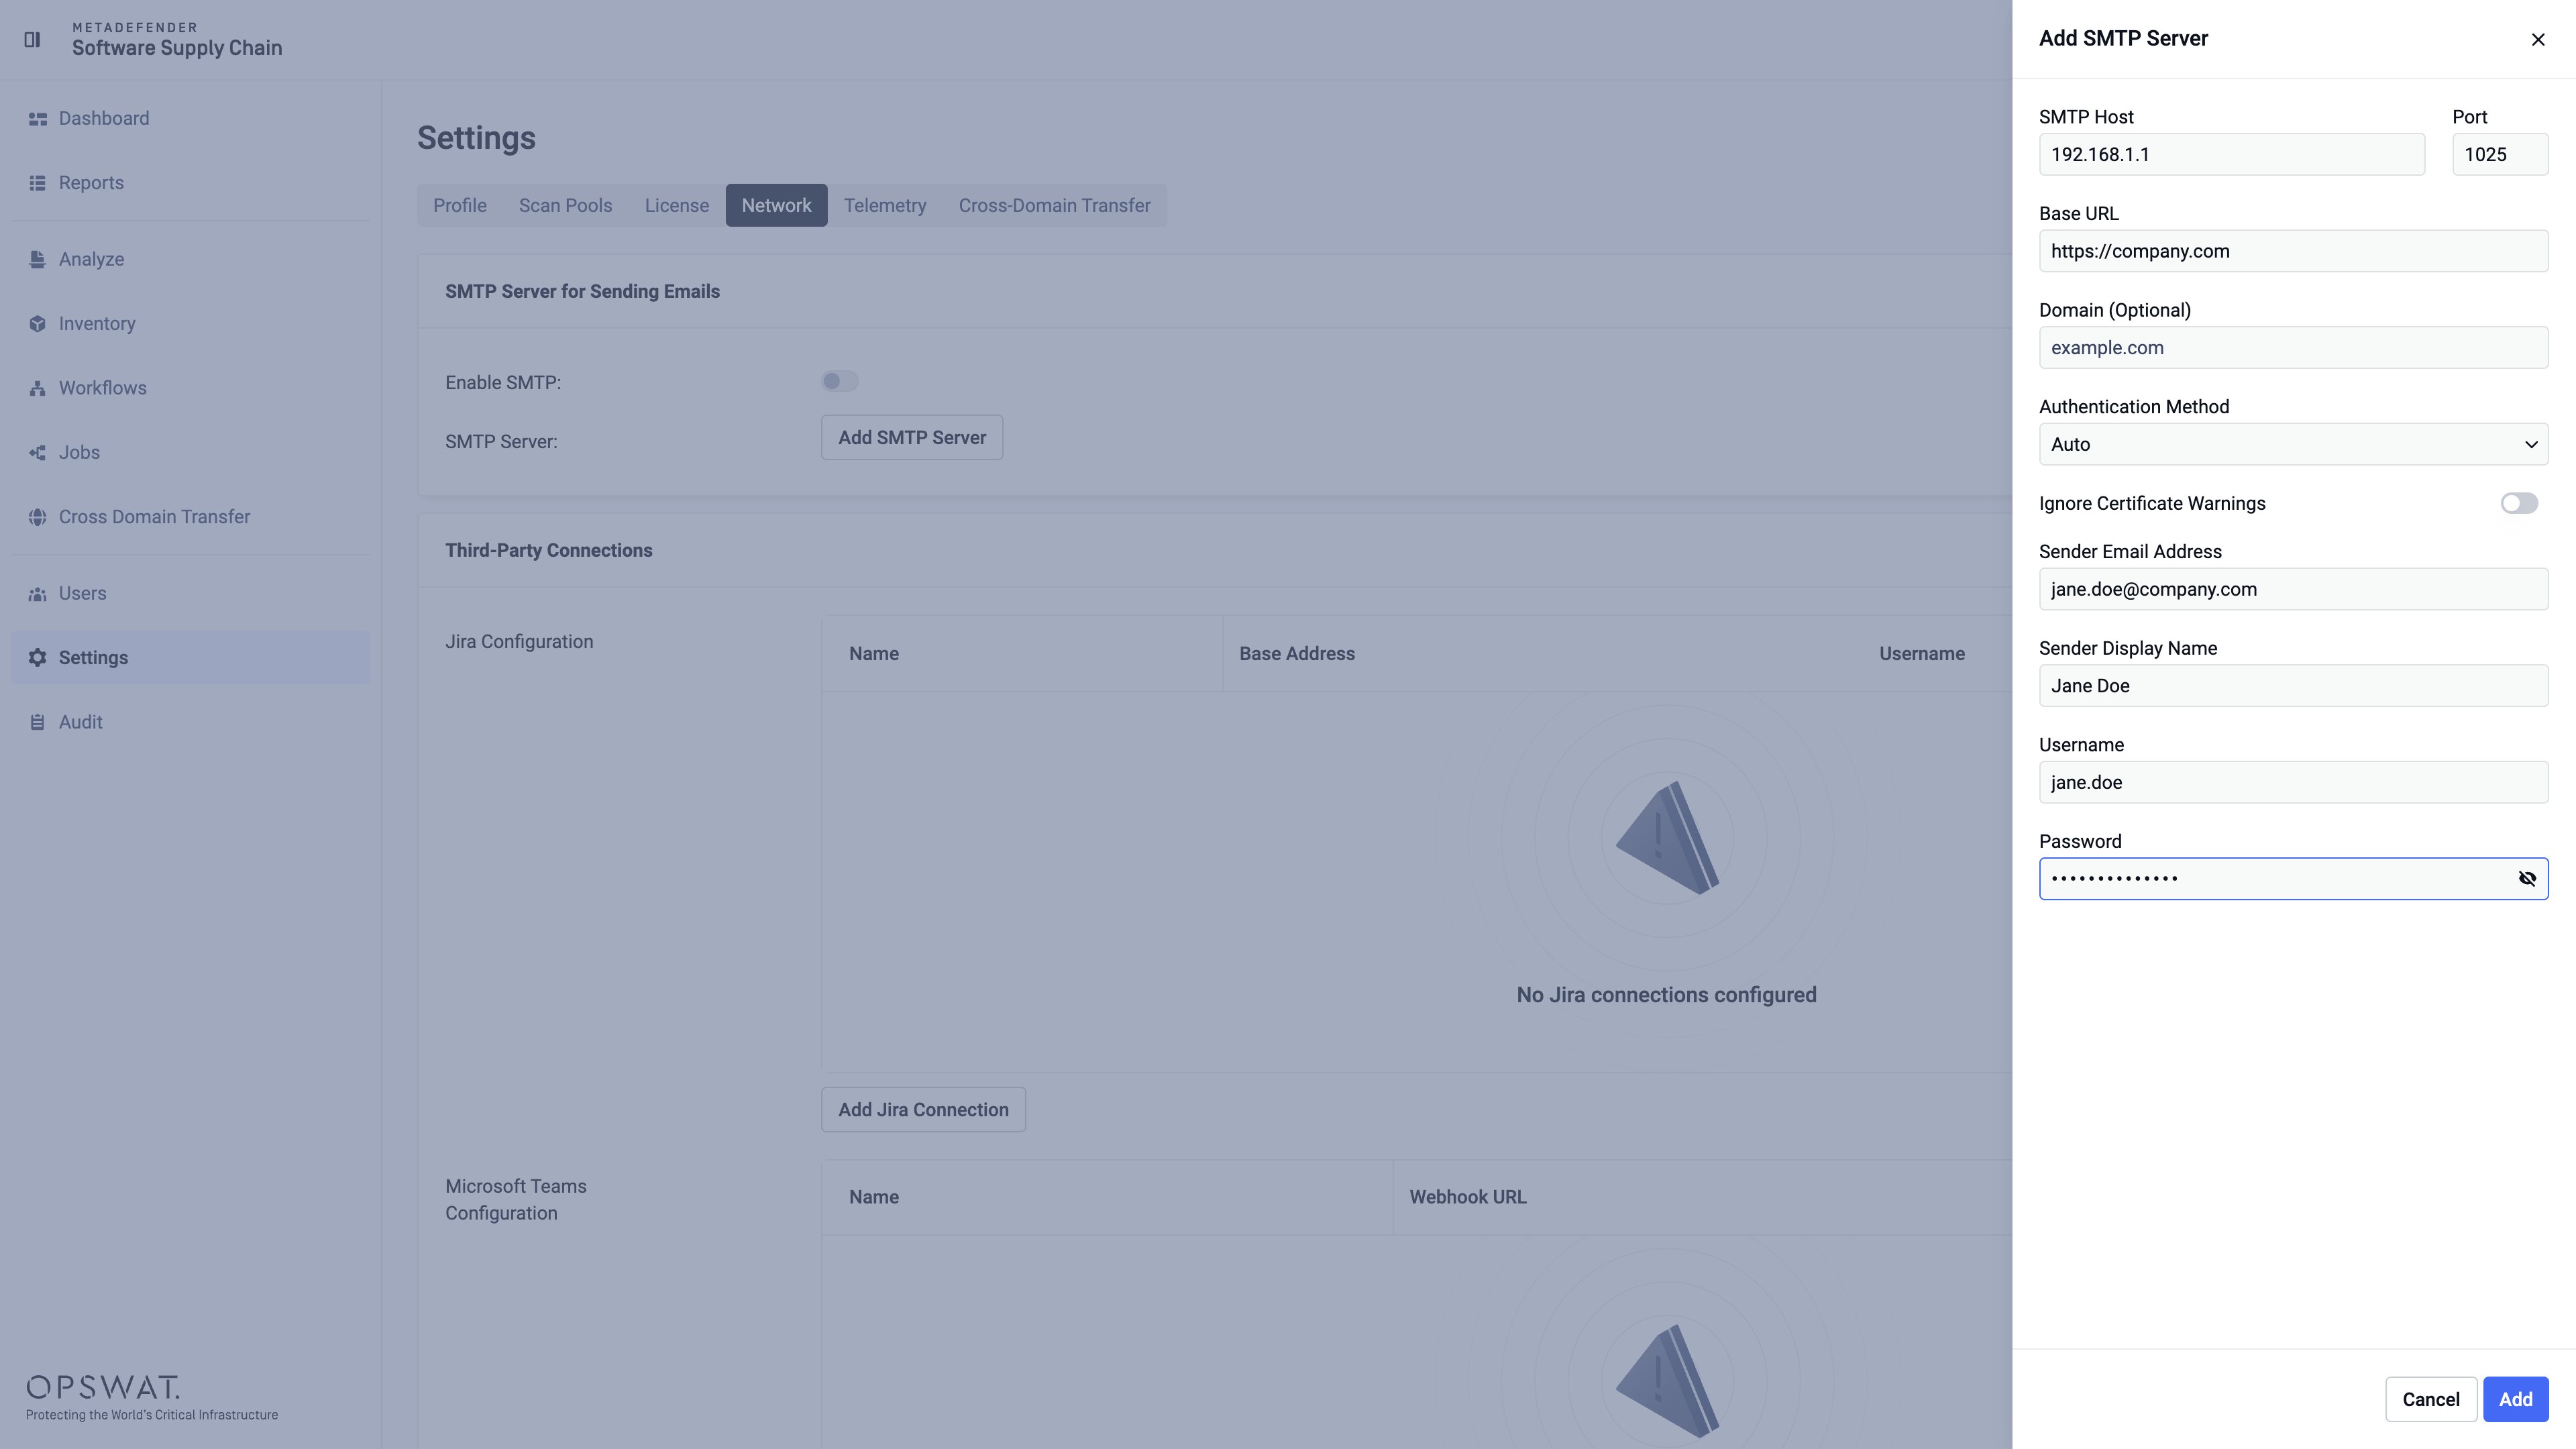
Click "Add" to save the configuration. Once saved, the SMTP server is listed in a table showing its Host, Port, Base URL, and sender email address.
Only one SMTP server can be registered. This server is used to send all emails.
Enabling the SMTP server
Adding the server does not enable it automatically. To activate it, turn on the Enable SMTP switch and click Save. The switch stays disabled until an SMTP server has been added.
You can disable or re-enable the server at any time using the same switch — the stored configuration (including the password) is preserved, so there is no need to re-enter it.
Editing an SMTP server
To change the configuration, click the edit (pencil) icon on the SMTP server row. This opens the same form, now titled "Edit SMTP Server", pre-filled with the current values. Save your changes to update the configuration.