The purpose of this guide is to demonstrate the process of setting up a smart card for authentication in MetaDefender Kiosk. In this example, we use a Thales (formerly Gemalto) smart card. Please note that this guide is for reference only, for the most accurate instructions, refer to the setup documentation provided by your smart card providers.
Smart card authentication requires proper setup and configurations on Domain Controllers, Active Directory and Kiosk.
Root Certificate Authority (CA) certificate must be created
Domain Controllers must be configured and trust the root CA certificate
Kiosk host machine must join the domain
The instruction bellow assumes requirements mentioned above have been met. Configuring these requirements are out of the scope of this document.
Kiosk 4.7.2 or later should support all ISO 7816-compliant microprocessor-based and FIPS 201 standard smart cards such as PIV smart card.
If Further Assistance is required, please proceed to log a support case or chat with our support engineer.
1. Certificate Template configuration
Step 1. Open Certificate Template
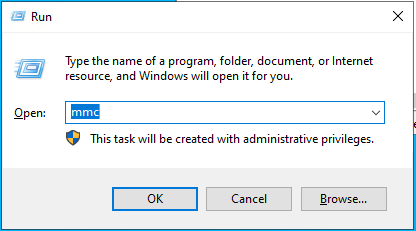
Press Win + R, type mmc, and open it with Administrator permissions
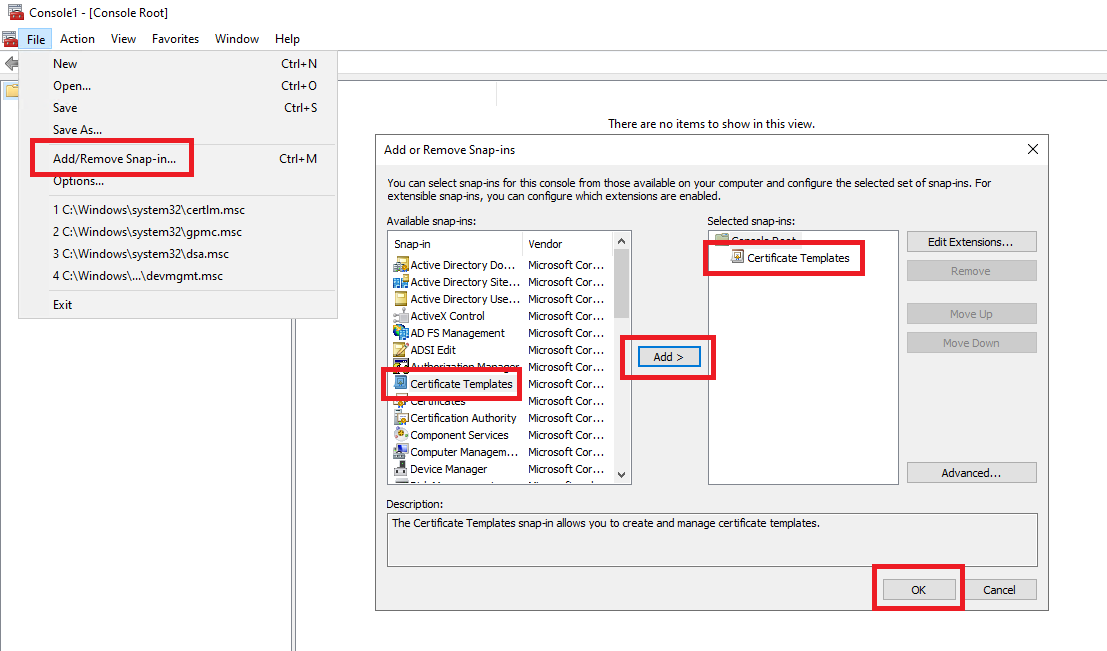
In the MMC window, select File, select Add/Remove Snap-in. From the list, select Certificate Template and click Add. Then, click OK.
Step 2. Duplicate two highlighted certificate templates (Enrollment Agent and Smartcard Logon) to create your own Smartcard certificate Template.
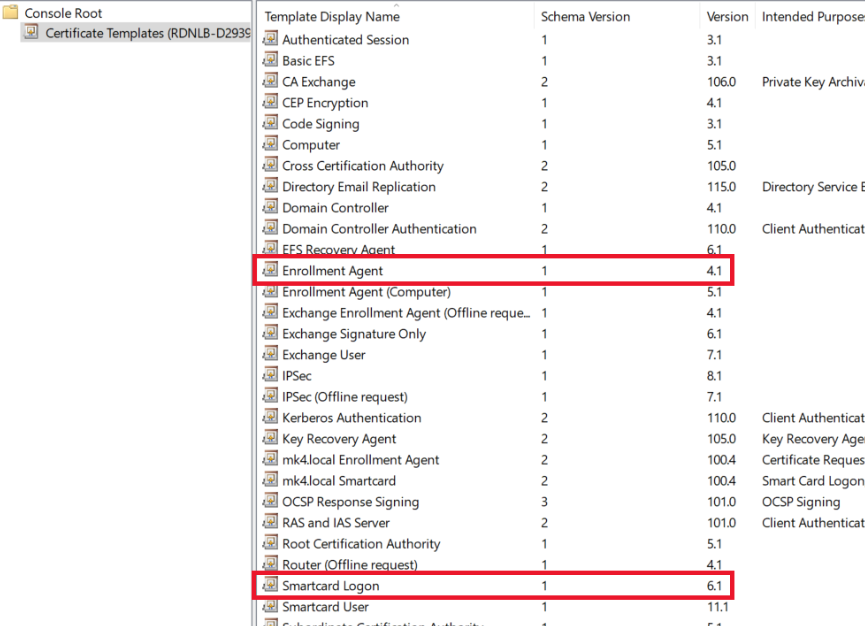
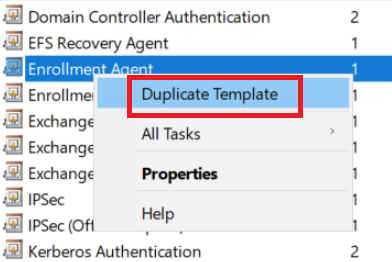
Right-click on each of these templates. Select Duplicate Template.
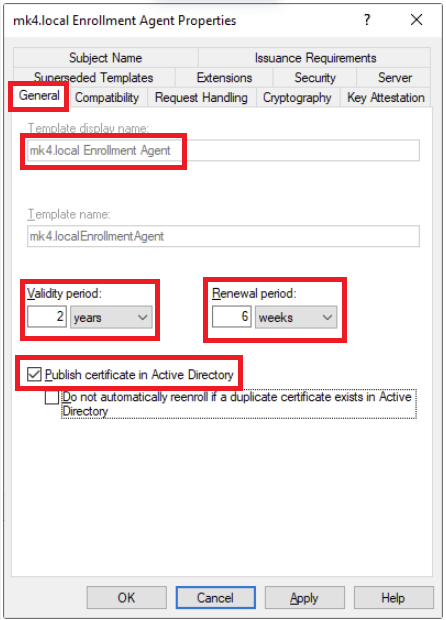
Step 3. Setup for Enrollment Agent template
Go to General tab:
Change Template display name to <domain-name> Enrollment Agent. e.g mk4.local Enrollment Agent
Set Validity period to 2 years
Set Renewal period to 6 weeks
Enable Publish certificate in Active Directory
Go to Security tab
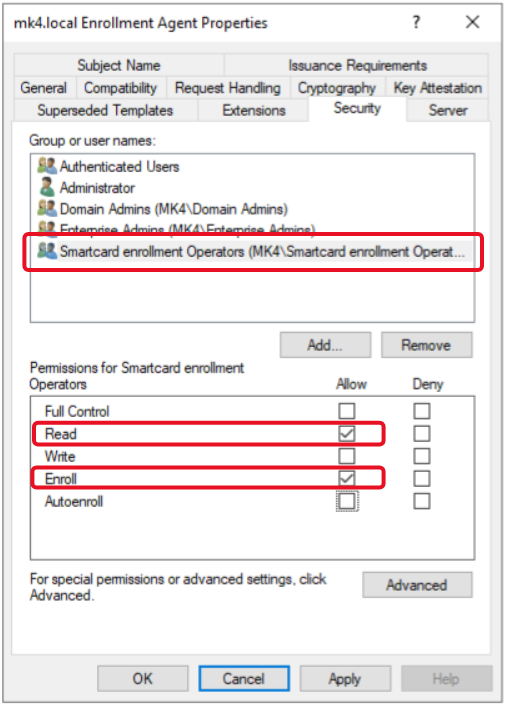
Add Read permission to Authenticated Users
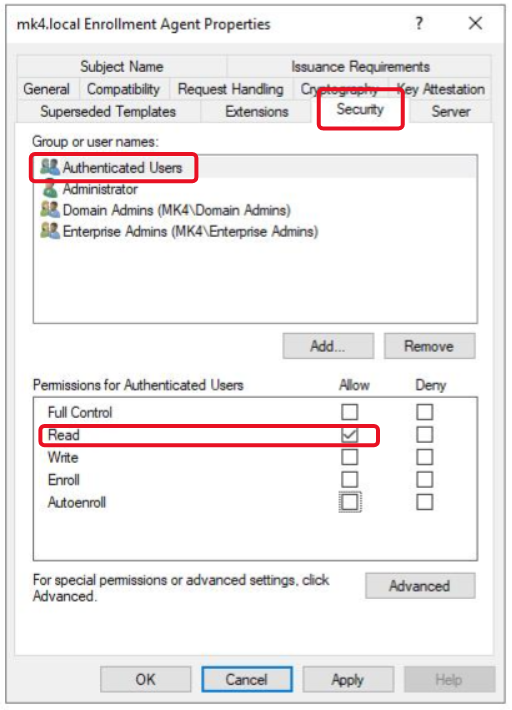
Do not grant Write or Enroll to Authenticated Users on the Enrollment Agent template - an enrollment-agent certificate can issue smart card logon certificates on behalf of any user (AD CS ESC3 risk).
Create and add a dedicated Enrollment Operator group (for example Smartcard Enrollment Operators), then grant Read and Enroll permissions. The users in this group can obtain an enrollment-agent certificate and issue smart card logon certificates to other users
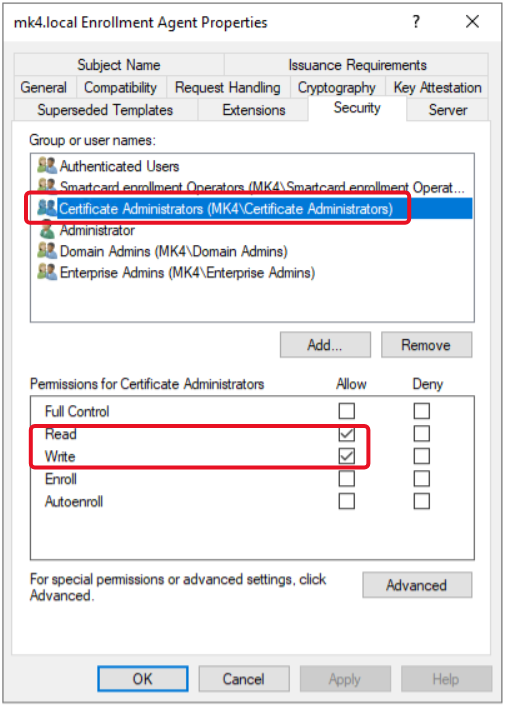
Create and add a dedicated Certificate Administrator group (template administrators only), then grant Read and Write permissions. The users in this group can manage and change the template.
Click OK to duplicate the template
Step 4. Setup for Smartcard Logon template
Duplicate Smartcard Logon template
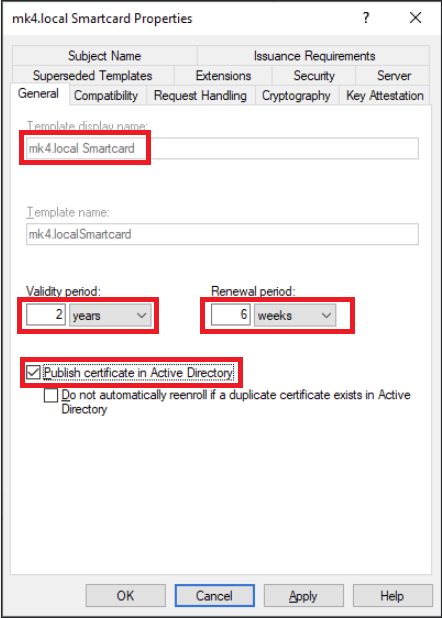
Go to General tab
Change Template display name to <domain-name> Smartcard. e.g mk4.local Smartcard
Set Validity period to 2 years
Set Renewal period to 6 weeks
Enable Publish certificate in Active Directory
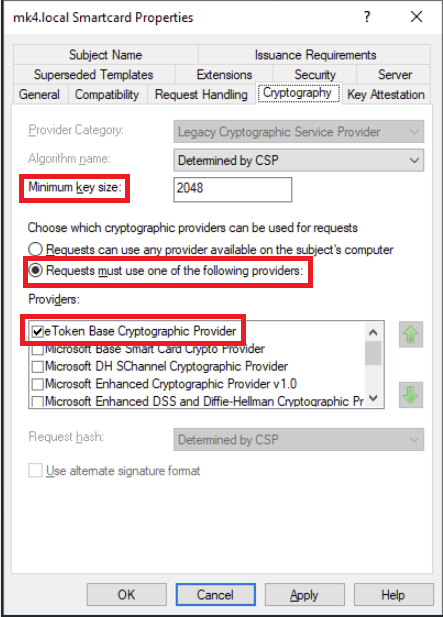
Go to Cryptography tab
Set Minimum key size to 2048
Select Requests must use one of the following providers, and enable eToken Base Cryptographic Provider
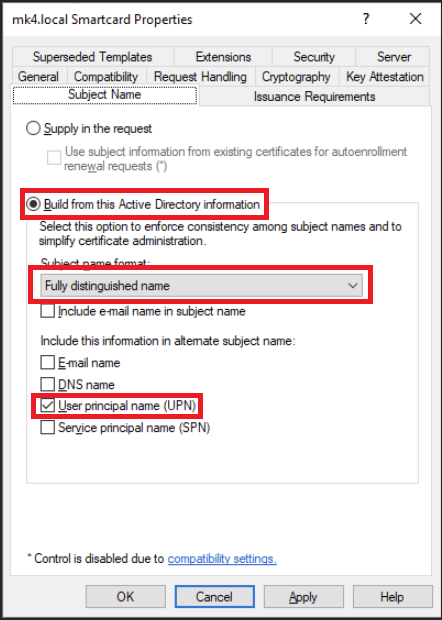
Go to Subject Name tab
Select Build from this Active Directory information. Under Subject name format, select Fully distinguished name and enable User principal name (UPN)
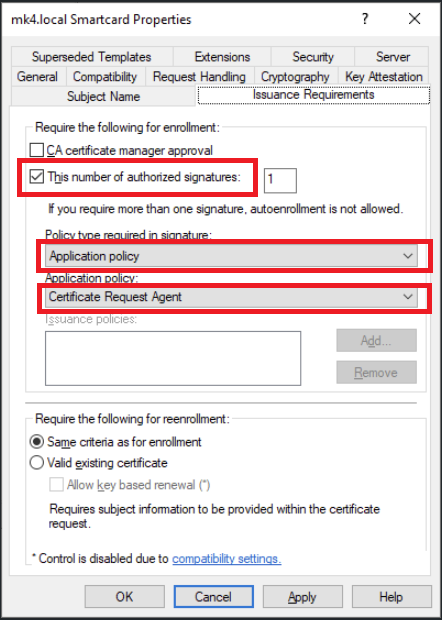
Go to Issuance Requirements tab
Enable This number of authorized signatures, and set value of 1
Under Policy type required in signature, select Application policy
Under Application policy, select Certificate Request Agent
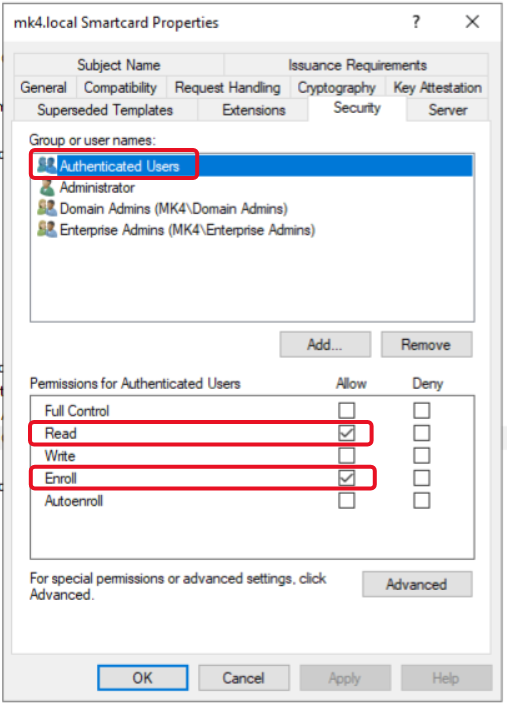
Go to Security tab
Add Read and Enroll permissions to Authenticated Users
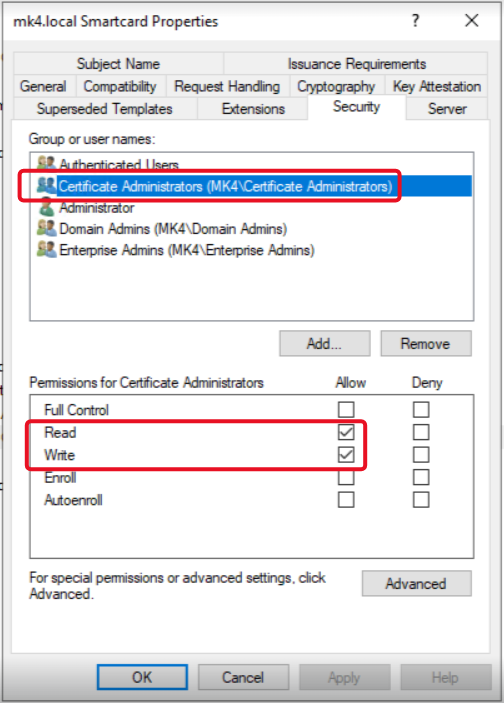
A dedicated Certificate Administrator group (template administrators only) → grant Read and Write permissions to this group
Go to Request Handling tab
Under purpose, select Signature and encryption, and enable Include symmetric algorithms allowed by the subject
Select Enroll subject without requiring any user input
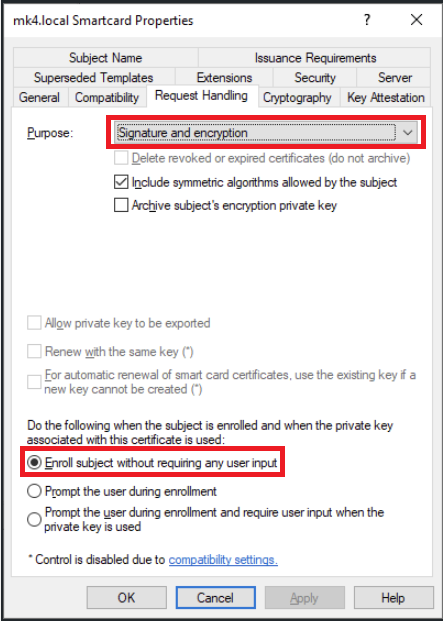
Click OK to duplicate the template
2. Enrollment Agent certificate
Step 1. Login as a user in the Certificate Administrator group with the Read and Write permissions for the smartcard certificate.
Step 2. Open Certificate Manager
Press Win + R, type certmgr.msc, and open it with Administrator permissions
Step 3. Request new certificate
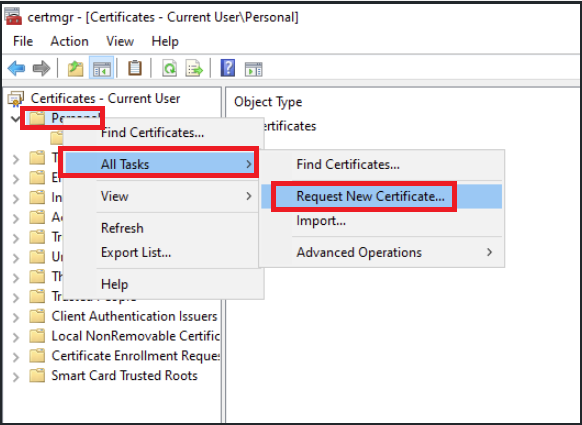
Under Certificate Manager, right-click on Personal, select All Tasks, select Request New Certificate
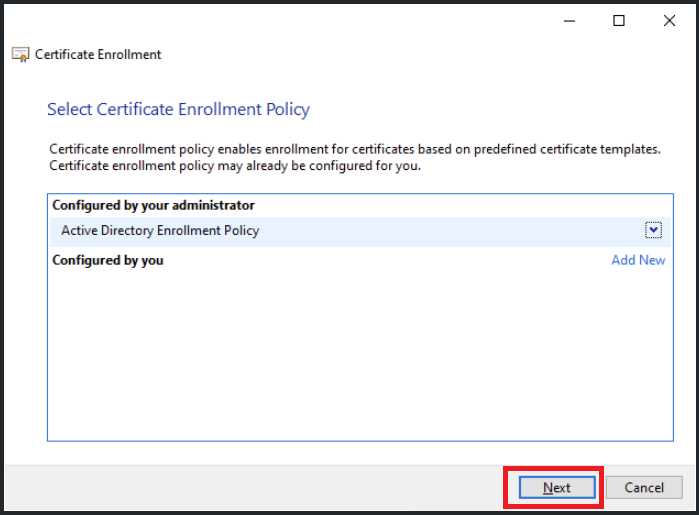
in Certificate Enrollment Policy, select Next to continue
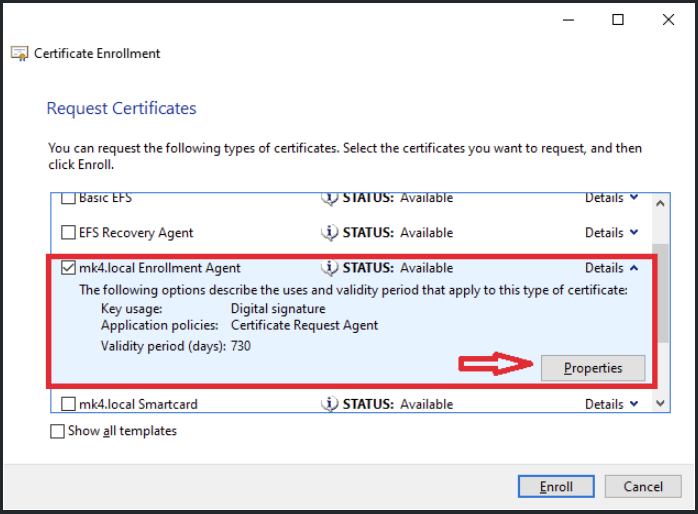
Select <domain-name> Enrollment Agent created in previous steps, click on Properties
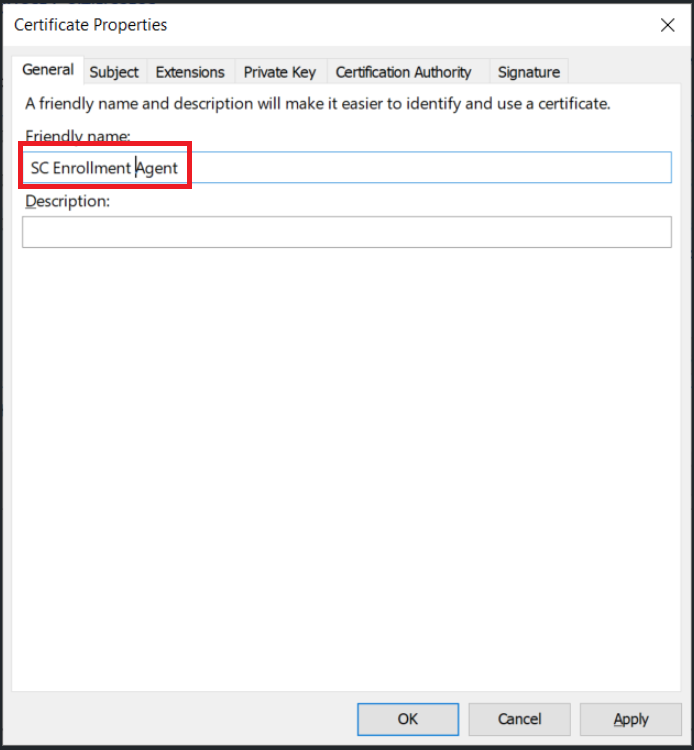
Provide a friendly name for this certificate, click Apply, then click OK
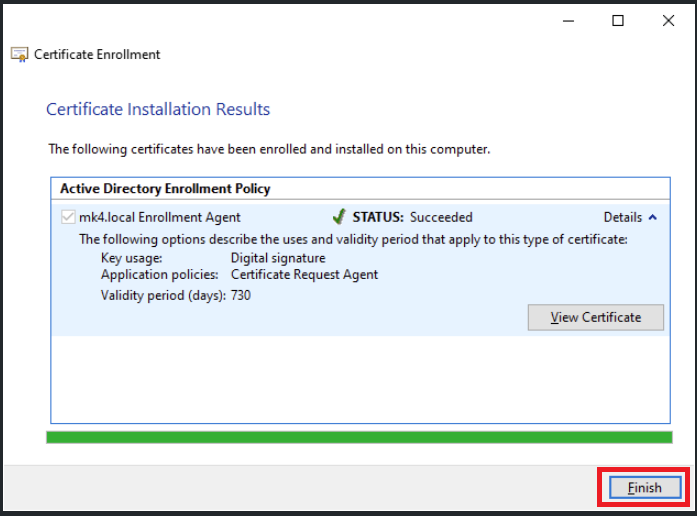
Click Finish to end the process
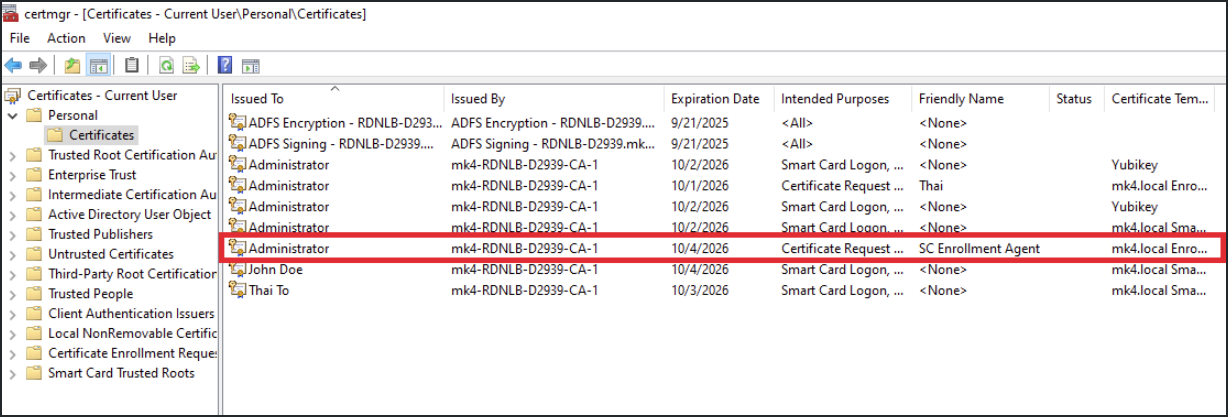
A new Enrollment Agent certificate is now created and shown under Certificate section.
3. Smart card Initialization
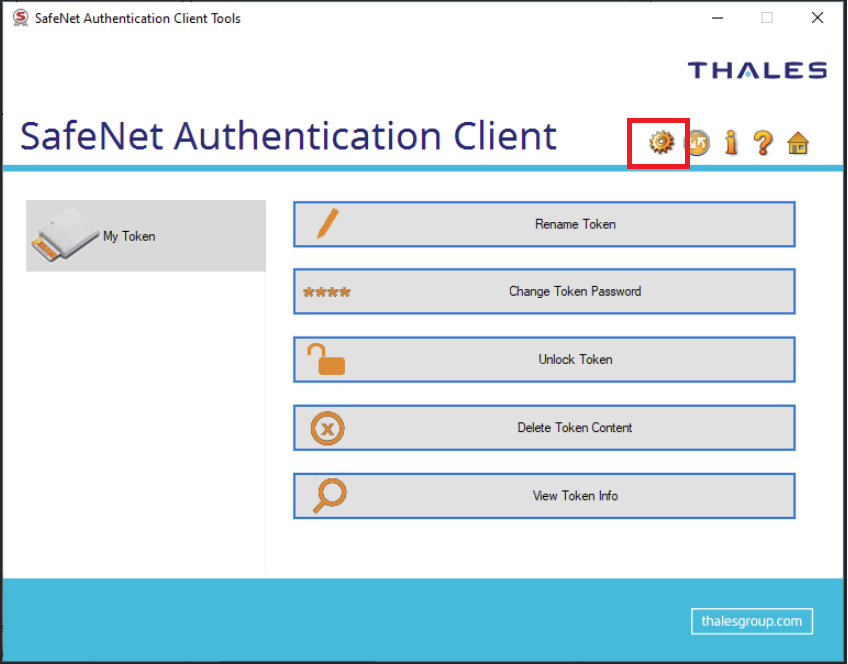
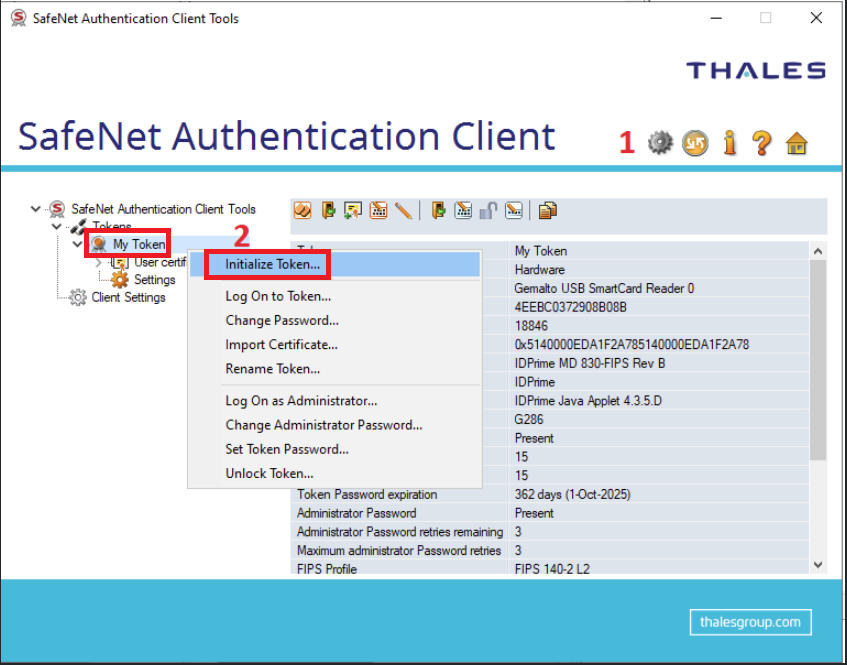
Open Safenet Authentication Client, and inset the smart card. Click on the gear icon to open Advanced View.
Right-click on My Token, select Initialize Token
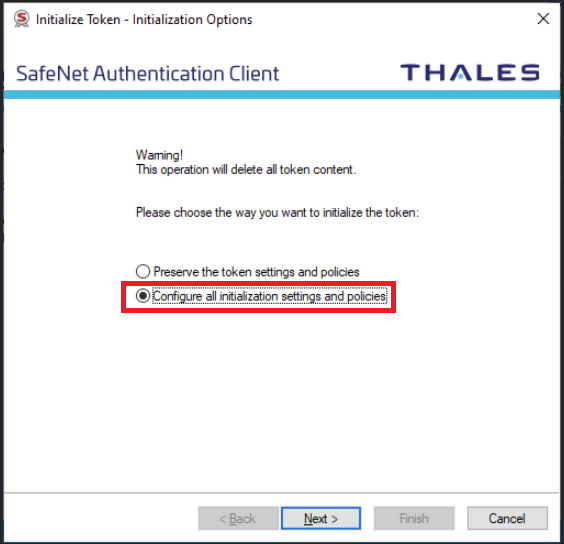
Select Configure all initialization settings and policies
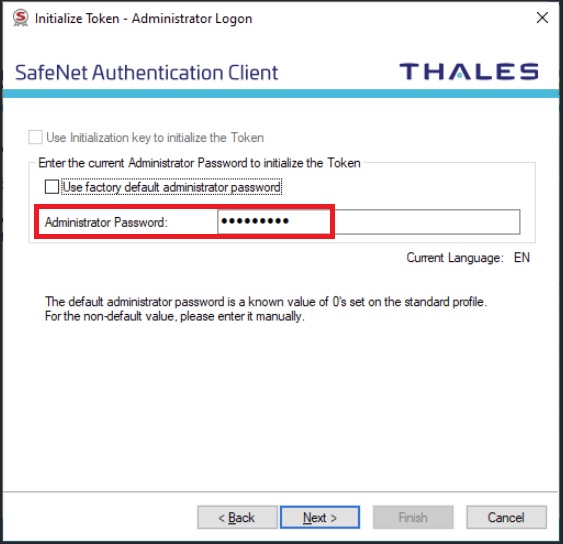
Provide Administrator Password to initialize the Token, click Next
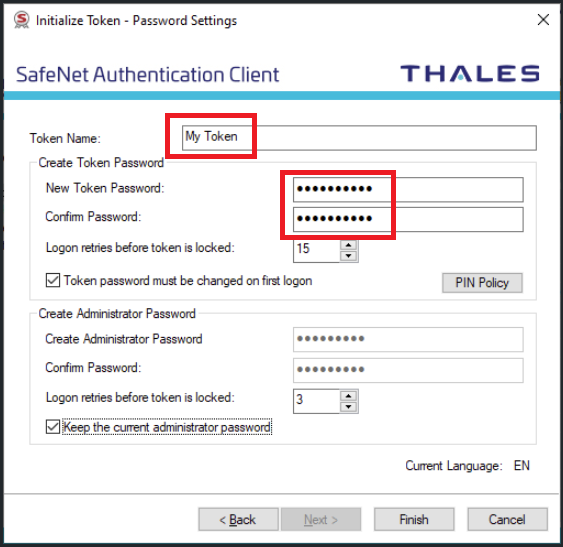
Provide Token Name and Token Password. Other settings are optional. Enable Keep the current administrator password if don't want to create a new one
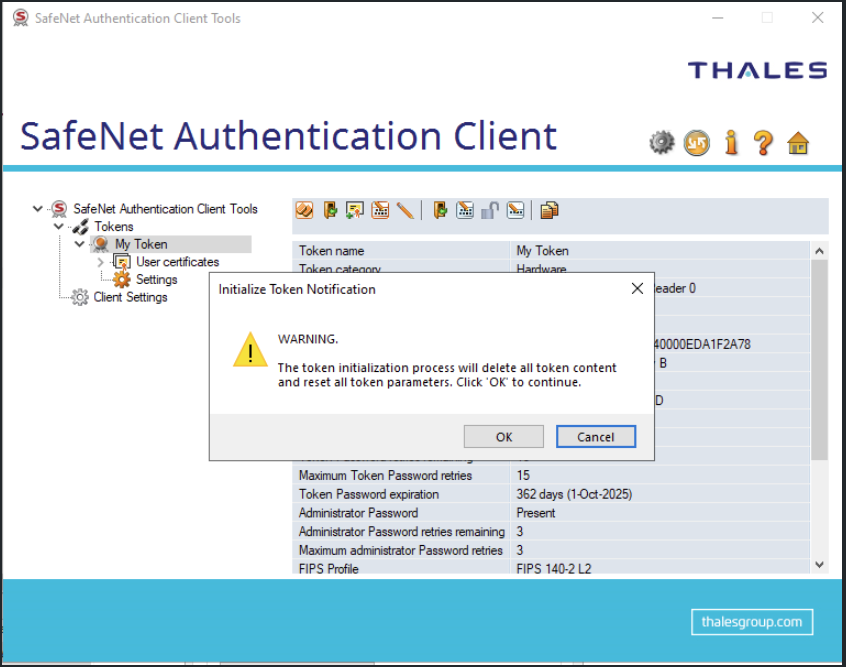
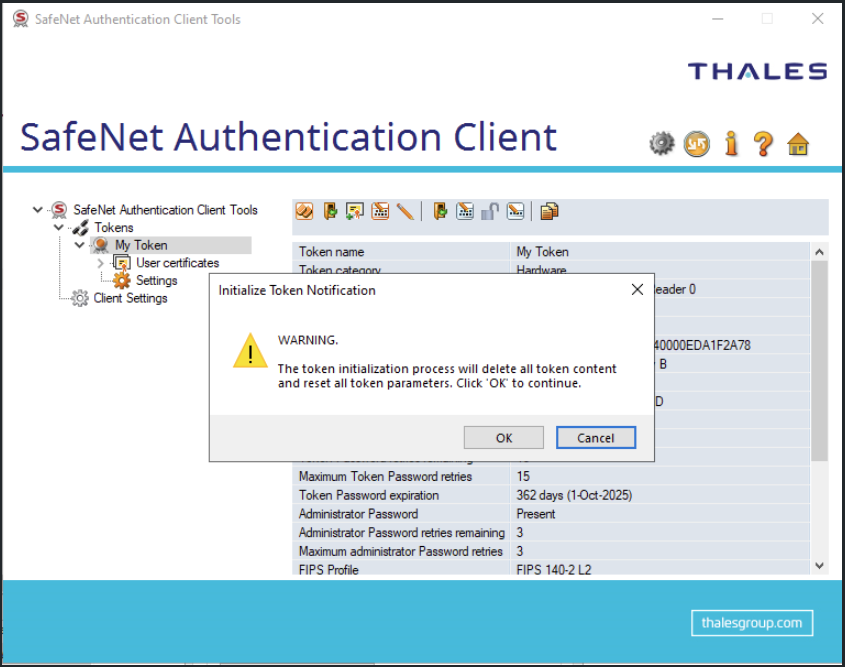
A warning of data clearance will appear. Click OK.
The smart card is successfully initialized.
4. User Enrollment
Step 1. Login as a user in Enrollment Operator group with the Enroll permission for the smartcard certificate.
Step 2. Open Certificate Manager
Press Win + R, type certmgr.msc, and open it with Administrator permissions
Step 3. Enroll Users
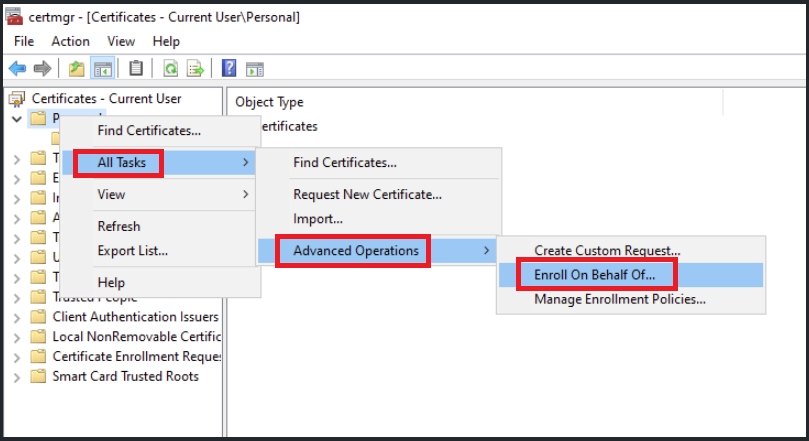
In Certificate Manager, Right-click on Personal, Select All Tasks, Select Advanced Operations, Select Enroll on Behalf of...
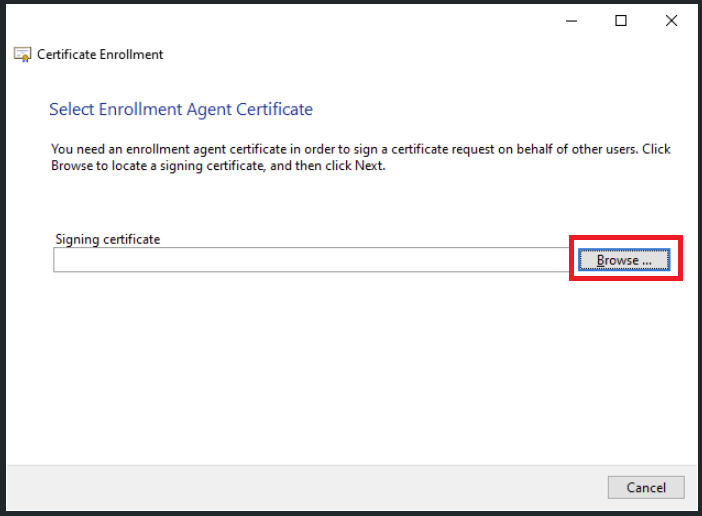
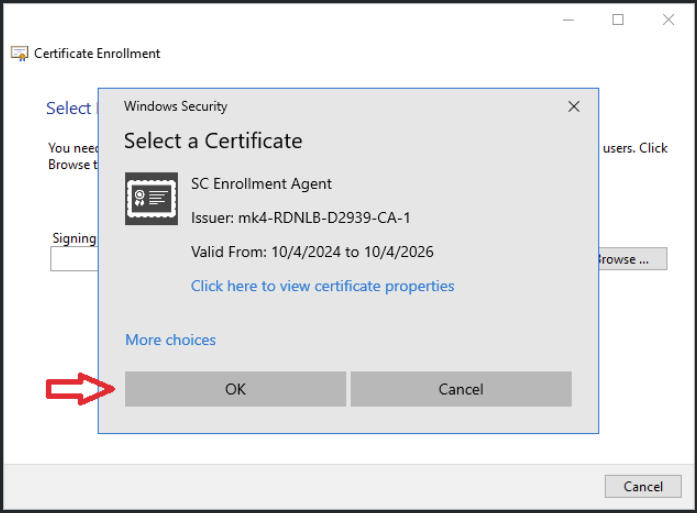
Keep default settings and click Next until Select Enrollment Agent Certificate. Click Browse. Select a certificate for Enrollment Agent
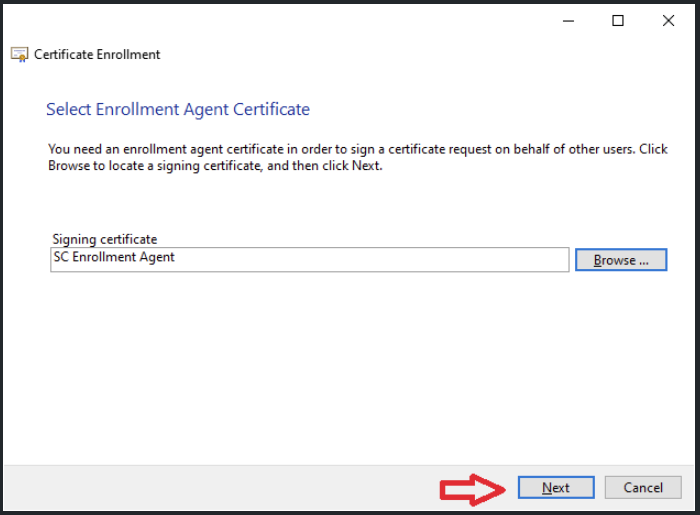
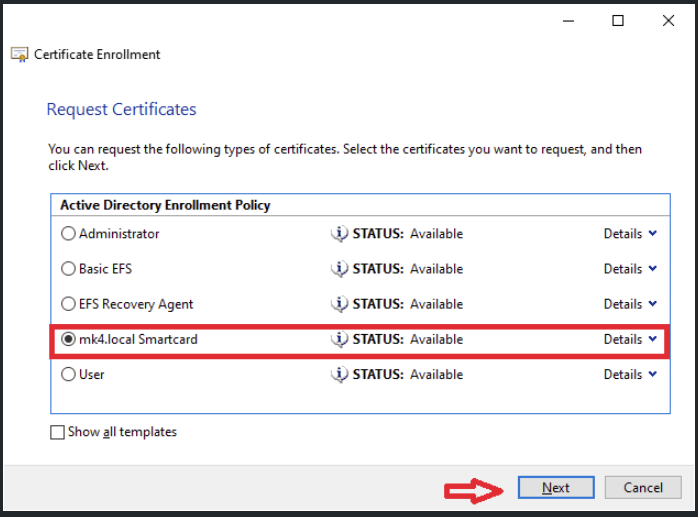
Select <domain-name> Smartcard template created from previous steps. Click Next
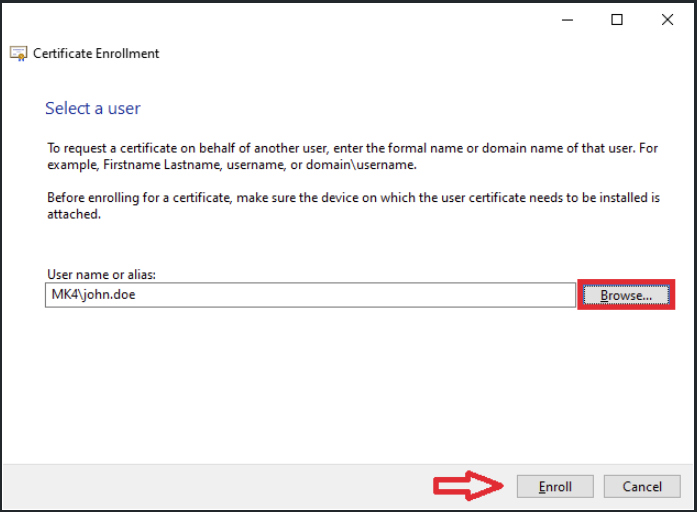
Click Browse and select the user to enroll it to smart card. Click Enroll to finish the process
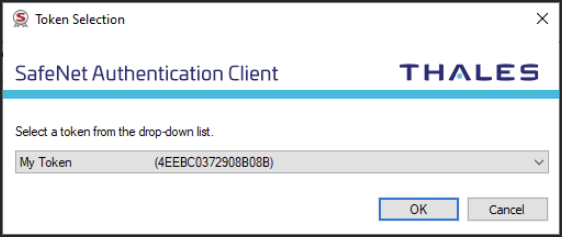
Insert the smart card to the reader and select its token in Token Selection
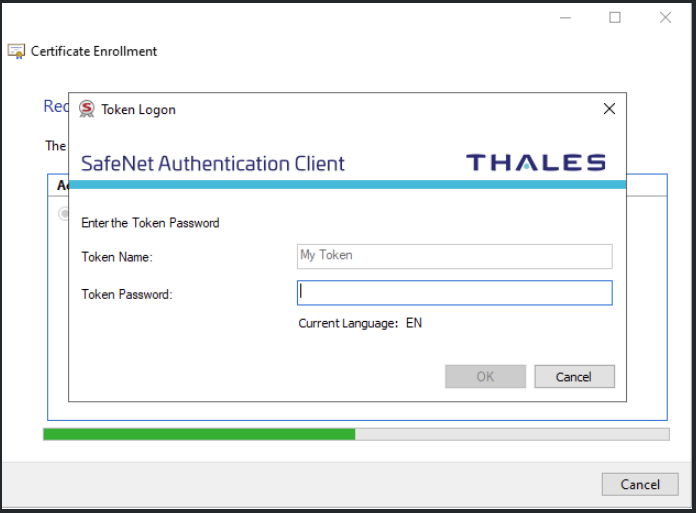
Enter the Token Password and click OK
Wait for the enrollment to finish and click Close to exit, or click Next user to enroll another user
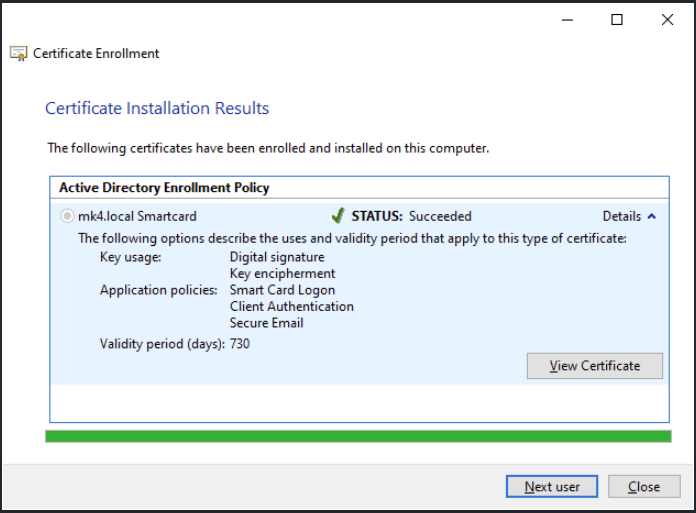
When multiple users were enrolled to the smart card, Kiosk will only grant access to the most recent enrolled user.
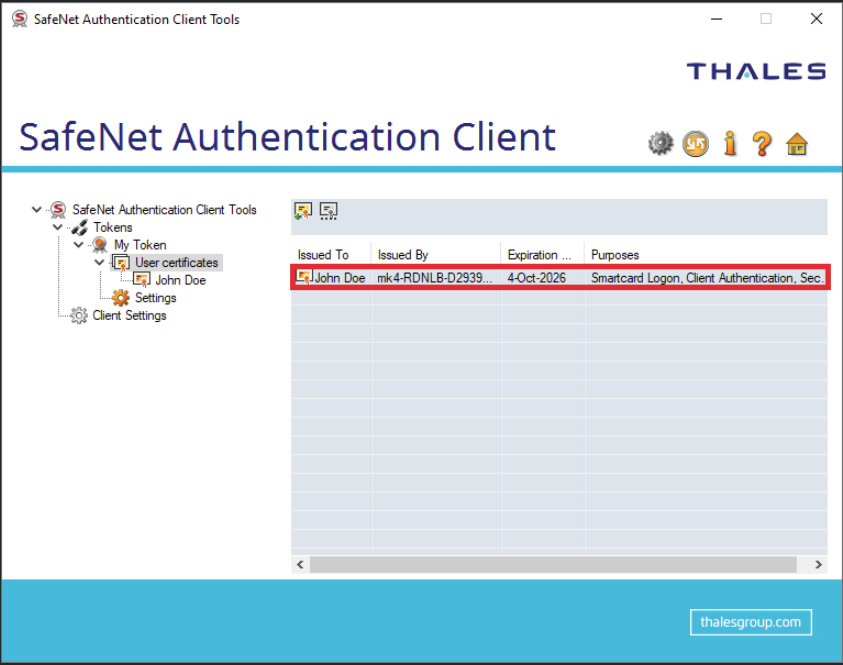
Enrolled user will appear under User certificates
5. Install Smart Card Reader driver on the Kiosk machine
On the Kiosk machine, it is essential to install the appropriate drivers for your smart card Reader
Please refer to your smart card provider's website for the correct drivers. For reference, we use SafeNet Authentication Client, which includes drivers for Thales (formerly Gemalto) smart card readers
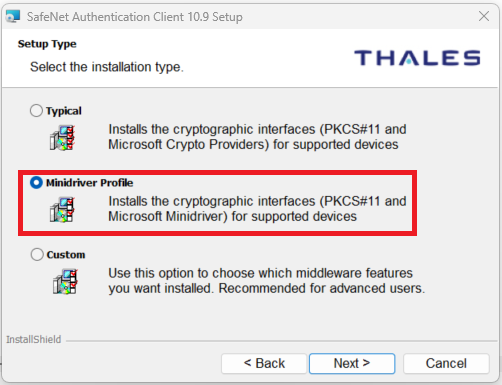
When running SafeNet Authentication Client installer, you will be given two options: Typical (including client and drivers) or Minidriver Profile (drivers only). Select Minidriver Profile
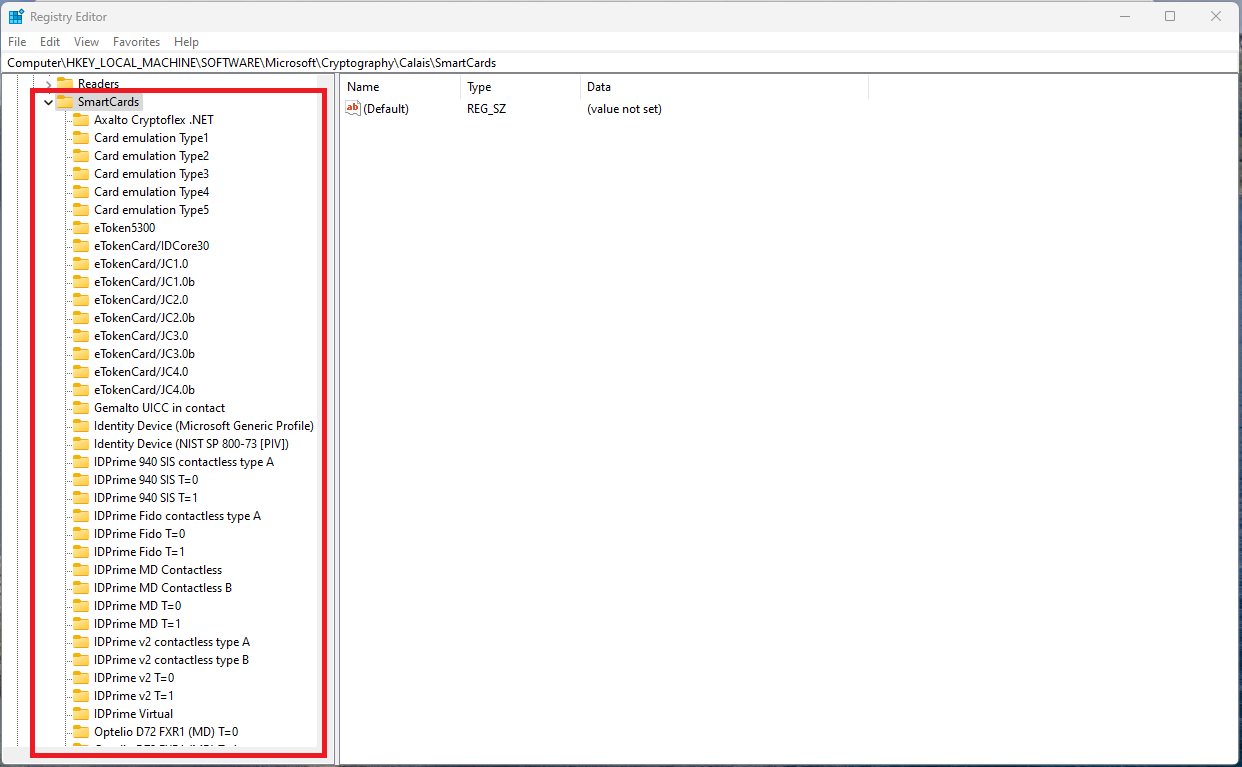
After completing the driver installation, you can verify that the installation was successful by checking the registry. Open the Registry Editor and navigate to
Computer\HKEYLOCAL** MACHINE\SOFTWARE\Microsoft\Cryptography\Calais\SmartCards**
Here, you should see the list of all installed drivers
6. Enable smart card detection on Kiosk configuration
From Kiosk WebMC, navigate to Workflows, click on Set Default Login Method. Select MetaDefender kiosk Authentication, select Remote Active Directory, check Enable smart card authentication.
To use smart card reader authentication, Active Directory must be enabled and configured.
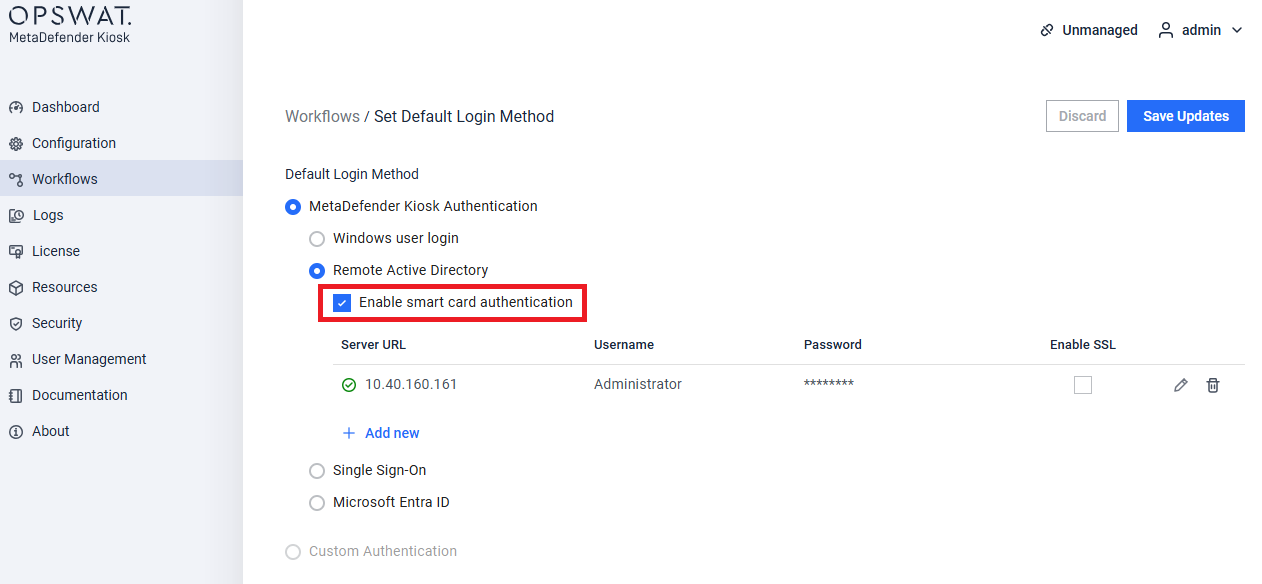
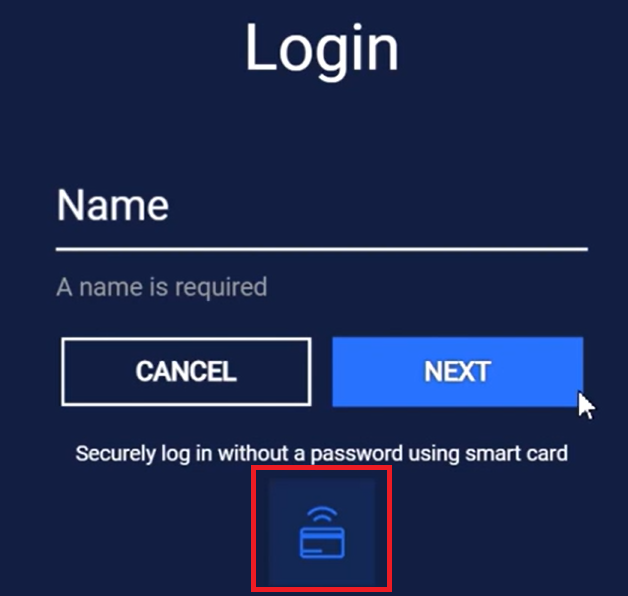
When enabled smart card authentication, an icon will appear in the Kiosk UI during the authentication process. Users can swipe their smart card for authentication.