This section provides instructions for administrator to configure ADFS as SAML Identity Provider for authenticating to Kiosk UI and Kiosk Web Management Console.
I. Configure ADFS server
On Windows Server 2019/2022, enable role “Active Directory Federation Services”
Ensure service “Active Directory Federation Services” - “adfssrv” - is running.
Create a certificate (self-signed is acceptable) for the ADFS server.
II. Configure ADFS as SAML Identity Provider for Kiosk
Pre-conditions
Make sure Kiosk system can access ADFS via domain name, e.g.
https://adfs.localEnable HTTPS on Mangement Console. See Enable HTTPS for more detail.
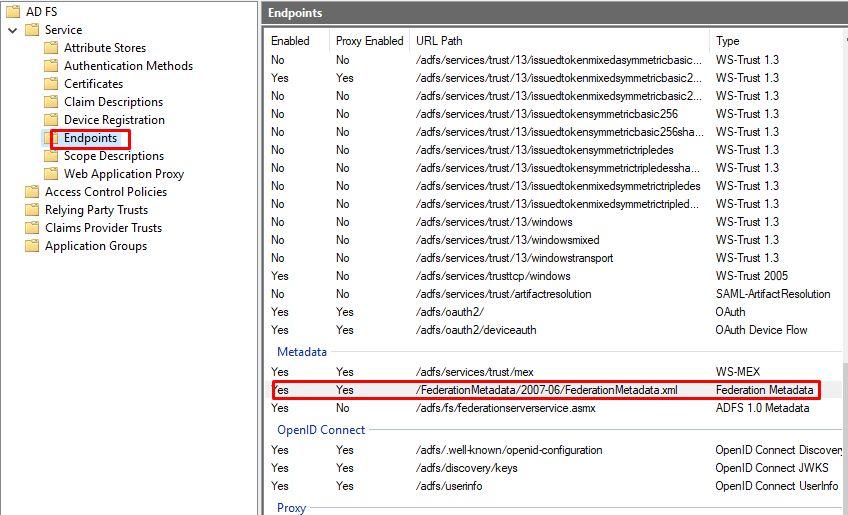
Get metadata URL from the ADFS server
Step 1: Get the Login URL
Login URL will be used as Relying Party Trust Identifier on ADFS Management
Login URL for Kiosk UI:
On Kiosk WebMC, navigate to the Workflows tab, click on Select Default Login Method
Select Single Sign-On, and select Protocol Type, in this case using SAML 2.0, then enter Name
Enter the metadata URL into the Kiosk console according to the format:
https://<ADFS server_name>/FederationMetadata/2007-06/FederationMetadata.xmlIdentifier will be automated generated → Check if the status is
Connectedand then click on Apply

Kiosk UI Login URL format:
<http/https>://localhost:<port>/metadefender_rest/uissologin/saml/<identifier>
Please modify the elements enclosed in <> to match your Kiosk's configuration. It must be localhost for Kiosk UI login.
Login URL for Kiosk Console:
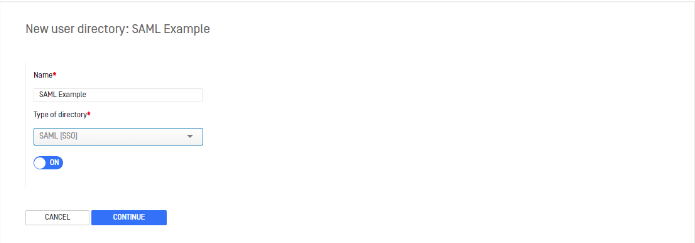
Select SAML (SSO) in the menu to create a User Directory that integrates with a SAML 2.0 SSO Identity Provider (IdP). Switch the toggle button to ON to enable this User Directory. As soon as it is submitted, any other User Directories configured with SAML (SSO) will be automatically disabled. Switching to OFF only creates the User Directory and will not change any currently enabled User Directories.
Click CONTINUE to go to the Configure Service Provider page. This will set up the login URL the Identity Provider uses to redirect after a successful login. Fill in Host or IP to generate the Login URL.
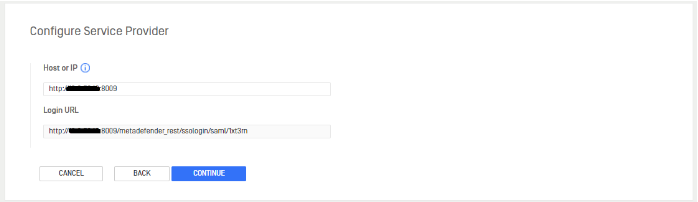
Kiosk console Login URL format:
<http/https>://localhost:<port>/metadefender_rest/ssologin/saml/<identifier>
Step 2: On ADFS server, open “ADFS Management“.
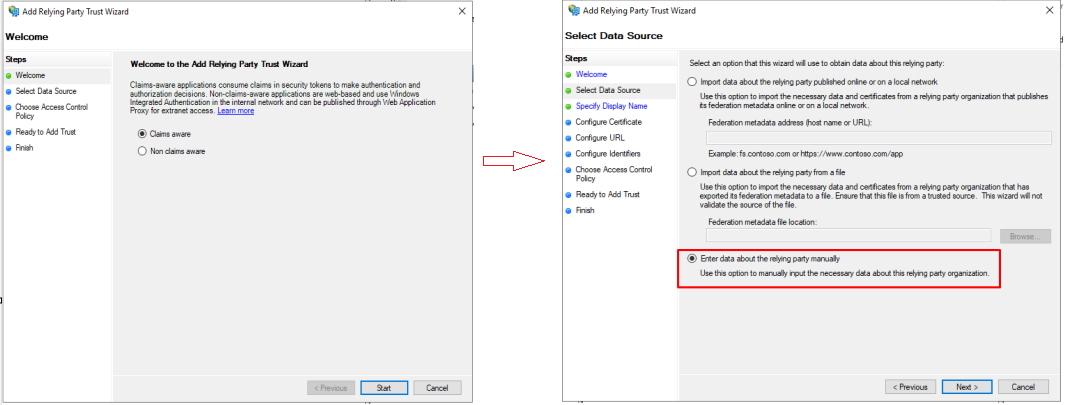
Step 3: Add Relying Party Trust
Navigate to Tools → ADFS Management, select Relying Party Trust, and then click on Add Relying Party Trust.
Select Claims aware from the Relying Party Trust Wizard and click on Start button.
Enter Display name and then click on Next twice
Perform the following two steps
Check on Enable support for the SAML 2.0 Web SSO protocol option and then enter the Relying party SAML 2.0 service URL.
Enter the Login URL from Step 1 as Relying party trust identifier and click on Add
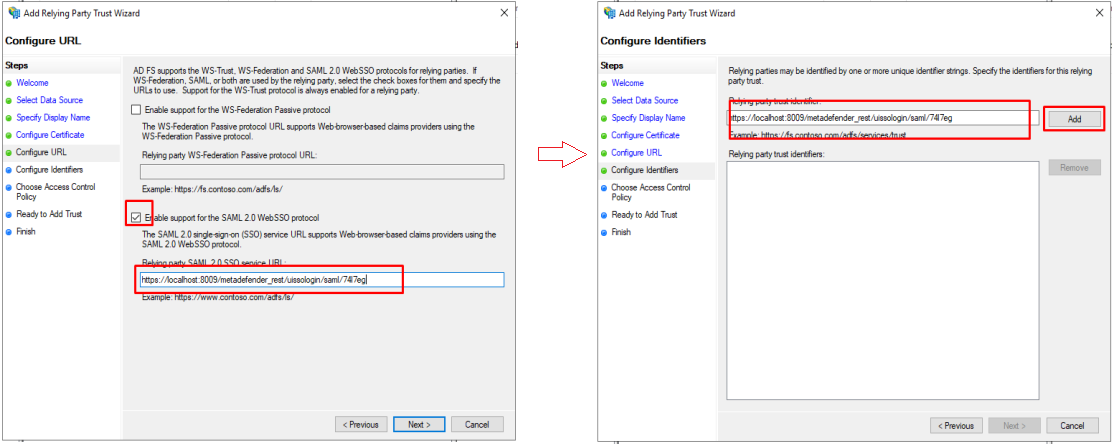
Click on Next 3 times and then Close
Step 4: Define the ADFS claim rules
Go to the Edit Claim Issuance Transform Rules tab and click Add Rules to launch the Add Transform Claim Rule Wizard.
In the Choose Rule Type panel, choose Send LDAP Attribute as Claims and click Next.
Type the Claim rule name in the respective field
From the Attribute store drop-down list, choose Active Directory. In the Mapping of LDAP attributes to outgoing claim types section, choose the following values from the respective
For Kiosk UI: [Require] LDAP Attribute: SAM-Account-Name, Outgoing Claim Type: Name ID
For Web Console: [Require] LDAP Attribute: User-Principal-Name, Outgoing Claim Type: Name ID
Click on Finish
Notes
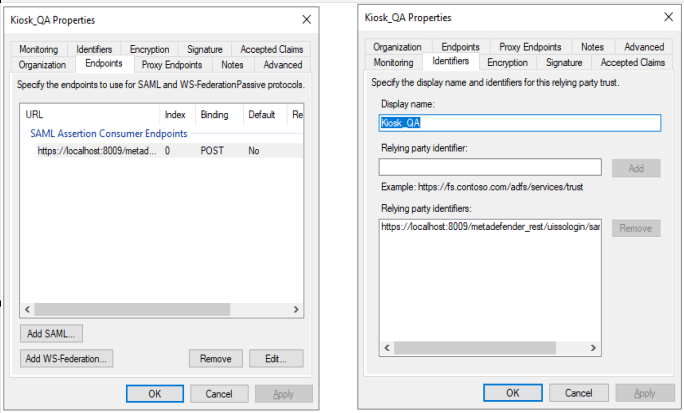
Make sure the Binding method is POST (not Artifact)
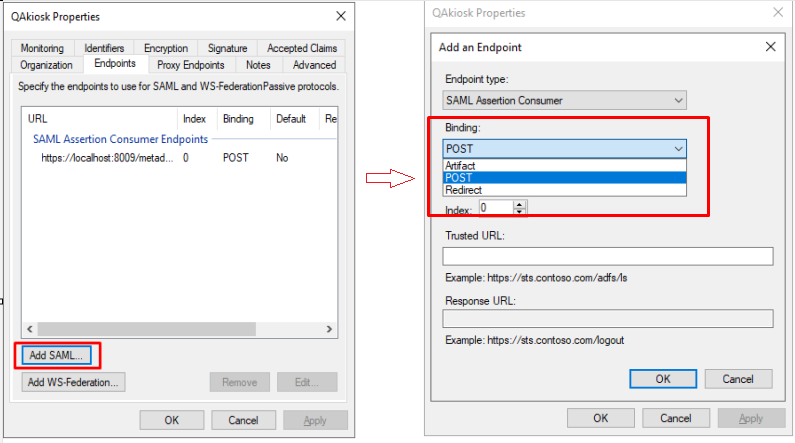
Any updates in Login URL must be updated on both Identifiers and Endpoints tabs → Apply
III. Configure many Kiosks - using as many Relying Party Trusts on ADFS
Configure each Kiosk as a seperate Relying Party Trust, using II. Configure ADFS as SAML Identity Provider for Kiosk
Each Kiosk must have a different Identifier.
IV. Configure many Kiosks - using one Relying Party Trust on ADFS
Not support to config directly from Kiosk, will need OCM for this.
Add all Kiosks to one OCM set of Kiosks.
Config from OCM using II. Configure ADFS as SAML Identity Provider for Kiosk
Make sure all Kiosk have the same port number and SSL is enabled.