This article applies to all MetaDefender Core releases deployed on Windows and Linux systems from version v5.15.1 and newer
📘 Overview
This article provides step-by-step instructions to configure a cloud-hosted Ubuntu instance on Amazon Web Services (AWS) as a Syslog receiver and connect it to MetaDefender Core via the Management Console.
Prerequisites
AWS Console Access: Permissions to modify EC2 Security Groups.
Ubuntu EC2 Instance: Root or
sudoSSH access to the target Linux server.MetaDefender Core: Administrator access to the Management Console.
🛠️ Step-by-Step Instructions
Phase 1: Configure AWS Infrastructure (Security Groups)
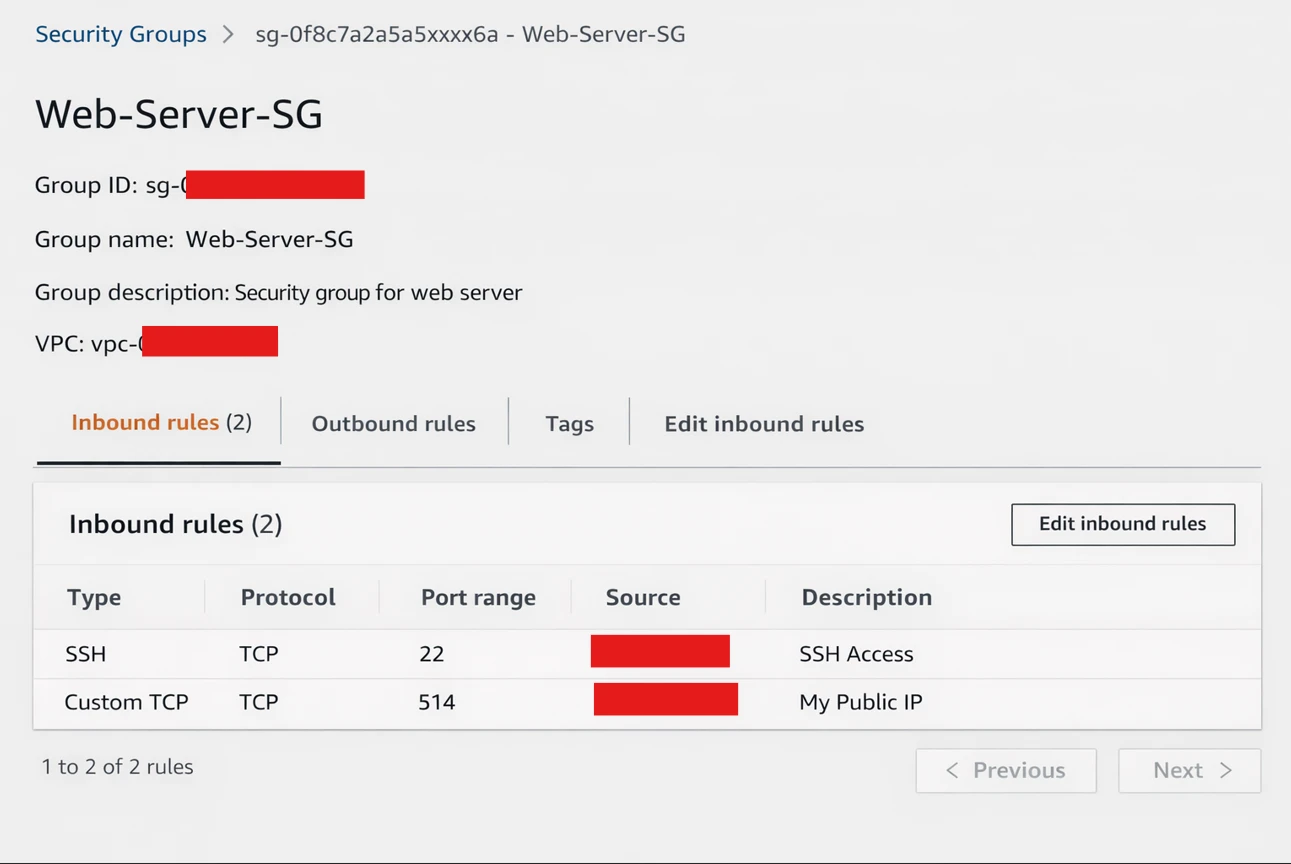
By default, AWS blocks all inbound traffic. You must explicitly allow Syslog traffic (Port 514) to reach your Ubuntu instance.
Log in to the AWS Management Console and navigate to the EC2 Dashboard.
Select your Ubuntu instance and locate the Security tab at the bottom of the screen. Click on the associated Security Group link.
Click Edit inbound rules.
Click Add rule and configure the following:
Type: Custom UDP Rule (and/or Custom TCP Rule depending on your preference).
Port Range:
514Source: Select
Customand input the public IP address (or Private VPC IP, if peered) of your MetaDefender Core server.
💡 Pro Tip: Add /32 to the end of the IP to restrict access strictly to the Core server (e.g., 198.51.100.20/32).
Click Save rules.
Phase 2: Configure the Ubuntu Instance (rsyslog)
Ubuntu uses rsyslog as its default logging service, but it only accepts internal logs out-of-the-box. You must configure it to listen for external connections.
Connect to your AWS Ubuntu instance via SSH.
Open the
rsyslogconfiguration file using a text editor (e.g.,nano):
Scroll down to the
MODULESsection. Uncomment the following lines (remove the#at the beginning) to enable UDP and/or TCP reception:
For UDP (Standard Syslog):
For TCP (Reliable Syslog):
Save the file and exit (
Ctrl+O,Enter,Ctrl+Xin nano).Restart the
rsyslogservice to apply the changes:
Check for the rsyslog service status and make sure its showing active and running
Verify the service is actively listening on port 514:

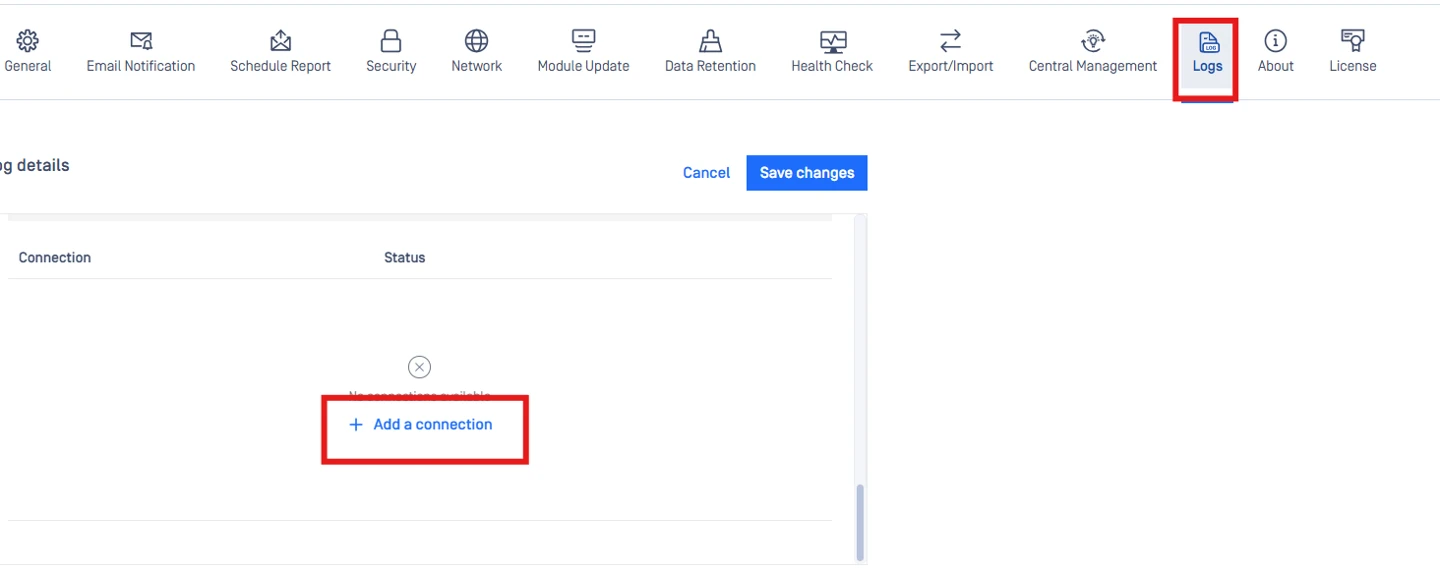
Phase 3: Configure MetaDefender Core
Now that the AWS server is ready to receive data, configure MetaDefender Core to forward the logs.
Log in to the MetaDefender Core Management Console.
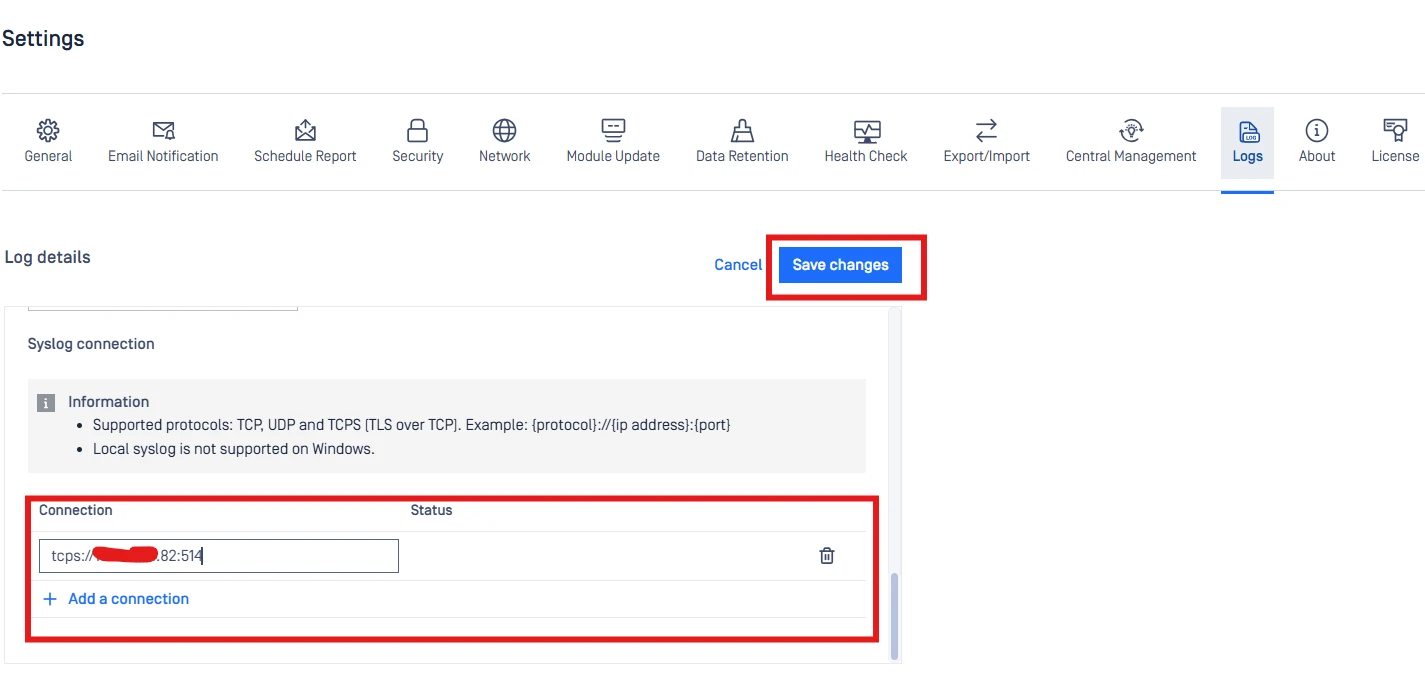
Navigate to Settings > Logs >> Edit.
Under Syslog tab >> Add a connection
Input the details for your AWS Ubuntu instance in {protocol}://{ip address}:{port} format
Server Address: The Public IP address (or Private IP if internally routed) of your AWS EC2 instance.
Port:
514Protocol:
UDP(orTCPif configured in Phase 2).
Click on Save Changesto save the configuration.
Phase 4: Verification
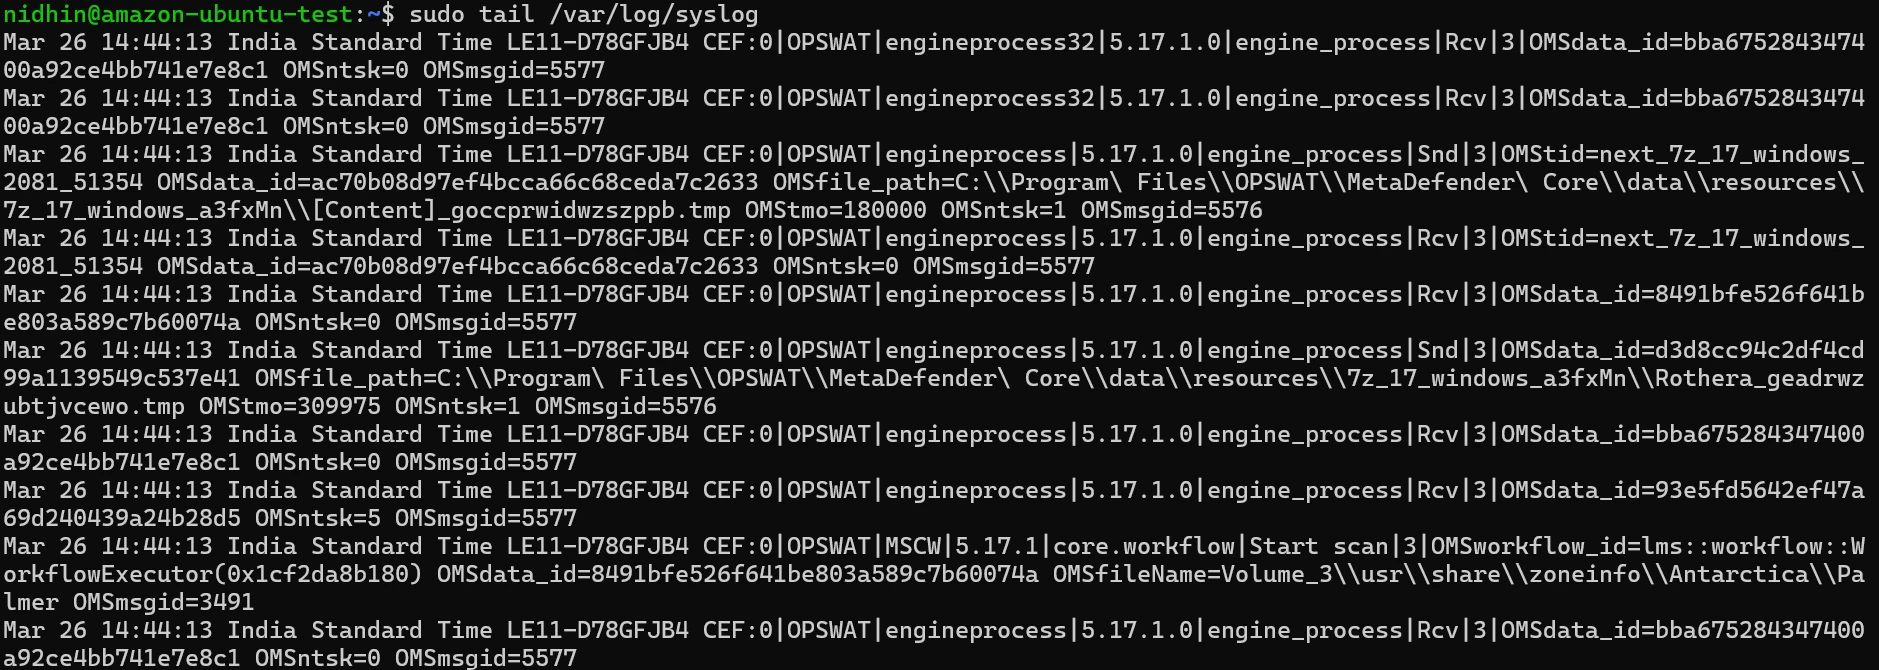
To confirm that logs are successfully travelling from MetaDefender Core to your AWS instance:
Return to your SSH session on the Ubuntu instance.
Run the following command to watch the live incoming system logs:
Trigger an event in MetaDefender Core (e.g., upload a file for scanning, or log out and log back into the UI).
Watch the Ubuntu terminal. You should see new log entries appear containing the
ometascanormdcoreservice tags.
If logs do not appear, verify that the Ubuntu Uncomplicated Firewall (UFW) is not overriding the AWS Security Group. You can check this by running sudo ufw status. If active, run sudo ufw allow 514/udp.
If Further Assistance is required, please proceed to log a support case or chatting with our support engineer.