How Do I Setup Syslog connect to Splunk Cloud by using Universal Forwarder?

Check Your Version:

This article applies to all MetaDefender Core releases deployed on Linux systems.

This KB, I will provide the guideline to setup integrate with Splunk Cloud. Splunk Cloud requires Universal Forwarder, therefore, we need to setup Universal Forwarder first. In this KB I am using RedHat 9.2 (Plow) to setup so the command in this KB will be runned on RedHat and package system should be RPM.

root>15:50:19 (Core) # cat /etc/redhat-release Red Hat Enterprise Linux release 9.2 (Plow)

1 - Install Universal Forwarder

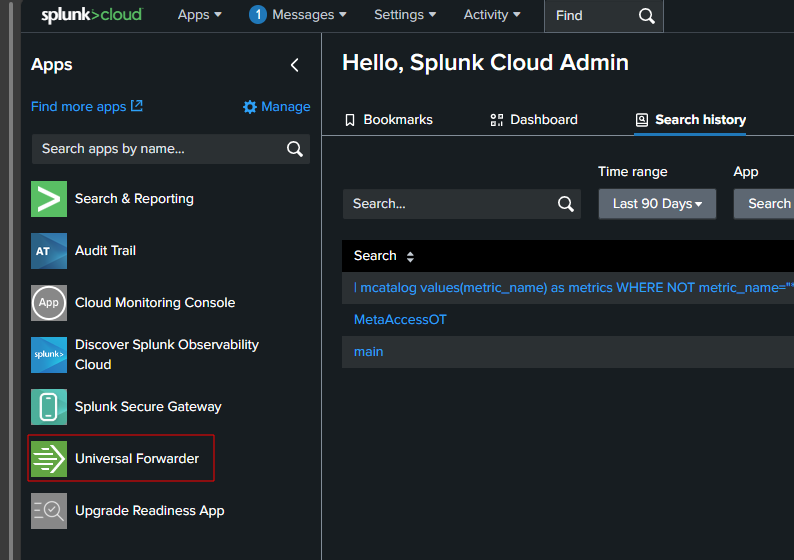
In your Splunk Instance, you can select this to setup Universal Forwarder

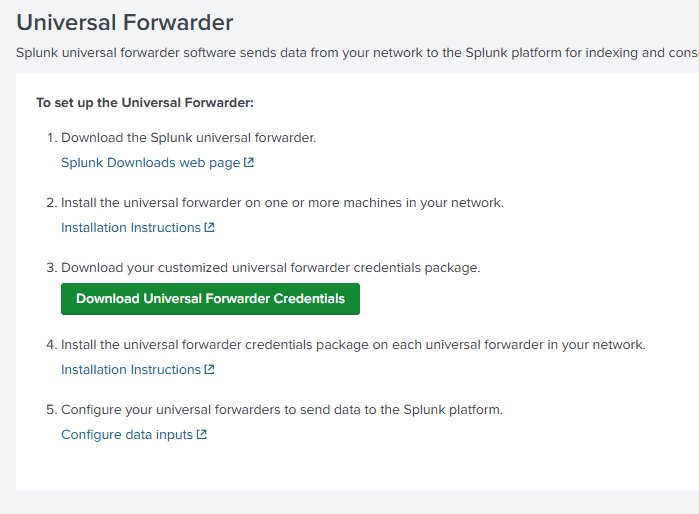
Then, you can follow this Splunk instruction to setup

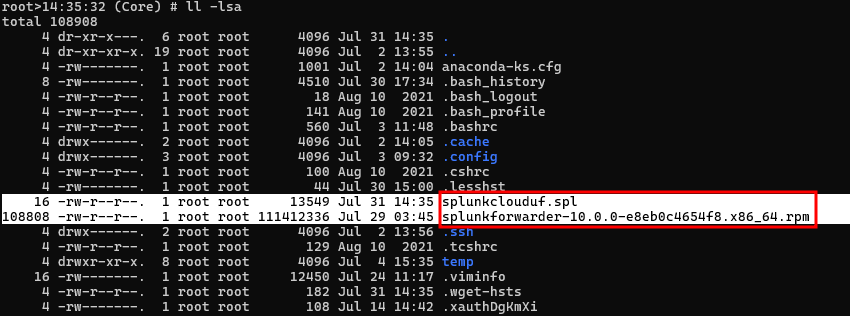
After downloading the installer and credential files as shown in the screenshot below, you can proceed with setting up the Splunk Universal Forwarder.

  • Installer file: splunkforwarder-10.0.0-e8eb0c4654f8.x86_64.rpm

  • Credential file: splunkclouduf.spl


Install the Splunk Universal Forwarder using the following command:

Step 1: Create the Splunk user and group.

useradd -m splunkfwd groupadd splunkfwd

Step 2: Install the Splunk software, as described in the installation instructions for your platform in Installation instructions. Create the $SPLUNK_HOME directory wherever desired.

export SPLUNK_HOME="/opt/splunkforwarder" mkdir $SPLUNK_HOME

Step 3: Running command to install package.

rpm -i splunkforwarder-10.0.0-e8eb0c4654f8.x86_64.rpm

The output should be

rpm -i splunkforwarder-10.0.0-e8eb0c4654f8.x86_64.rpm warning: splunkforwarder-10.0.0-e8eb0c4654f8.x86_64.rpm: Header V4 RSA/SHA256 Signature, key ID b3cd4420: NOKEY verify that this sytem has all the commands we will require to perform the preflight step no need to run the splunk-preinstall upgrade check complete

Step 4: Run the chown command to change the ownership of the Splunk directory and all its contents to the user that will run the Splunk software.

Step 5: run the command below to start

$SPLUNK_HOME/bin/splunk start

or this command

$SPLUNK_HOME/bin/splunk start --accept-license

You will be prompted to create a new administrator username and password. After entering the required information, you should see the following output:

Warning: Attempting to revert the SPLUNK_HOME ownership Warning: Executing "chown -R splunkfwd:splunkfwd /opt/splunkforwarder" This appears to be your first time running this version of Splunk. Splunk software must create an administrator account during startup. Otherwise, you cannot log in. Create credentials for the administrator account. Characters do not appear on the screen when you type in credentials. Please enter an administrator username: admin Password must contain at least: * 8 total printable ASCII character(s). Please enter a new password: Please confirm new password: Creating unit file... Important: splunk will start under systemd as user: splunkfwd The unit file has been created. ... ... All preliminary checks passed. Starting splunk server daemon (splunkd)... Done

To verify, you can run this command below

$SPLUNK_HOME/bin/splunk version

The output should be:

Warning: Attempting to revert the SPLUNK_HOME ownership Warning: Executing "chown -R splunkfwd:splunkfwd /opt/splunkforwarder" Splunk Universal Forwarder 10.0.0 (build e8eb0c4654f8)

2 - Install the forwarder credentials

To install the forwarder credentials, run the following command:

$SPLUNK_HOME/bin/splunk install app splunkclouduf.spl

It will prompt you for the username and password you set during the Splunk Forwarder installation.

Once completed, you should see an output confirming the action, followed by a prompt to restart Splunk.

Warning: Attempting to revert the SPLUNK_HOME ownership Warning: Executing "chown -R splunkfwd:splunkfwd /opt/splunkforwarder" Couldn't change ownership for /opt/splunkforwarder/etc/deployment-apps: Operation not permitted App '/opt/splunkforwarder/etc/deployment-apps/splunkclouduf.spl' installed You need to restart the Splunk Server (splunkd) for your changes to take effect.

To restart Splunk, you can run this command

$SPLUNK_HOME/bin/splunk restart

The output should be

All preliminary checks passed. Starting splunk server daemon (splunkd)... Done

To configure Splunk to listen for syslog, create the file /opt/splunkforwarder/etc/system/local/inputs.conf and add the following settings:

cat /opt/splunkforwarder/etc/system/local/inputs.conf # For TCP syslog (optional) [tcp://1514] index = main sourcetype = syslog disabled = 0

To verify whether the Splunk Universal Forwarder (UF) port is open, you can use the following command:

netstat -ntlp | grep 1514 tcp 0 0 0.0.0.0:1514 0.0.0.0:* LISTEN 1071882/splunkd

3 - Integrate MD Core syslog with Splunk Universal Forwarder.

If you are using MD Core on Linux (Red Hat, Ubuntu, or Debian), you can configure syslog by adding the settings below to the /etc/ometascan/ometascan.conf file.

These settings should be placed directly beneath the [logger] section.

syslog=tcp://10.40.192.43:1514 syslog_level=info

For example

[global] dbmode=1 restaddress=* restport=8008 [logger] log_rotation=1 logfile=/var/log/ometascan/ometascan.log loglevel=info nginx_log_rotation=1 nginx_logfile=/var/log/ometascan/nginx-ometascan.log syslog=tcp://<IP_SPLUNK_UNIVERSAL_FORWARDER>:1514 syslog_level=info

Then, restart MD Core service.

systemctl restart ometascan

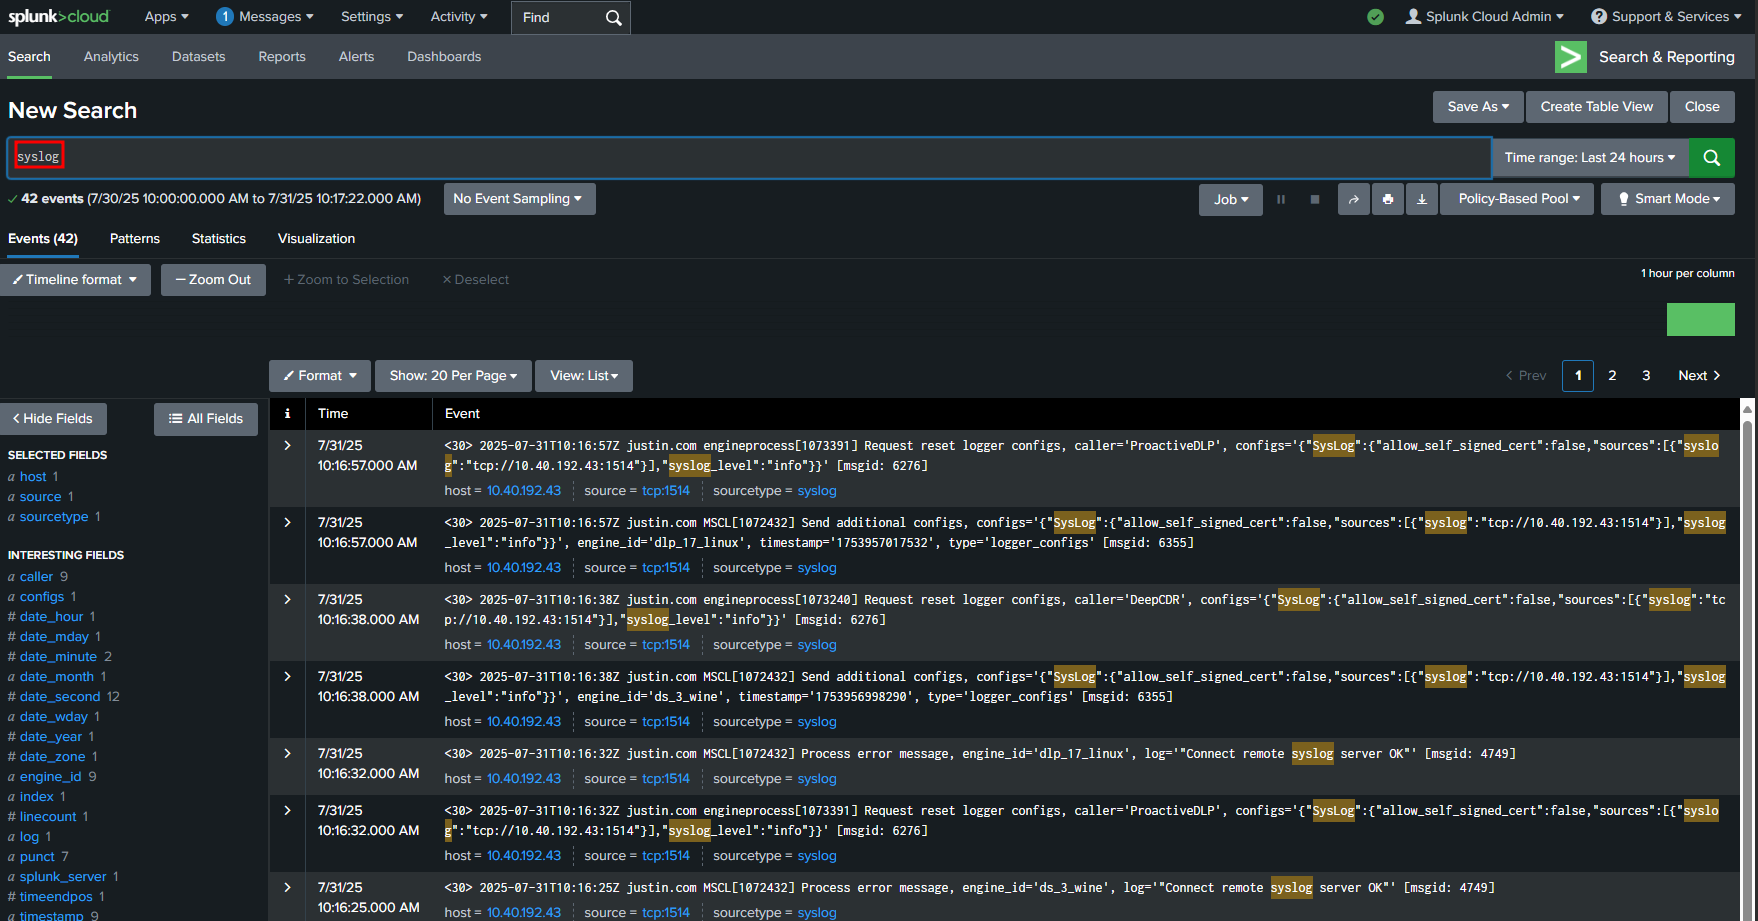
Now, go back to your Splunk instance and search for "syslog" — you should see entries related to MD Core appearing there.

Support:

If Further Assistance is required, please proceed to log a support case or chatting with our support engineer.


On This Page