
Overview
Vendors tell MetaDefender NAC what kind of network equipment it is talking to, so it sends attributes that equipment actually understands. Vendors are key to RADIUS NAC: they help identify devices joining the network and ensure the right access profiles are applied correctly.
Each vendor expects different attributes — Aruba uses roles, Cisco uses AV pairs and VLAN attributes, and so on. Selecting the correct vendor on an Access Profile is what makes the profile's attributes valid for your hardware.
Info
This page applies to both deployments. Vendors work the same way on Hybrid NAC and On-premise NAC.
Before You Start
Know the make and model of the switch, controller, or wireless equipment NAC will authenticate against.
Know whether it uses CoA (Change of Authorization) or Disconnect for dynamic authorization.
Have your vendor's documentation to hand for the attribute names it expects.
Create a Custom Vendor
Use this when your equipment is not already listed.
Log into the My OPSWAT Central Management console as Administrator.
Navigate to RADIUS NAC → Vendors.
Click the Add Custom Vendor button.
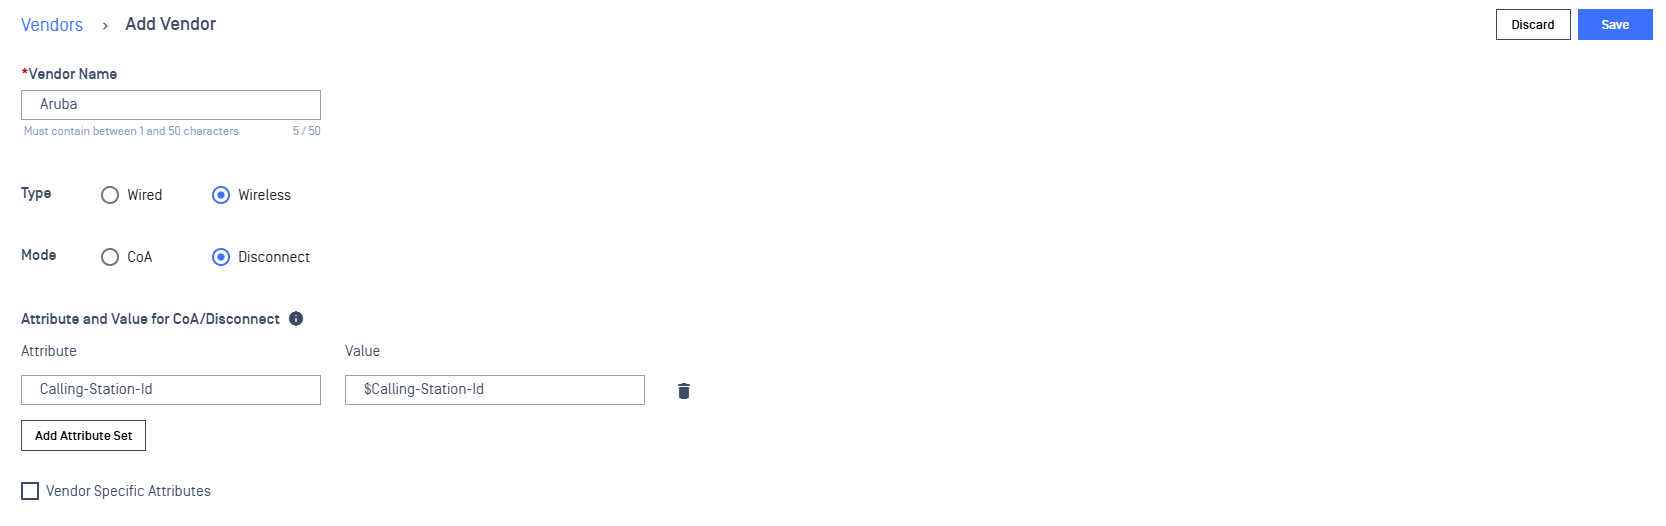
Fill in the detailed information:
Field | What to enter |
|---|---|
Vendor Name | A name for the vendor. |
Type | Wired or Wireless connection. |
Mode | The dynamic authorization mode — CoA (Change of Authorization) or Disconnect. |
Attribute and Value sets | The attributes and values sent with the CoA or Disconnect request. |
Click the Save button.
Note
Mode determines how NAC re-applies access to a device already on the network. CoA changes the device's authorization in place; Disconnect forces it to reauthenticate. Choose the one your equipment supports.
Create a Vendor with Specific Attributes
Some Vendor-Specific Attributes (VSAs) are not available until you enable them for that vendor — for example Extreme-User-Vlan for Aerohive, or Juniper-Local-User-Name for Juniper.
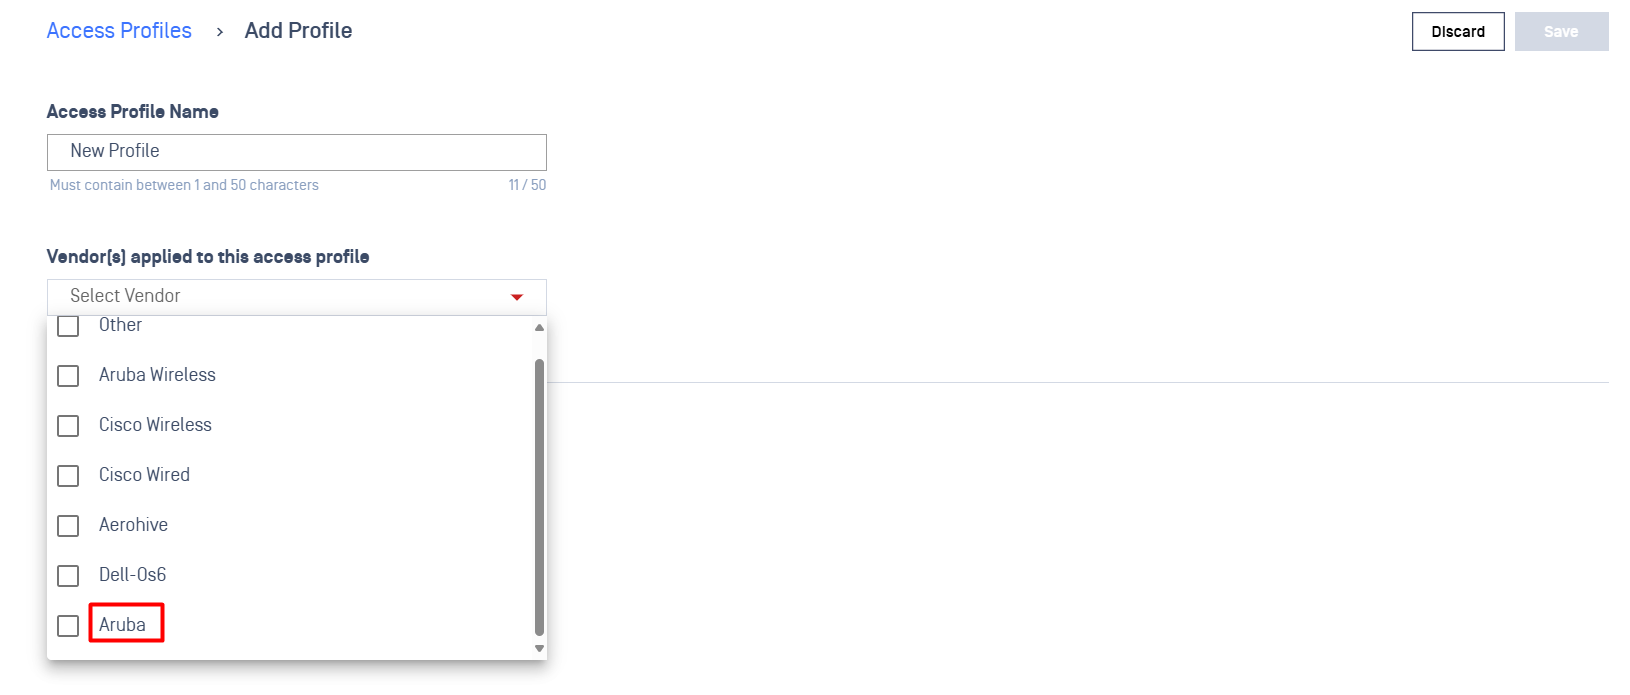
To enable VSAs for a particular vendor:
Navigate to the Vendor tab.
Select your specific vendor.
Enable the Vendor-Specific Attributes checkbox.
Fill in your vendor name. If your desired vendor is not listed, reach out to OPSWAT support for assistance.
Click Save.
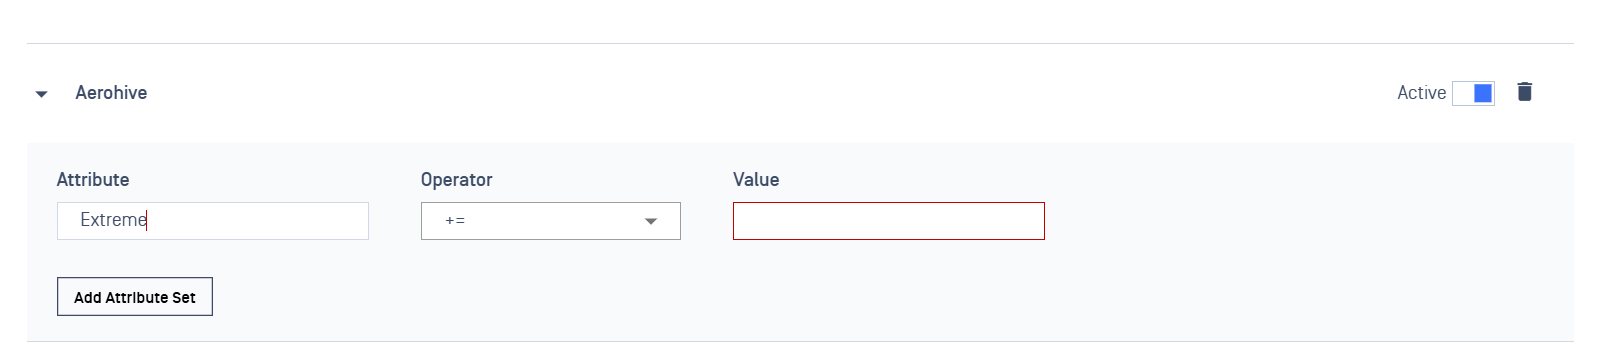

The attribute then becomes selectable when you build an Access Profile for that vendor.
Known Vendor-Specific Attributes
Vendor | Attribute |
|---|---|
Aerohive |
|
Juniper |
|
<!-- TODO: Add the full list of supported vendors and their attributes. This is the reference readers most often come to this page for, and it is currently missing. -->
Verify the Configuration
Create or edit an Access Profile and select the vendor — confirm its attributes are now selectable.
Connect a test device and check RADIUS NAC → Sessions for the expected Applied Access Profile.
Confirm on the equipment itself that the attribute took effect (the device is on the right VLAN or role).
Troubleshooting
The attribute you need is not in the list
It is likely a VSA that has not been enabled. Follow Create a Vendor with Specific Attributes above.
If the vendor itself is not listed, contact OPSWAT support.
The profile applies but the equipment ignores it
The attribute or value may not match what the equipment expects. Check the name and format against your vendor's documentation.
Confirm the Type (Wired/Wireless) matches how the device connects.
Access changes do not take effect on already-connected devices
Check the Mode setting. If the equipment does not support CoA, use Disconnect so the device reauthenticates.
Related Pages
Access Profiles — where vendor attributes are used
Rules — which devices receive which profile
Captive Portal Configuration — vendor redirect for the captive portal