
Overview
An Access Profile defines the level of network access a device receives. It is a named set of vendor attributes — a VLAN assignment, a user role, or other access controls — that NAC returns to your network equipment when a device matches a rule.
Access Profiles are the "what access" half of your policy. Rules decide which devices get a profile; the profile decides what that access looks like on the network.
Info
This page applies to both deployments. Access Profiles work the same way on Hybrid NAC and On-premise NAC.
How Access Profiles Fit Together
A device authenticates and is evaluated against your Rules.
The first matching rule assigns an Access Profile.
NAC returns that profile's attributes to your switch, controller, or wireless equipment.
The equipment applies the access — placing the device on a VLAN, assigning it a role, and so on.
Which attributes are available depends on the Vendor you select, because each vendor expects different attributes.
Before You Start
Know which VLANs or roles represent each level of access in your network.
Confirm your network equipment's vendor is available. See Vendors if you need to add a custom one.
Create an Access Profile
Log into the My OPSWAT Central Management console as Administrator.
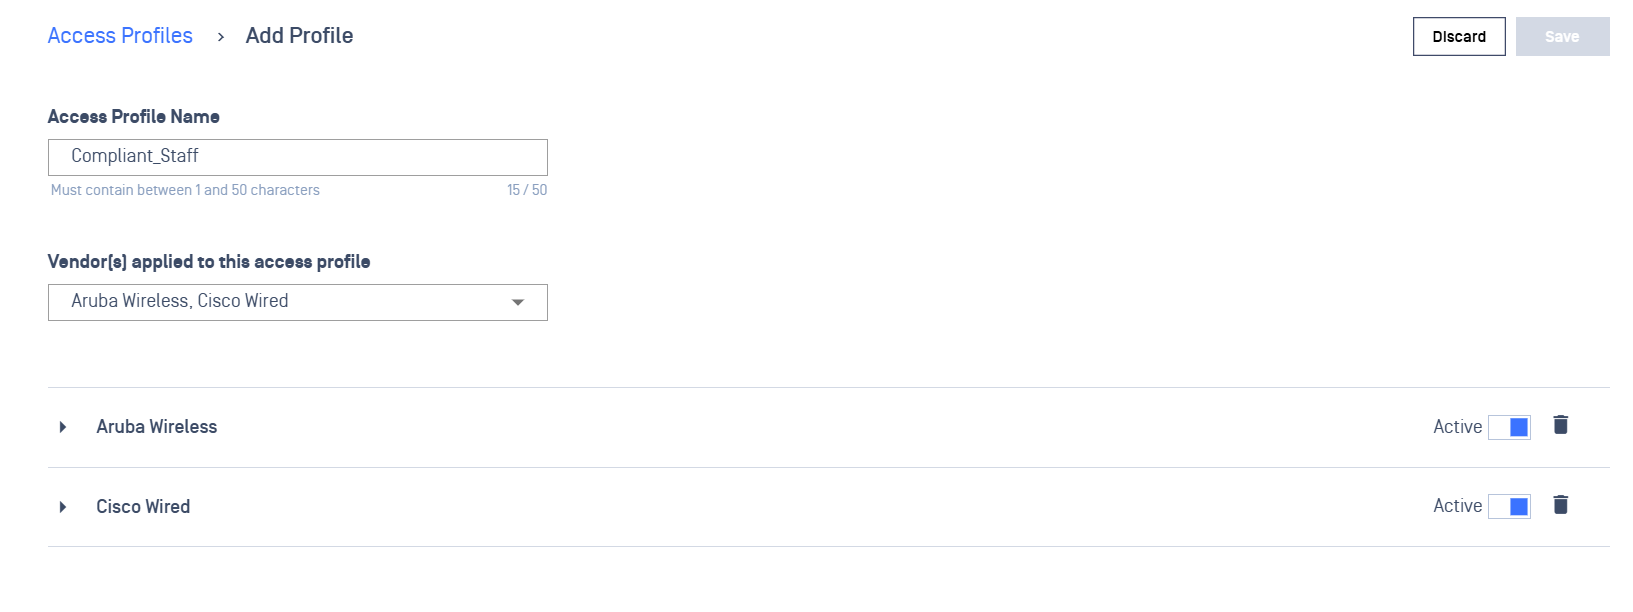
Navigate to RADIUS NAC → Access Profiles.
Click Add Profile.
Fill in the profile details:
Field | What to enter |
|---|---|
Name | A descriptive name for the profile — for example, |
Vendors | The vendor(s) this profile applies to. This determines which attributes you can set. |
Note
Devices that do not match any of the supported vendors will still have a default profile assigned to them, allowing for basic access control and management.
Add Attributes to a Profile
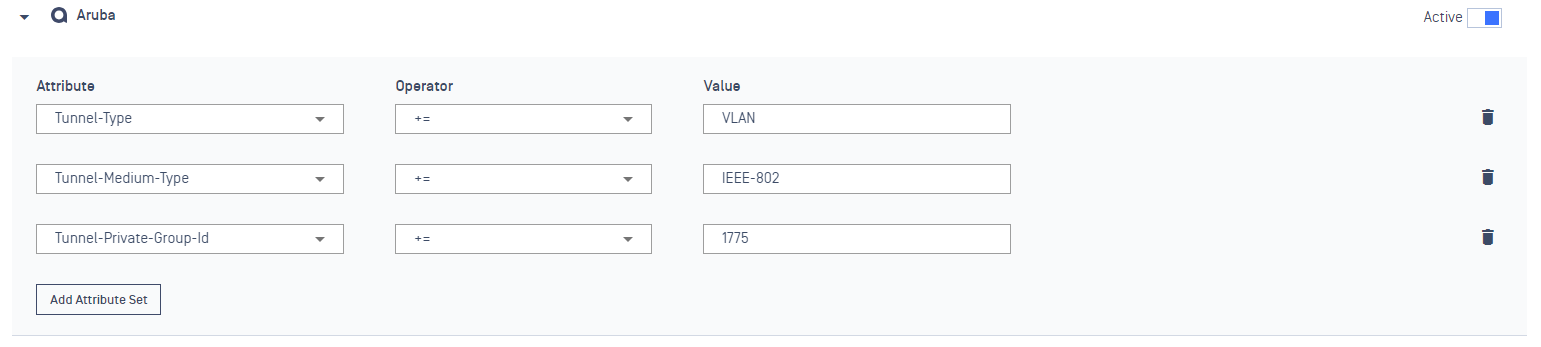
The attributes carry the actual access instruction to your equipment. Vendor profiles include pre-configured attributes and templates tailored to that vendor's requirements.
Open the profile and click Add Attribute Set.
Select an attribute available for the chosen vendor.
Complete the operator and value fields.
Click Save.
Common Attributes by Vendor
Vendor | Attribute | Typical use |
|---|---|---|
Aruba |
| Assign a user role, for example a captive-portal redirect role |
Cisco |
| Pass vendor-specific access instructions |
Cisco |
| Assign a VLAN by ID |
<!-- TODO: Extend this table with the other supported vendors and their commonly used attributes. -->
If your vendor is not listed, see Vendors for how to add a custom vendor and enable its vendor-specific attributes.
Manage Existing Profiles
Add Attribute Set — add further attributes to the profile.
Delete — remove an attribute from the profile.
Toggle — activate or deactivate a profile without deleting it.
Remember to Save after making changes.
Verify the Configuration
Connect a test device that should match a rule assigning this profile.
In RADIUS NAC → Sessions, confirm the device shows the expected Applied Access Profile.
Confirm on your network equipment that the device landed on the intended VLAN or role.
Troubleshooting
The device gets a different profile than expected
A different rule matched first. Rule order matters — see Rules.
The profile is applied but the device does not get the right access
The attributes may not match what your equipment expects. Confirm the attribute and value against your vendor's documentation, and that the correct Vendor is selected on the profile.
The attribute you need is not available
It may be a vendor-specific attribute that must be enabled first. See Vendors.
Related Pages
Rules — which devices receive which profile
Vendors — vendor definitions and vendor-specific attributes
Captive Portal Configuration — the profile used for captive-portal devices