Setup Steps
In My OPSWAT Central Management, navigate to Secure Access > Access Methods > IdP MFA, and Enable IdP MFA

Copy the Entity ID, Single Sign-On Url, and download the IdP Certificate. Then navigate to your Okta Administrator account.
In Okta Admin, go to “Security > Identity Providers“ to setup OPWAT’s Compliance-Based IdP MFA
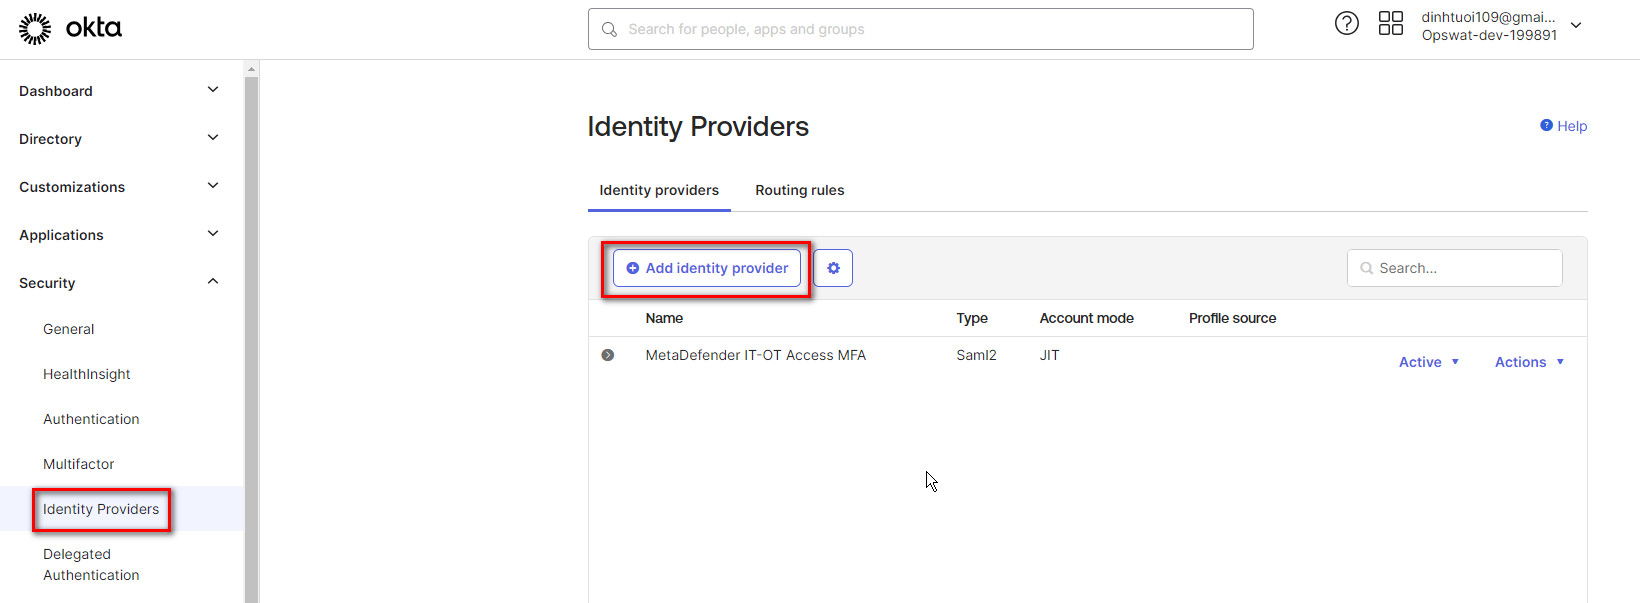
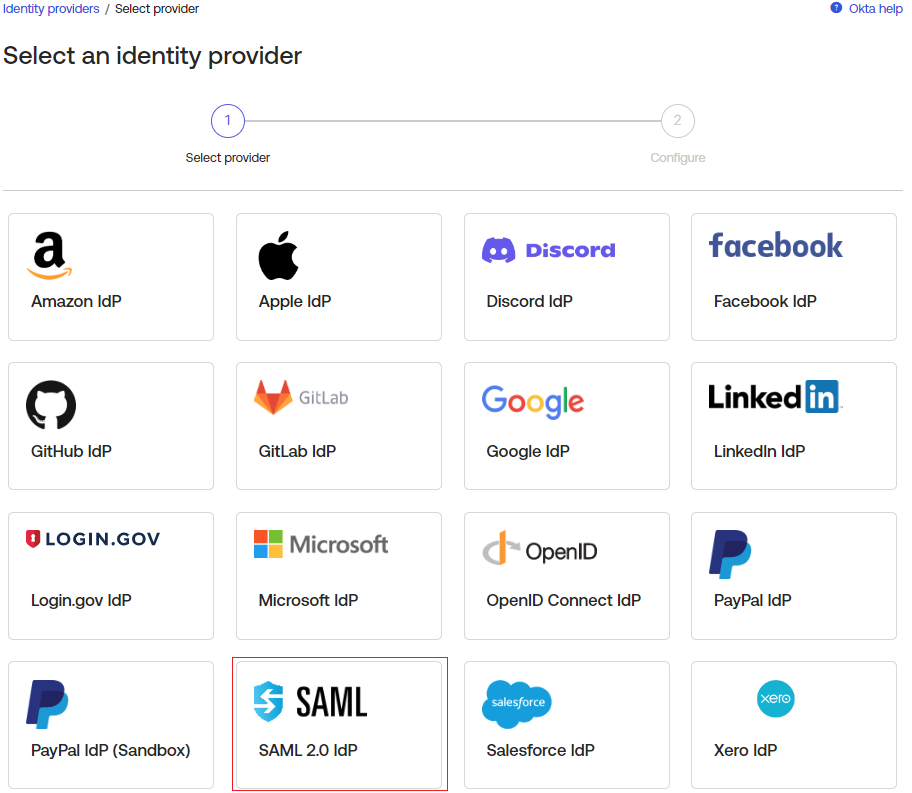
Add Identity Provider, select “SAML 2.0 IdP“ and click "Next" button
Fill in the information with the provided metadata from My OPSWAT Central Management
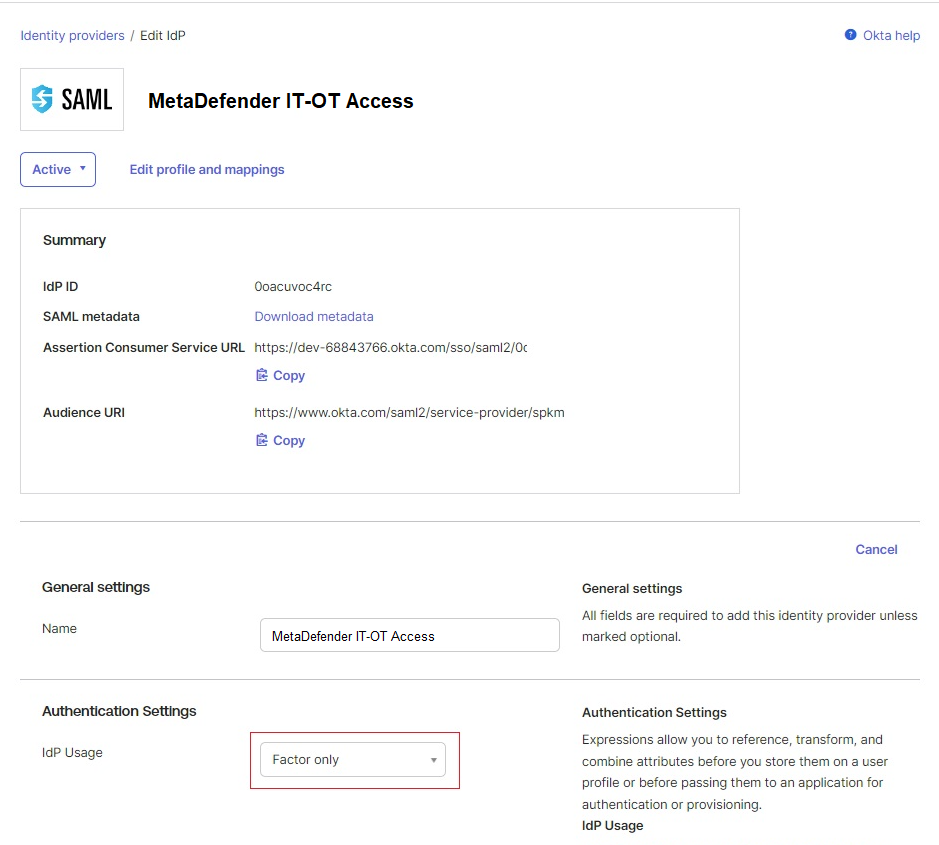
Keep the default configurations in the Advanced Settings
Download the SAML metadata of the new IdP
_
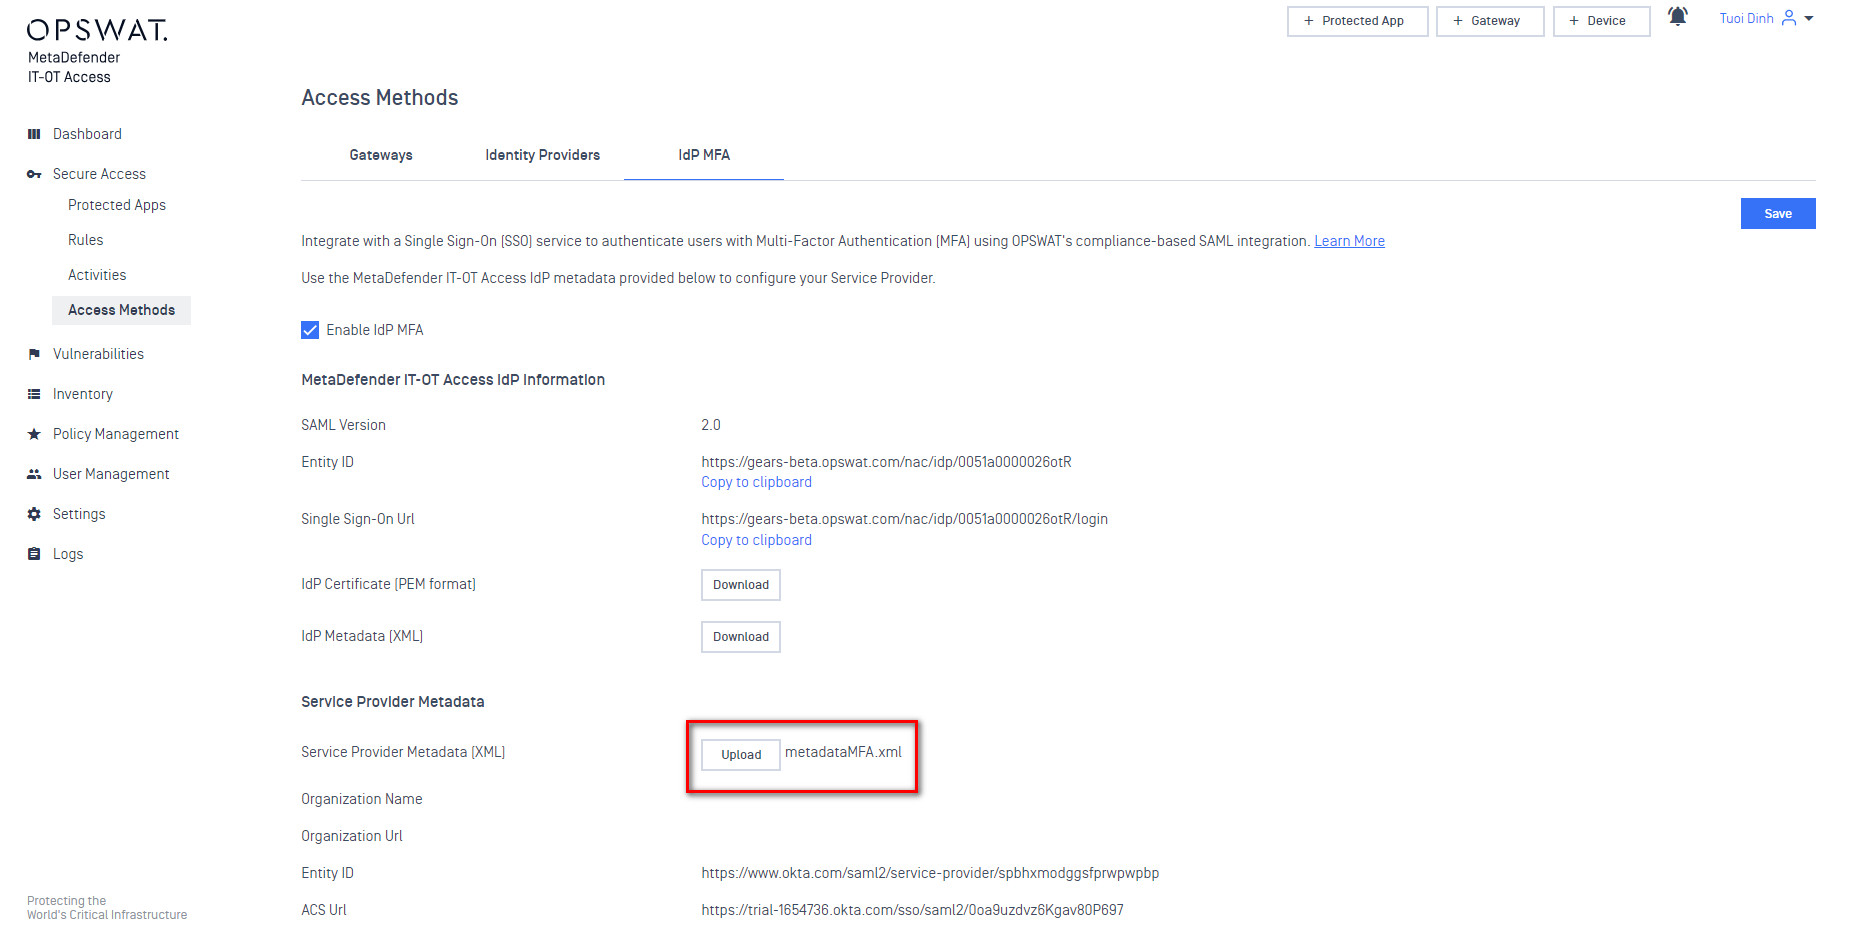
Upload the Okta Metadata in My OPSWAT Central Management and Save
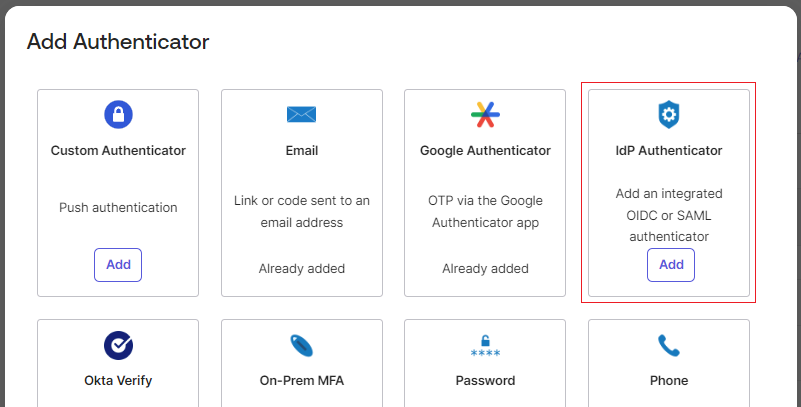
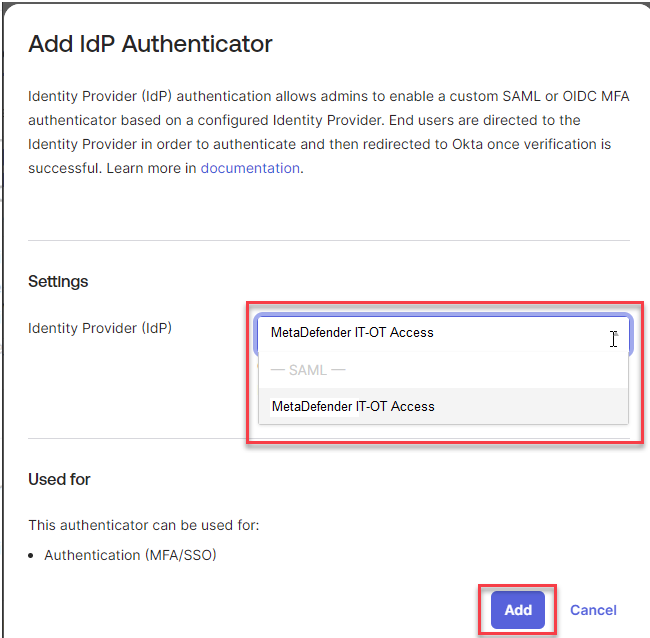
In Okta, navigate to Security > Authenticators > Setup and click "Add authenticator"
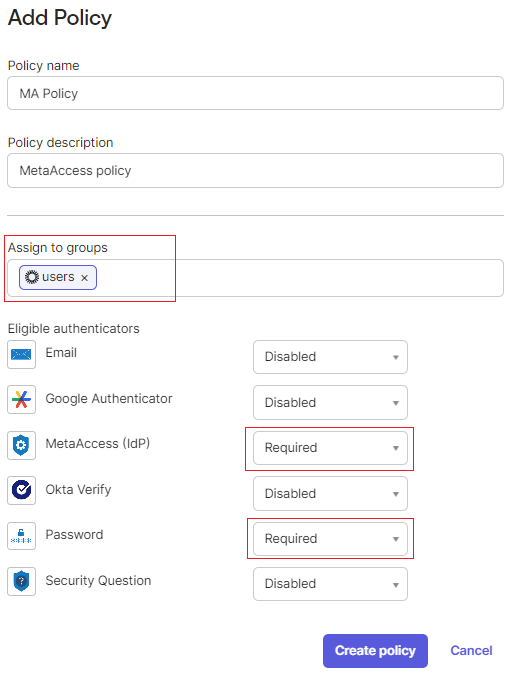
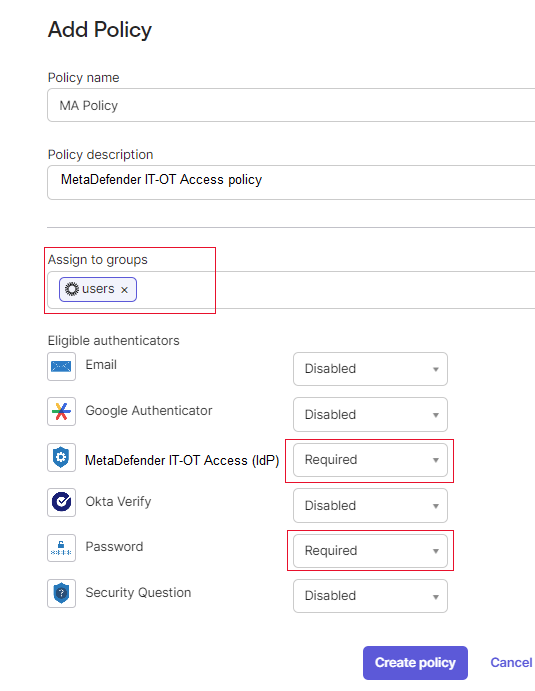
In the Security > Authenticators, select Enrollment tab and add a new My OPSWAT Central Management policy
It's recommended to assign none-admin group in this policy before testing all the configuration and flow.
Need to require "My OPSWAT Central Management (IdP)" and "Password" and disable other authenticators
Keep the default rule
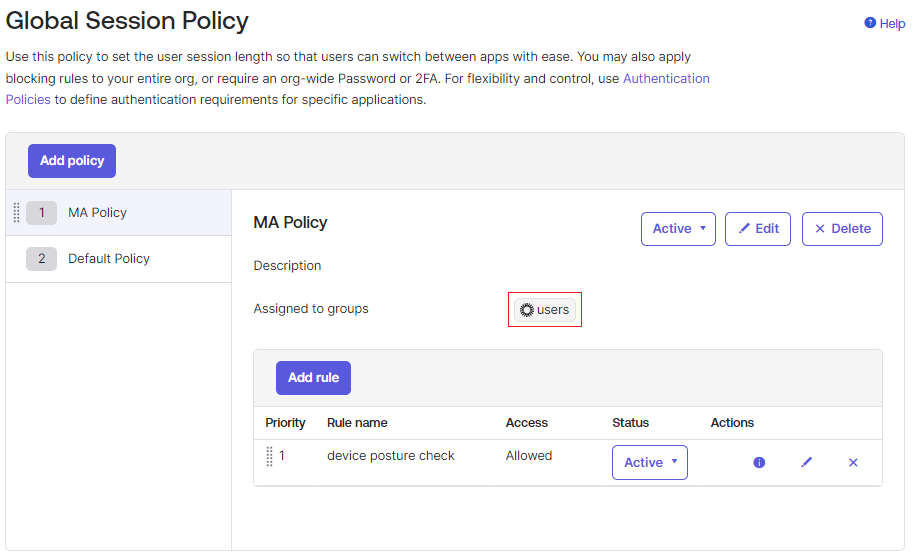
Configure your Global Session Policy.
It's recommended to assign to a none-admin group before testing the flow and policy
It's recommended to require MFA at every sign in $plugin[16ahuz7dkwj]

Test your integration