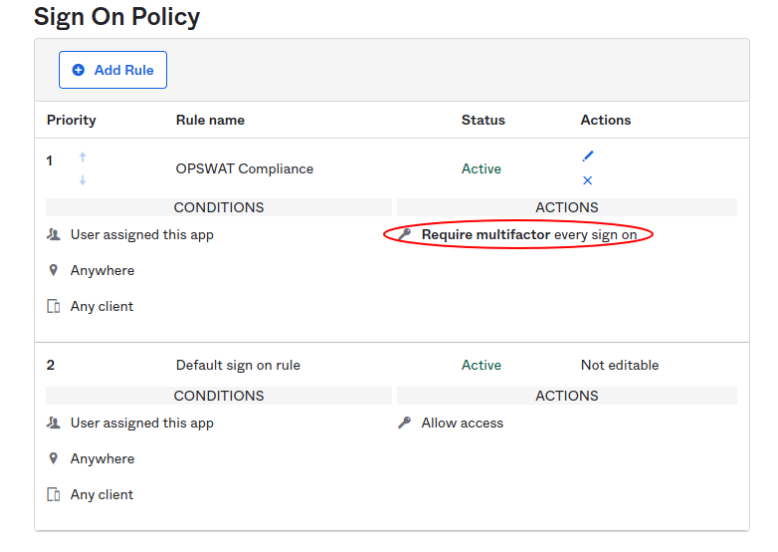
Setup Steps
In My OPSWAT Central Management, navigate to Secure Access > Access Methods > IdP MFA, and Enable IdP MFA
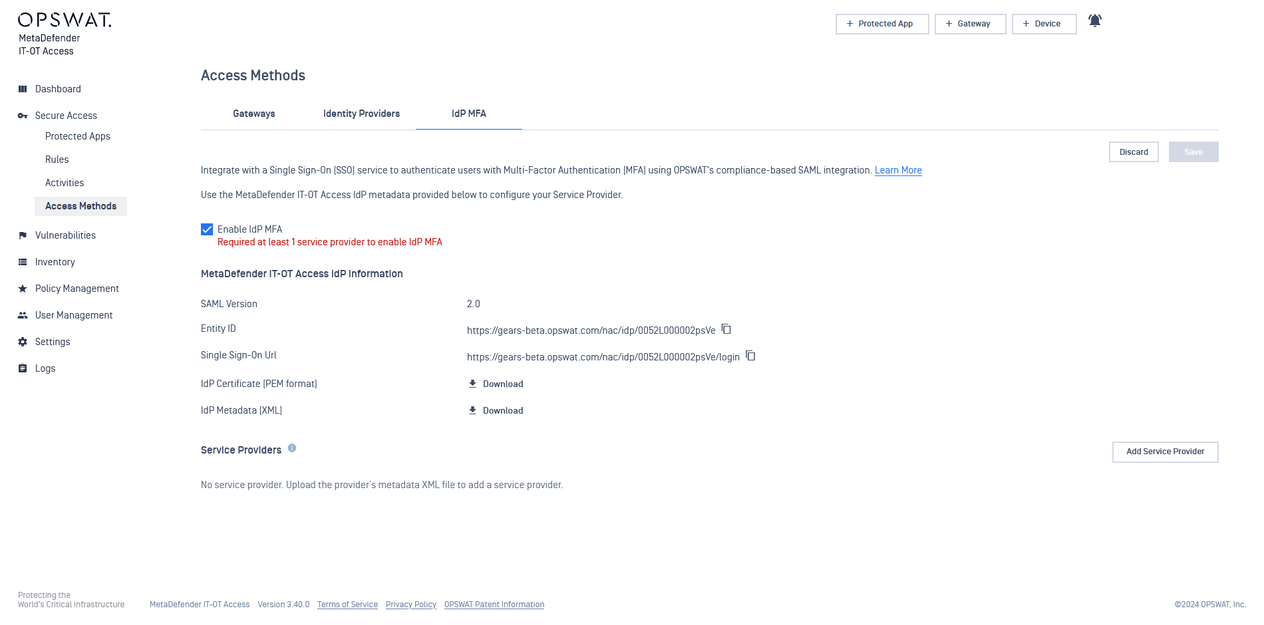
Copy the Entity ID, Single Sign-On Url, and download the IdP Certificate. Then navigate to your Okta Administrator account.
In Okta, go to “Identity Providers“ to setup OPWAT’s Compliance-Based IdP MFA
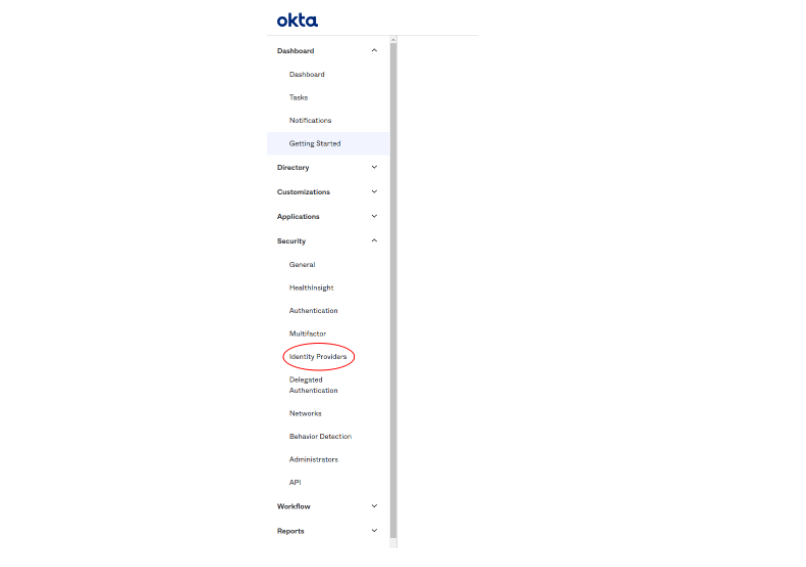
Add Identity Provider, “Add SAML 2.0 IdP“
Fill in the information with the provided metadata from My OPSWAT Central Management
Keep the default configurations in the Advanced Settings, then click “Add Identity Provider“
_
_
Download the SAML metadata of the new IdP
_
Upload the Okta Metadata in My OPSWAT Central Management and Save
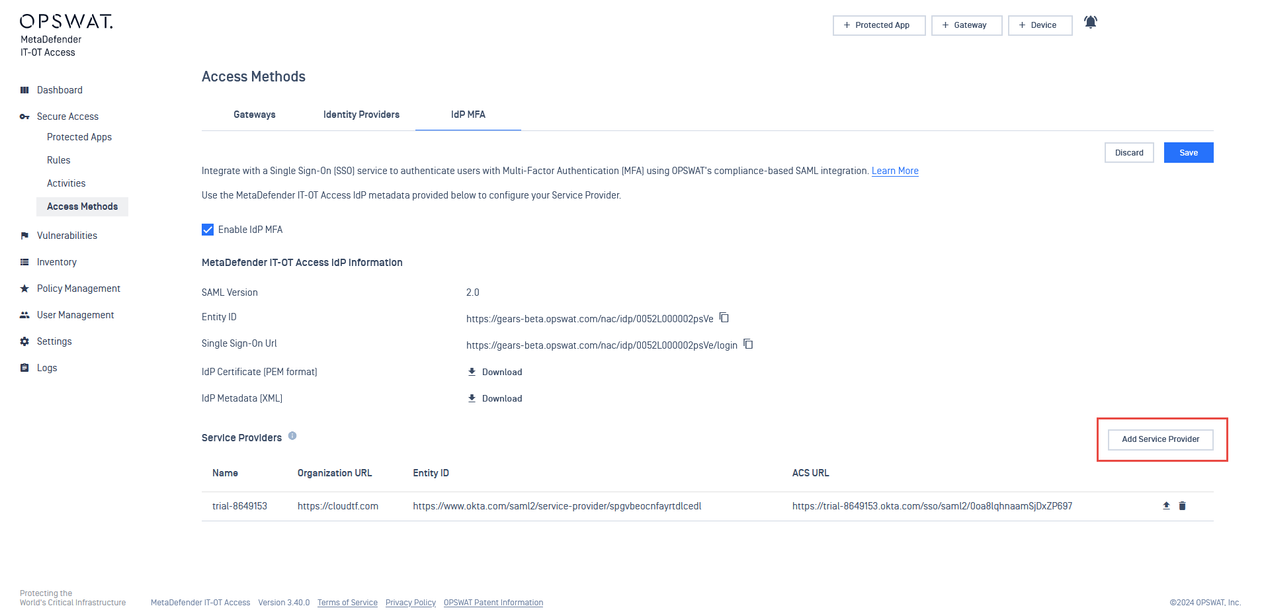
In Okta, navigate to Multifactor and configure IdP Factor to use the newly setup IdP
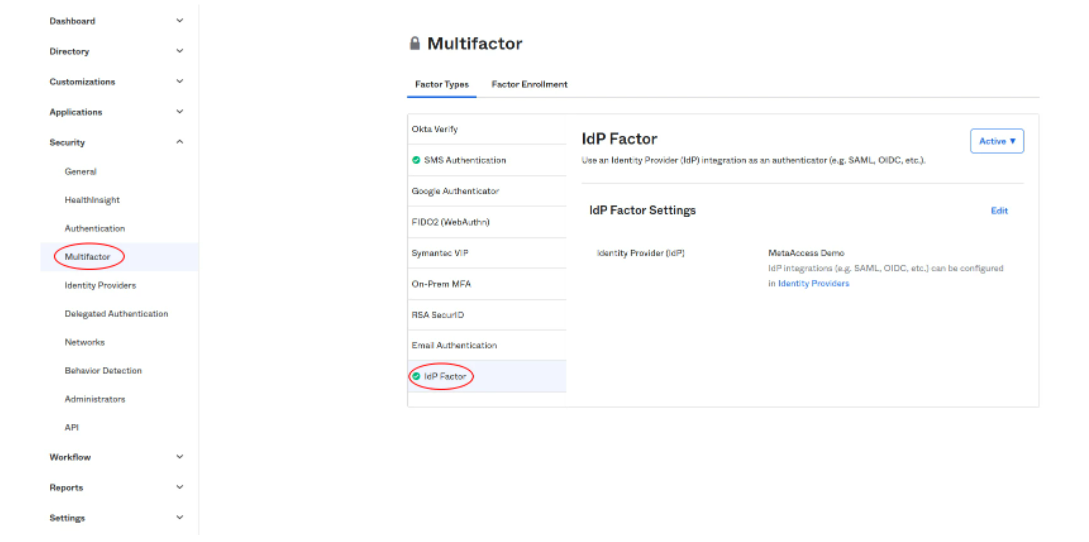
Recommended Settings
It is recommended to enable IdP factor on every sign on attempt for your critical applications.
Inside the Okta admin panel, go to Security → Multifactor.
In the Mutlifactor page, open the Factor Enrollment tab, click Add Multifactor Policy
Create a Multifactor Policy with only the IdP Factor Required and all other factors Disabled
In the Multifactor page, make newly created Multifactor Policy the highest priority by moving the policy to the first position in the policy list
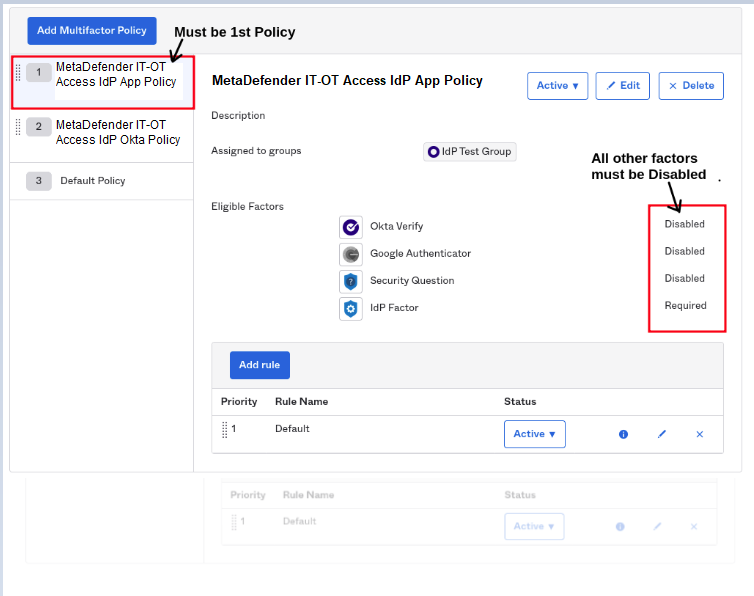
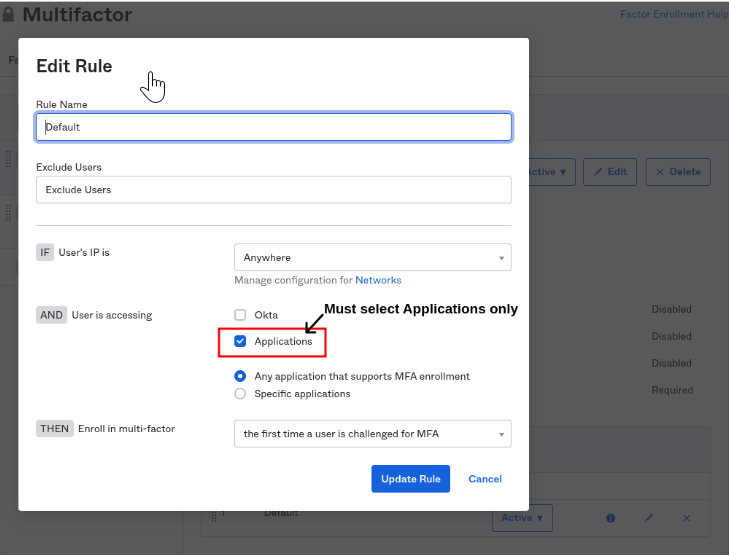
In the newly created Mutlifactor Policy, click the pencil icon on the Default rule.
In the Default rule dialog, select only Applications under “User is accessing” section.
Back inside the Okta admin panel, go to your applications and select an application.
Select the Sign On tab
Scroll down to Sign On Policy and Add Rule
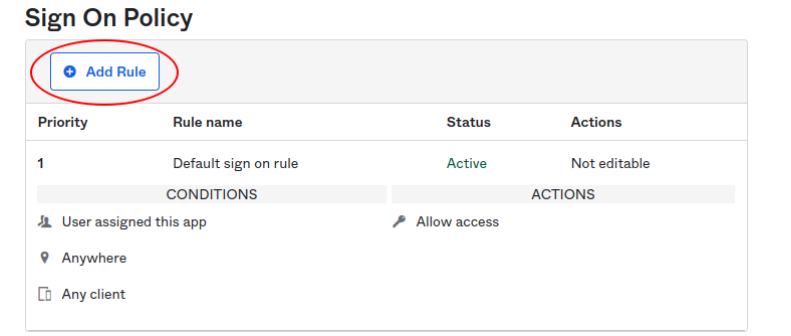
Configure your policy with the following Access settings, and Save
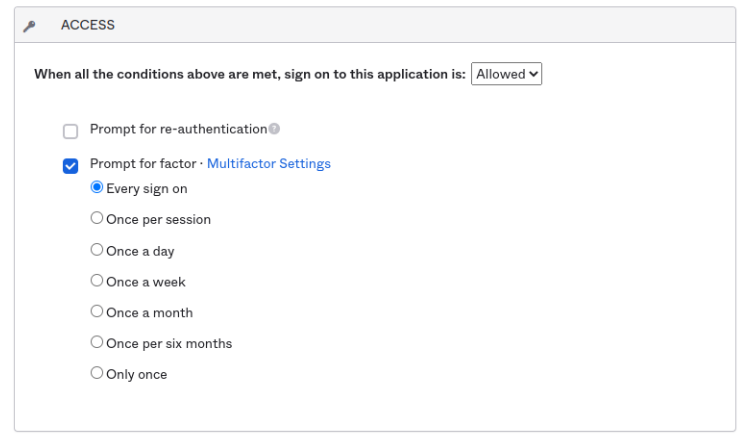
Your critical application is now configured to require IdP MFA on every sign on