
My OPSWAT Central Management can be easily integrated with an existing G-Suite & AWS SSO integration to ensure that a device is compliant with the organization's security policy before it is granted access to AWS Console. This ensures that the user is not only authenticated by G-Suite, but also a device the user uses to access SaaS applications tested for risks and vulnerabilities such as infections or outdated operating systems, BEFORE it access an organization's cloud services.
To get started with implementing My OPSWAT Central Management integration to enforce device posture check before granting a device to access AWS with G-Suite service.
After configuring SSO, you should test it out to make sure that SSO works as expected.
Now it's the time you can integrate My OPSWAT Central Management with your G-Suite & AWS SSO by following the below steps. You can learn more details for each step here at Configuration.
Step 1. Enable Access Control on your My OPSWAT Central Management account
Log into the My OPSWAT Central Management console.
Navigate to Secure Access > Protected Apps
Check "Enable Secure Access".
Click SAVE.
Navigate to Integrations and then Device Identity, and enable Enable cross-domain API integration at port xxxx
Step 2. Add protected applications with IdP Method on My OPSWAT Central Management
Log into G-Suite admin console
Go to Apps > Web and mobile apps then click on your application. For example: AWS
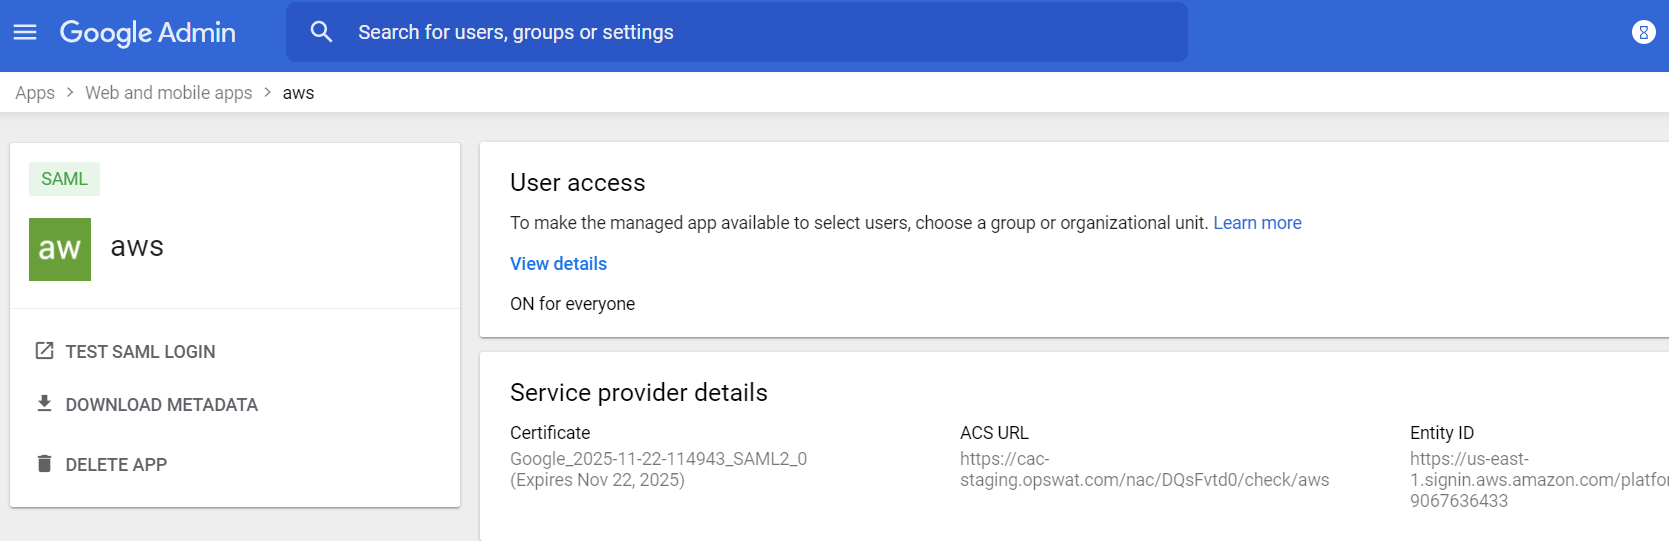
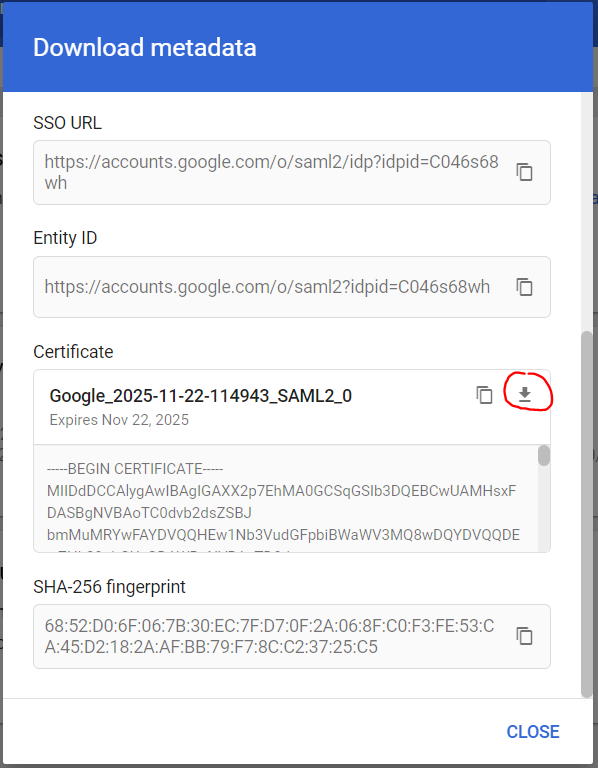
Download G-Suite certificate: the next step is importing an G-Suite certificate to My OPSWAT Central Management. This allows My OPSWAT Central Management to verify users signing though a trusted G-Suite. Download the certificate by following these steps:
Click on Download Metadata on the left and click the download button to download the certificate
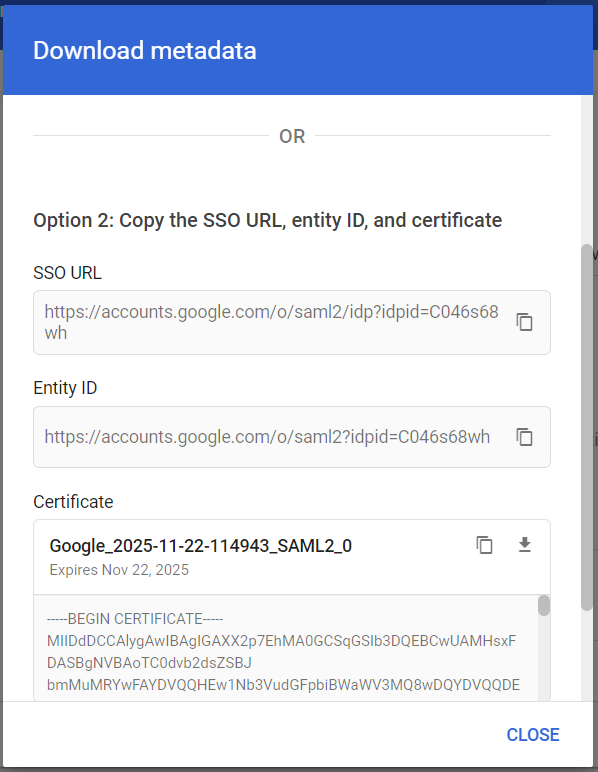
Collect Idp Login URL
In the Download Metadata popup, scroll down and copy SSO URL
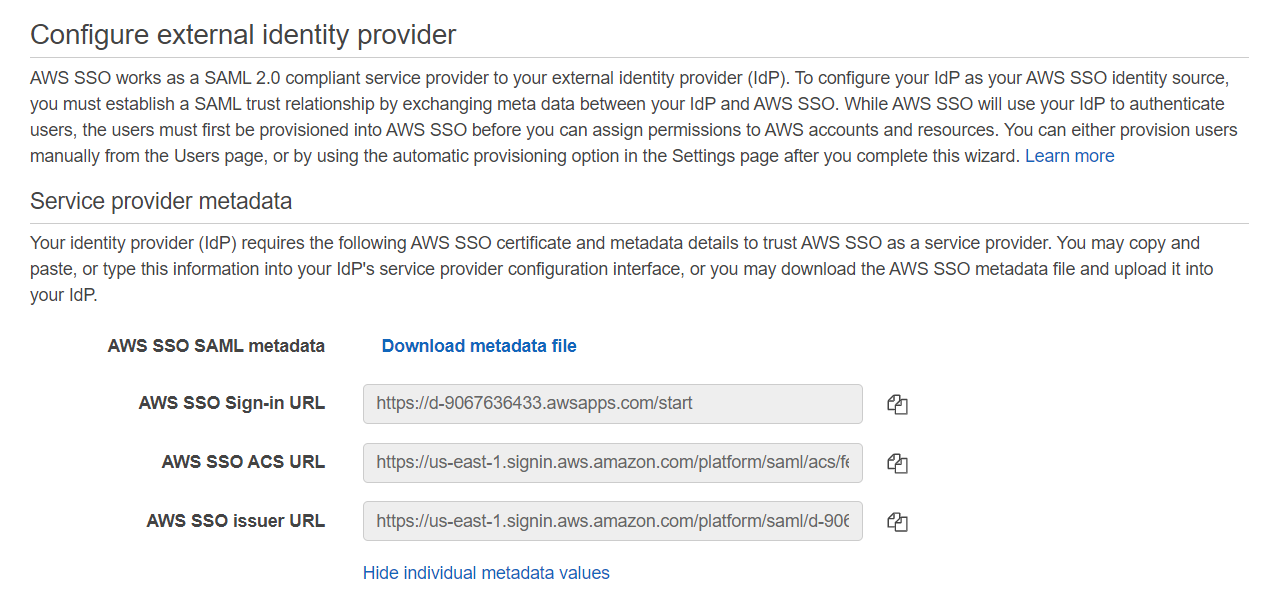
Collect AWS SSO Sign-in URL
Login to your AWS console then go to AWS SSO > Settings then click on the Change link in the section **Identity source
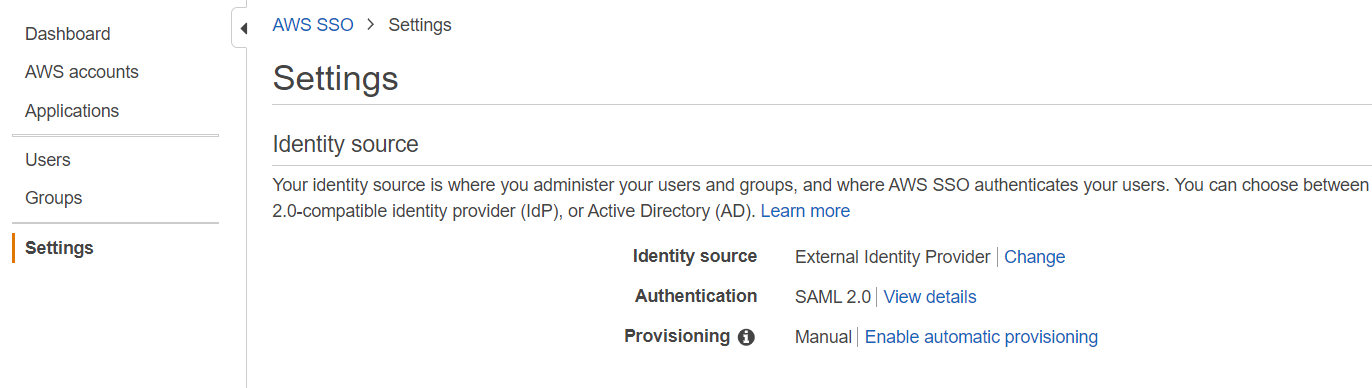
Show individual metadata values then copy **AWS SSO Sign-in URL
**
Add AWS application on My OPSWAT Central Management:
Log into the My OPSWAT Central Management console.
Navigate to Secure Access > Protected Apps
Click Add Protected Application then choose IDP METHOD option
Choose option Add new IDP, enter name and upload the certificate got in step 2.3. Then Continue
Enter required field
Application_:_ application name, for example: aws
IDP: choose the IDP created in the previous step
IdP Login URL: fill with the link which you have from Step 2.5
App ACS URL: fill with the link which you have from Step 2.4
Access Mode: pick an access mode you prefer. See details on the access modes at Add Protected Applications with IdP Method.
Enter your pin then click SAVE
After saving your changes successfully, it shows a popup, copy the URL My OPSWAT Central Management generated there and download Opswat Certificate.
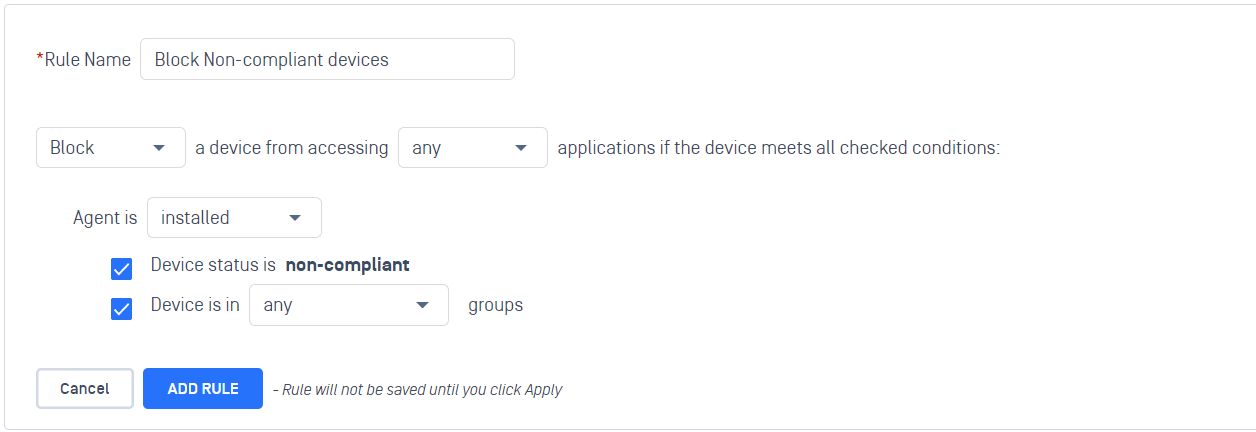
Configure Access Rules. This step can be skipped if you have done this step in the past or you can use the default rules
Navigate to Secure Access > Rules
Click "ADD NEW RULE"
With a new access rule, you need to specify how you would like to block/allow access a device from the application
Rule name: a rule name, for example Block non-compliant devices
Action: Block or Allow
Configure conditions to do the action. Details at Configure Access Rules
Click ADD RULE
Step 3. Update Applications settings on G-Suite
Log into G-Suite admin console
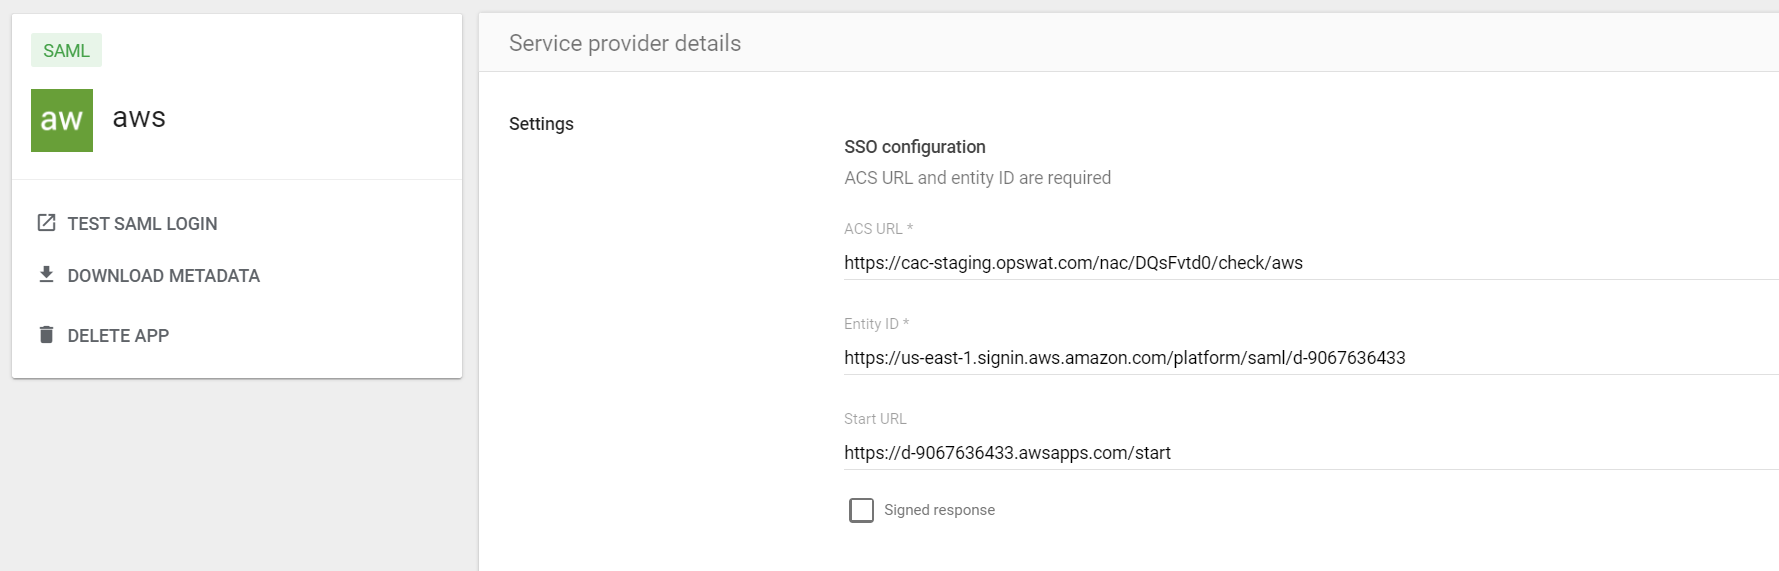
Navigate to your application
Click to section Service provider details then replace the ACS URL with the link got in step 2.7
Click Save
Step 4. Configure SSO settings on AWS SSO
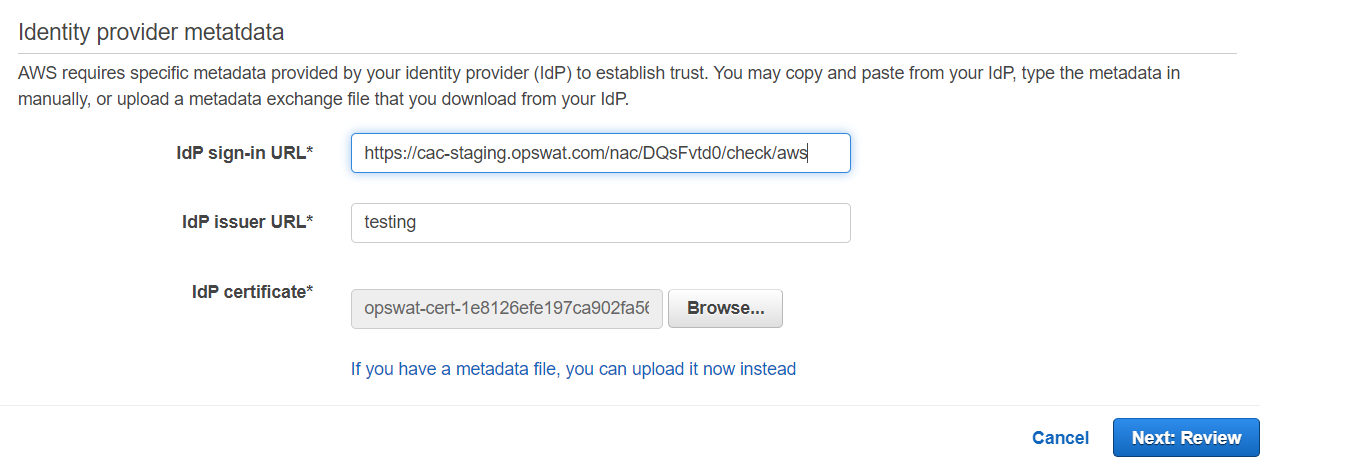
Login to your AWS console then go to AWS SSO > Settings then click on the Change link in the section Identity source
Go to the section Identity provider metatdata
Fill IdP sign-in URL with the URL link got in step 2.7
Upload OPSWAT certificate got in step 2.7 to IdP certificate
Click Next Review
Step 5: Test your integration
Follow guideline at Test Your Integration to verify if it works as your expectation.