My OPSWAT Central Management can be easily integrated with an Microsoft Entra ID & AWS WorkSpaces integration to ensure that a device is compliant with the organization's security policy before it is granted access to AWS WorkSpaces. This ensures that the user is not only authenticated by Microsoft Entra ID, but also a device the user uses to access SaaS applications tested for risks and vulnerabilities such as infections or outdated operating systems, BEFORE it accesses an organization's cloud services.
Follow below steps to integrate My OPSWAT Central Management with your Microsoft Entra ID & AWS WorkSpaces.
Step 1. Complete the prerequisites
Complete the following prerequisites before integrating with My OPSWAT Central Management:
Create a WorkSpace. For more information, see the AWS WorkSpaces documentation: https://docs.aws.amazon.com/workspaces/
Configure your Microsoft Entra ID IdP to establish a SAML‑based trust relationship with AWS WorkSpaces. For detailed configuration steps, refer to the Amazon WorkSpaces SAML Authentication Implementation Guide: https://d1.awsstatic.com/workspace-saml-guide.pdf
Step 2. Get Information From Microsoft Entra ID Saml Application
Log in to the Microsoft Entra console.
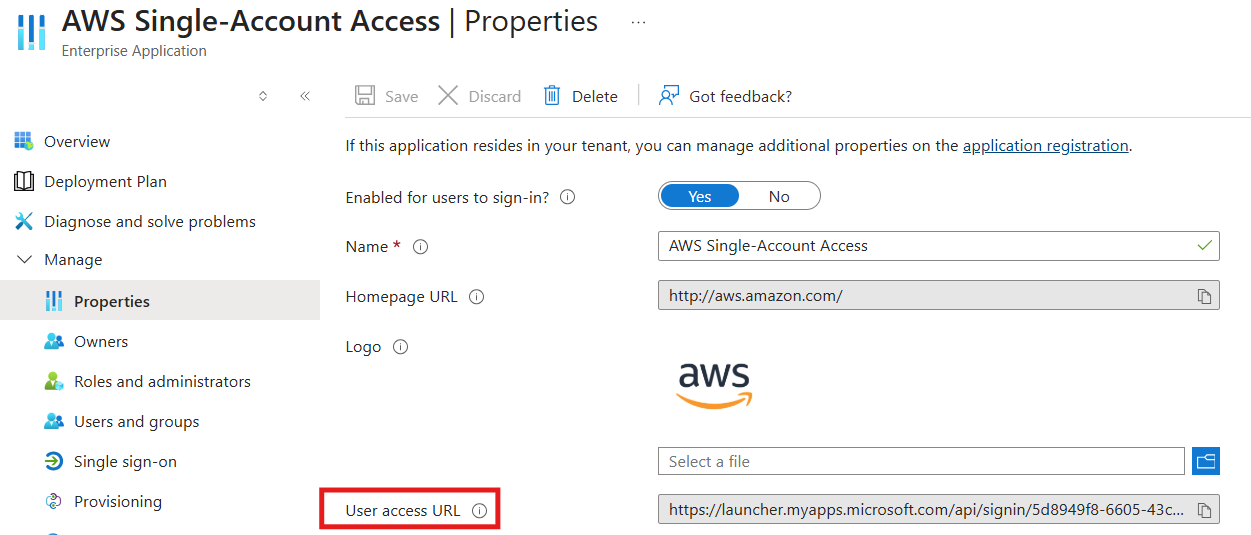
Navigate to Enterprise Application > Your Application
Navigate to the Properties tab and copy the User access URL
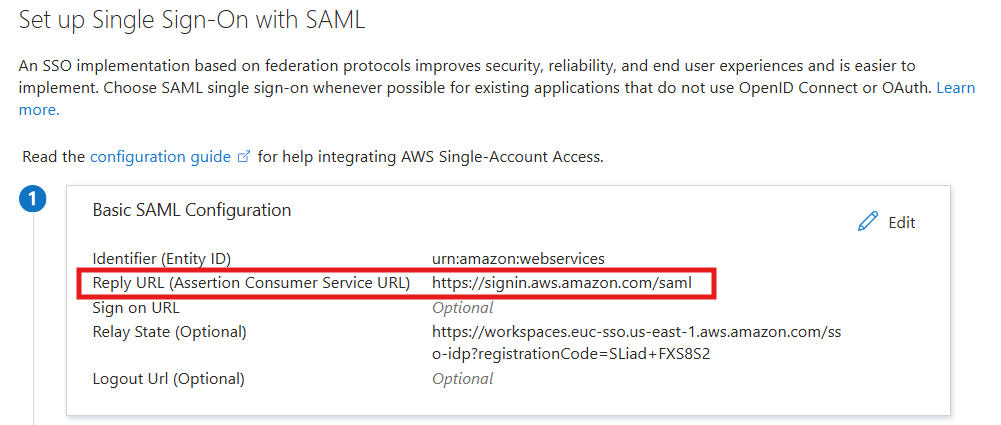
Navigate to the Single Sign-on tab, copy the Reply URL
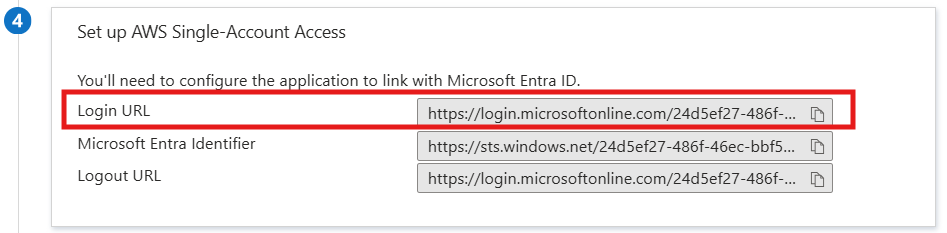
Copy Login URL
Step 3. Add application and configure Access Rules on My OPSWAT Central Management
Log in to the My OPSWAT Central Management console.
Navigate to Secure Access > Protected Apps
Check "Enable Secure Access".
Click SAVE.
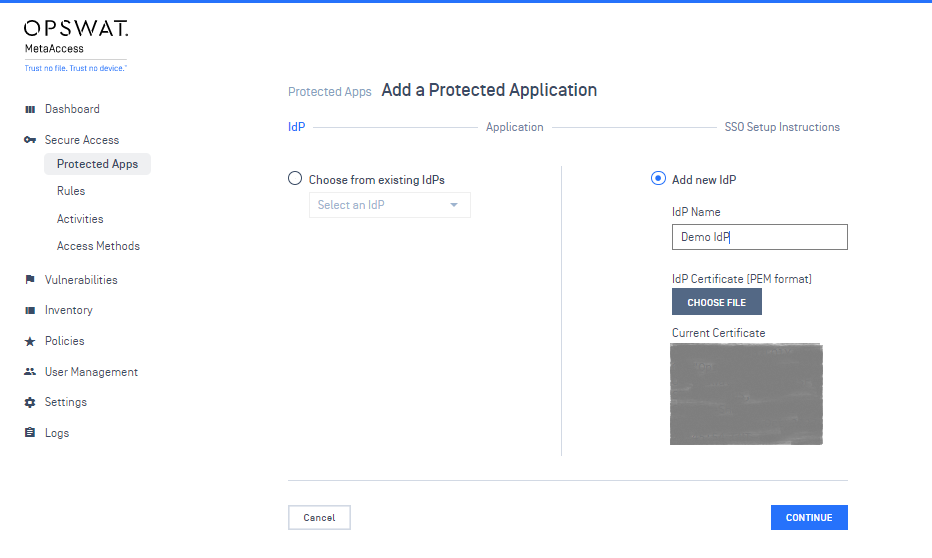
Click Add Protected Application then choose IDP METHOD option
Choose option Add new IDP, enter the name, and upload the certificate got in step 2.3. Then click Continue
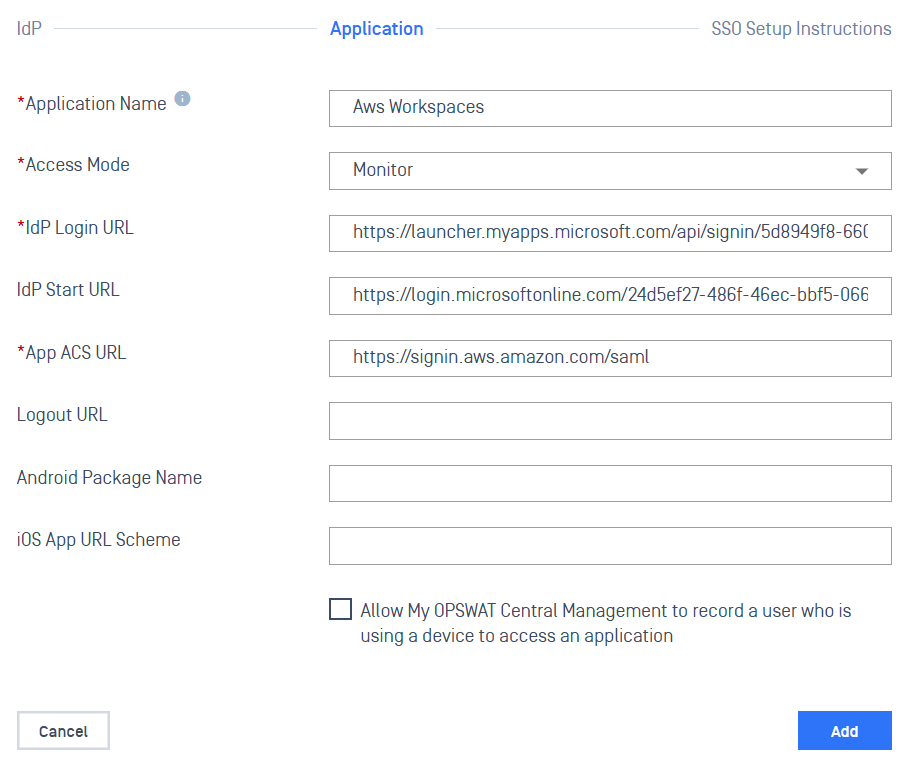
Enter the required fields
Application: application name, for example: AWS Workspaces
IdP Login URL: fill in the link that you have from Step 2.3 (User Access URL)
IdP Start URL: fill with the link that you have from Step 2.5 (Login URL)
App ACS URL: fill with the link that you have from Step 2.4 (Reply URL / ACS URL)
Access Mode: pick an access mode you prefer. See details on the access modes at Step 2. Add protected applications with IdP Method
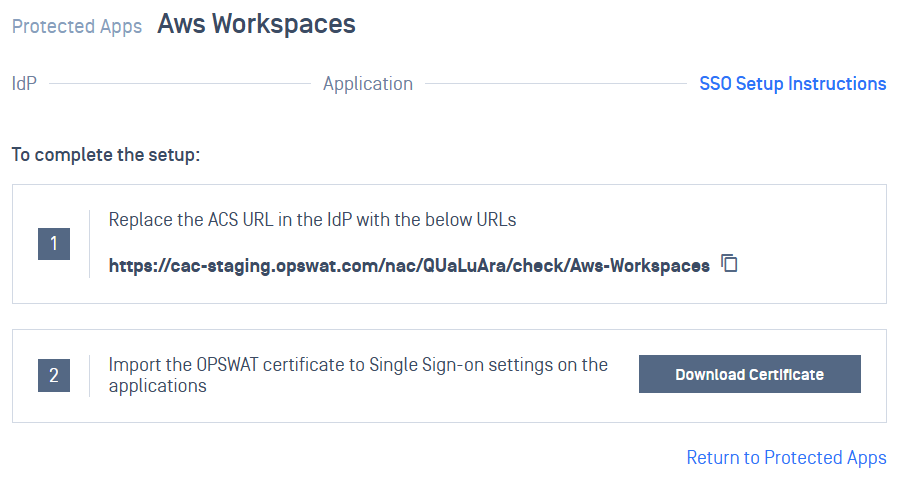
After saving successfully, a SSO setup instruction will be shown, copy the ACS URL My OPSWAT Central Management generated there and download the OPSWAT Certificate. Note that this information can be found in the protected app's details later.
Step 4. Update Applications settings on Entra ID
Log into Entra Portal as Administrator, then go to your application
Navigate to your application
Select Single sign-on
Click the edit icon (pencil icon) on Basic SAML Configuration section
Replace Reply URL with the My OPSWAT Central Management URL which you got from Step 3.6
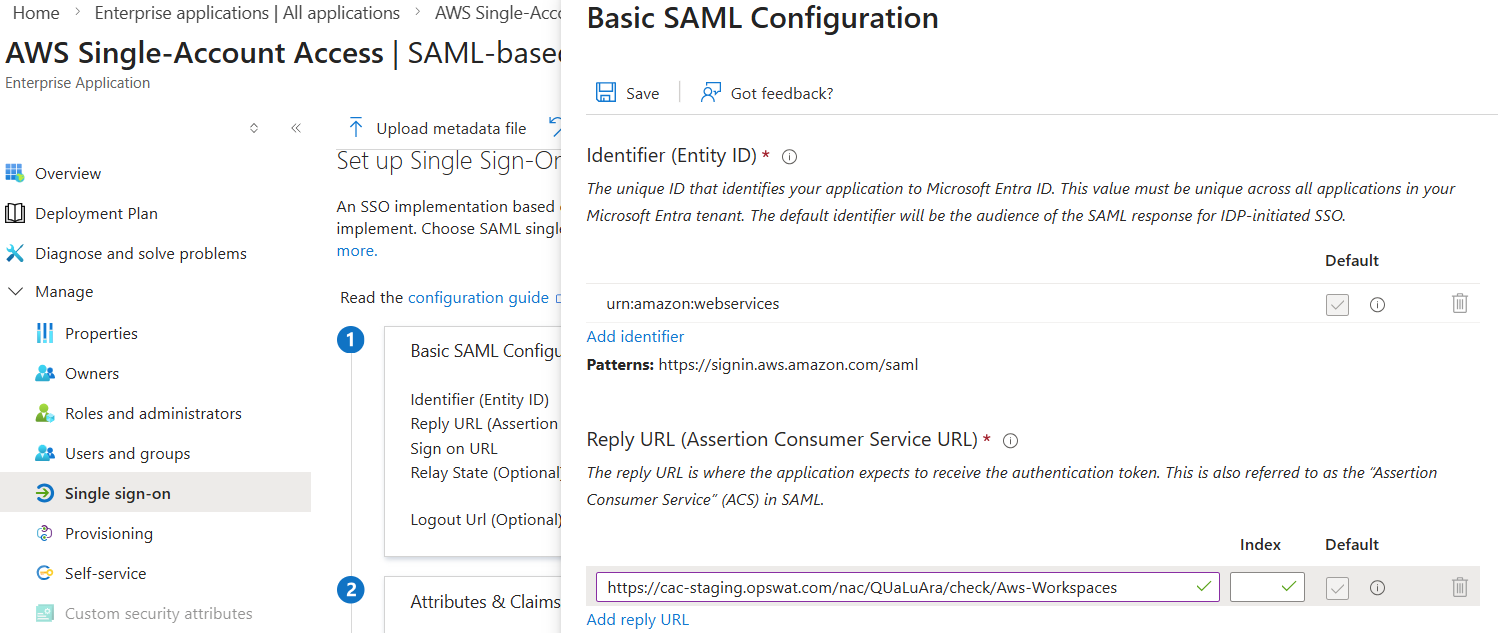
Click Save. Note: It may take some time for Entra ID to apply your changes.
Step 5. Configure SSO setting on AWS Identity Providers
Open the certificate from Step 3.6 with notepad, remove all the break lines, then copy the content only. For example:
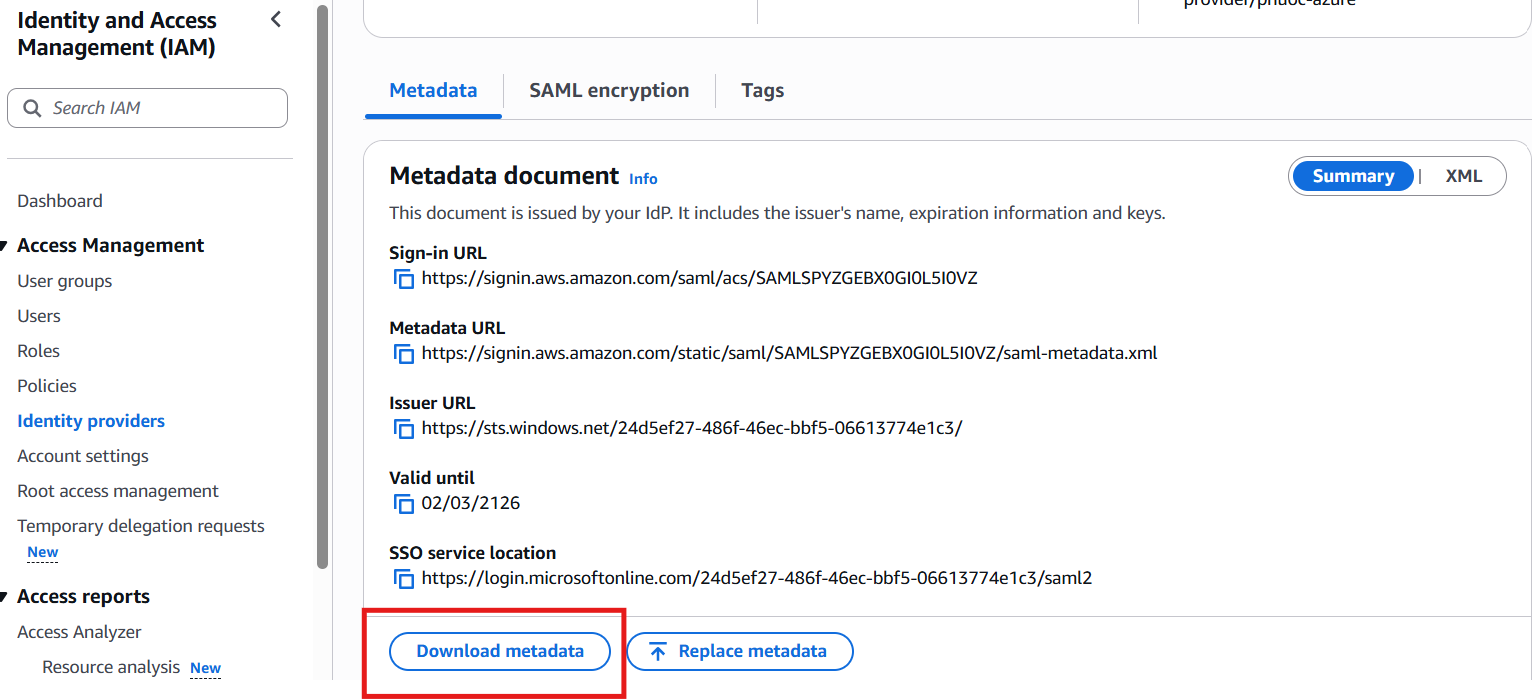
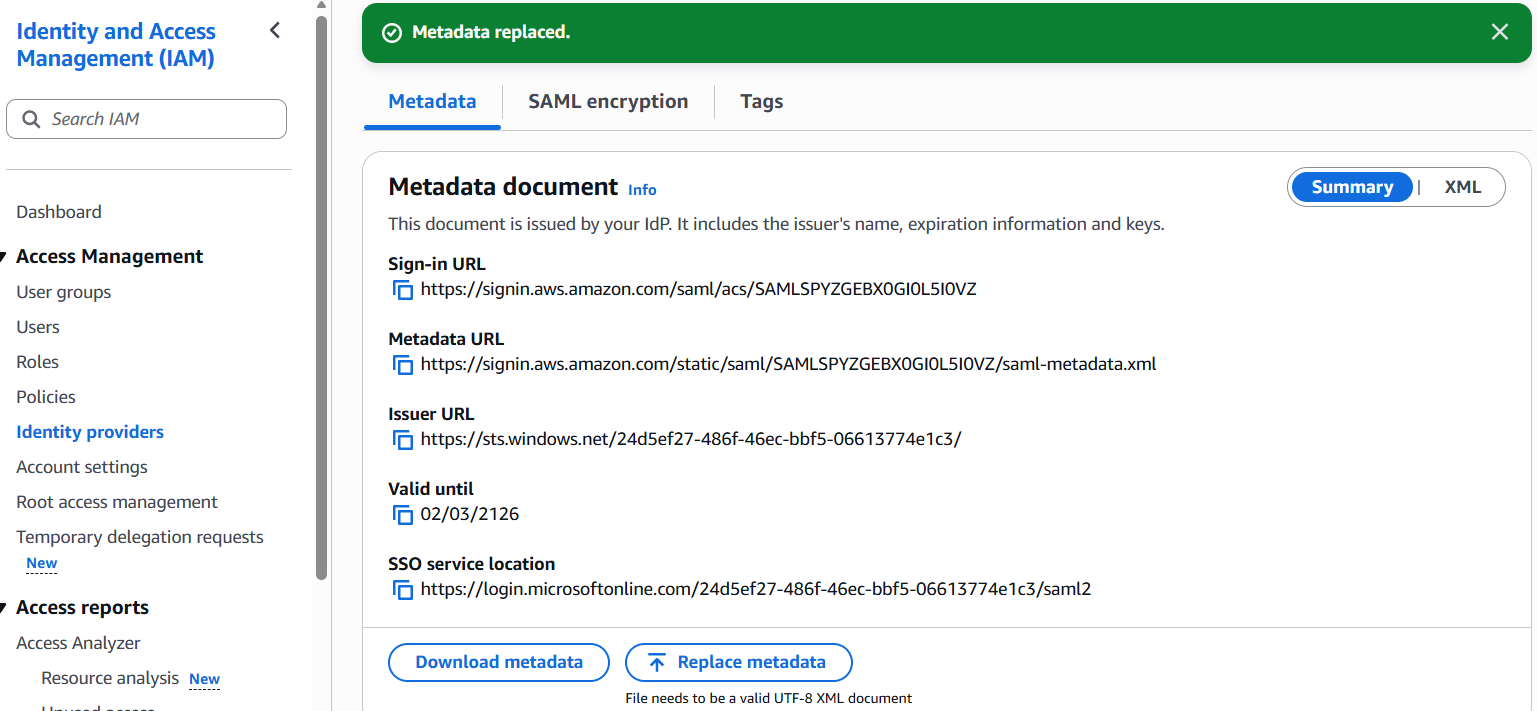
Login to your Aws Account. Navigate to IAM > Identity providers, then choose your Identity provider.
Download the metadata
Open the metadata file using Notepad and update every certificate value (in the
<ds:X509Certificate>and<X509Certificate>tags) with the one provided in step 5.1. You must update all certificate entries; otherwise, you will receive the error: "No valid roles associated with the account."Replace metadata with the updated file
DONE! CONGRATULATIONS. Log in as normal to test your integration and verify if it works as expected.