This guide explains how to turn on BadUSB protection in My OPSWAT Central Management and how to read the results.
This features applies to Windows Endpoints and Windows Kiosks that are managed by My OPSWAT Central Management and have Peripheral Media Protection enabled.
What BadUSB Protection Does
Most USB security checks look at the files on a drive. BadUSB attacks work differently: the danger is the device itself.
A USB stick can carry firmware that makes Windows see it as a keyboard and type commands the moment it is plugged in. A charging cable can hide a radio. A memory stick can register itself as a network adapter and quietly reroute traffic. Nothing on the device has to look like malware for any of this to work.
BadUSB protection inspects the peripheral itself, including how it identifies to the operating system, what it claims to be, and how it behaves on connection. It reports anything suspicious as a device threat, separately from file scanning results.
Please Note BadUSB protection does not replace file scanning. A single session can produce both file findings (malware, data loss, sanitization) and device findings (BadUSB). My OPSWAT Central Management keeps the two on separate tabs so you can tell them apart.
BadUSB Category and Status
Every device finding has a Category (what kind of threat it is) and a Status (how certain the detection is).
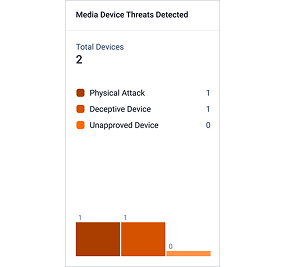
Category | What It Means | Example Attacks |
|---|---|---|
Deceptive Device | The peripheral presents itself as something it is not | Network adapter spoofing; combined keyboard and storage attack; malicious charging cable |
Physical Attack | The peripheral tries to act directly on the machine it is plugged into | Malicious keyboard impersonation; keystroke injection; BadUSB firmware replacement |
Unapproved Device | The peripheral is not on the list of devices you allow | Unapproved peripheral device |
Status | What It Means | What To Do |
|---|---|---|
DETECTED | The attack pattern was confirmed | Treat as an incident: identify the device from Session Details and the person who used it |
SUSPECTED | Indicators were found but the evidence is not conclusive | Review the risk description and the hardware details before deciding |
NOT DETECTED | The check ran and found nothing | No action |
Turn On BadUSB Protection
BadUSB protection is configured per policy, so it applies to every device group that policy is assigned to.
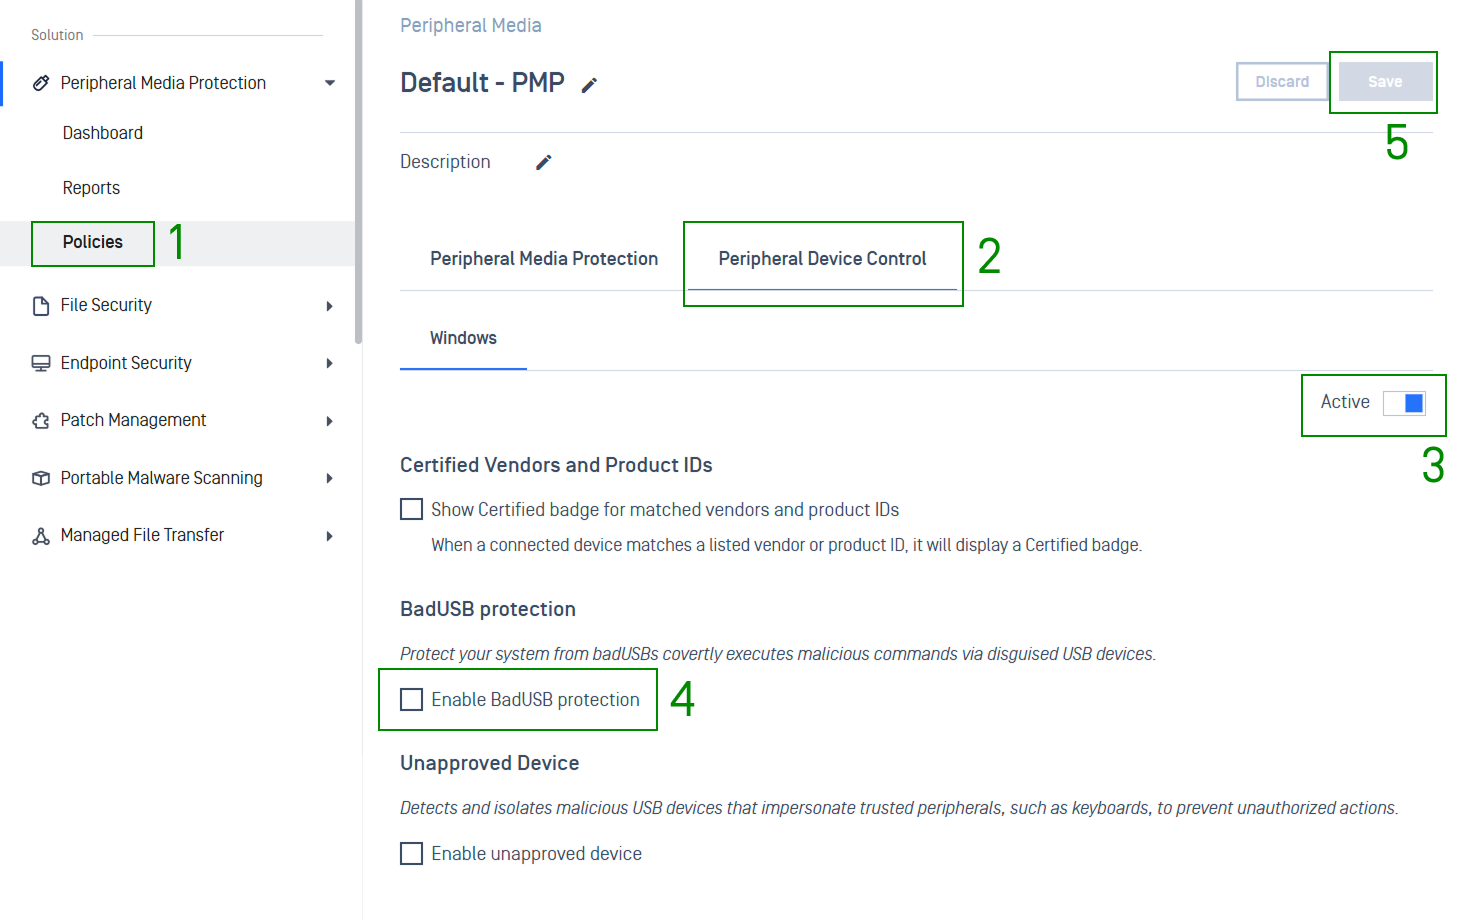
Go to Peripheral Media Protection > Policies. Open the policy that is assigned to the group you want to protect, or select Create New Policy
Open the Peripheral Device Control tab, then the Windows sub-tab
Switch the tab toggle from Inactive to Active
Select Enable BadUSB protection
Optionally select Enable unapproved device to detect and isolate peripherals that impersonate trusted devices such as keyboards, and Show Certified badge for matched vendors and product IDs to mark devices you have already approved
Select Save. The change reaches the endpoints at their next sync
Please Note Peripheral Device Control is available for Windows only. The macOS sub-tab under Peripheral Media Protection is unaffected by these settings.
BadUSB Reports
The Reports module is designed as a drill-down experience, letting you move from high-level aggregates down to the exact attack on a specific device:
Drill Down Path | What You See |
|---|---|
Go to Peripheral Media Protection > Reports |
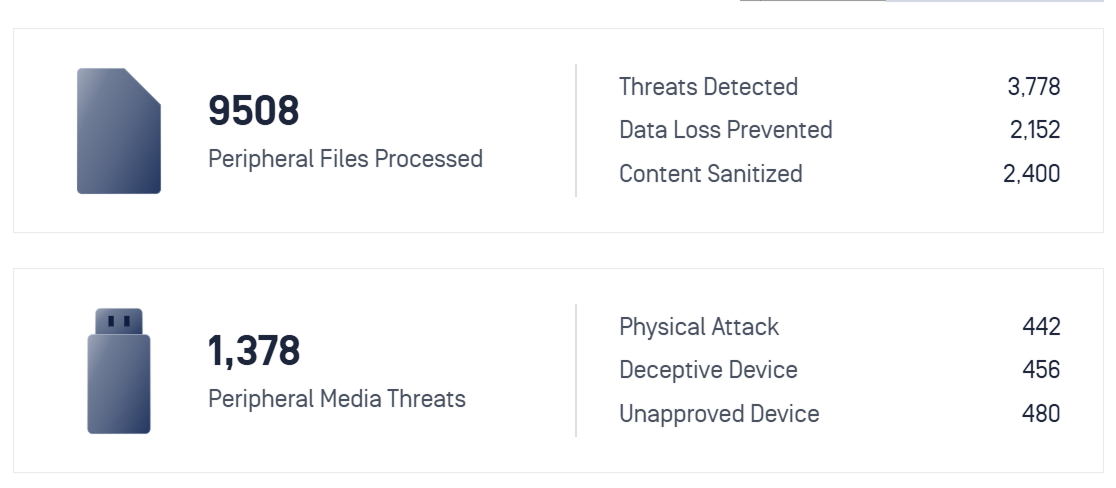
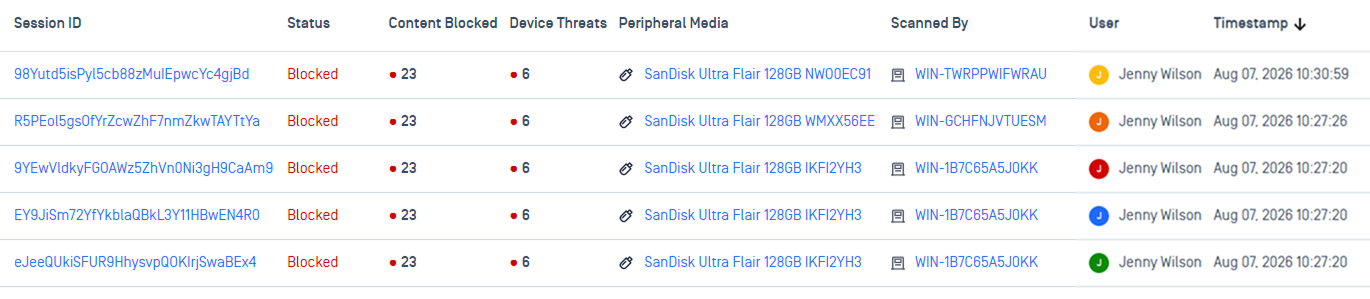 |
Click any Session ID to open the full report |
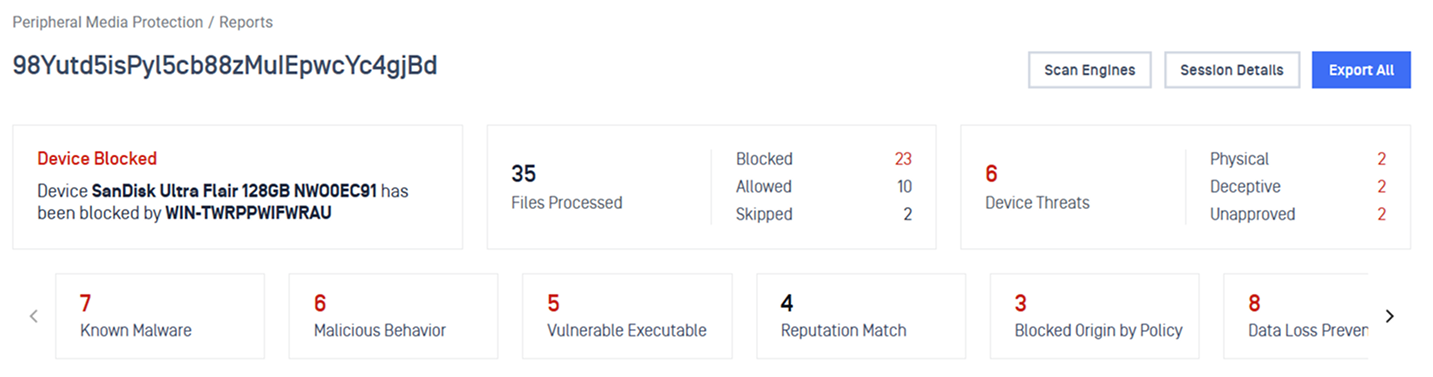
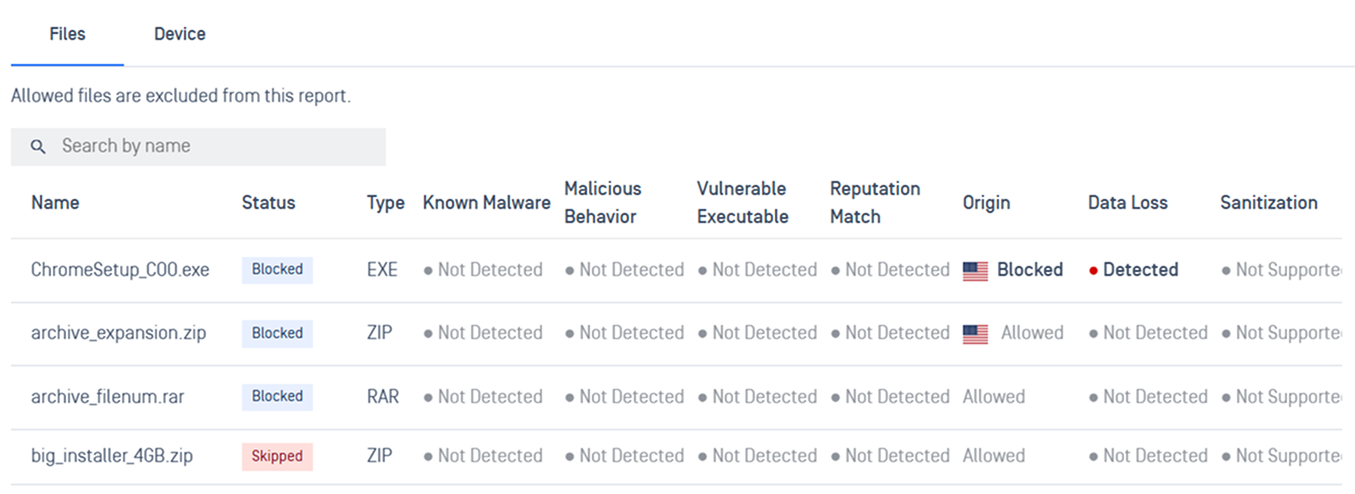
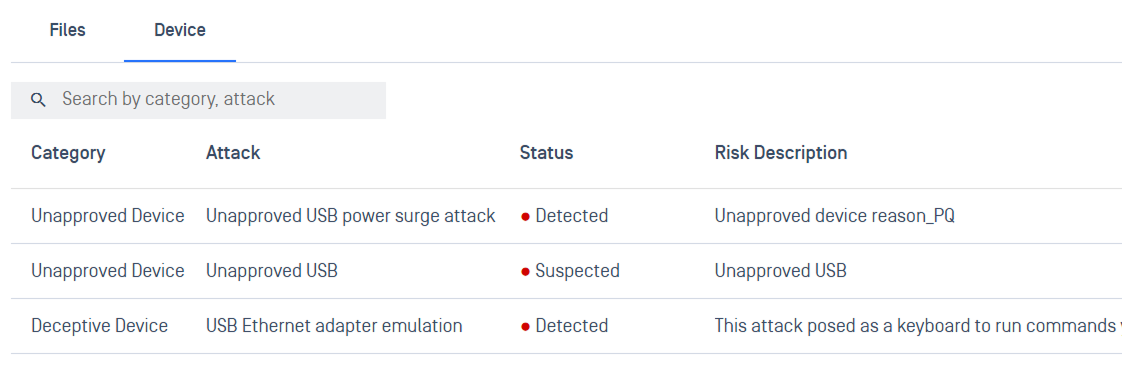 |
Select the Session Details button at the top-right | Identify the exact hardware, including vendor, model, serial number, firmware version, USB version, along with the endpoint that ran the scan and when. This is what you need in order to physically locate the device. 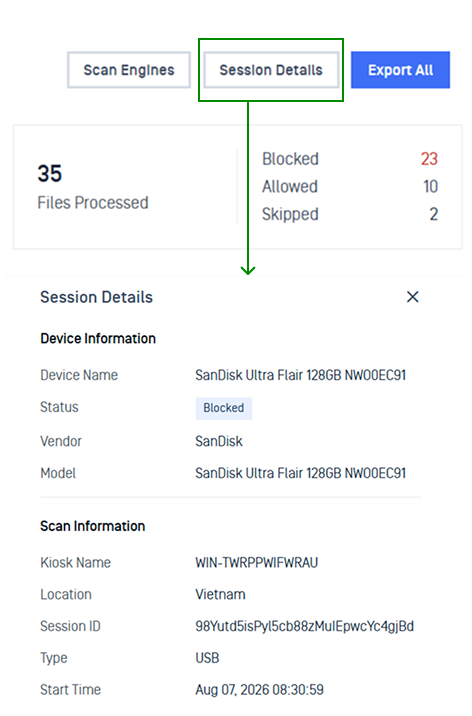 |
Check Affected Devices
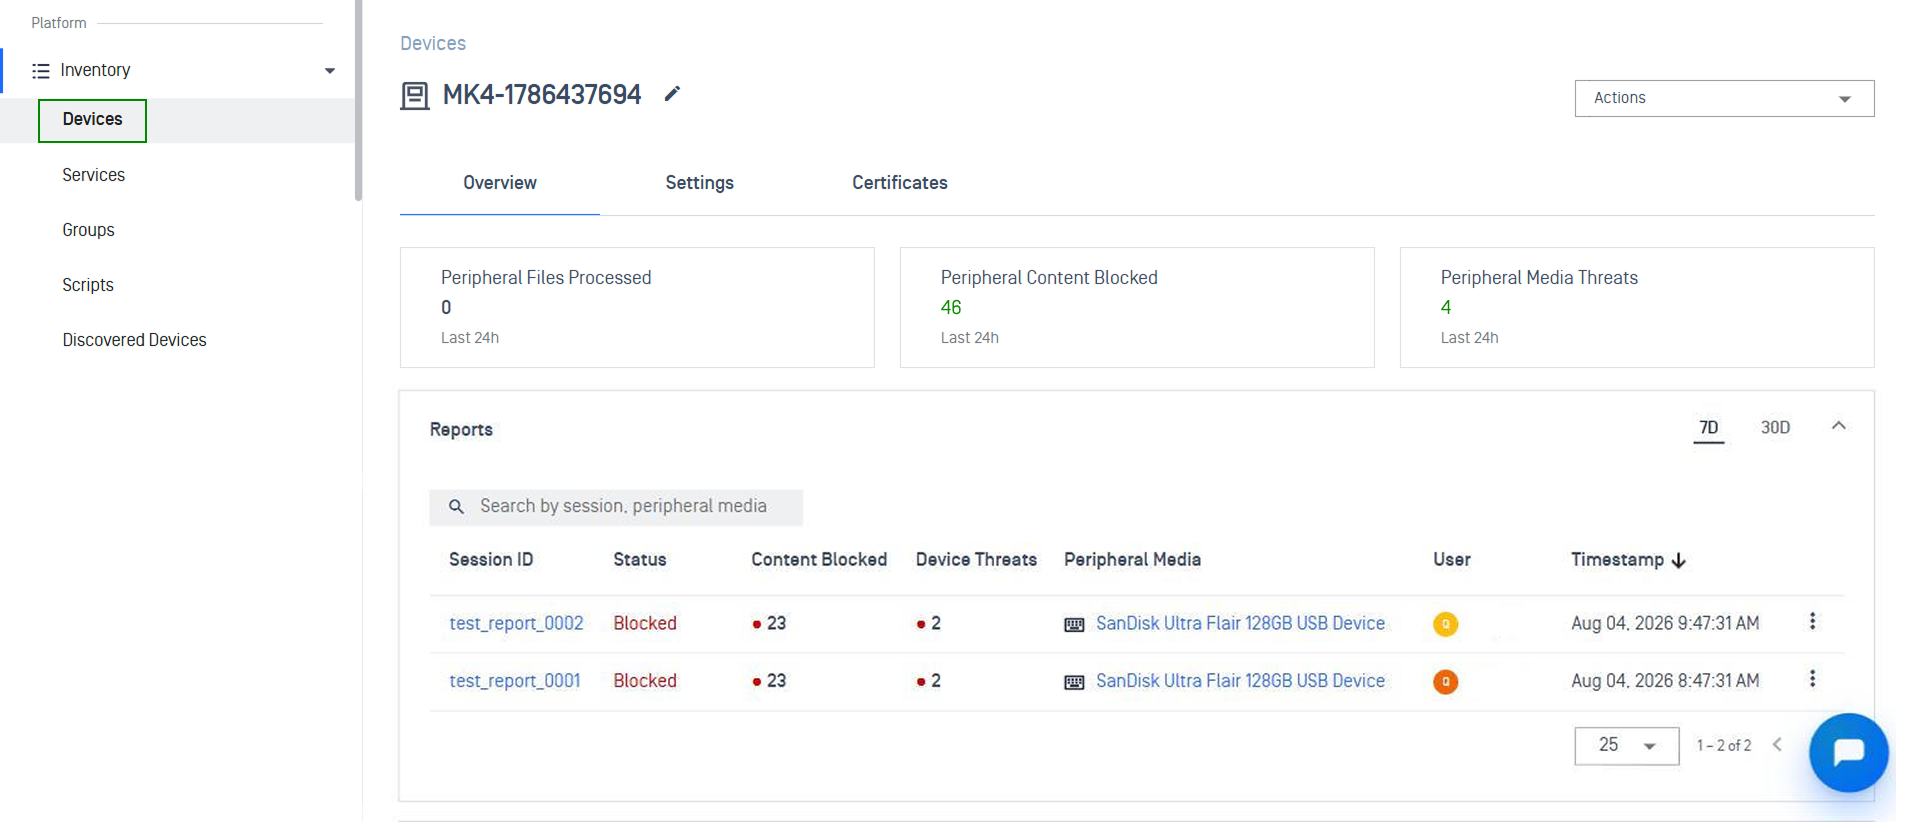
Go to Inventory > Devices, open the Kiosk Windows or Endpoint tab, then select a device name.
The cards at the top show Peripheral Content Blocked and Peripheral Media Threats for the last 24 hours.
Reports lists every session for that device (7D or 30D) and links to the same report details.
Peripheral Inventory shows the peripherals seen on the device, with an Events tab for their activity.