This article applies to Linux Cryptsetup, the current MetaDefender IT-OT Access Console and API, and all MetaDefender Endpoint releases deployed on virtual Linux systems.
Users running MetaDefender Endpoint on one or more Linux virtual devices (VMs) may occasionally seeMetaDefender IT-OT Access device compliance warnings/flags related to encryption.
This warning/flag is triggered by a device issue and will appear under MetaDefender IT-OT Access Console>Inventory>Devices>Relevant Device>Detailed Device Information>Deep Compliance>Encryption.
Cryptsetup is a Linux command line tool that allows users to interface with dm-crypt to create, access and manage encrypted devices and streamline setup of dm-crypt managed device-mapper mappings.
OPSWAT highly recommends that you use this tool to encrypt all unencrypted Linux virtual devices in your MetaDefender IT-OT Access inventory.
This article covers the process of using Cryptsetup to:
Option 1: encrypt your virtual disk during the Ubuntu install process.
Option 2: encrypt your Home partition following Ubuntu install.
Encryption during install is always recommended since it allows full disk encryption that includes swap space and system partitions. Should this not be an option on one or more of your virtual devices, please use Option 2.
Option 1: Encryption During Install
Phase 1: Initiate Ubuntu installation
Boot your new VM via either your computer’s DVD drive, a USB flash drive, your VM installer tool, or an Ubuntu image.
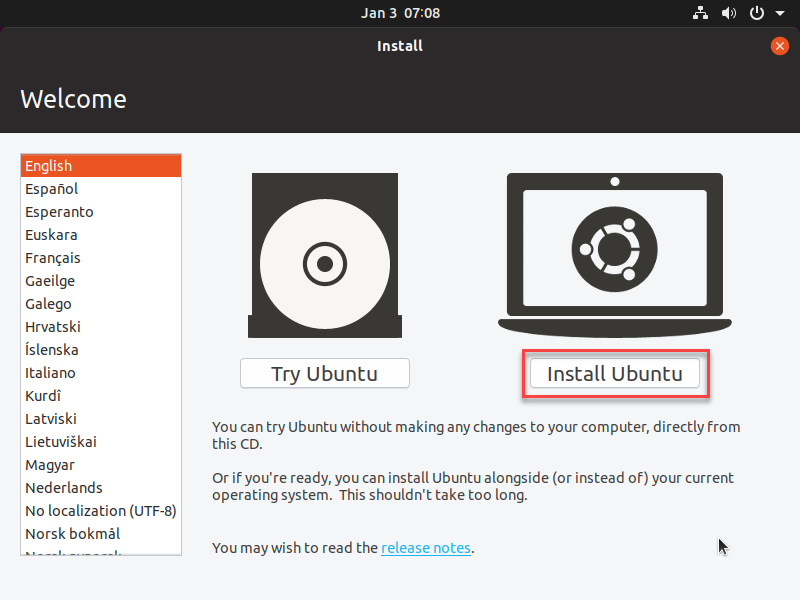
Select your Language, then click Install Ubuntu on the right-hand side of the screen to start installing the distro.
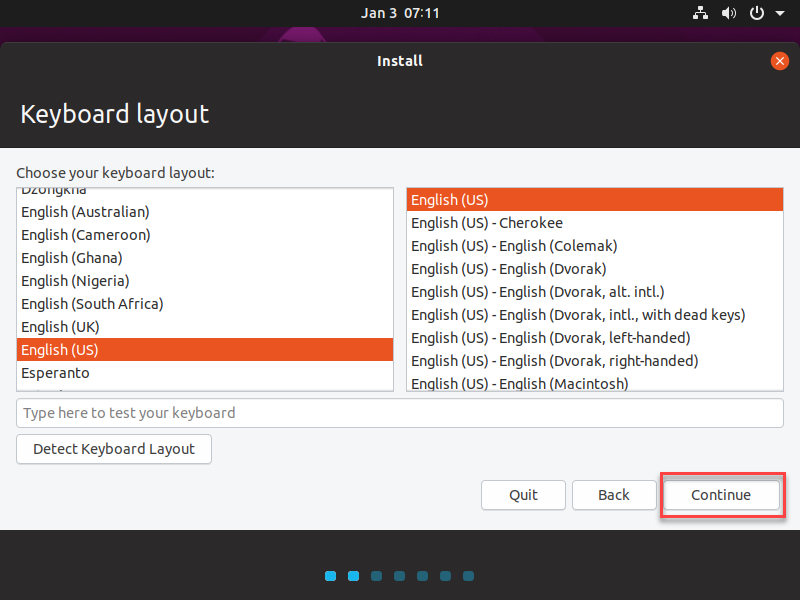
Select your preferred Keyboard layout, then click Continue.

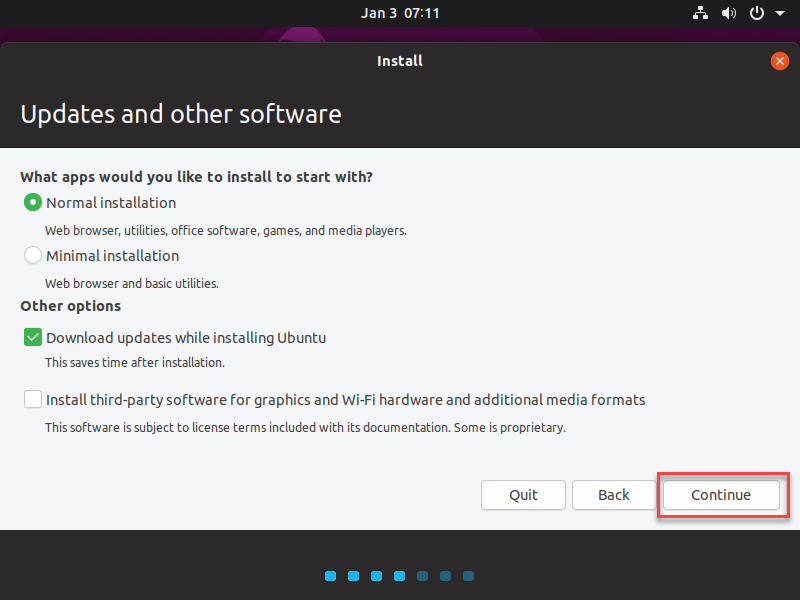
On the Updates and other software screen, select how you would like to install Ubuntu. Your options include:
Normal installation: all features and selected software will be installed.
Minimal installation:only basic components will be installed, and you can download and install software as required.
Download updates while installing Ubuntu: auto-download updates while installing, provided you are on a stable, fast internet connection.
Install third-party software for graphics and Wi-Fi hardware and additional media formats: some license-requiring software, and some proprietary software for graphics, Wi-Fi and additional media formats, will be installed.
Click Continue to save and proceed.
Phase 2: Encrypt Your Disk During Install
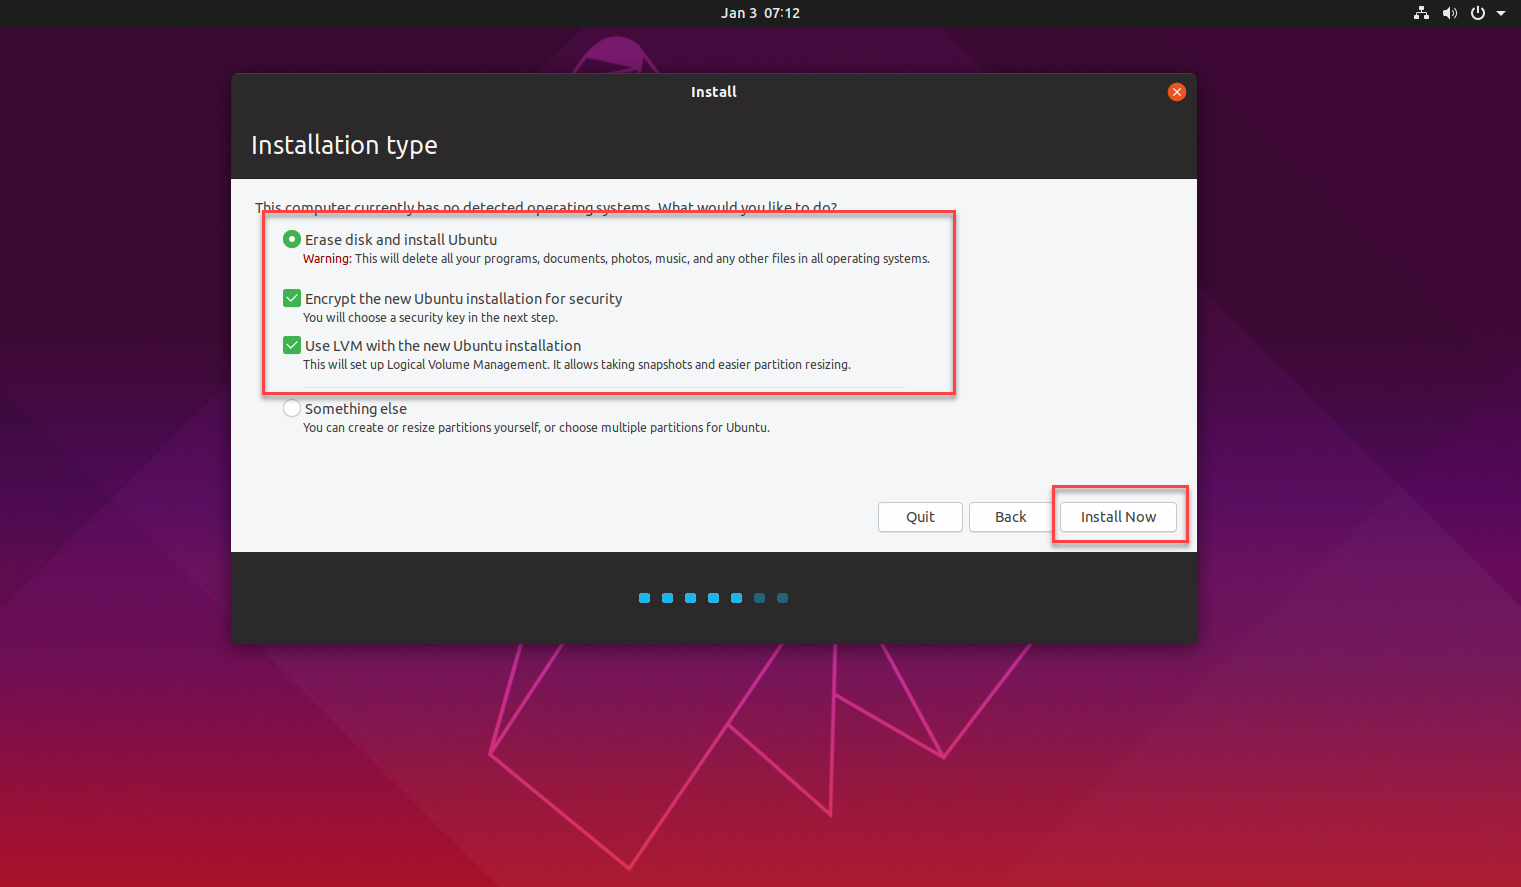
On the Installation type screen of the wizard, select the installation type to be applied to your disk while installing. There are two options:
Erase disk and install Ubuntu: select this option.
Something else: ignore this option.
Under the first option above, there are two sub-options that are checked by default and that should remain checked. If they are not checked, ensure that you check them. They are:
Encrypt the new Ubuntu installation for security: select this option.
Use LVM with the new Ubuntu installation: select this option.
With the appropriate boxes checked, click the Install Now button.
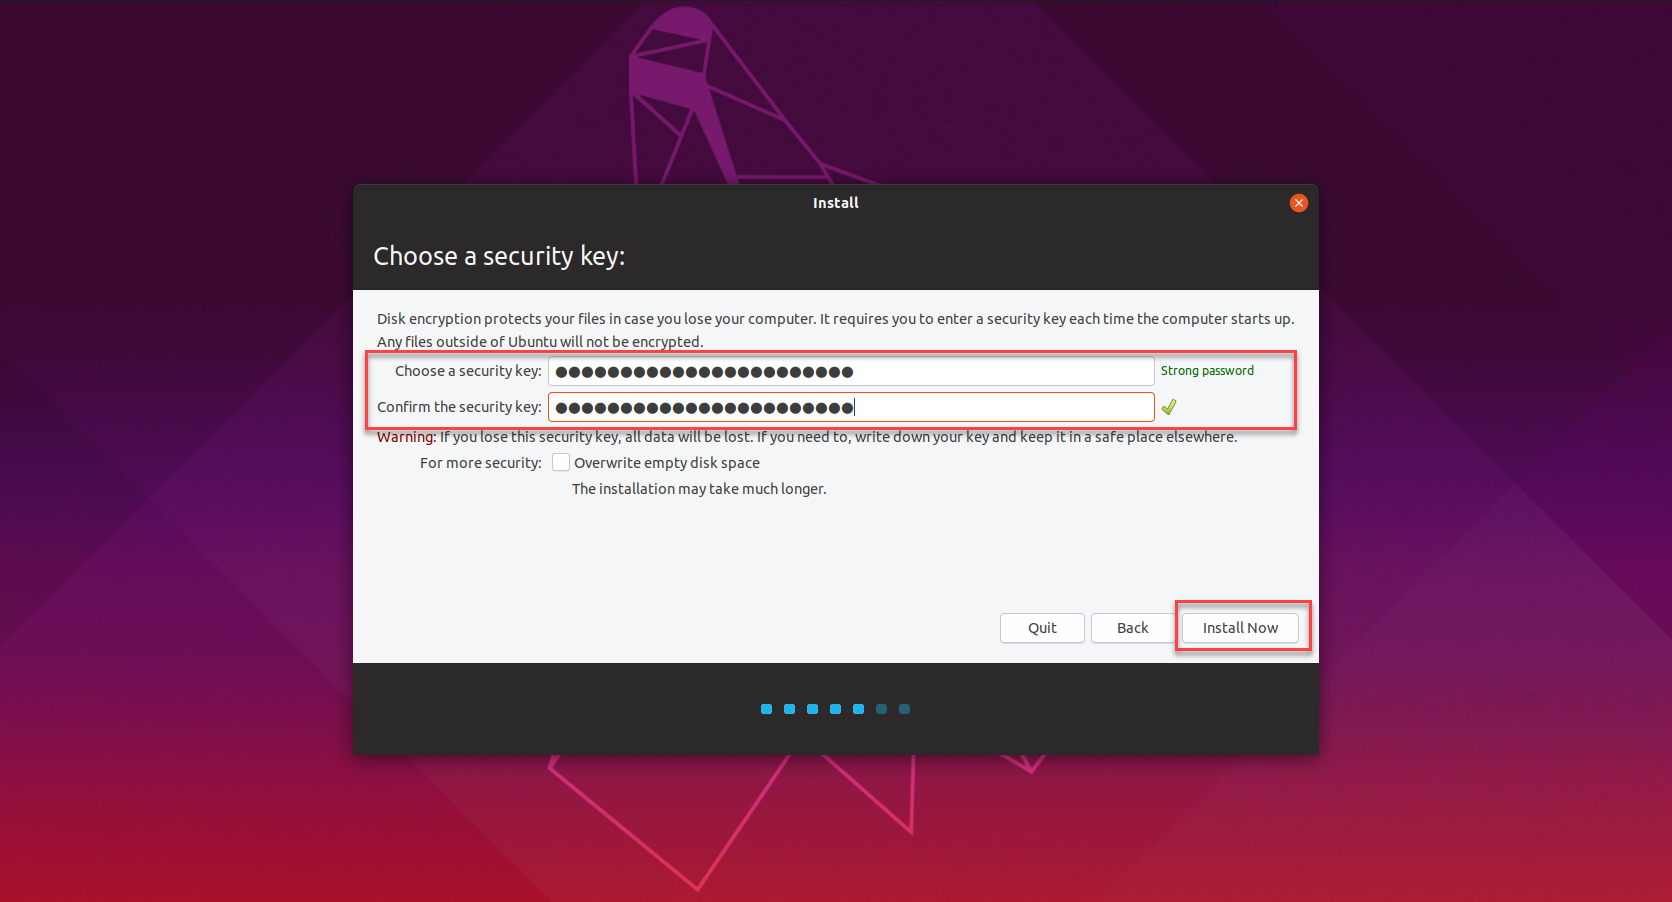
Clicking Install Now after selecting encryption options, as you did in the previous steps, will trigger an additional configuration screen on which you will be asked to Choose a security key.
Once set up, this key will need to be entered when the virtual machine starts up.
Set and confirm a strong Security Key that will be entered when the VM starts up.
Click Install Now to proceed.
On the pop-up screen, you should opt to Overwrite all empty disk space, then click Continue to proceed.
This is the most secure option, as all unused disk space will be overwritten by the filesystem, with either random content or zeros.
Phase 3: Finish the Installation
The following steps are based on typical Ubuntu installation configurations, but the process may vary according to your preferences and specific version.
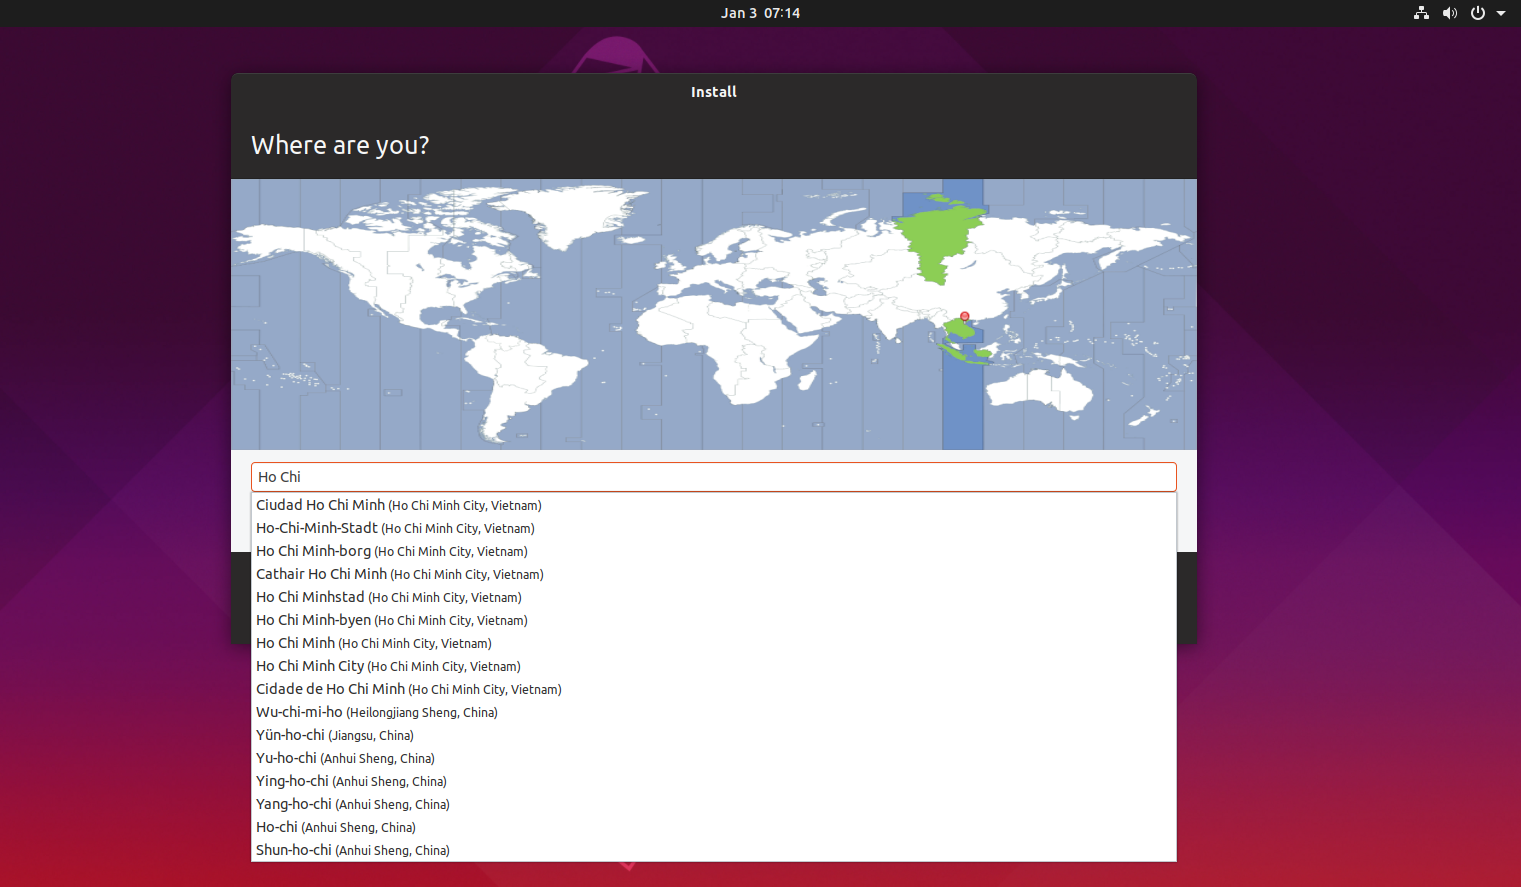
Select your preferred Time Zone.
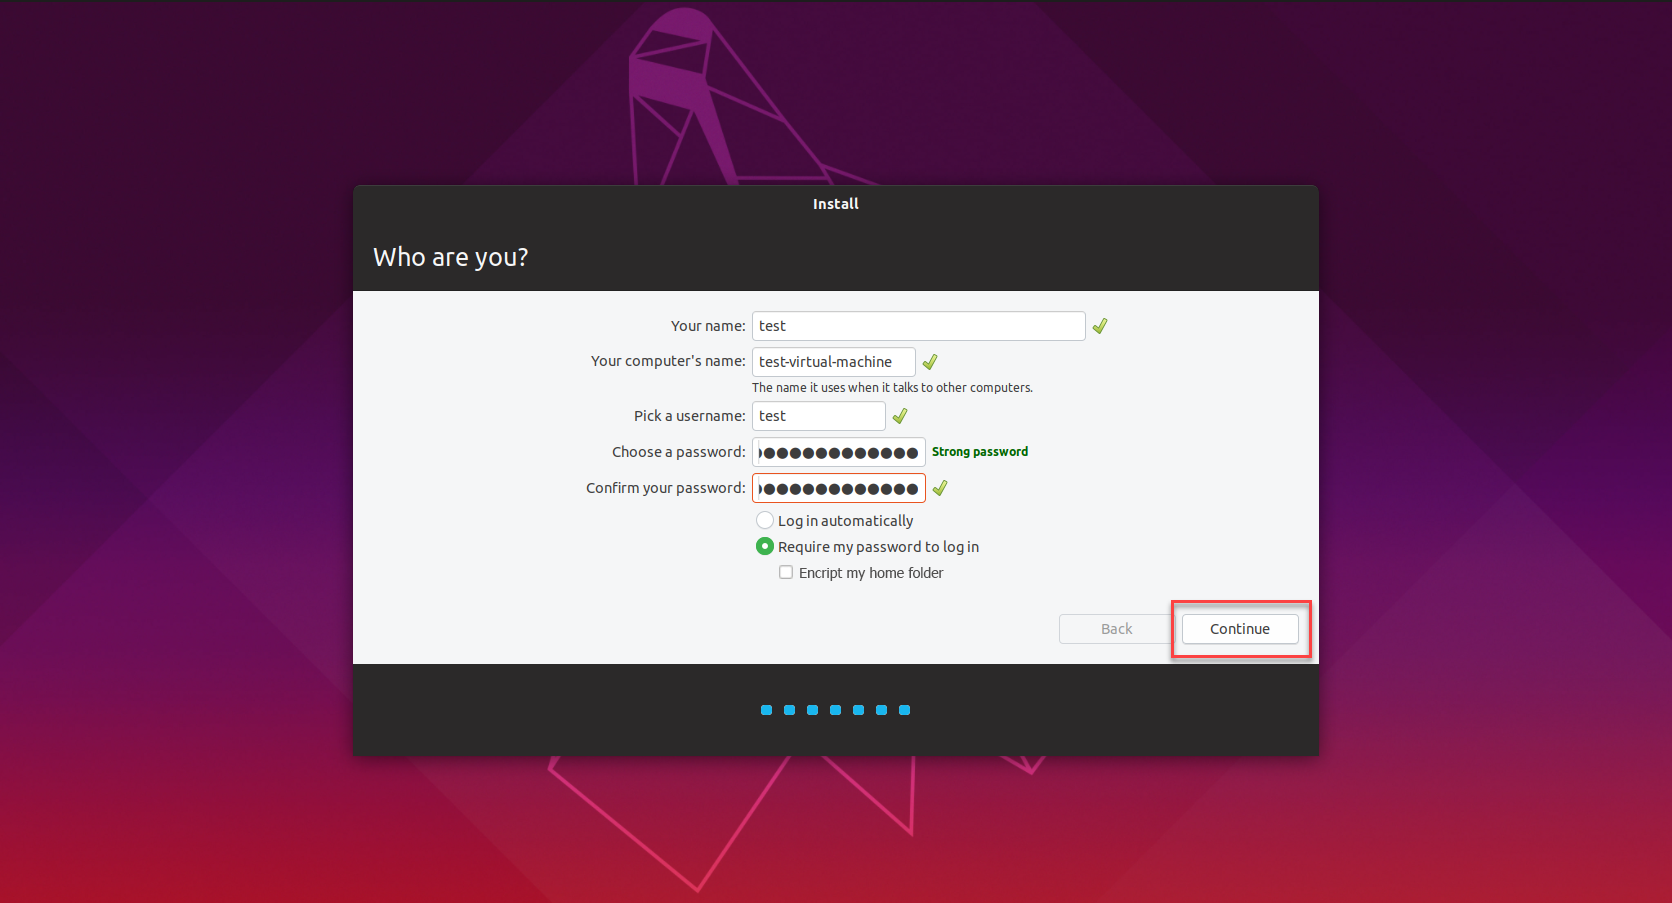
On the Who are you? Screen, create a login account and set a hostname for your VM.
As an additional layer of security, select the Require my password to log in option on this same screen.
A login screen will now be shown at each boot up, and you will not be permitted to log in until you have entered your credentials.
On the same page, you should also select the option to Encrypt my home folder, as an added layer of security for the data on your system.
Click Continue to save your settings and begin the installation.
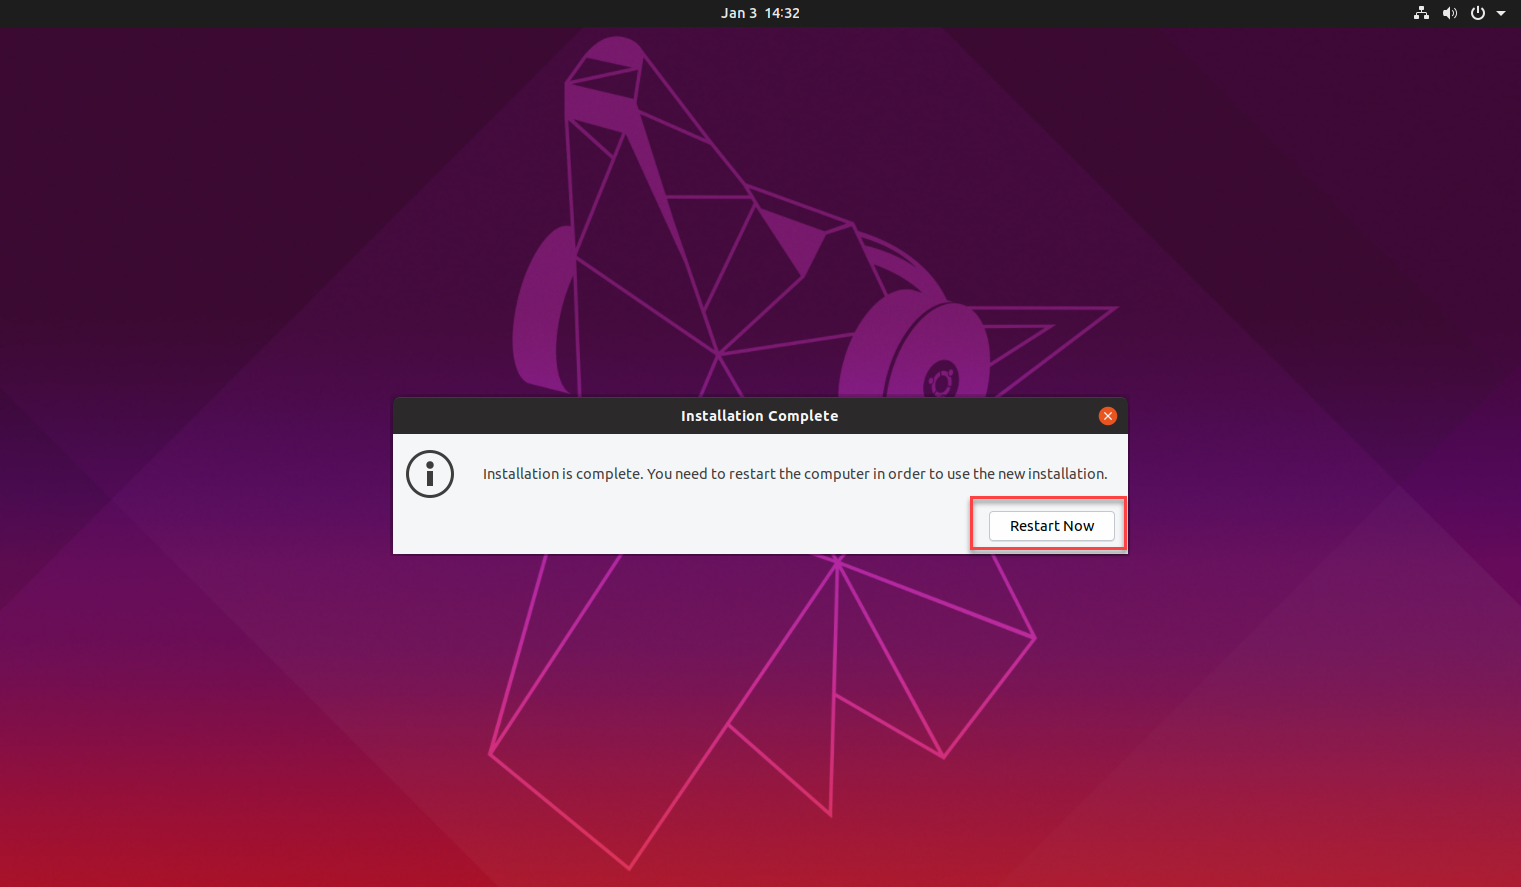
Finally, click the Restart Now button on the pop-up to restart your system and complete the installation.
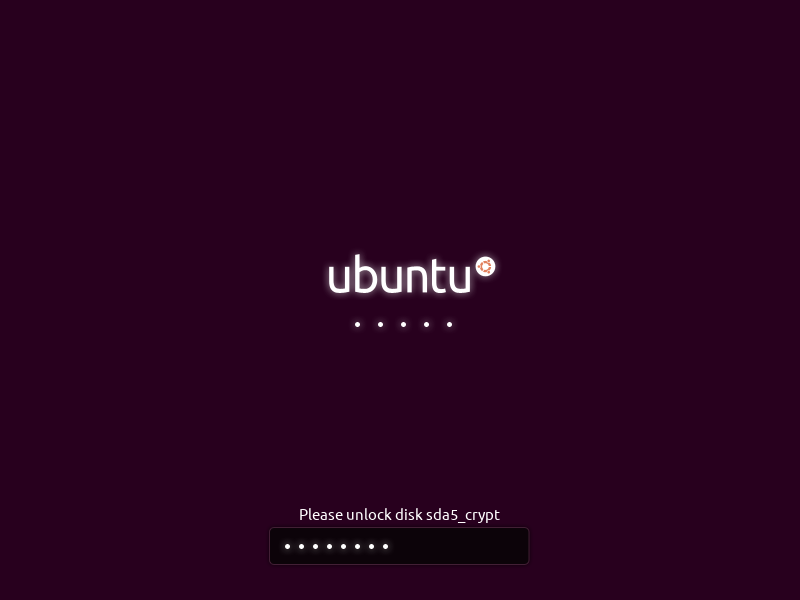
Once this system starts, you will be prompted to enter the security key that you set up in Step 4 of Phase 2 above.
Without this encryption-passkey, the system will not boot - and there is no way to bypass it.
Phase 4: Verify That the Disk Is Encrypted
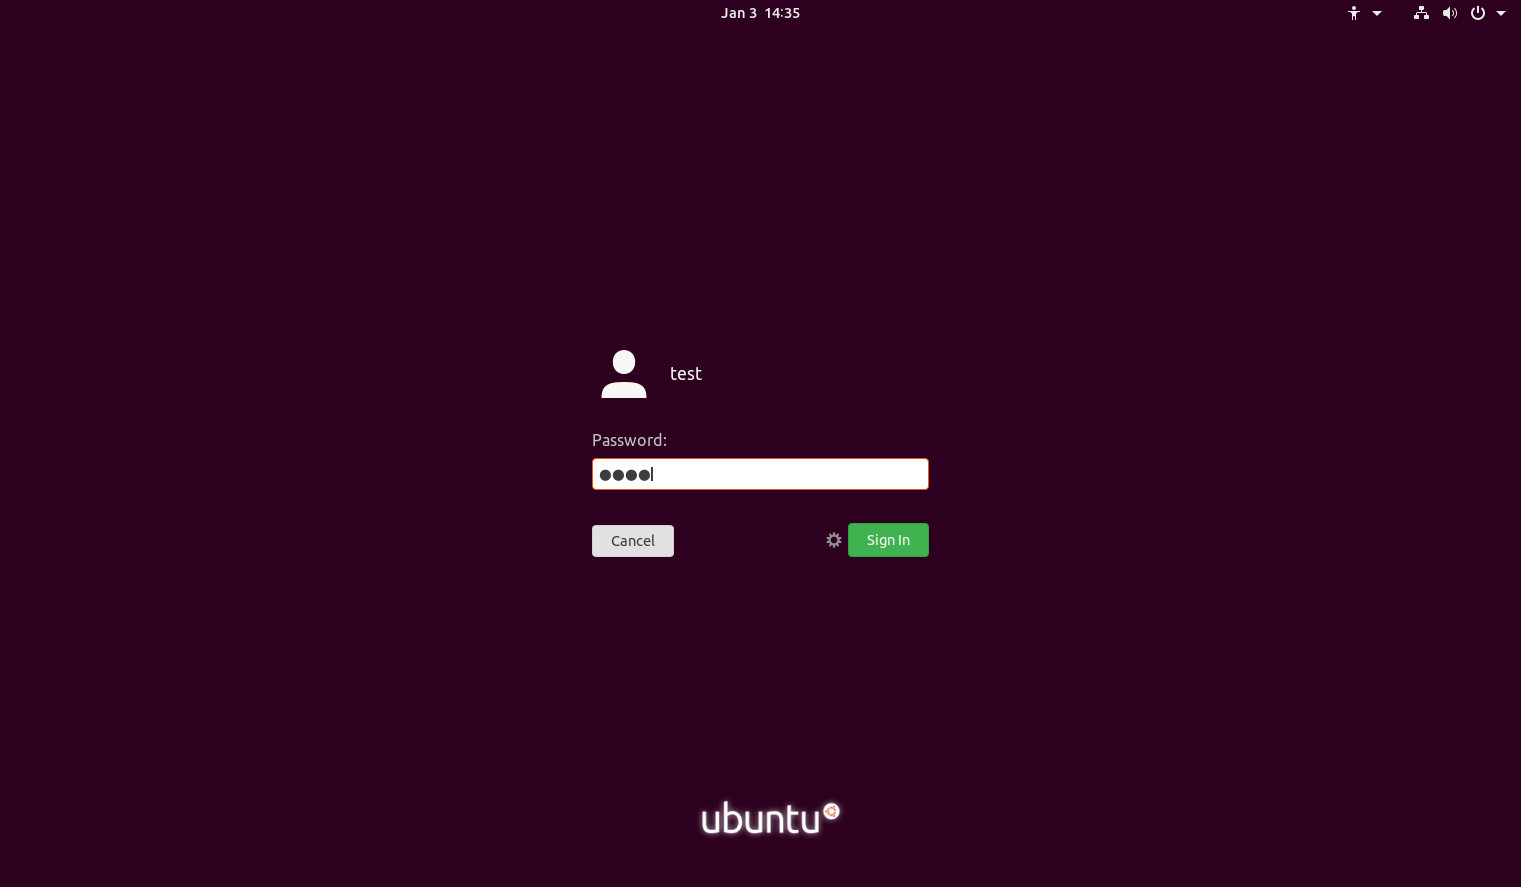
Log into the system by entering the Credentials that you set up during Phase 3 above, then clicking Sign In.
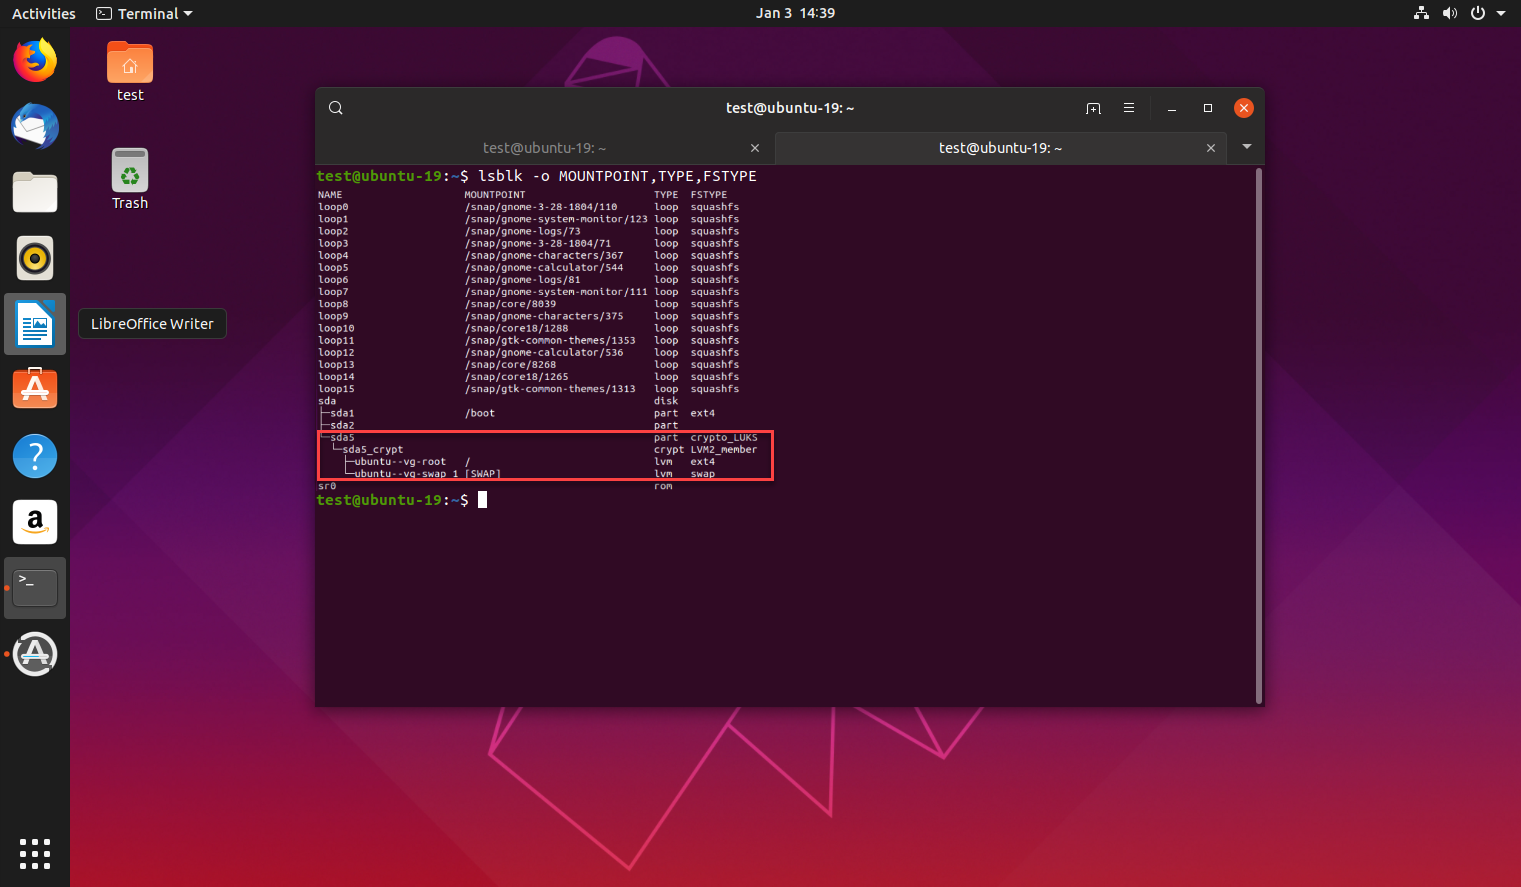
Once you’re logged in, open a Terminal and run the following command to check your encryption status: $lsblk -o NAME,MOUNTPOINT,TYPE,FSTYPE
In the response, check the file system type of a given partition. If it is listed as crypto_LUKS for the FSTYPE, this means the partition is encrypted.
The following guideline demonstrates the process to encrypt a home partition for the user named test, with the user running their migration as the newly created tempuser.
This guideline was prepared on Ubuntu 19.10 and Ubuntu 18.4, and the process may vary slightly from version to version.
Phase 1: Install the Encryption Utilities
Open a Terminal and run the following command to install the encryption utilities: sudo apt-get install ecryptfs-utils cryptsetup
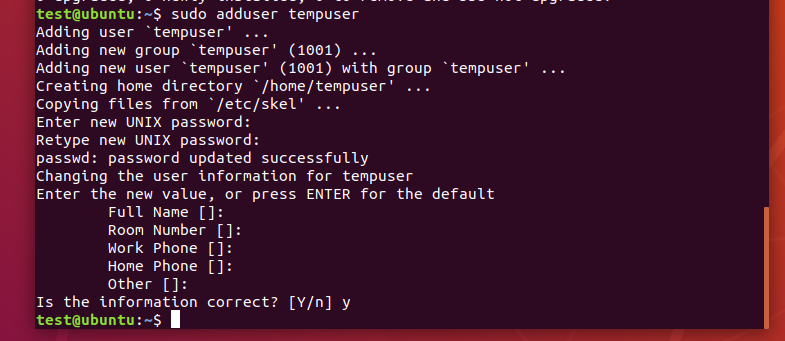
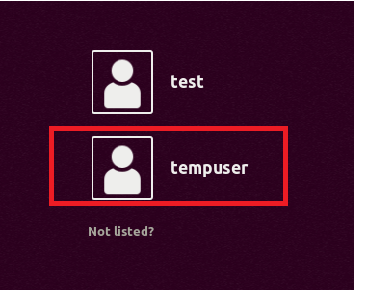
Log out, then log in again with the newly created user, tempuser.
Phase 3: Migrate the Same Home Folder That You Wish To Encrypt
It is essential that you log in as an administrator user, but not the user who’s Home partition you would like to encrypt.
Open a Terminal, then run the following command to migrate the Home partition of the user named test, the same Home partition you plan to encrypt:
Phase 4: Log Into The Account for Which the Home Partition Is To Be Encrypted
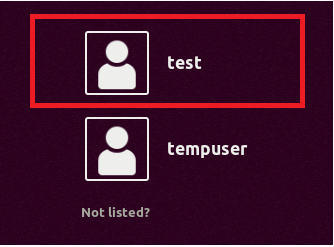
Log out and log back in again as the user who’s Home partition will be encrypted - in this case, test.
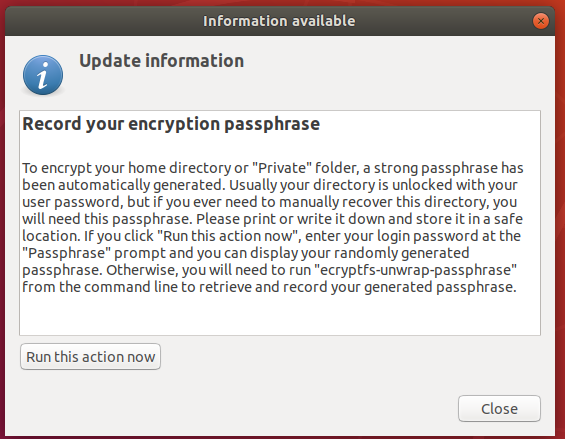
Once you are logged in, click the Run this action now button to create a recovery Passphrase. Store this passphrase safely, as you will need it if you ever have to recover files manually in future.

Phase 5: Verify That the Home Partition Is Encrypted
Open a Terminal and run the following command to verify the encryption status of your Home partition: ls -A /home
If your home folder has been encrypted, you will see a .ecryptfs folder in the response.
Reference:

If you have followed the instructions above but Continue To Experience Encryption Issues On Your MetaDefender Endpoint/ MetaDefender IT-OT Access Virtual Devices, please open a Support Case with the OPSWAT team via phone, online chat or form, or feel free to ask the community on our OPSWAT Expert Forum.