
Check Your Version: This article applies to MetaDefender Kiosk and is applicable for all OPSWAT K3001 Series KIOSK USB hardware-related troubleshooting. It covers deployments on Hardened Image (Windows-based), both Internet-connected or Air-gapped, and on-premise installations.
Issue
USB hardware-related issues on the OPSWAT K3001 Series KIOSK, including:
USB ports not detecting devices
USB ports physically broken or displaced
Intermittent USB connectivity
No power to USB ports
Peripheral devices not recognized despite correct drivers
Hardware Troubleshooting Workflow
Always follow the steps below in order to correctly isolate the issue.
Step 1: Visual & Physical Inspection
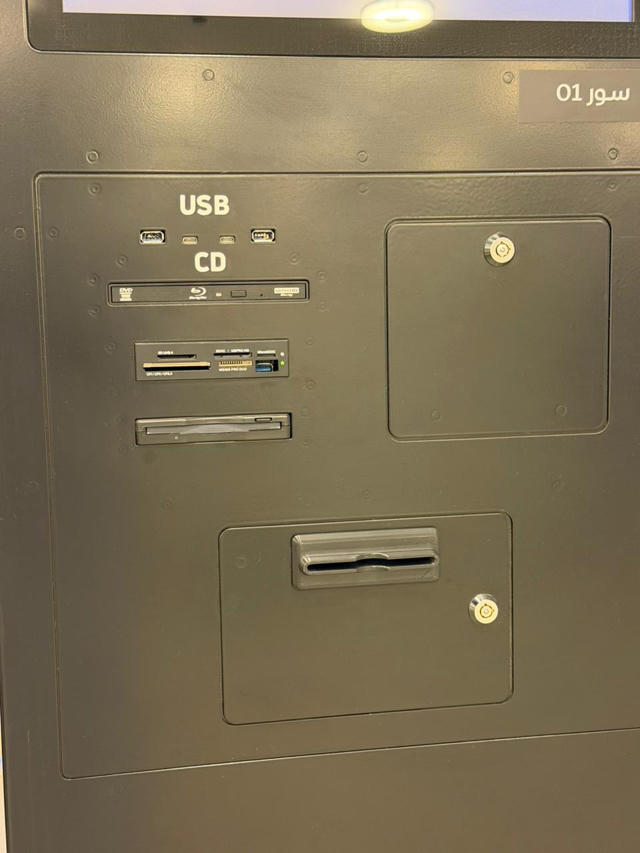
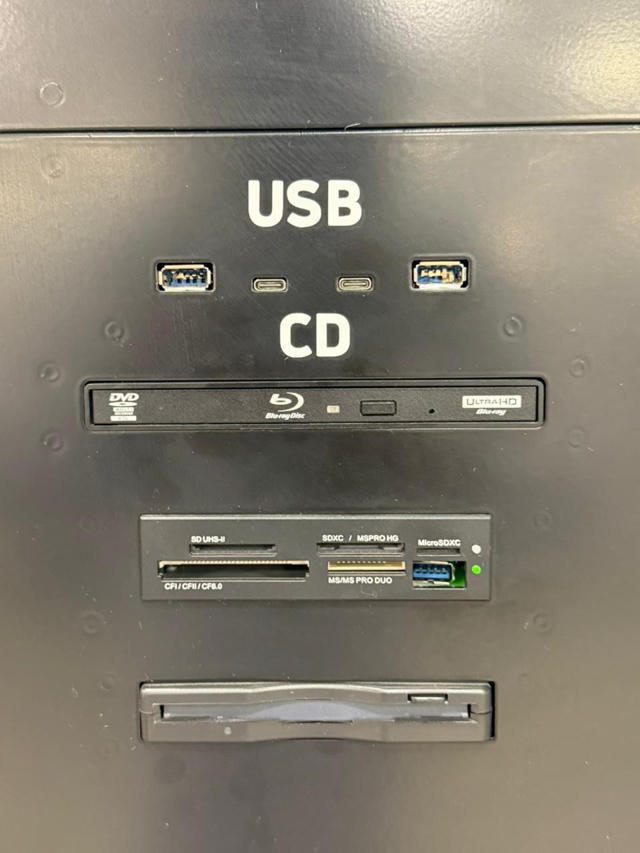
Inspect all front-facing USB ports:
Top panel USB ports (USB-A / USB-C)
USB port below the MicroSD slot
Check for:
Bent pins
Loose or sunken ports
Physical displacement from chassis
Confirm whether the issue affects:
A single port
Multiple ports
All USB ports
If physical damage is visible, continue to Step 4 directly.
Step 2: BIOS Verification
Reboot the KIOSK
Press F12 during startup
Enter BIOS Setup
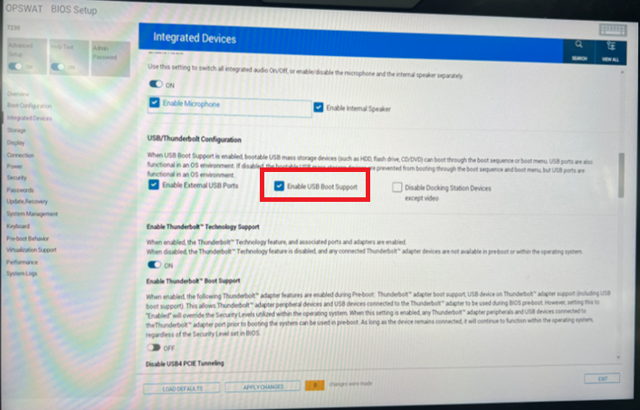
Navigate to: Integrated Devices → USB / Thunderbolt Configuration
Ensure the following option is enabled:
Enable External USB Ports
Save changes and reboot
Step 3: Operating System & Driver Validation
Log in to Windows on the KIOSK
Open Device Manager
Expand Universal Serial Bus Controllers
Verify there are no warning icons on USB devices
Reinstall USB drivers if required:
Right-click each USB Root Hub → Uninstall
Reboot the system
Note: Internet access is not required for driver reinstallation.
Step 4: Internal Hardware Isolation
Perform this step only if software and BIOS checks are clean.
4.1 Inspect Internal USB Cabling
Power off the KIOSK
Open the rear access panel
Verify internal USB cables are:
Firmly seated
Not pinched or damaged
4.2 Trace Cable to StarTech USB Adapter
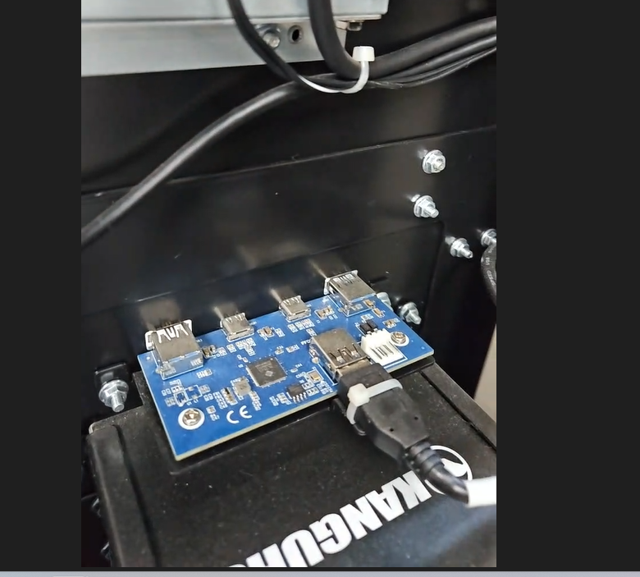
Follow the internal USB cable to the StarTech.com USB adapter
Confirm:
Adapter has power
Power cable is connected securely
If it is correctly plugged in, follow the cable (note down the cable number) and make sure that it is correctly connected to the StarTech.com USB adapter as shown in the screenshot given below.
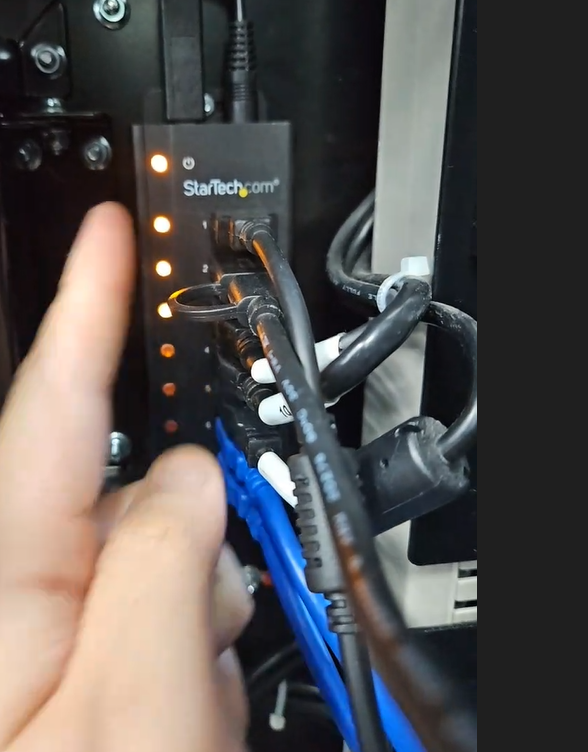
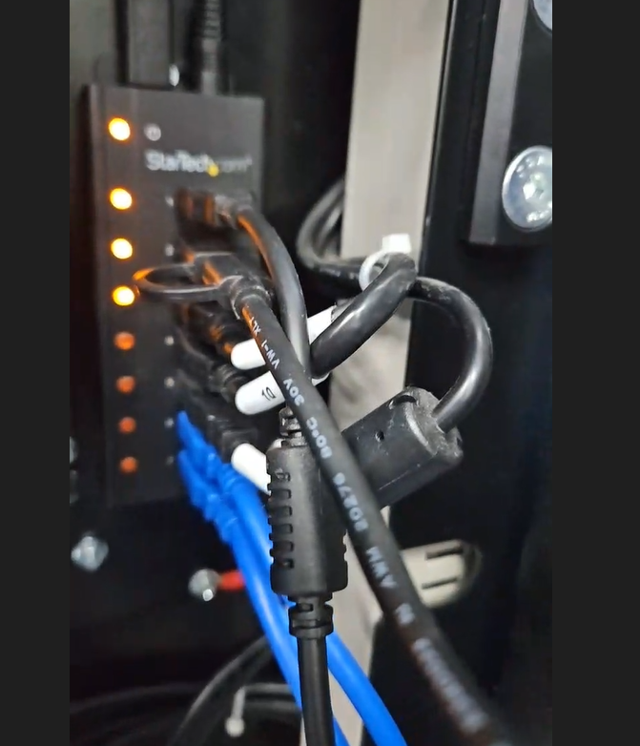
4.3 Port & Cable Testing
Disconnect the USB cable from the kiosk front panel
Connect it directly to a laptop
Plug a USB device into the front USB port
Validate whether the device is detected
4.4 Cross-Test with Secondary Adapter (if available)
Move the cable to another available StarTech adapter port
Re-test USB functionality
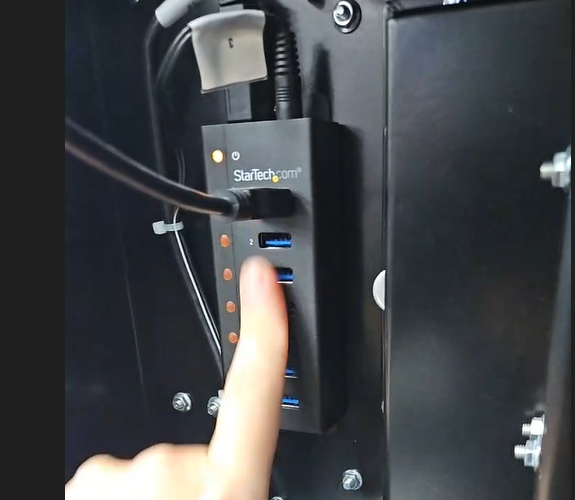
Step 5: CPU Connectivity Check
Ensure at least one cable from the StarTech adapter is connected to the CPU box under the KIOSK
Confirm that the StarTech.com adapter power cable is correctly plugged in to the power socket along with other cables.
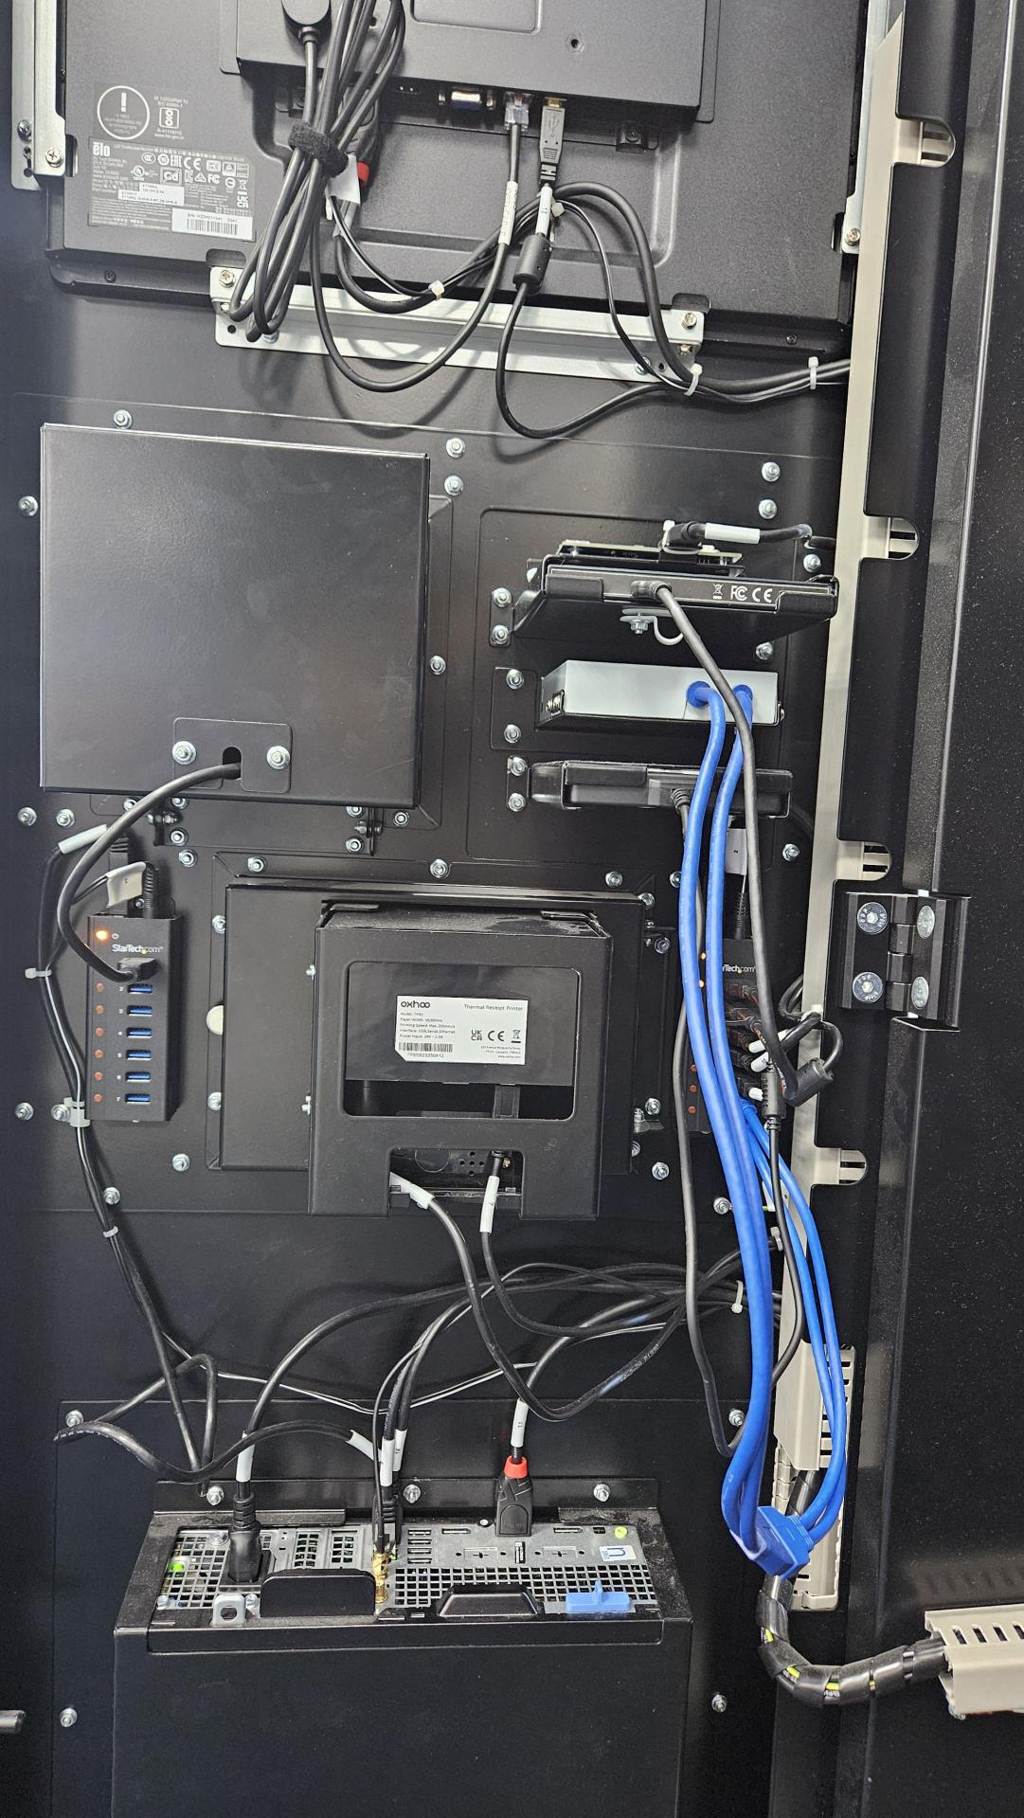
Decision Matrix
Observation | Conclusion |
|---|---|
USB works on laptop but not on kiosk | Front USB port or adapter fault |
No USB power or detection at all | Adapter or power issue |
Visible physical damage | Hardware replacement required |
BIOS / driver issue resolves problem | Software-related |
When to Proceed with Hardware Replacement
Proceed with hardware replacement request if any of the following are true:
USB ports are physically damaged
Ports are displaced or broken
Internal connectors are damaged
Issue persists after all isolation steps
How to Report a Hardware Issue (Required Details)
When opening a support case, all details below are mandatory:
Customer Name:
Partner / Distributor Name (if applicable):
End Customer Name:
KIOSK Model: K3001 Series
Serial Number (SN):
Issue Description:
Affected Ports / Components:
Troubleshooting Steps Performed:
Photos of Damage (clear images):
Site Environment (Air-gapped / Internet-connected):
Contact Name:
Contact Phone:
Contact Email:
Shipping Address:
Reported By:
VAT Number (if applicable):
Best Practices
Always attach clear photos of the affected hardware
Confirm whether the site is air-gapped early
Perform isolation steps before requesting onsite support
Clearly state if the issue is physical vs functional
Support: If Further Assistance is required, please proceed to log a support case or chatting with our support engineer.