
Issue
MetaDefender Drive fails to boot, and/or the operating system detects it as a corrupted storage partition.
Solution
To recover a possibly corrupted MetaDefender Drive, try the following methods in order.
1. Using MetaDefender Drive Toolkit
If you can't boot your MetaDefender Drive or you do not have access to the internet: Follow the instructions to create and flash a drive using MetaDefender Drive Toolkit.
If you can boot your MetaDefender Drive with internet access: Check if an update is available for the Drive software by going to Settings → Update and clicking Check for Updates.
2. Wipe the Drive with Windows Disk Management or diskpart, then restore with the Toolkit
If the issue wasn't resolved using MetaDefender Drive Toolkit, the MetaDefender Drive's partition table is likely corrupted, which can prevent the Toolkit from detecting or writing to it. Wiping the Drive's partitions with the built-in Windows tools clears the corruption so the Toolkit can recreate the Drive. Use one of the two well-understood Windows tools below, then re-run the Toolkit.
Warning — this erases all data on the Drive
Wiping removes all data on the MetaDefender Drive, including scan reports, configuration, and any stored files. Save anything you need off the Drive first. Make sure you select the MetaDefender Drive and not another disk — selecting the wrong disk will erase that disk.
Before you begin:
Copy any reports or other data you want to keep from the MetaDefender Drive to another location.
Unplug other external/USB drives so you don't accidentally select the wrong disk.
Insert the MetaDefender Drive and note its capacity so you can identify it in the steps below.
Option A — Windows Disk Management (graphical)
Right-click the Start button and choose Disk Management (or press Win + R, type
diskmgmt.msc, and press Enter).In the lower pane, locate the MetaDefender Drive. Identify it by its capacity and its Removable type — do not use your system disk.
Locate the partition names MetaDefender Drive, right-click it and choose Delete Volume. You can also repeat until the entire disk shows a single block of Unallocated space, but it is not necessary.
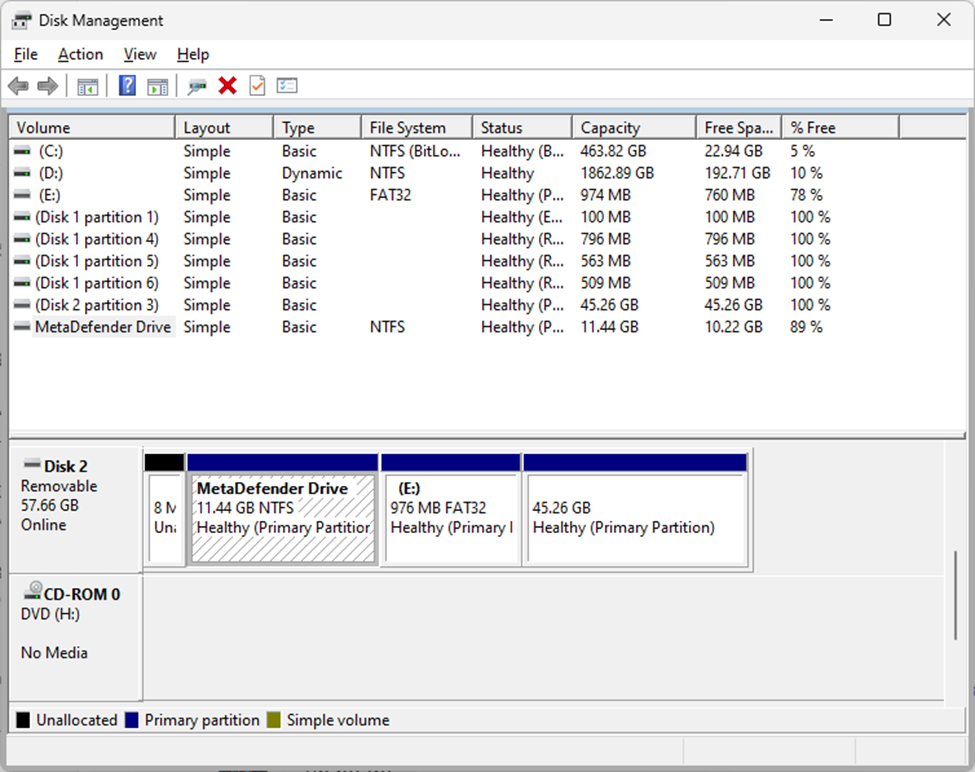
Leave the space Unallocated — do not create a new simple volume. Close Disk Management.
Restore the Drive using the Toolkit (see Method 1).
Note
If Delete Volume is grayed out for a partition (for example, a protected or recovery partition), use Option B (diskpart) instead, which removes the partition table directly.
Option B — diskpart (command line — removes the partition table)
Use this option if Disk Management cannot delete one of the partitions. Here is the screenshot of illustrating the method. Detail commands are below.
Quit MetaDefender Drive Toolkit (DTK) if running.
Remove the Drive from the computer.
Right click on Start (Windows) button, select "Terminal (Admin)"
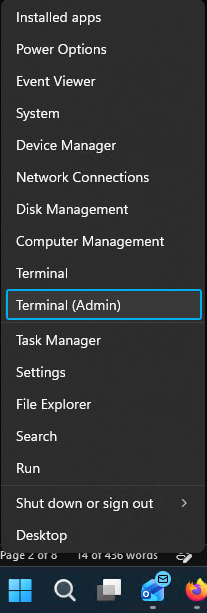
Run:
Get-Disk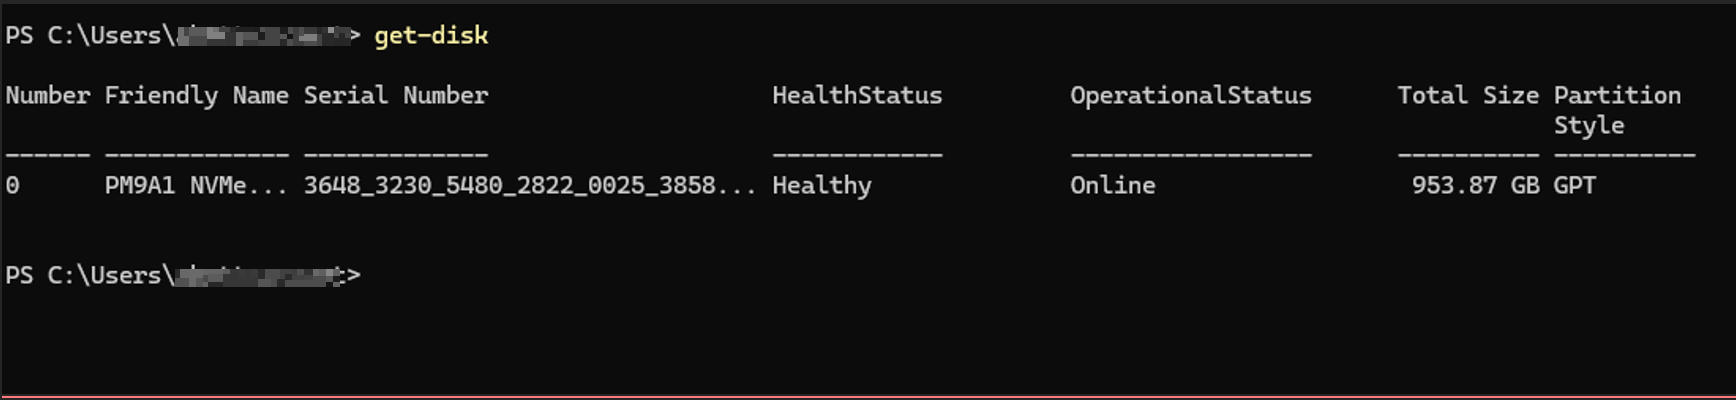
Insert the MetaDefender Drive.
Run again:
Get-Disk
Identify the new disk that appears when running the 2nd
Get-Disk. Note its disk number (in this case it is 1).Start
diskpartprogramUsing the number found above using
Get-Disk, select new disk MetaDefender Drive:select disk X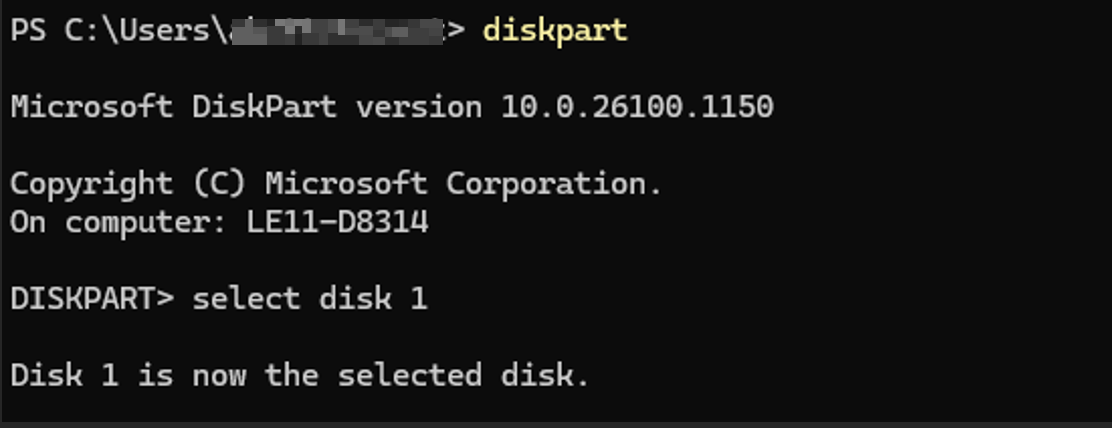
Run
detail diskand carefully verify the selected disk is MetaDefender Drive. Could be like below or similar: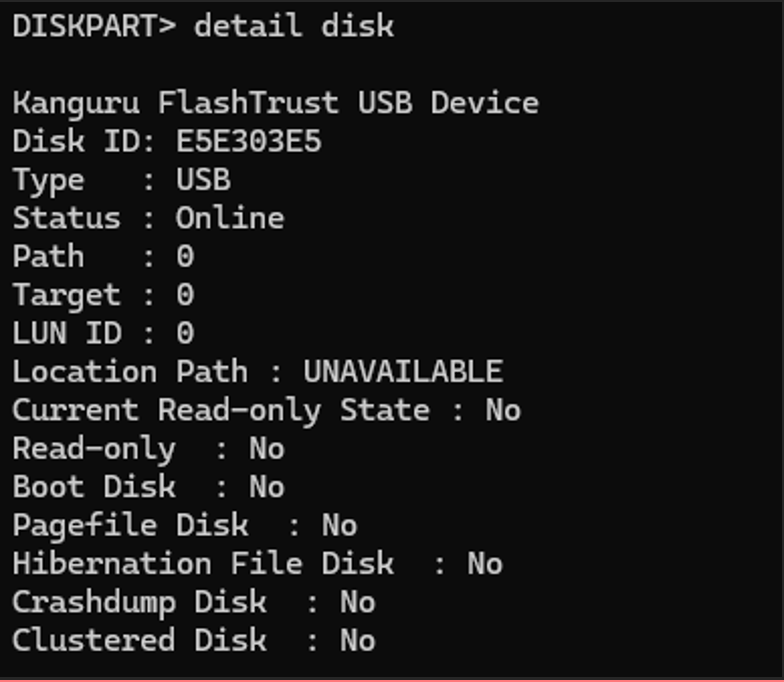
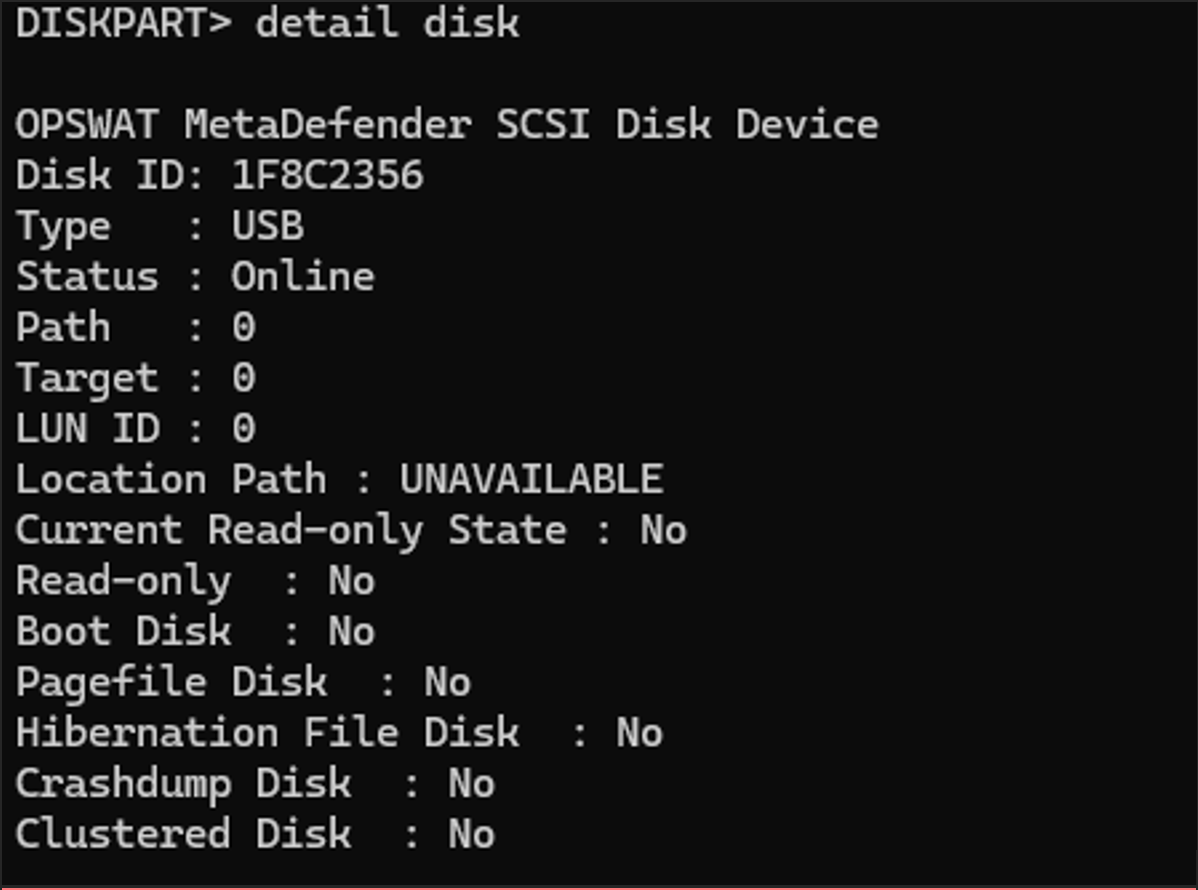
Then run the clean which will wipe the device:

After the Drive is wiped, repeat Method 1 (MetaDefender Drive Toolkit) to recreate and flash the Drive image so it becomes bootable again. If the Toolkit still cannot detect the Drive after wiping, see Toolkit Fails to Detect Some Drives.