
Overview
Full scans on devices with large storage typically take hours, even days. If such a machine is scanned frequently, e.g. multiple times within a week, it gets re-scanned from scratch, even though most files have not changed since the last time. This used to be unnecessary time consumption when the same device kept coming back to the facility.
Solution
The Differential Scan enables writing every scan file hashes into a database on the device. Any subsequent scan that uses the same settings, whether launched from a Workflow, a Full Scan, or a Custom Scan, checks file hashes and only sends the new, changed, or expired ones to the scanning engines.
MetaDefender Drive does not require a specific baseline or even a Workflow to execute the Differential Scan feature. The lookup runs against the hash database of every previous scan with matching settings. The Workflow feature is only a convenient way to ensure the same settings are used on the next visit. With the Differential Scan, when you run a Full Scan that matches a previous one, MetaDefender Drive will automatically compare it to the stored hashes.
Benchmark
The following is an example of the scan results on a laptop (Dell Latitude 5420, Kali, 1,908,762 files / 887.20 GB), with the same Full Scan settings:
Scan | Duration | Process |
|---|---|---|
First scan: | 53:23:54 | Every file is analyzed and hashed |
Second scan: | 02:14:17 | Only new or changed files are scanned |
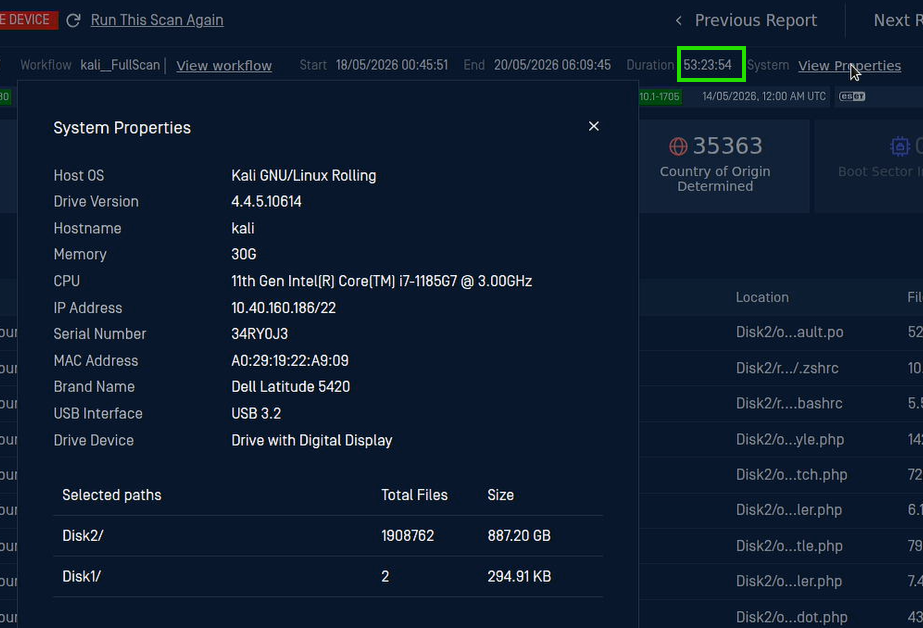
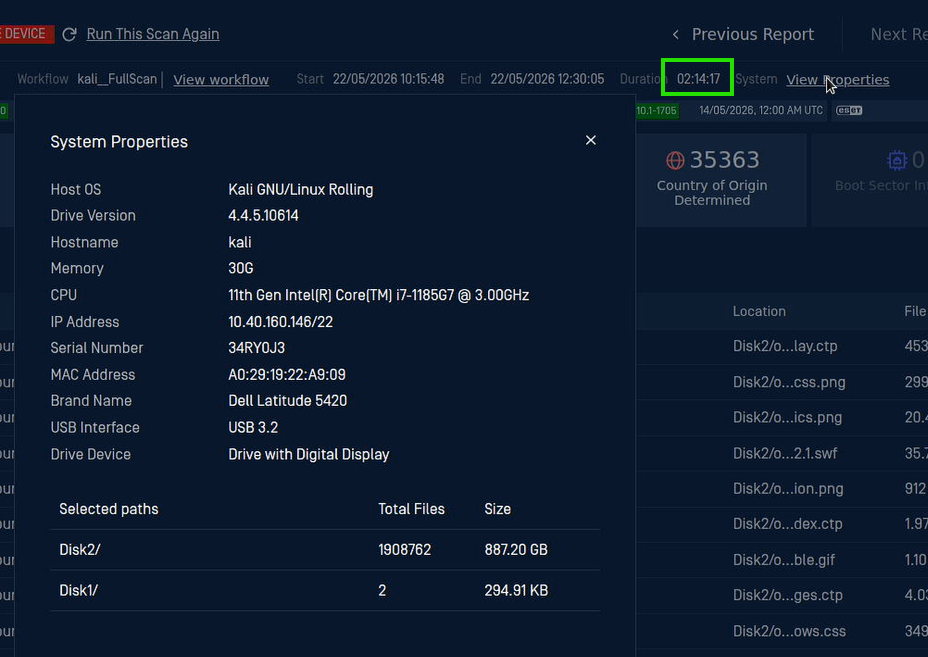
The result is a nearly 24× faster scan with no loss of coverage.
Set Up Instructions
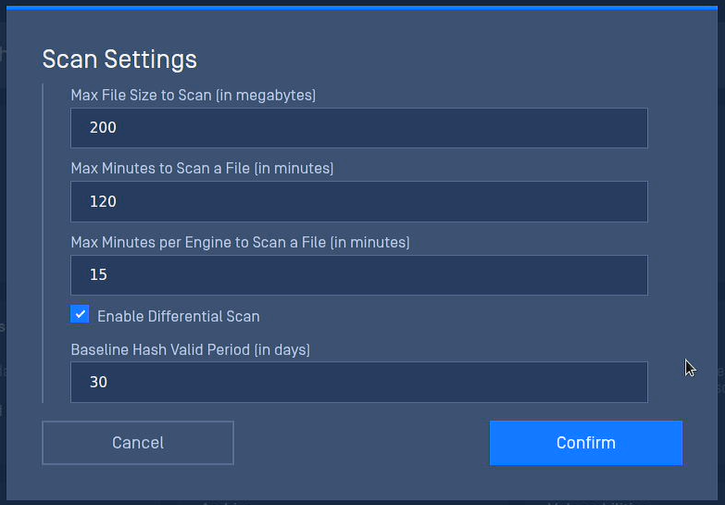
Navigate to Settings → Preferences → Scan Settings and tick the Enable Differential Scan and set Baseline Hash Valid Period (e.g.
30days), then click Confirm.Run a scan. It can be a Full Scan or a Custom Scan. This first run takes the full time and seeds the hash database.
Run another scan. Any subsequent scan with matching settings is automatically a differential scan.
MetaDefender Drive shows the cached entry's date in the scan progress, so you can see when each file was last inspected.
Optional Step
Manage Scans As Workflows
The Workflows screen lets you save a scan configuration, assign a name, and pin a report to use it as a comparison reference. Useful when several operators share the device or when you want a labeled history of each repeat visit.
From a finished report, click Save as workflow (or use the auto-created workflow from your Full Scan).
On the Workflows screen, expand the workflow and click Set as baseline on the report you want to use as the reference. It will be labeled as a baseline.
For the next scan, click Run on the workflow.
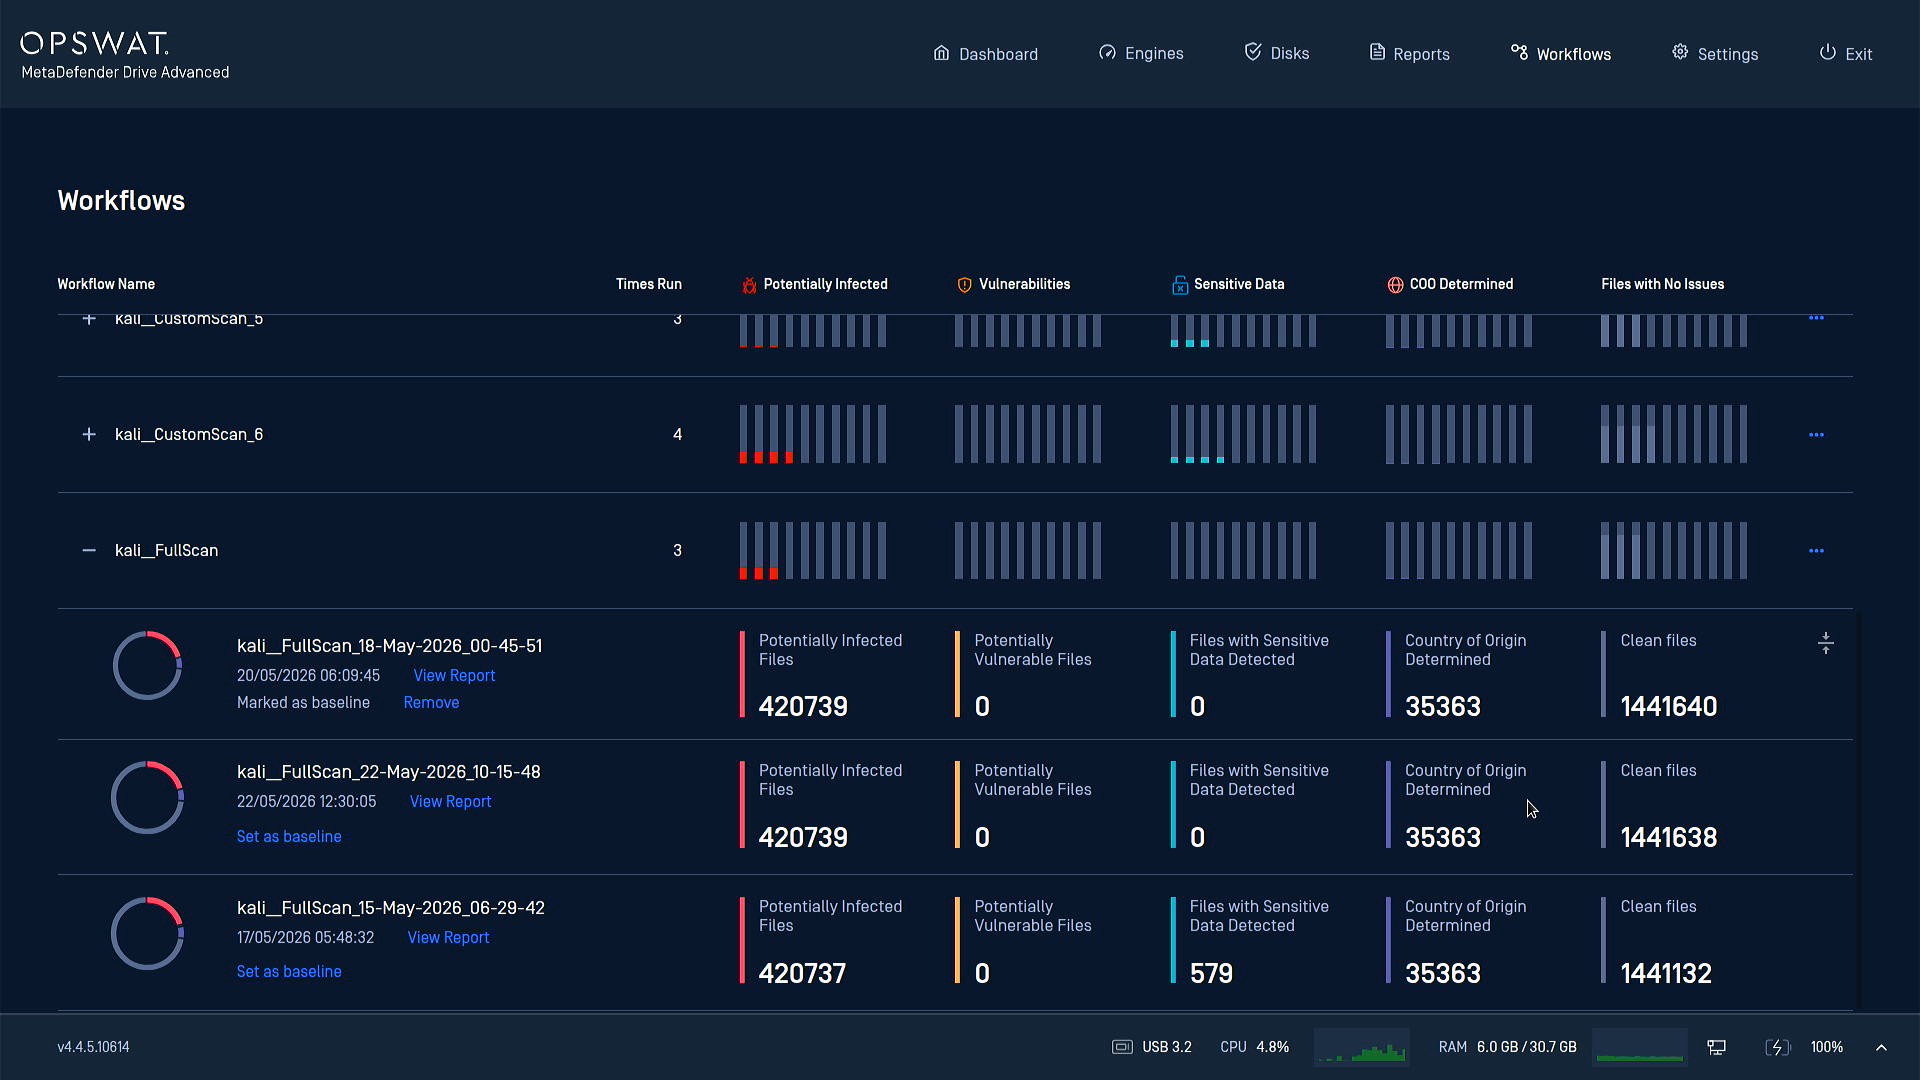
The marked baseline is only a comparison reference for the UI and OCM. It is not used by the Differential Scan feature. Changing or removing it does not invalidate any cached hashes.
How the skip decision works
MetaDefender Drive skips engine scanning for a file only when all the following three criteria are met:
Same scan settings as the cached entry (engines, archive options, scan paths, etc.).
Hash found is in the database. The DB is cumulative across every previous Differential Scan run with matching settings, not tied to a single baseline or workflow.
The entry is within the Valid Period you set.
If one of these three criteria isn't met, the file is scanned normally, and its fresh result is written.
Things worth knowing
A Workflow is a feature to add more convenience, not a requirement. Plain Full Scan / Custom Scan with the same settings as a prior run benefits from the cache too.
Hashes are physically retained for up to 30 days while the feature is on, regardless of the validity Period. This period only controls the cutoff used at lookup.
Un-ticking Enable Differential Scan wipes the hash database. You will receive a warning first.
Builds with 1 TB capacity, including Digital Display, Drive 2, and Smart Touch, hold up to 30 days of hashes. The 64 GB MetaDefender Drive build keeps either the last 3 scans or the last 3 days of hashes.
Deleting old reports (manually or via the My OPSWAT Central Management auto-delete) does not delete the hashes associated with them.
Both the seed scan and every differential scan sync to My OPSWAT Central Management, with differential scan evidence preserved per report.