My OPSWAT Central Management offers an integration with a 3rd-party Single Sign-on Service (SSO). This enables an account to provision new users to manage your account. When a user logs into the My OPSWAT Central Management console through your own SSO service, My OPSWAT Central Management will provision that user as a read-only user on your account. You can update the user's role later.
My OPSWAT Central Management uses the secure and widely adopted industry standard Security Assertion Markup Language 2.0 (SAML 2.0), so that you can integrate easily with any large identity provider that supports SAML 2.0.
To get started, log into PingOne and create an application for My OPSWAT Central Management.
Log into PingOne as an administrator
Navigate to Applications
Click Add Application > New SAML Application
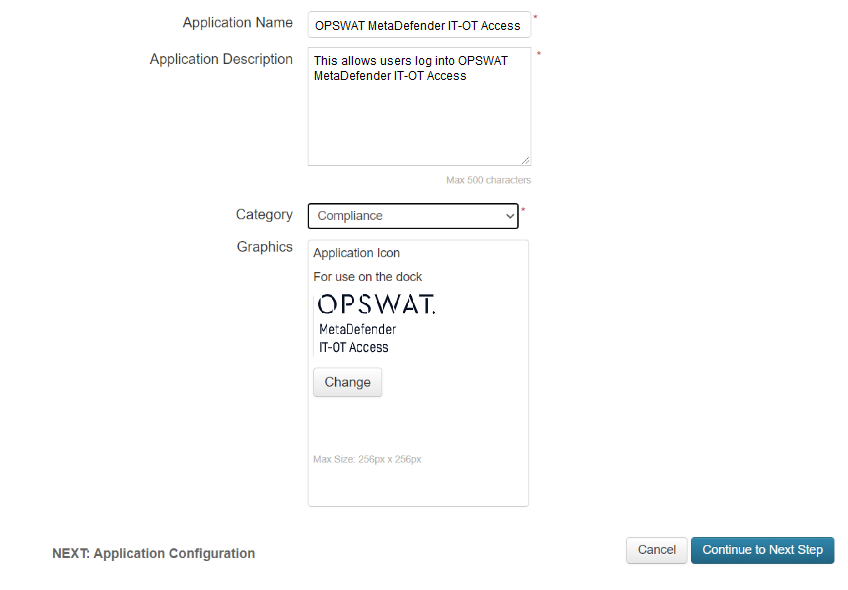
Fill in required information and click Continue to Next Step
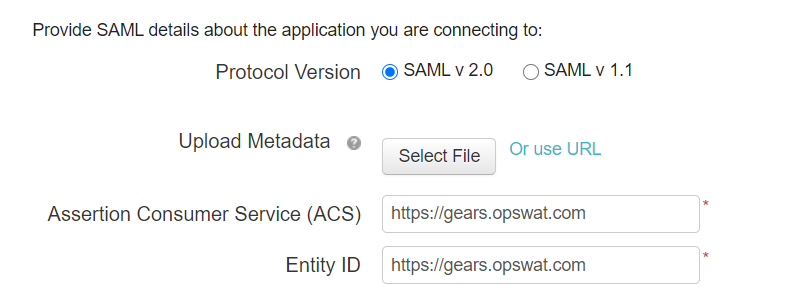
Provide SAML details as below:
Protocol version: select SAML v2.0
Assertion Consumer Service (ACS) & Entity ID: your My OPSWAT Central Management, for example: if your account is connecting to US tenant, it should be https://gears.opswat.com
Click Continue to Next Step
Click Save and Exit . You can continue to next steps if you would like to grant access to users and groups or you can do this later.
Expand the app again and download the metadata to import it to My OPSWAT Central Management later, named it saml2metadata PingOne,xml
Configure PingOne on My OPSWAT Central Management
Log into the My OPSWAT Central Management console with an admin permission. Navigate to User management > SSO
On Control tab, enable "Enable Single Sign On" checkbox
Click Choose File to import the identity provider metadata you got earlier in step #8, saml2_metadata_PingOne,xml. If the file is valid then IdP certificate, Issuer, and IdP SSO URL will be popped up.
Enter an IdP Name, for example: PingOne

Click the Save button and enter your PIN to confirm the action.
After you save your changes successfully, My OPSWAT Central Management generates a login URL. Copy this URL.

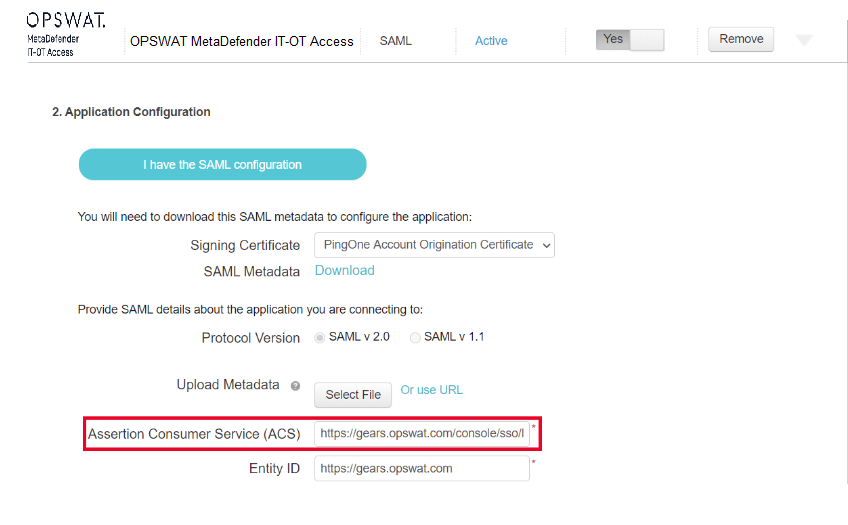
Go back to PingOne to update ACS URL for the My OPSWAT Central Management app
Switch to PingOne Admin
Navigate to Applications, then select the application My OPSWAT Central Management application you created earlier.
Click Edit and Continue to Next Step
Replace the ACS URL with the URL the My OPSWAT Central Management generated in step #14
Click Continue to Next Step until the end and click Finish.
DONE. Now you need to assign people/groups who can access this application on PingOne.
If You couldn't import the identity provider information from the IdP metadata file, you can copy IdP certificate, Issuer, and IdP SSO URL to the My OPSWAT Central Management console
IDP Mappings
IdP Mapping allows you to synchronize user groups from your external Identity Provider (IdP) to specific roles within My OPSWAT Central Management. This ensures users are automatically assigned the correct permissions upon their SSO login.
To enable group syncing, Okta must be configured to include group memberships in the SAML assertion.
Step A: Attribute & Group Statements
Log in to your PingOne Admin Console.
Navigate to Connections > Applications and select your My OPSWAT Central Management SAML Application.
Go to the Attribute Mappings tab and click the Edit (pencil) icon.
Ensure the following core identity attributes are mapped:
firstName — Maps to
User > First NamelastName — Maps to
User > Last Nameemail — Maps to
User > Email
Add Group Attribute: To send group data, click Add Attribute.
Attribute:
groupsMapping: Select Group Names.
Requirement: Ensure this attribute is included in the SAML assertion.
Step B: My OPSWAT Central Management Configuration
Go to My OPSWAT Central Management > User Management > SSO.
In the Group Attributes field, enter:
groups(this must be an exact string match to the attribute name defined in PingOne).Navigate to User Management > IdP Mappings > Add IdP Mapping.
Name on IdP: Enter the exact Group Name from PingOne (e.g.,
IT_Admins).Role: Select the corresponding My OPSWAT Central Management role (e.g.,
Security-Admin).