My OPSWAT Central Management offers an integration with a 3rd-party Single Sign-on Service (SSO). This enables an account to provision new users to manage your account. When a user logs into the My OPSWAT Central Management console through your own SSO service, My OPSWAT Central Management will provision that user as a read-only user on your account. You can update the user's role later.
My OPSWAT Central Management uses the secure and widely adopted industry standard Security Assertion Markup Language 2.0 (SAML 2.0), so that you can integrate easily with any large identity provider that supports SAML 2.0.
To get started, log into Microsoft Entral ID Portal and create an application for My OPSWAT Central Management . Details can be found here.
Log into Azure Portal as an administrator
Navigate to Azure Active Directory > Enterprise applications
Click the + New Application

Select Non-gallery application
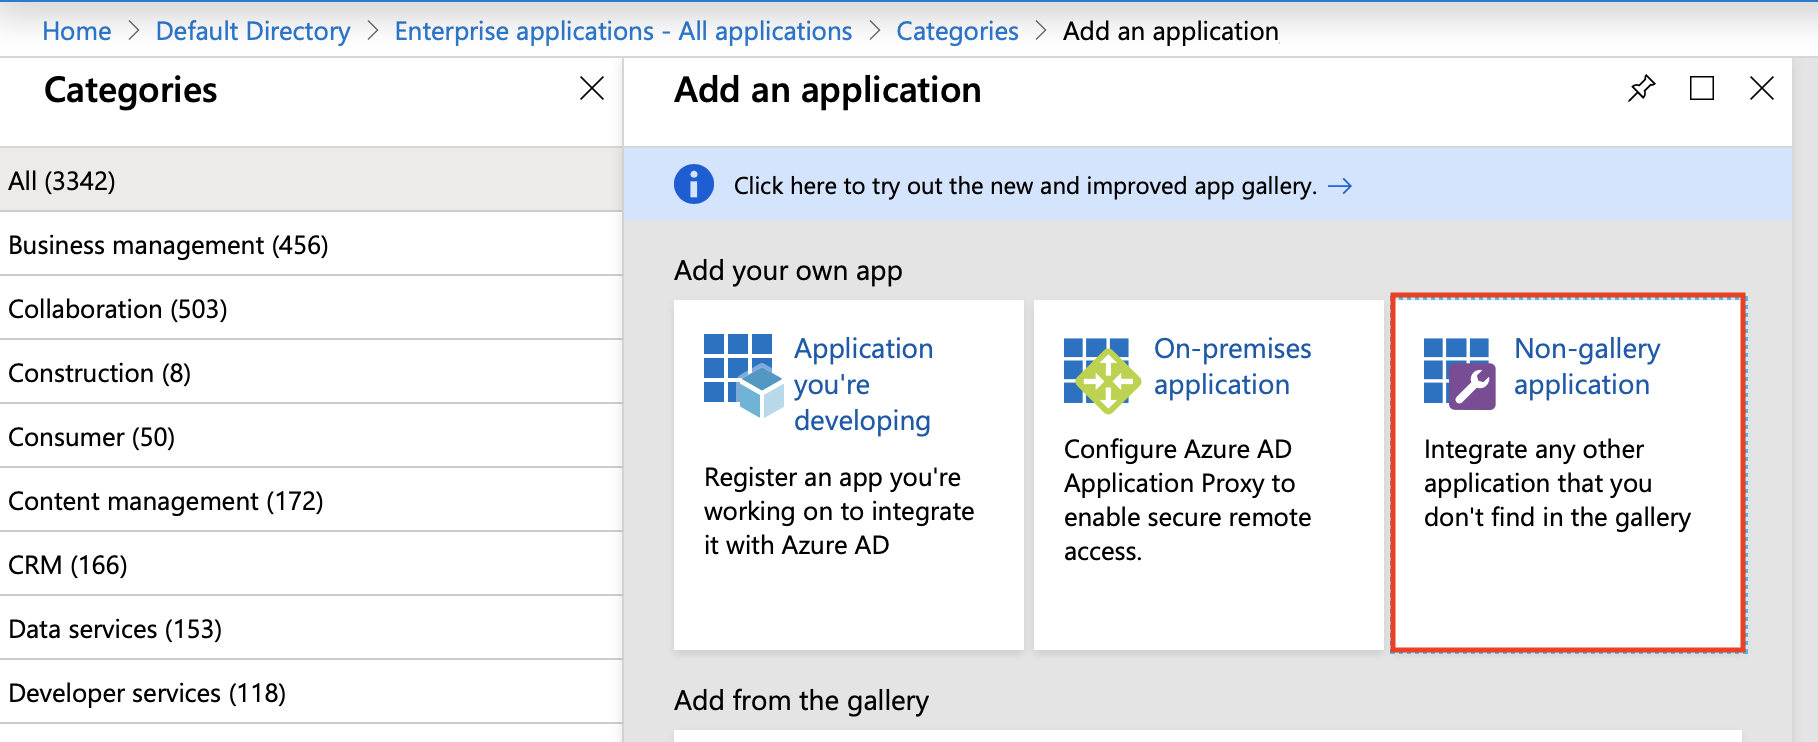
Enter Application name, for example My OPSWAT Central Management
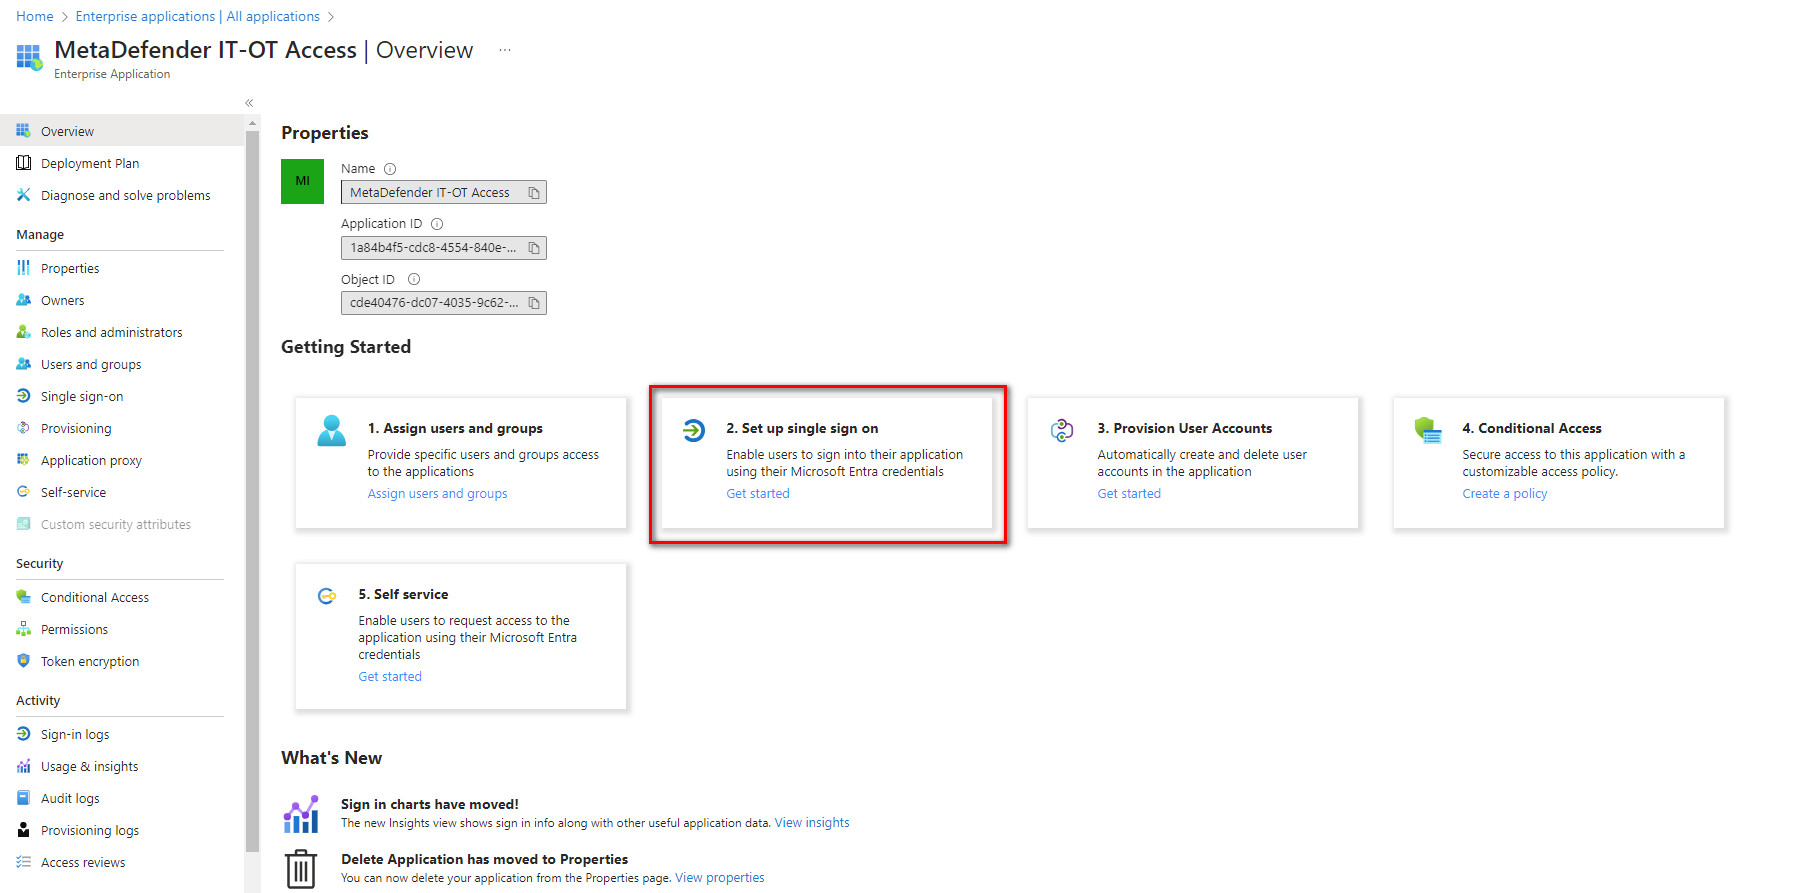
Under the Getting Started section, select 2. Set up Single sign on
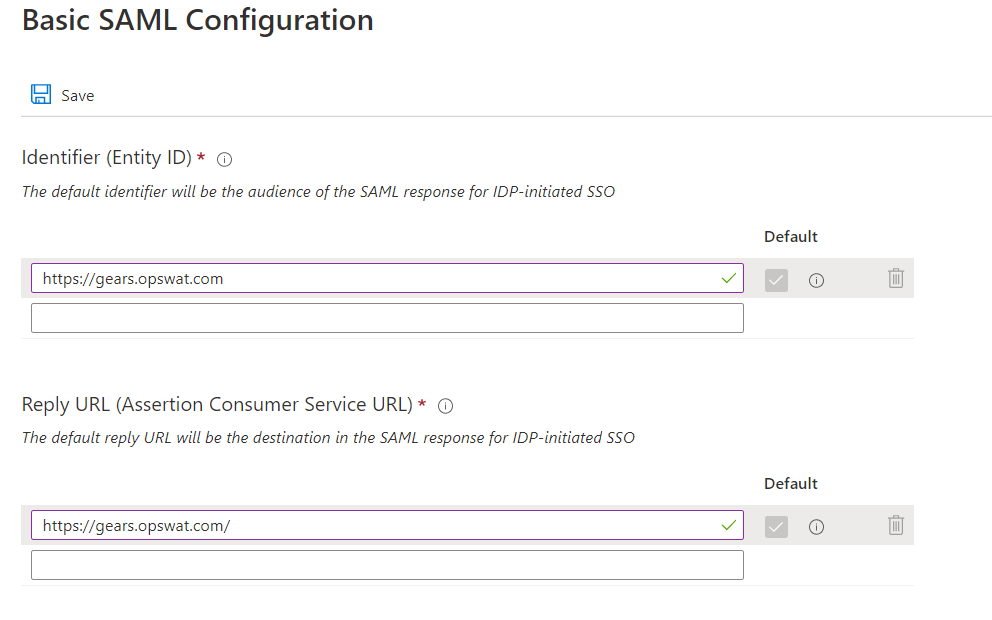
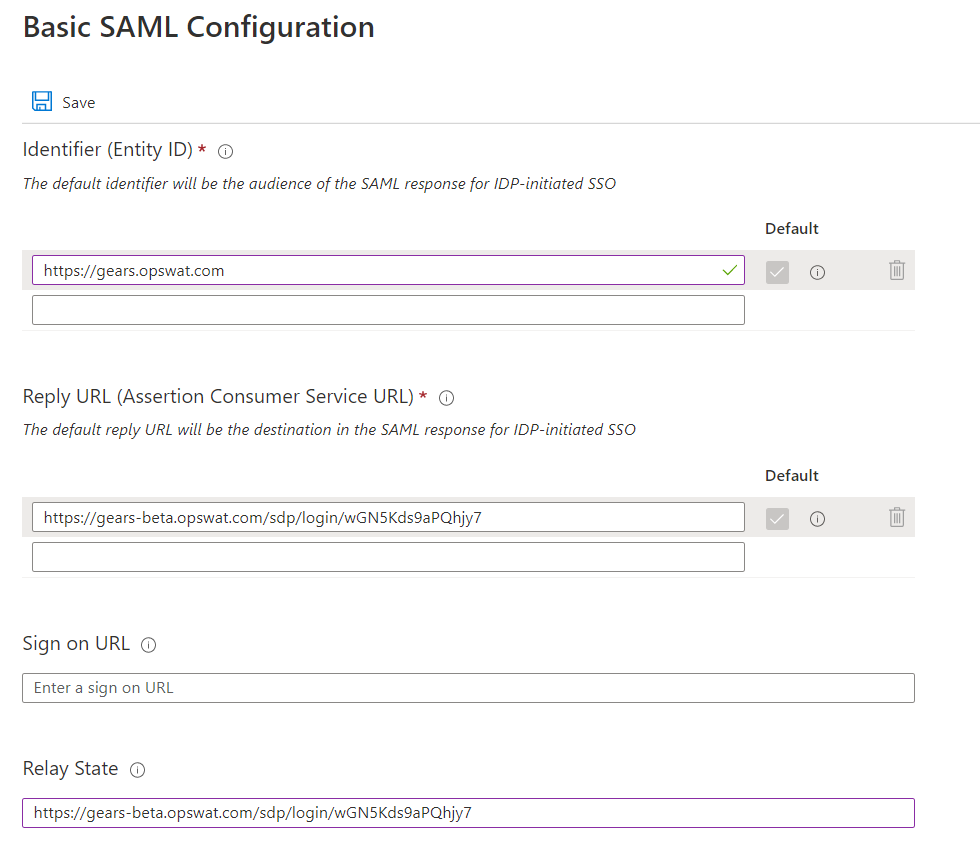
Click Edit icon on Basic SAML Configuration. Enter https://gears.opswat.com as a placeholder for all parameters. Click Save.
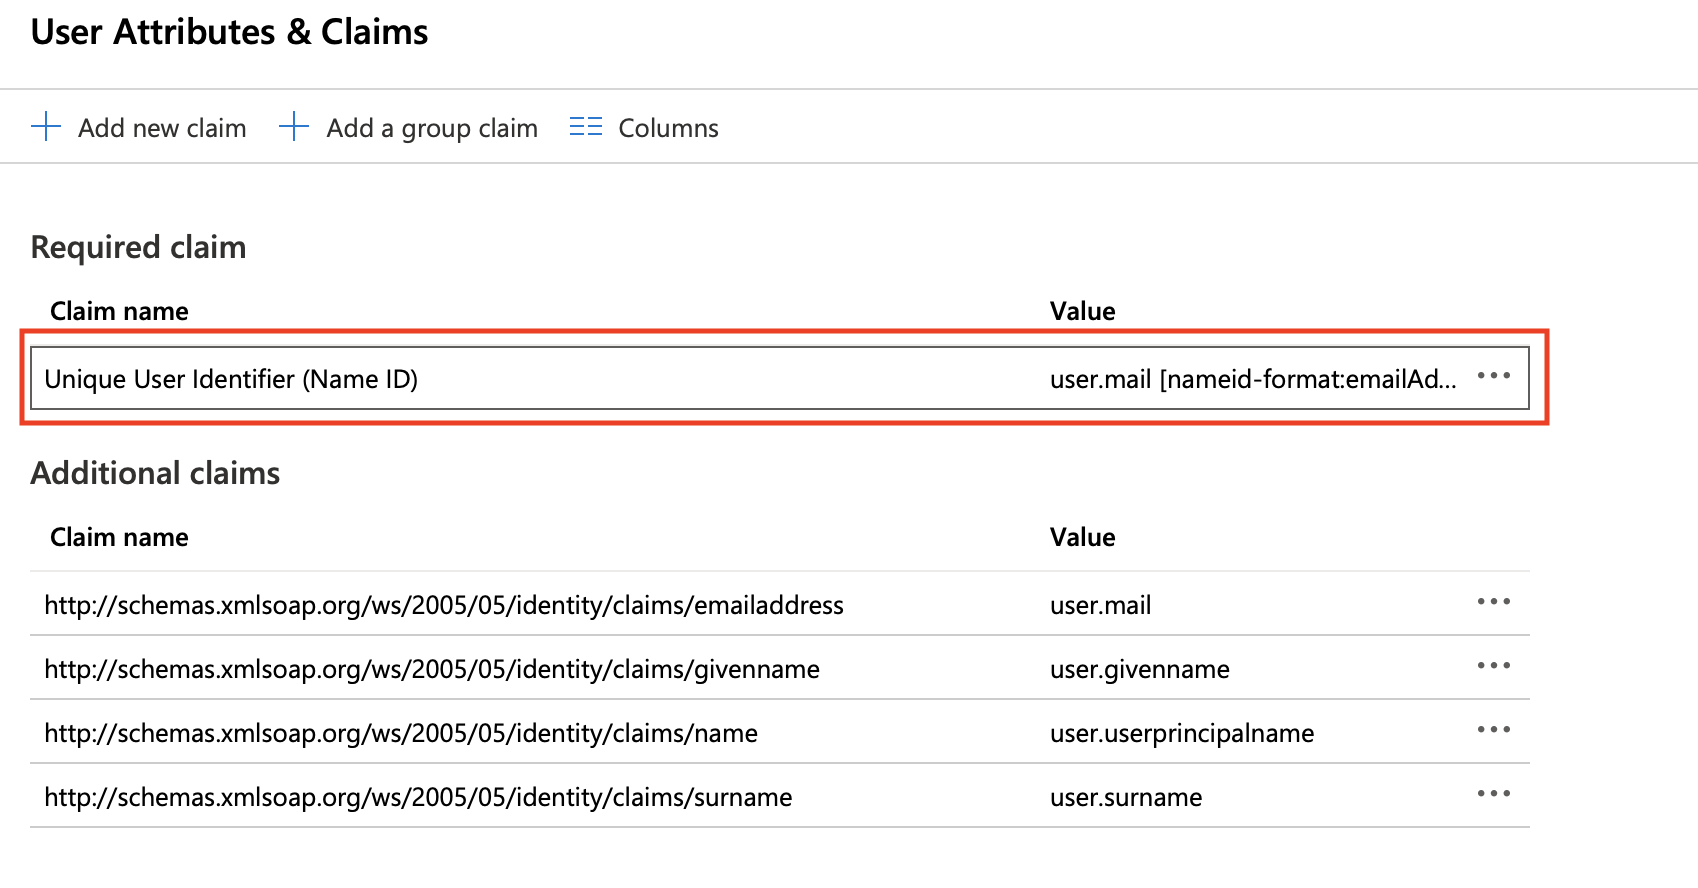
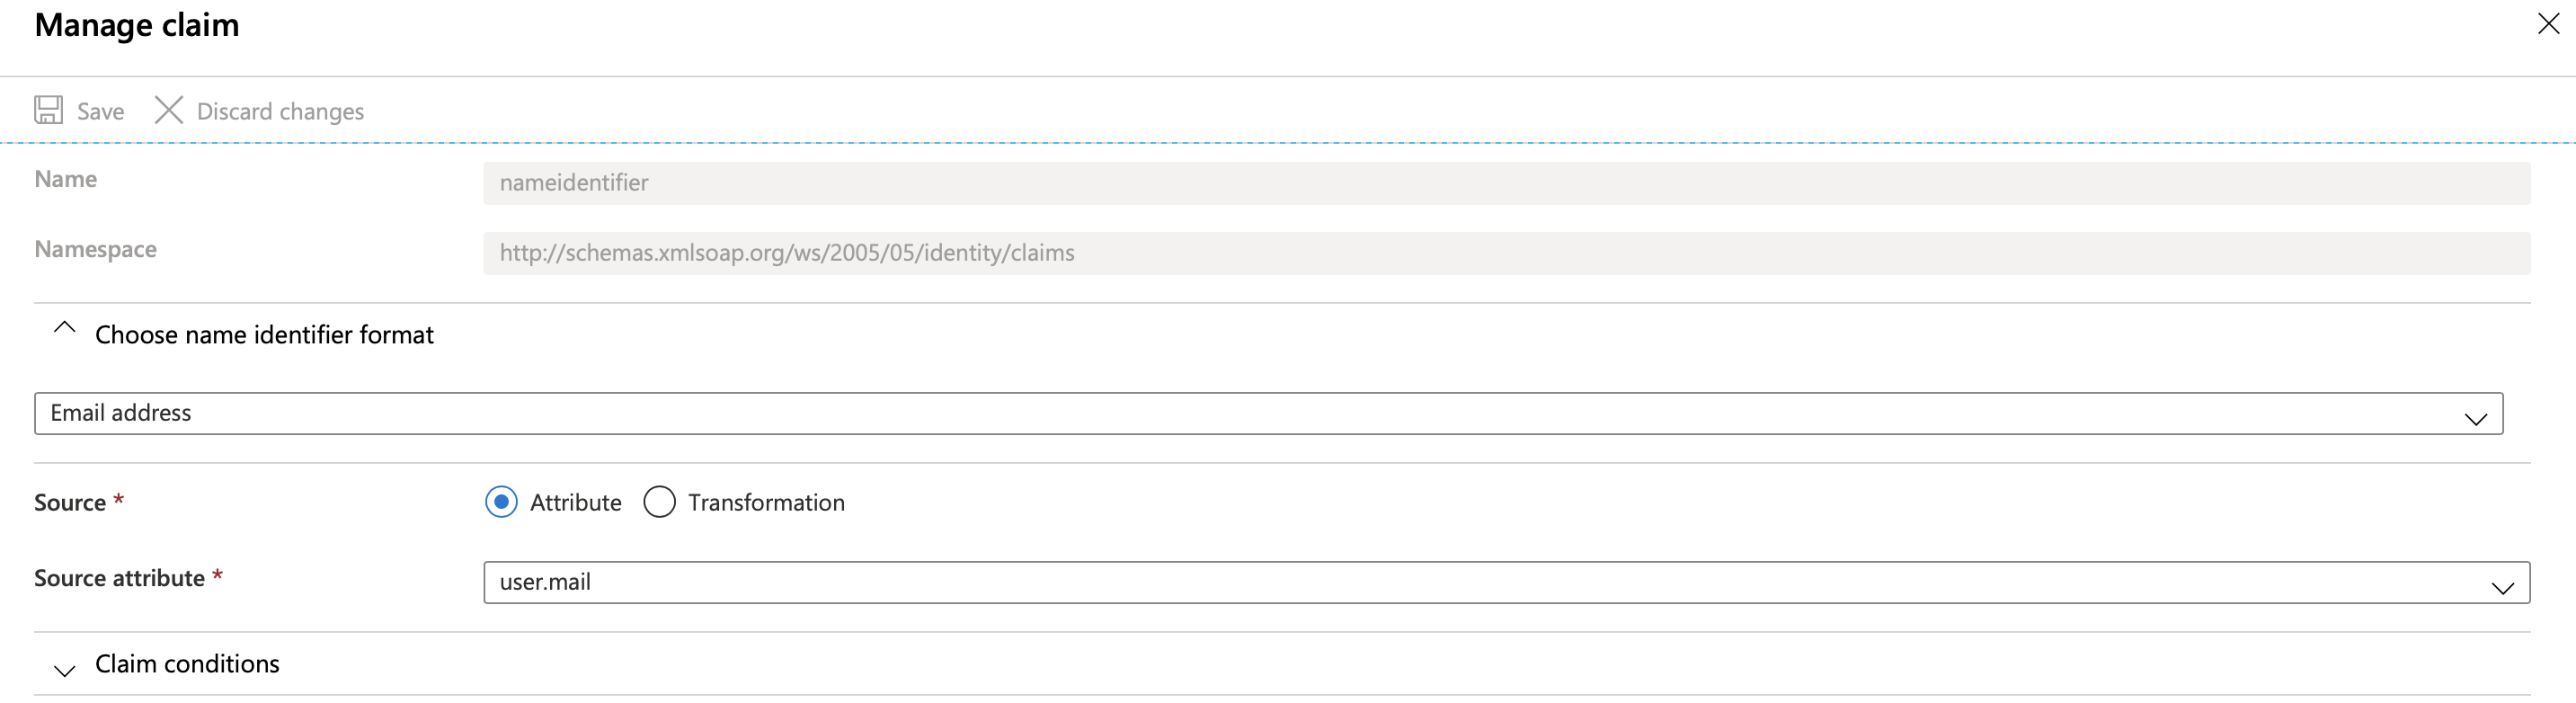
Click Edit icon on User Attributes & Claims: configure Unique User Identifier (Name ID) format as EmailFormat and its value as a user's email by clicking on that claim and choose its format as email address and source attribute as user.mail or user.localprinciplename
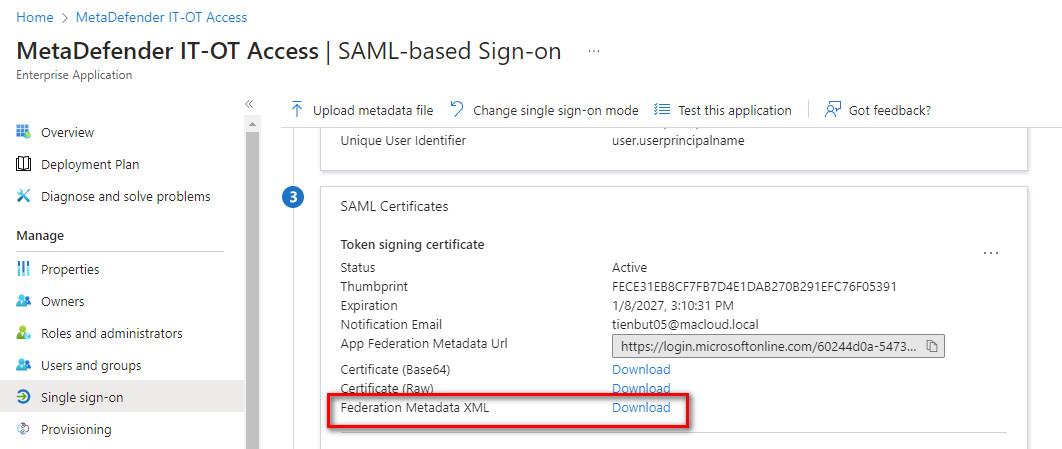
On SAML Signing Certificate section, you can now download the IdP configuration xml file by downloading Federation Metadata XML (for example, azure.xml). You can use this file to import to My OPSWAT Central Management.
(Optional) Get additional information
Download Azure’s certificate
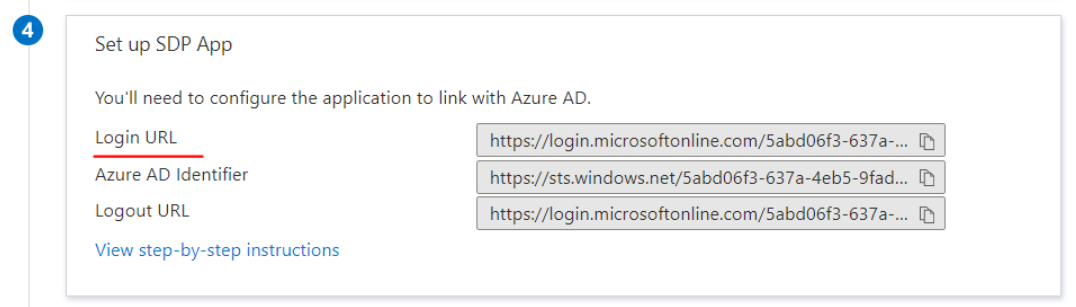
Get Azure Login URL
Get Azure AD Identifier
Configure Microsoft Azure on My OPSWAT Central Management :
Log into the My OPSWAT Central Management console with an admin permission
Navigate to User management > SSO
On Console Authentication tab, enable "Enable Single Sign On" checkbox
Enter an IdP Name, for example: Azure
Click Choose File to import the identity provider metadata you got earlier in step #9 . Select the file you saved in step #9, Azure.xml. If the file is valid then IdP certificate, Issuer, and IdP SSO URL will pop up. Click SAVE
(Optional) Use this step if you can not import the metadata file
IdP Certificate: Upload the certificate downloaded in Step 10.a
Issuer: Use the value got in Step 10.c
IdP SSO URL: Use the value got in Step 10.b
After you save your changes successfully, My OPSWAT Central Management generates a My OPSWAT Central Management Login URL and My OPSWAT Central Management Entity ID. Copy those values to import to Microsoft Azure

Update My OPSWAT Central Management app on Microsoft Azure
Switch to Azure Portal
Navigate to the application you created earlier, My OPSWAT Central Management, click Edit icon on Basic SAML Configuration.
Replace the value of Identifier (Entity ID) with the My OPSWAT Central Management Entity ID you copied in step 7 of "Configure Microsoft Azure on My OPSWAT Central Management"
Replace value of Reply URL (Assertion Consumer Service URL) and Relay State with the My OPSWAT Central Management Login URL you copied in step 7 then click Save.
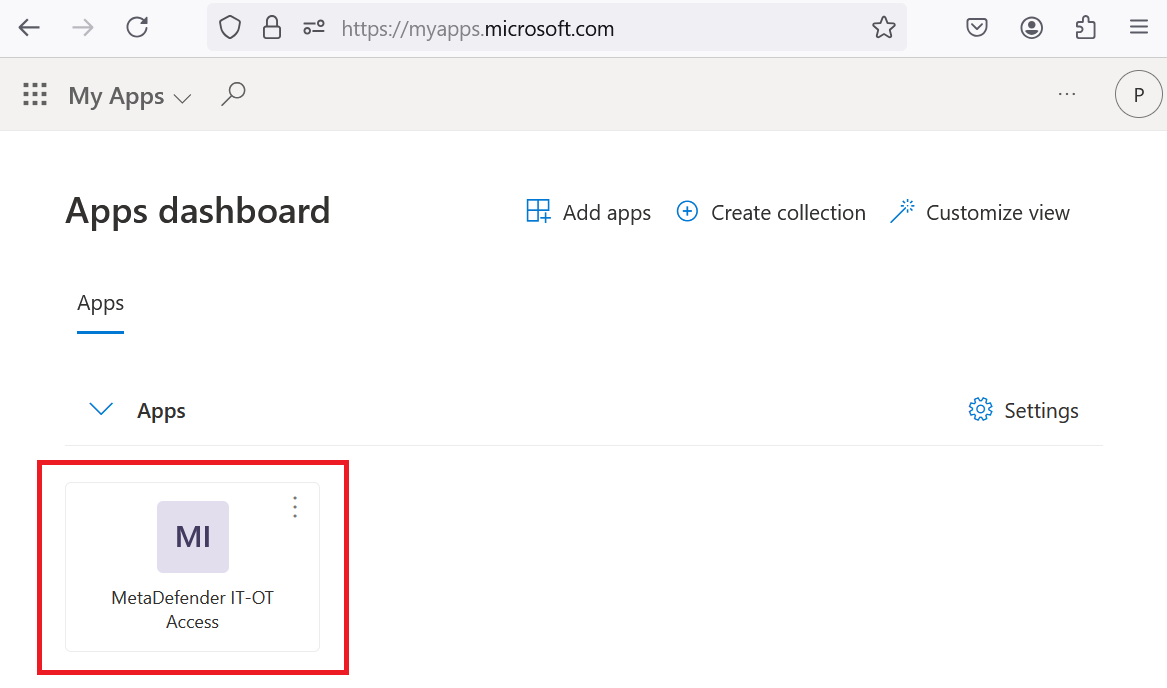
Log in to the My OPSWAT Central Management Console from Microsoft Azure
Log in to the Azure portal using this link: https://myapps.microsoft.com. Click on the My OPSWAT Central Management application, which the admin previously configured, to access the MD IT-OT Access Console.
DONE.
If You couldn't import the identity provider information from the IdP metadata file, you can get information from the Set up instruction page of the app and copy IdP certificate, Issuer, and IdP SSO URL to the My OPSWAT Central Management console.
IDP Mappings
IdP Mapping allows you to synchronize user groups from your external Identity Provider (IdP) to specific roles within My OPSWAT Central Management. This ensures users are automatically assigned the correct permissions upon their SSO login.
Azure handles group claims differently than Okta, often using unique identifiers rather than names.
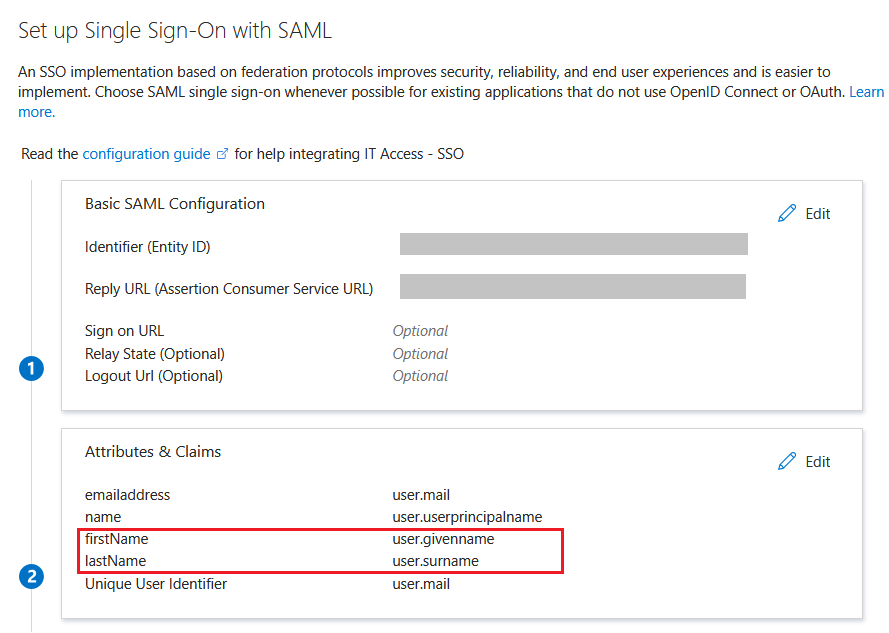
Step A: Attributes & Claims
In Azure Portal, go to Enterprise Applications > My OPSWAT Central Management App > Single sign-on.
Edit Attributes & Claims:
firstName:
user.givennamelastName:
user.surname
Click Add a group claim:
Select Security groups (or your preferred group type).
Source attribute: Select Group ID (Note: This sends the Azure Object ID).
Customize the name of the group claim: Set to
groups.
Step B: My OPSWAT Central Management Configuration
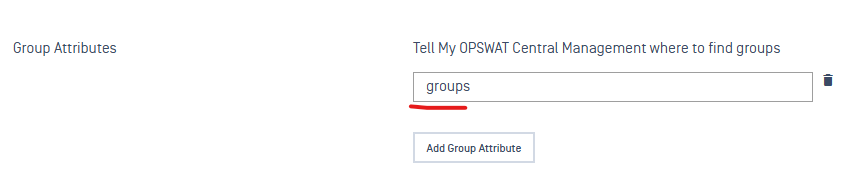
In My OPSWAT Central Management > User Management > SSO, ensure the Group Attributes field is set to
groups.Navigate to User Management > IdP Mappings > Add IdP Mapping.
Name on IdP: Paste the Azure Object ID (e.g.,
a1b2c3d4-e5f6...).
Note: Unless you specifically configured Azure to send "cloud-only" group names, My OPSWAT Central Management requires the Object ID here to match successfully.
Role: Select the corresponding My OPSWAT Central Management role.