The User Role feature in My OPSWAT Central Management provides administrators with the ability to create customized level of access for their console users. Administrators can create new roles, assign to users, and amend them as needed.
By providing this level of control, Administrators allow console users access to only those aspects of My OPSWAT Central Management they need in a "least privilege" approach to avoid sacrificing security.
Access Level | Definition |
|---|---|
Hide | Denies the console user access from the section in My OPSWAT Central Management. Users will not be able to see the section or sub-section. |
Read | Allows the console user to see the section in My OPSWAT Central Management, but the console user is not able to create, modify, or delete. |
Write | Allows the console user to create, modify, and delete within the section in My OPSWAT Central Management. |
Create a User Role
Login to the My OPSWAT Central Management console.
Go to User Management > Roles.
Click on the "Create New Role" button to create a new user role.
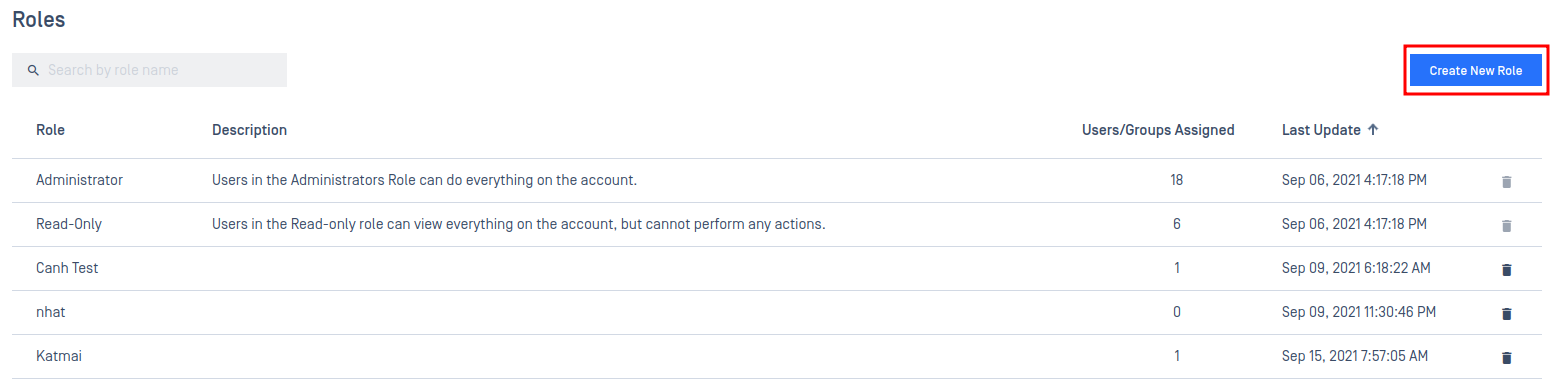
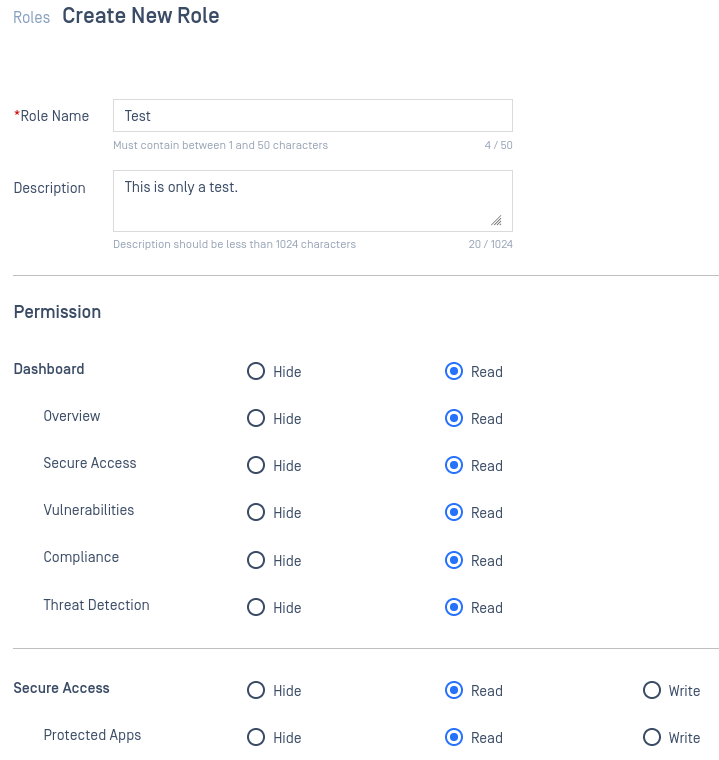
Give the new role a Role Name and a Description (optional).
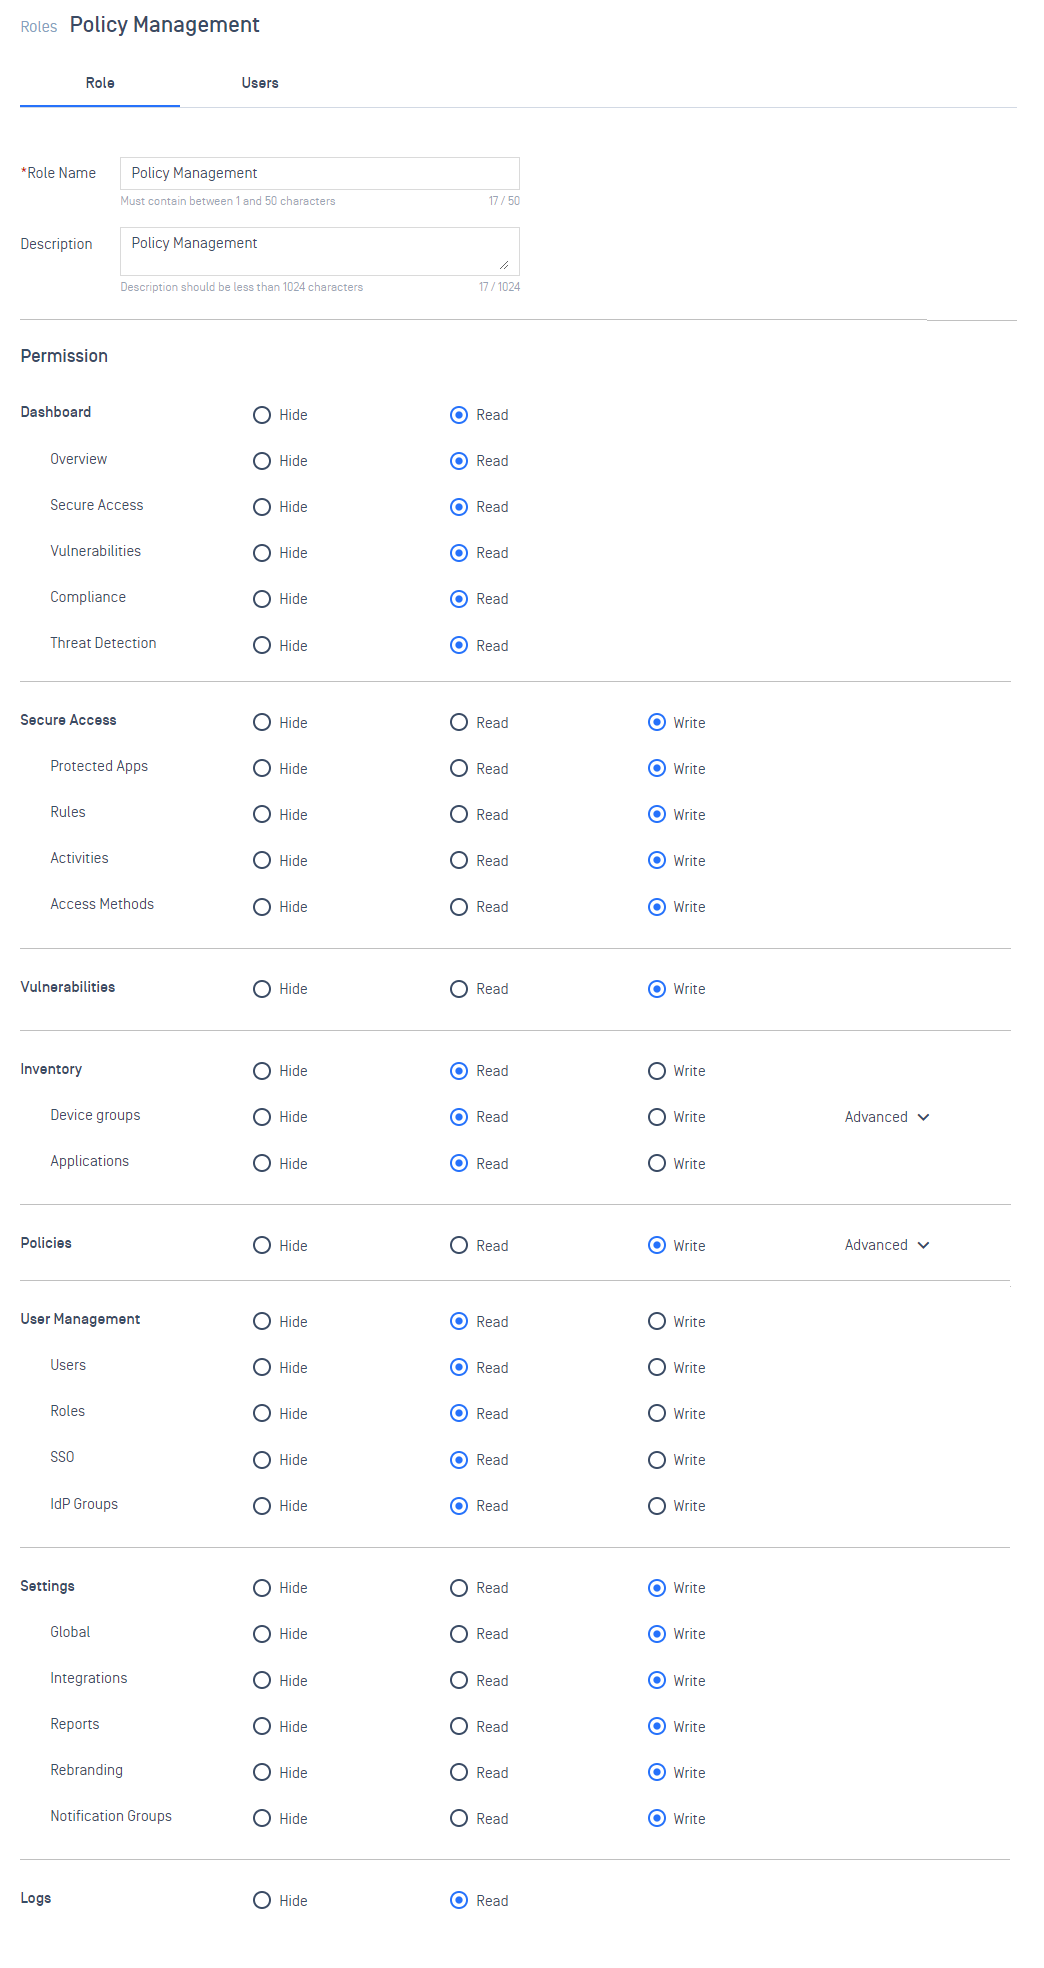
Adjust the Hide, Read, and Write permissions as desired for each section of the UI. When selecting the leading UI sections, the permission will act as a 'select all' and give all following sections the same permission.
The Device Groups and Polices sections offers advanced permissions. Advanced permissions allows an administrator to select specific resources and amend the current set permissions for a more tailored scope of access:
If Hide is selected, the advanced permissions will allow for the selection of Read and Write for any given resource.
If Read is selected, the advanced permissions will allow for the selection of Hide and Write for any given resource.
If Write is selected, the advanced permissions will allow for the selection of Hide and Read for any given resource.

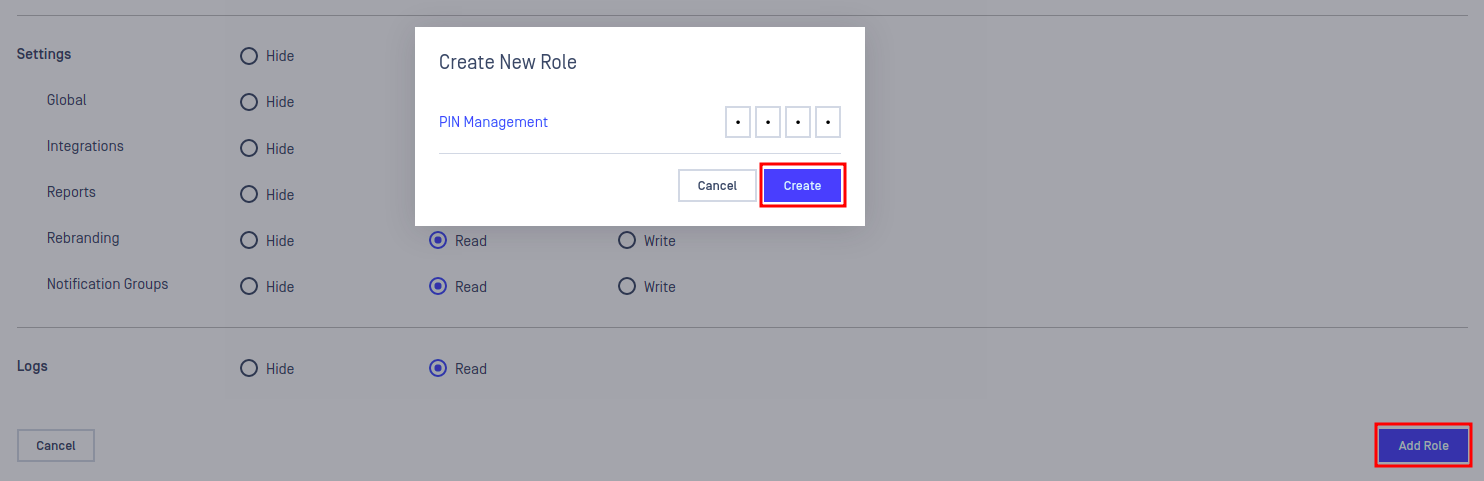
After configuration is complete, click the Add Role button in the lower right corner.
In the confirmation dialog, enter your PIN and click the Create button.
Examples of User Roles
Below are some suggestions for access control on some commonly seen console users in My OPSWAT Central Management. Adjustments may need to be made to fit your organization's needs:
If your organization has console users that require exclusive access to device groups and policies, the Advanced permissions will be a helpful tool. For example, OPSWAT has a console user that should only have write access to a device group called "Internal IT" and read access to a device group called "Marketing". By using the Advanced permissions, an administrator can give the write access to 'Device Groups', hide all device groups with the exception of "Internal IT" and "Marketing", and then provide the read permissions for "Marketing". These steps can be reproduced for policy permissions as well.
Assigning User Roles to Console Users
My OPSWAT Central Management can automatically place a console user into a My OPSWAT Central Management Role based on assignments you define within User Management. This mapping is done either by assigning a role to a My OPSWAT Central Management IdP Group or to individual local console users.
In regards to IdP, after assigning the user role to the My OPSWAT Central Management IdP Group, the following SAML workflow occurs:
A user logs into the My OPSWAT Central Management Console using SAML.
My OPSWAT Central Management will then look to see if the SAML Group attribute passed in the SAML flow matches the name of an external IdP Group specified in any of your My OPSWAT Central Management IdP Groups.
If there is a match, the associated Role is assigned for this console user.
To update local console users with created user roles:
Go to User Management > Users.
Check off the user you would like to update, and select 'Update'.
Select the user role you would like to assign to the user, enter your PIN, and select Update.
To update IdP group console users with created user roles:
Go to User Management > IdP Groups.
Check off the group you would like to update, and select 'Update'.
Select the user role you would like to assign to the group, enter your PIN, and select Update.