
Deployment Scripts let you run your own PowerShell script on each device right before and right after a patch is installed. Use them to stop a service, back up data, or verify that an application is running again after the update.
Note Deployment scripts are available for On-Demand deployments for Windows Patches and Application Patches, on Windows devices only. Refer to On-Demand Deployment for detailed instructions.
On This Page
How It Works
The deployment executes sequentially in three phases: Pre-script runs ➔ Patches install ➔ Post-script runs
Pre-script runs on the device before any patch is installed. If the script fails and the job is configured to abort on failure, patch installation is skipped on that device.
Patches are installed on target devices.
Post-script runs after the patches finish. You can configure it to run immediately, or delay execution until the device reboots or the application relaunches.
Execution & Reporting Notes
One-time execution: Each script runs once per device per deployment. Scripts are not retried, even if patch installation is retried.
Status tracking: Execution results are reported per device under the Scripts tab and summarized in the completion notification email.
Note Each script runs once per device per deployment. Scripts are not retried, even though patches are.
Add Scripts to a Deployment
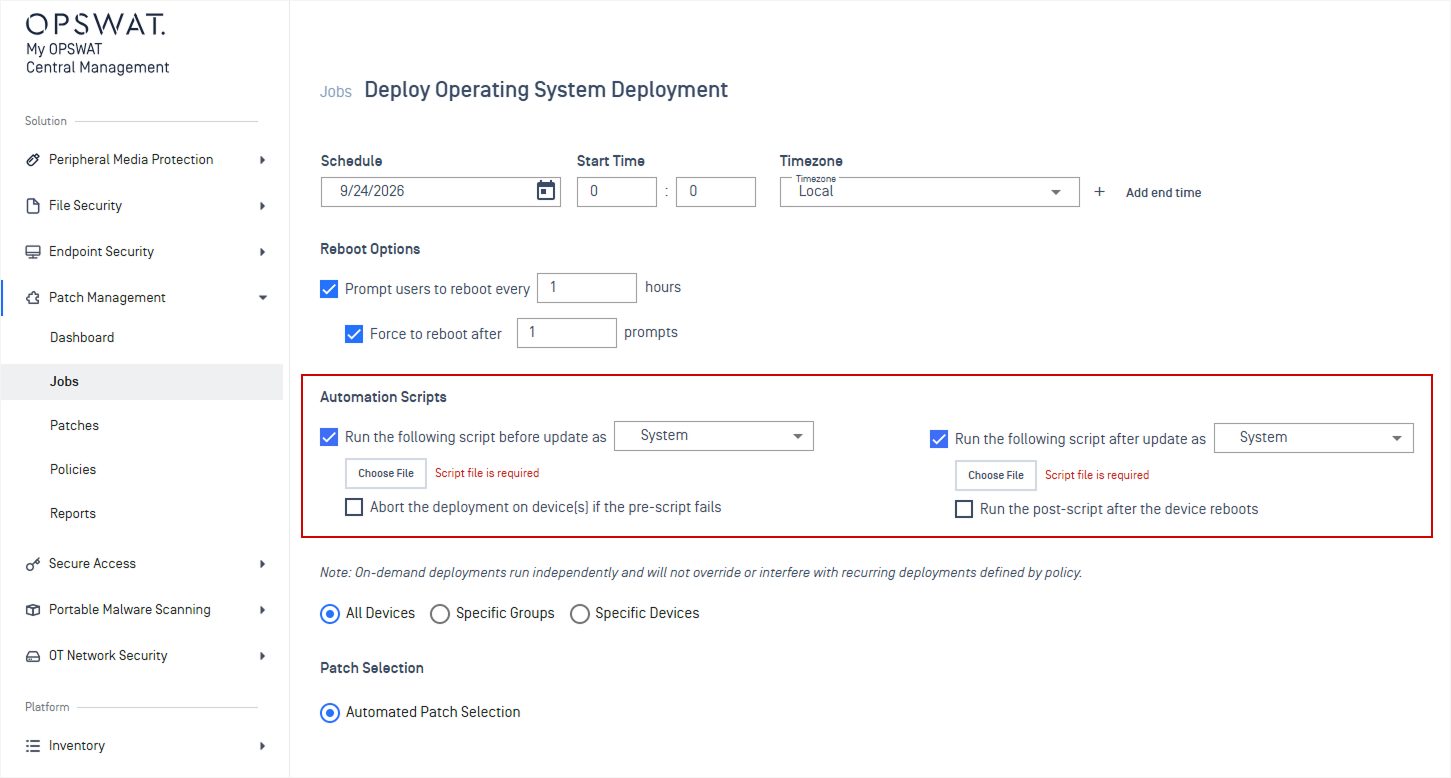
In the left navigation, select Patch Management > Jobs
Select Create On-Demand Deployment and choose Windows Patches or Application Patches
Scroll to the Automation Scripts section. You can enable the pre-script, the post-script, or both
Configure Scripts
Configuration | Details |
|---|---|
Enable the Pre-script 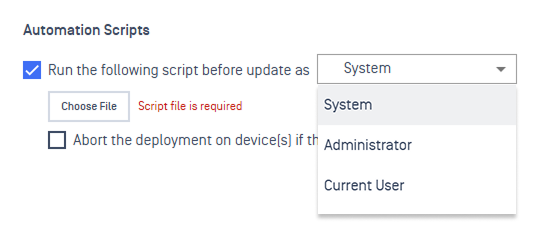 |
|
Enable the Post-script 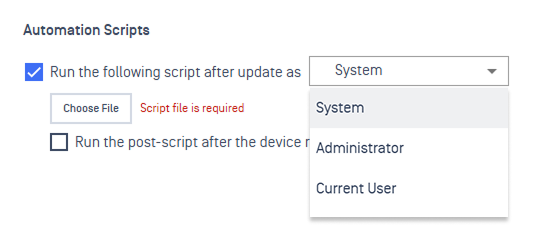 | Select Run the following script after update as and pick who the script runs as |
Upload the script 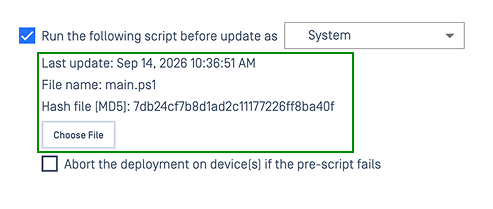 | Select Choose File and upload a .ps1 file or a .zip archive (max 3 MB) Once uploaded, the File name, Last update, and Hash file [MD5] are shown so you can confirm the right version is attached |
Stop patching if the pre-script fails 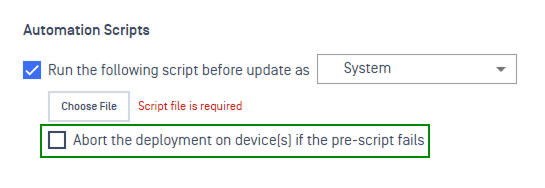 | Select Abort the deployment on device(s) if the pre-script fails Devices whose pre-script fails will not install any patch. Leave it unchecked (default) to record the failure and continue patching |
Run the post-script in the final state 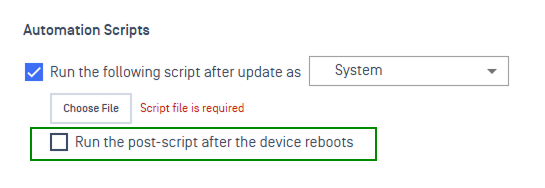 Note With Run after the device reboots enabled, the deployment stays open until the device actually restarts. With Run after the application relaunches, if the app is not relaunched before the deployment ends, the post-script is reported as Not executed. | Check Run the post-script after the device reboots (Windows Patches) or Run the post-script after the application relaunches (Application Patches) The post-script waits until the device has restarted or the app is running again. If no reboot is pending, it runs right away |
Choose Who the Script Runs As
Option | Use when |
|---|---|
System (default) | The script needs full access to the machine, such as stopping services or writing to protected folders |
Administrator | The script needs elevated rights in an administrator context |
Current User | The script works with the signed-in user's files or settings, or shows a prompt. Nothing runs if no user is signed in |
Write a Script
A script is a PowerShell file or a zip archive with main.ps1 at its root. Use a zip when the script needs helper files such as modules or configuration.
The script tells My OPSWAT Central Management how it went by printing an [output] block. The exit code is not used.
result must be 1 (success) or 0 (failure).
msg is shown in the Message column of the Scripts tab. Make it useful, it is the first thing you will read when a script fails.
Rule | Details |
|---|---|
File type | .ps1 or .zip. A .zip must contain main.ps1 at its root and at most 1,000 files. |
Size | Up to 3 MB. Empty files are rejected. |
Time limit | 10 minutes. A script that runs longer is stopped and reported as Timeout. |
Input | Scripts run non-interactively. A script that waits for input will fail. |
Tip Make scripts safe to run more than once, keep them short, and test them on a few devices before targeting the whole fleet.
Sample Scripts
Use these samples as a starting point. Each one prints the [output] block described above.
Purpose | Windows |
|---|---|
Stop a service before the update | |
Start a service after the update | |
Check whether a specific process is running | |
Check whether a specific file exists on a specific path | |
Check whether a specific registry key exists | |
Multiple script check (zip with main.ps1 and helper files) |
Monitor Script Results
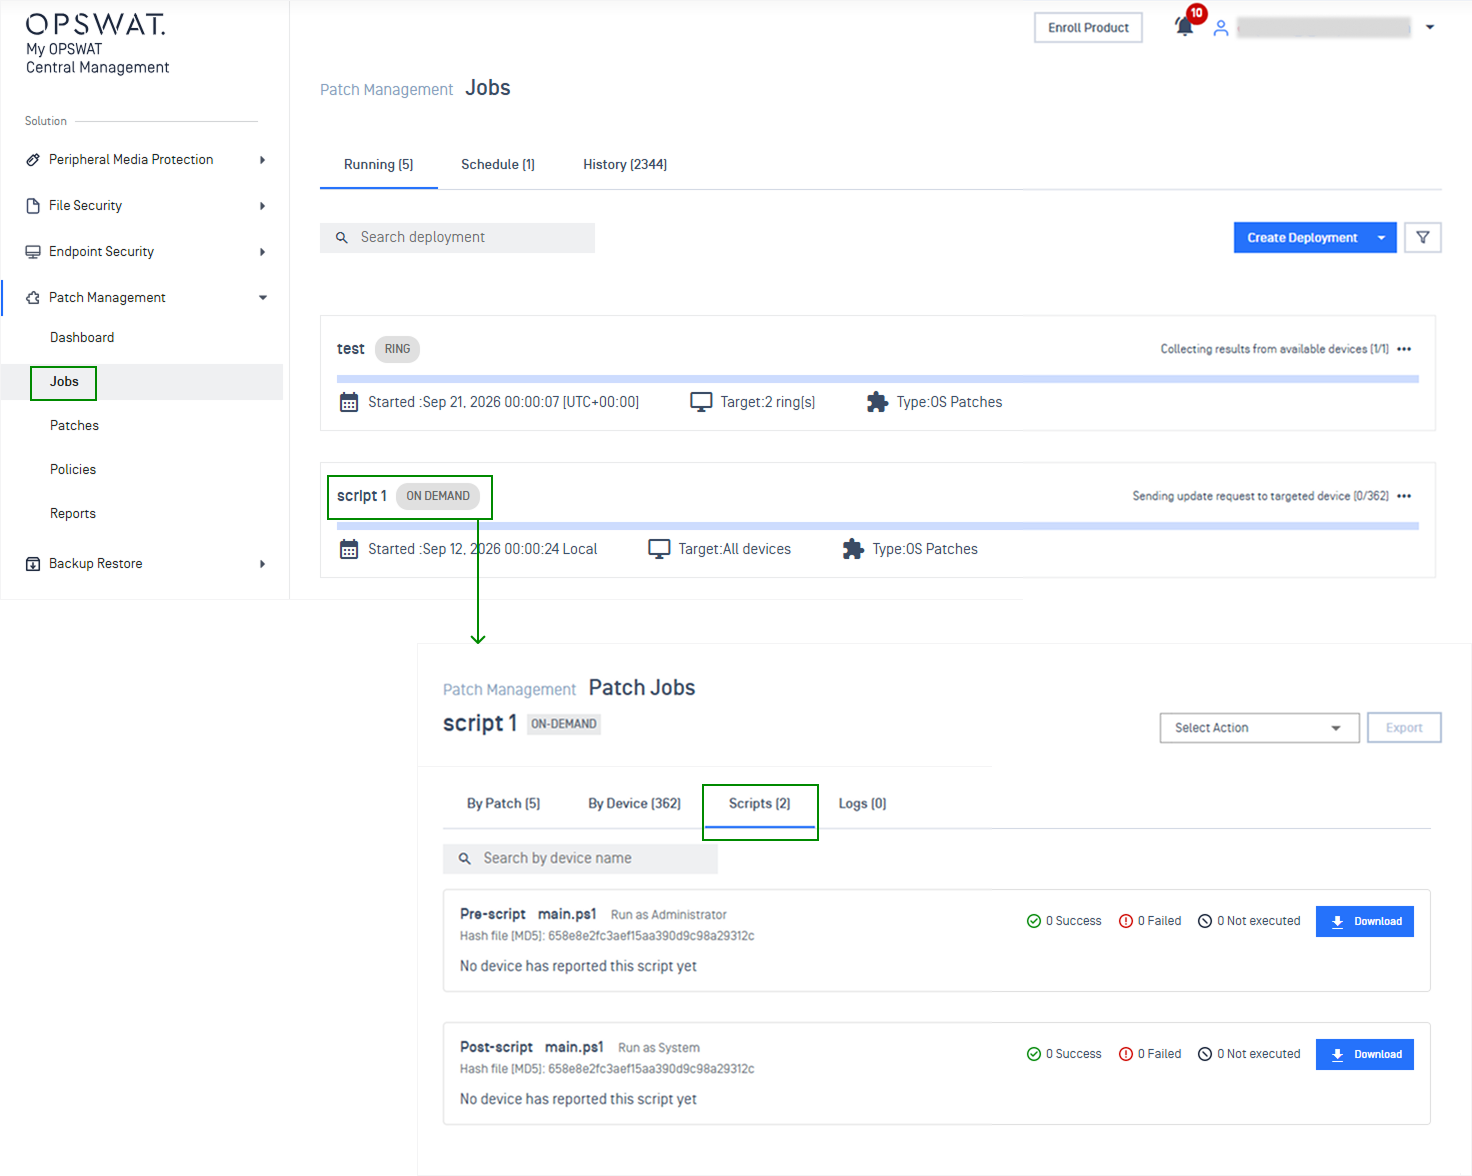
In the left navigation, select Patch Management > Jobs
Open the deployment and select the Scripts tab. The tab appears only when the deployment has at least one script
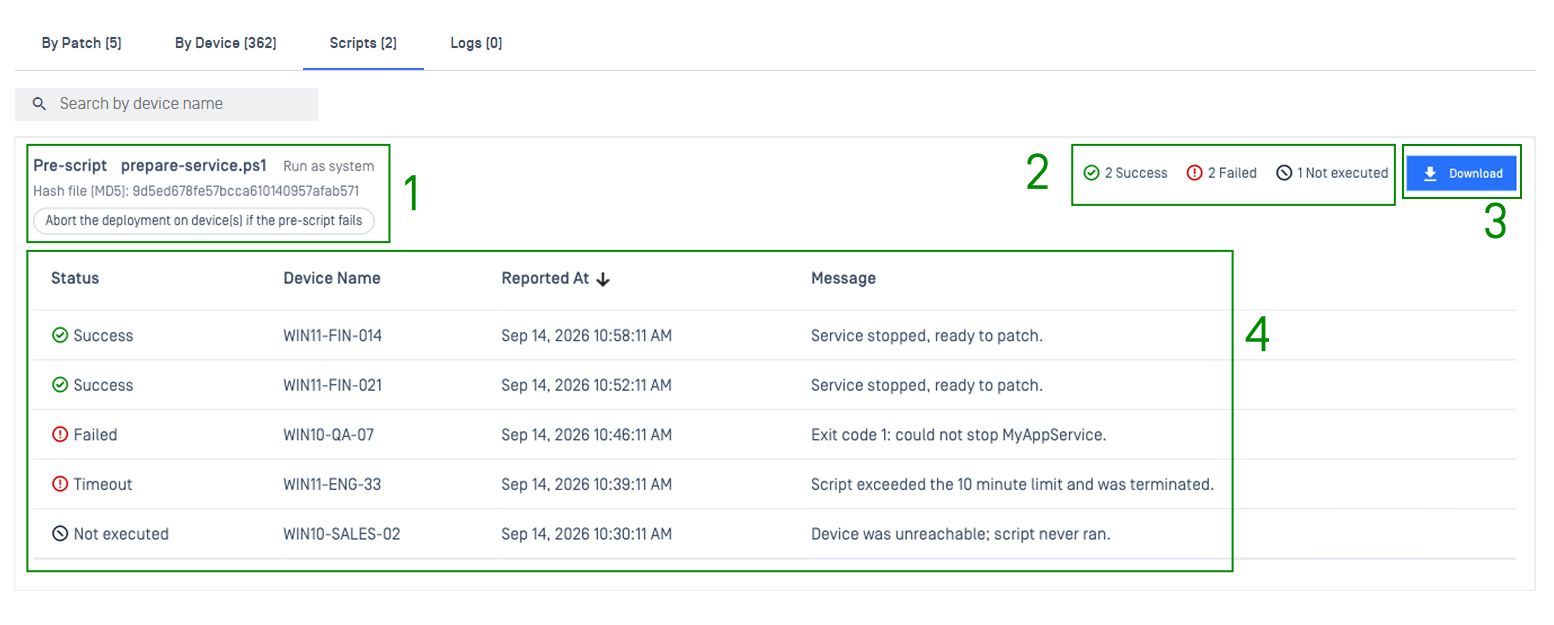
Each script has its own block showing:
File name, Run as, Hash file [MD5], and any option you enabled
Success / Failed / Not executed counts across the devices shown
Download to get the exact script this deployment is running
A per-device table with Status, Device Name, Reported At, and Message. Use Search by device name to find one device, and click a row to open the device
Script Statuses
The Status column shows how the script ended on each device. Hover over a status to see its raw result code. Codes 1 and 0 come from the script's own [output] block; negative codes are reported by the device when the script could not produce a result.
Status | Result code | Meaning |
|---|---|---|
Success | 1 | The script ran and reported result = 1 |
Failed | 0 | The script ran and reported result = 0 |
Timeout | -1 | The script ran past its time limit and was stopped |
Wrong format | -2 | The script did not print an [output] block |
Invalid output | -3 | The [output] block was malformed, for example a result other than 0 or 1 |
Could not run | -4 | The device could not download, verify, unpack, or start the script |
Not executed | -5 | The script was skipped, either because the pre-script aborted the deployment on that device, or because the awaited application relaunch never happened |
Summary Counts
The three counters at the top of each script block group the per-device statuses into three buckets.

Counter | Counts devices with status |
|---|---|
Success | Success |
Failed | Failed, Timeout, Wrong format, Invalid output, Could not run |
Not executed | Not executed |
In other words, a device counts as Failed whenever the script did not finish with a success result, whether the script itself reported a failure or the device could not run it at all. Not executed is kept separate because the script was deliberately skipped, not broken.
Note The counters reflect the devices currently listed in the table below them, so they follow the page size and the device-name search. The completion email uses the same three buckets but counts every device in the deployment.
Scripts Results in Completion Email
Details | Completion Email | |
|---|---|---|
When a deployment with scripts finishes:
| 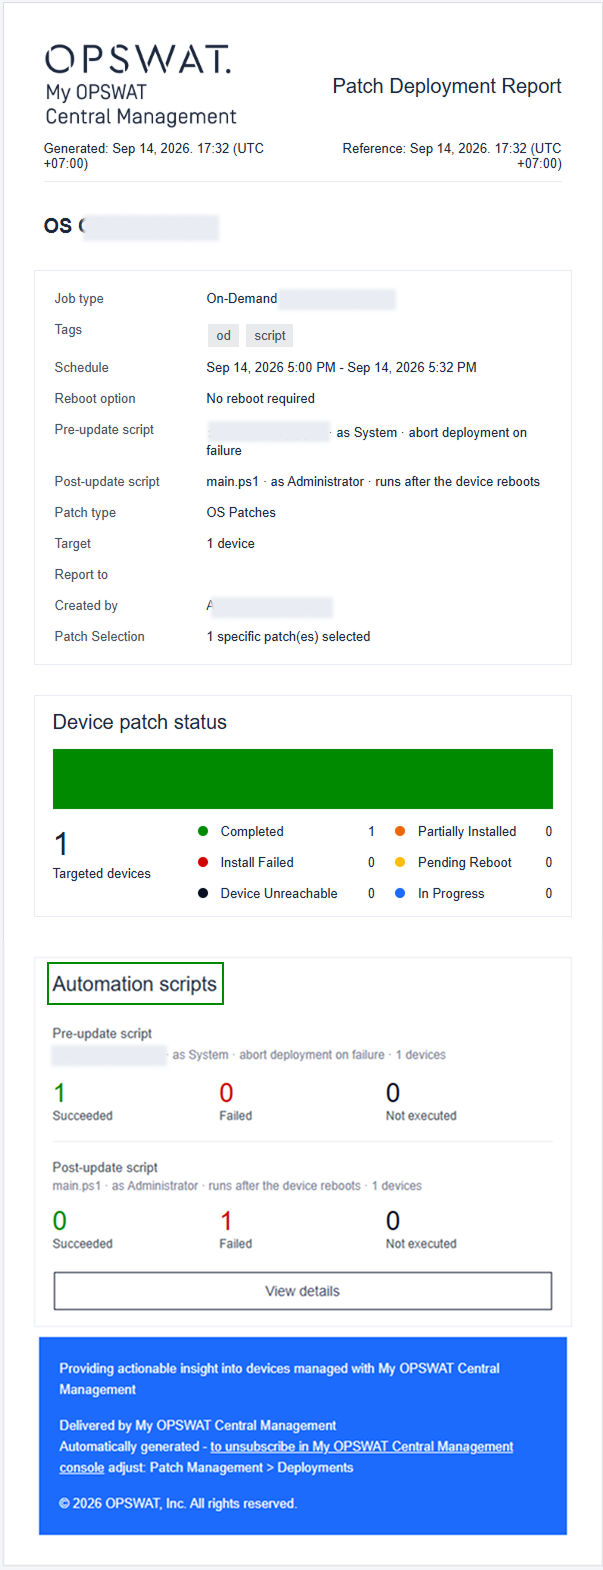 |
What Happens When a Script Fails
Script | Result |
|---|---|
Pre-script fails, abort unchecked | The failure is recorded. Patches install and the post-script runs as normal |
Pre-script fails, abort checked | That device installs nothing. Its patches are reported as failed with the reason Deployment aborted because the pre-deployment script failed, and the post-script is Not executed. Other devices continue normally |
Post-script fails | Installed patches stay installed and their results are unchanged. The failure is shown in the deployment detail for visibility |
Next Steps
Track the rest of the deployment in Monitor Deployment
Set real-time alerts for key patch events under Patch Notification