Starting with version 3.9.2 of MFT we are moving away from the locally installed SQL Express database, for reasons pertaining to application stability as well as mitigating the inherent limitations of SQL Express (a 10GB limit on database size, for example).
However, we understand that in certain situations a full SQL Server installation is not possible for a variety of reasons. To support a temporary deployment of MFT using SQL Express for non-production environments, we have put together the steps below to prepare all prerequisites and successfully go through the installation process.
NOTE: Installing MFT using SQL Express is not encouraged outside of test or proof-of-concept scenarios, this deployment is not suitable for any production environment and we can only offer very limited support in case of issues or unexpected behavior.
Step 1: Installing SQL Express
You will need to obtain the SQL Express installer from the Microsoft website. Currently supported SQL Express versions are similar to the supported SQL Server versions, and a list can be found here: https://www.opswat.com/docs/mdmft/installation#database
During installation, selecting the Basic installation type (default configuration) is sufficient for the purposes of MFT.
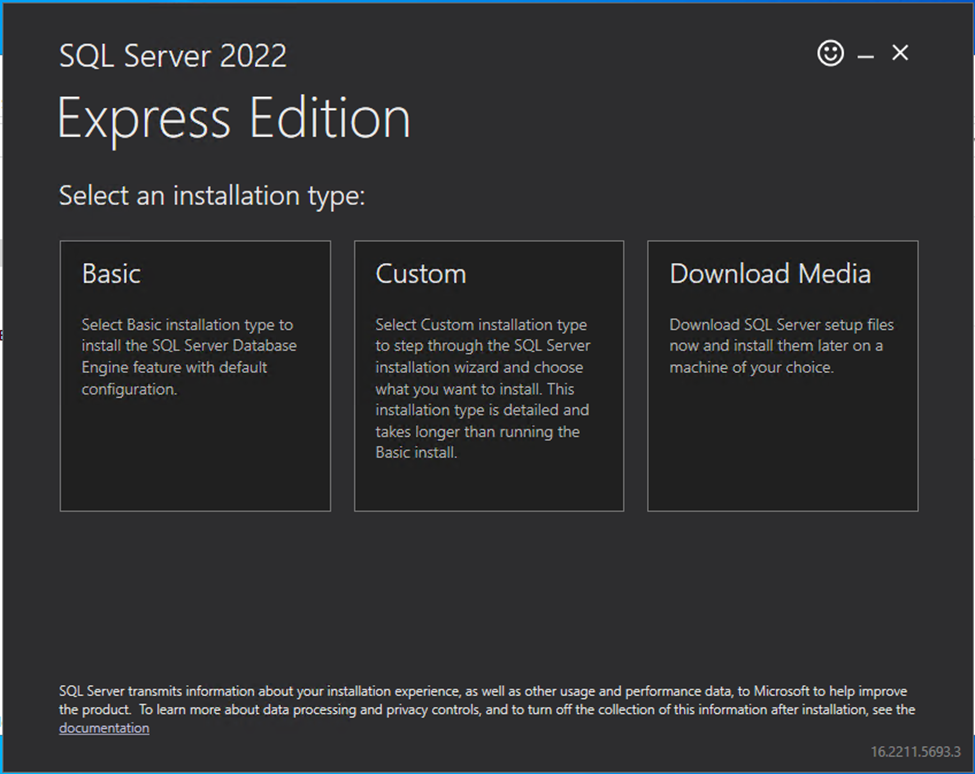
Proceed afterwards with the installation, modifying any necessary parameters such as installation path, and finish the installation. If the installer offers the option to install the additional Azure Extensions for SQL Server, please skip this as it is not necessary for the purposes of MFT.
At this point, a system restart is recommended before proceeding.
Step 2: Installing SQL Server Management Studio
You will need to obtain the SQL Server Management Studio installer either from the Microsoft website or by choosing the option to install this at the end of the SQL Express installation. There are no specific steps required to be followed during this installation, you can proceed with the default options until the end. SQL Server Management Studio is only required for a few configuration steps and can be uninstalled later if necessary.
Step 3: Configuring SQL Express for use with MFT
Before connecting MFT to the newly installed SQL Express instance, some further preparations need to be done.
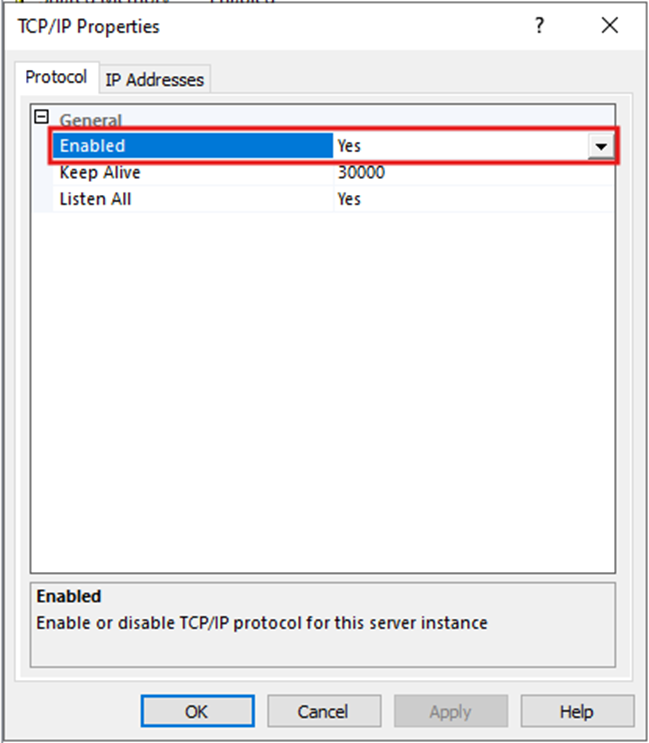
Firstly, open SQL Server Configuration Manager, navigate to SQL Server Network Configuration -> Protocols for SQLEXPRESS -> TCP/IP
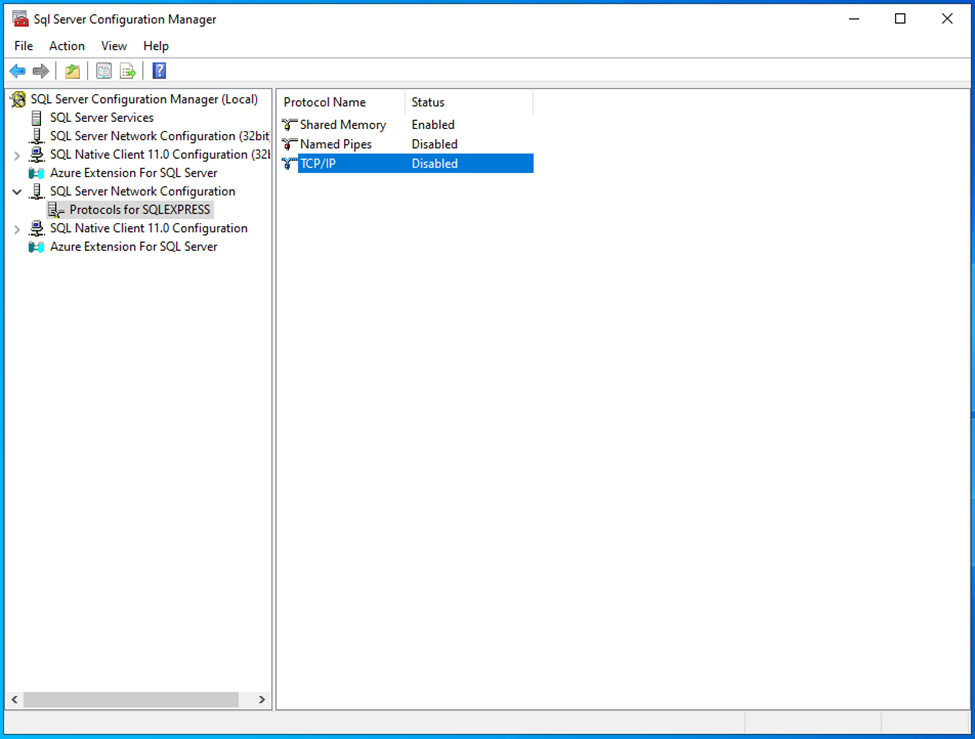
And configure the protocol to be enabled:
You can then configure custom ports on which SQL Express will listen for connections, as in this example (using the default port 1433):
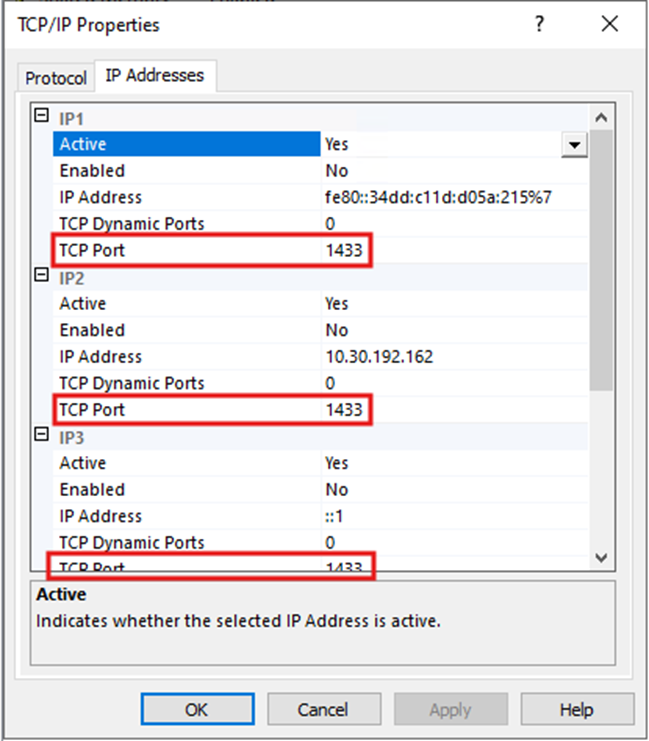
NOTE: Make sure the port is configured for all network interfaces on which SQL Express needs to listen for connections. A restart of the SQL service is mandatory for these configuration changes to take effect. Also ensure that the configured port is open in the firewall and accessible.
At this point, if Windows Authentication is sufficient, you can proceed with the MFT installation and use the same account that was used for SQL Express installation to connect. Keep in mind that this account has full access to SQL Express and is not restricted in any way.
If there are security concerns and a separate account is necessary, the next step will cover account creation for both SQL and Windows authentication methods.
Step 4 (optional): Creating an account for more restricted access to SQL Express and the MFT databases
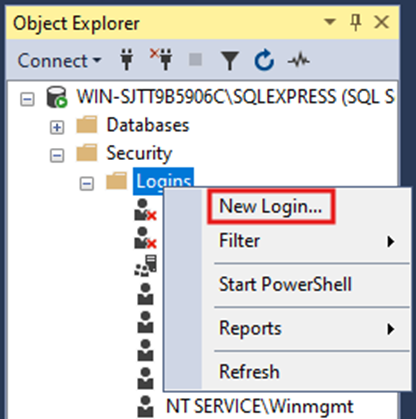
After the MFT installation is complete, you may wish to restrict access only to the MFT databases. For this purpose, new accounts can be created using SQL Server Management Studio, by navigating to Security -> Logins then right-clicking on Logins and clicking on New Login:
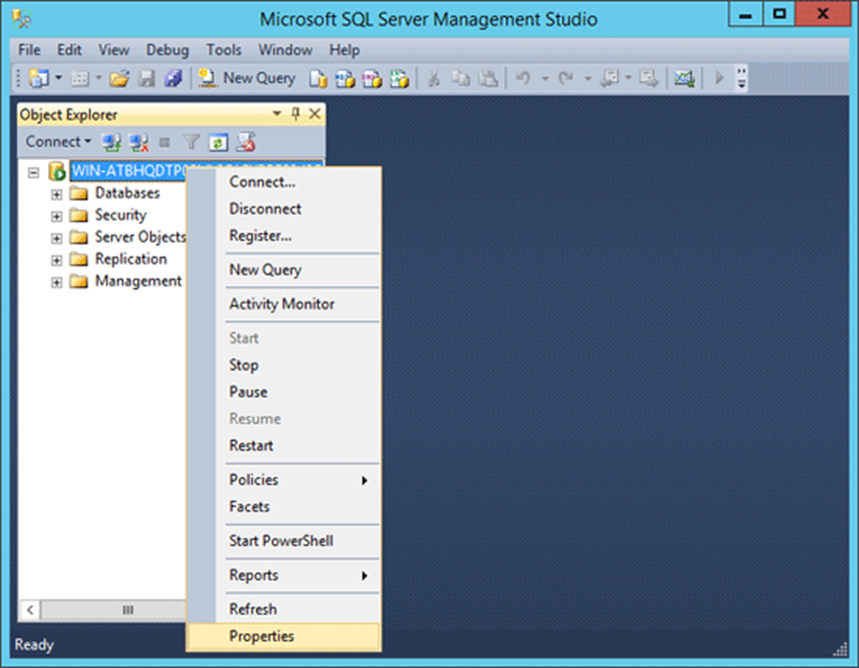
NOTE: By default, SQL Express comes with only Windows authentication enabled. To also be able to create and use SQL accounts, this needs to be manually enabled. To do this, from SQL Server Management Studio right-click on the SQL Express instance, and go to Properties:
Then go to the Security page on the left side menu and under Server authentication enable SQL Server and Windows Authentication mode:
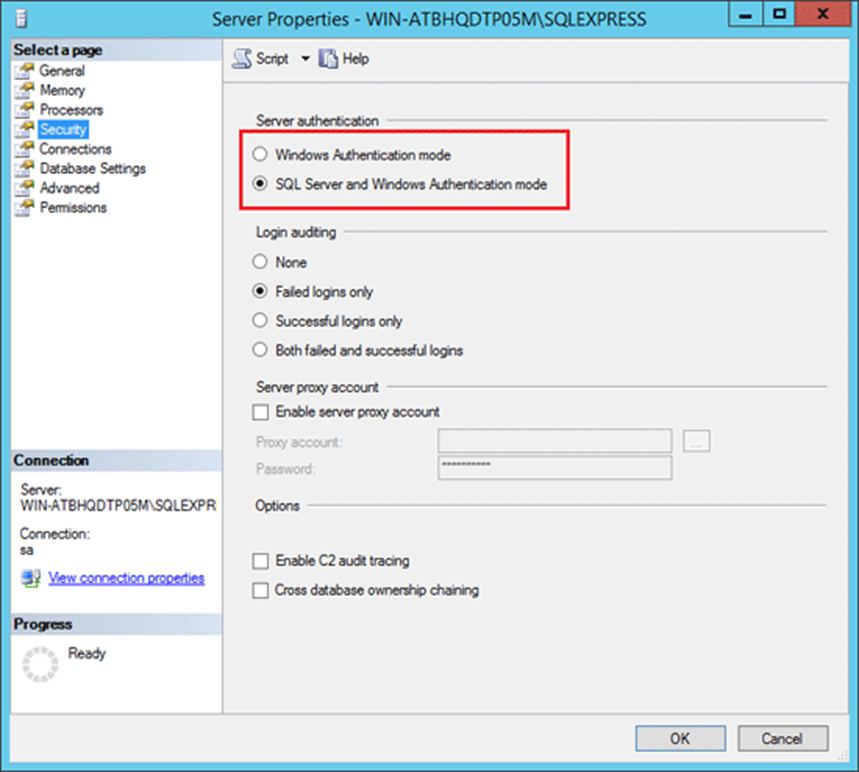
Please restart the SQL Express service for these changes to take effect.
Afterwards, to create an SQL account, please select SQL Server authentication and fill in the desired username and password.
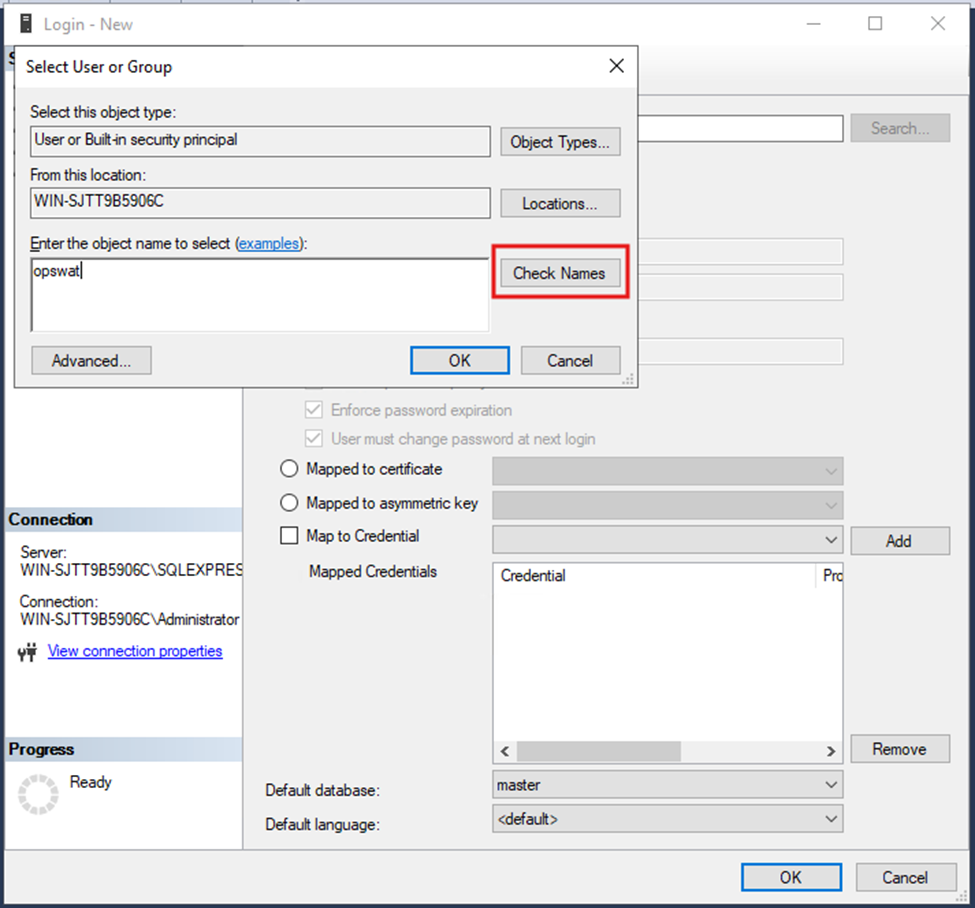
For Windows Authentication, select the corresponding option then click Search to select one of the local or Active Directory accounts present on the system as in the following example, making sure to click on Check Names to confirm the user account is valid:
Once the account is selected, it needs to be assigned to the relevant MFT databases and the following access rights need to be allocated:
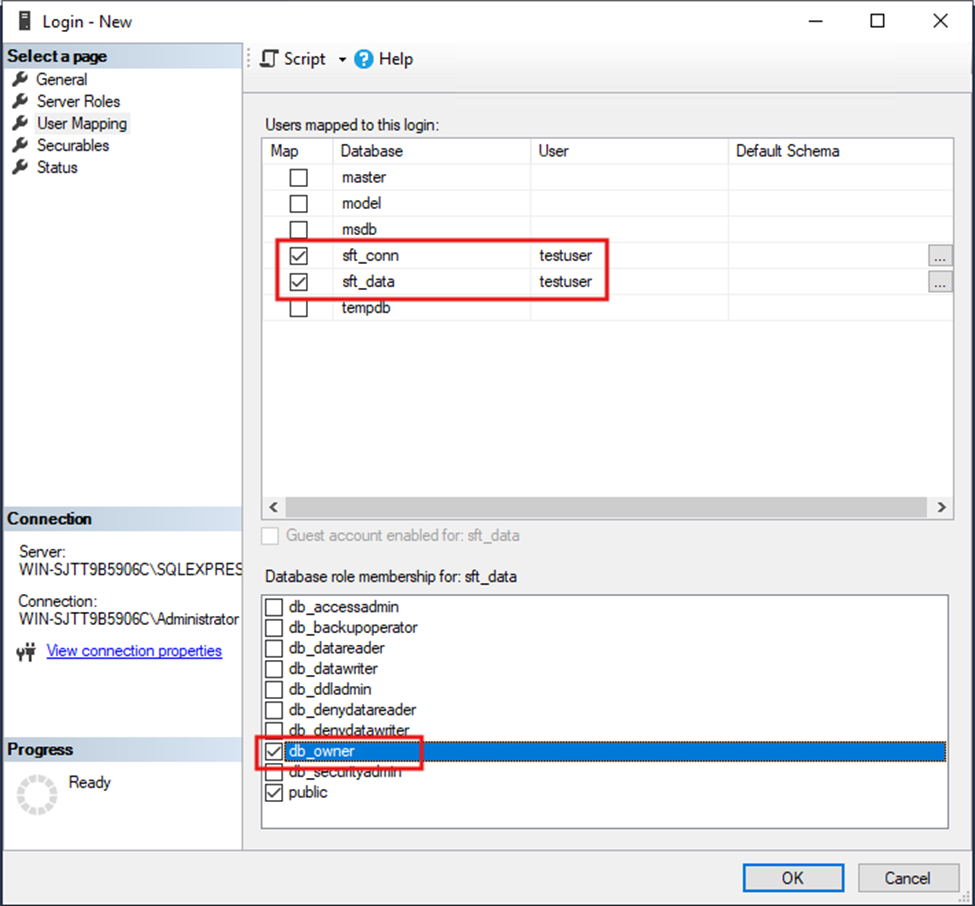
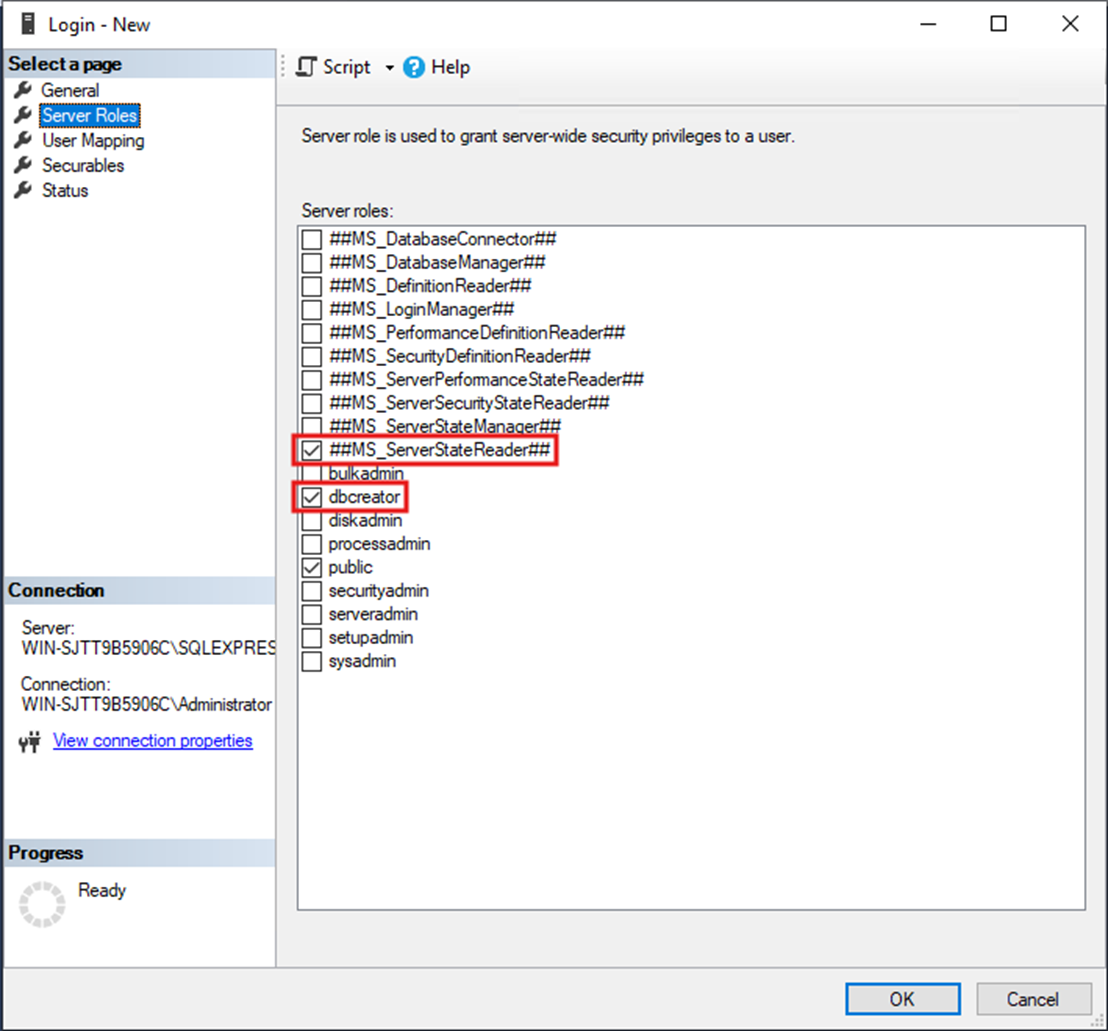
In addition to this, the ServerStateReader server role needs to be assigned to this user, for correct functionality of the MFT database monitoring feature.
Optionally, you can also configure this user before MFT installation to be used from the beginning, but in this case please note the dbcreator server role is also necessary.
The example below illustrates both rights options:
If Further Assistance is required, please proceed to log a support case or chatting with our support engineer.