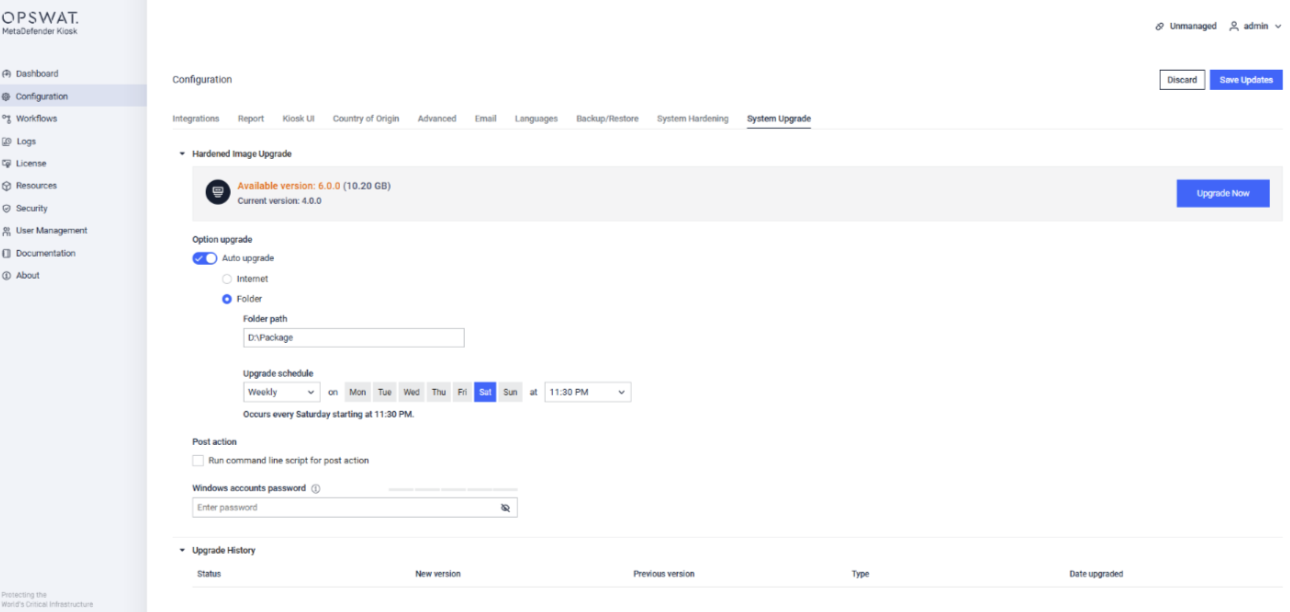
Kiosk Hardened Image can be manually upgraded by downloading the appropriate upgrade package and providing the path to the folder containing it. Once the path is set, you can either click "Upgrade Now" or wait for the scheduled upgrade time. Kiosk will use the provided package to perform the upgrade.
Instruction
Identify the Kiosk Model
Login to Kiosk Console, Navigate to Settings > About.
Here you will find the Kiosk Hardware Model (e.g Dell 7230). This ensures you download the correct upgrade package.
Download the Upgrade Package
Based on your Kiosk model, download the corresponding .zip and .yml files (find the download links from the table below)
Prepare the upgrade folder
Create a folder on the Kiosk device or a shared network location.
Copy both the .zip and .yml files into this folder.
Provide the upgrade package path in the Kiosk Folder Upgrade option
Navigate to Configuration > System Upgrade > Enable Auto upgrade
Select Folder option, set the Folder path to the folder containing the upgrade files. Click Save Updates
Trigger the Upgrade
Click Upgrade Now to start the upgrade immediately
Or set upgrade schedule for the upgrade
If a network folder is used as Upgrade option, please ensure the Windows account used to log in to the Kiosk system has the necessary permissions to access the network resource.
For example, If Kiosk uses a domain account for Windows logon, this account must have access to the assigned network folder.
Kiosk Hardened Image offline package
Current version: 26.07.0
Model | Device | Upgrade Package |
|---|---|---|
Kiosk Desktop | Dell Pro 24, Dell 7420, Dell 7410, Lenovo M70a | |
Kiosk Mobile/ Mini | Dell Pro Rugged 12, Dell 7230, Dell 7220 | |
Kiosk Tower | D19U, D18S (XE5), D17S (XE4), D17S (7000) | |
D15S (7090) (From an old Kiosk Hardened Image version) |