
Overview
Smart Scan is the first, fully configurable scan option on the MetaDefender Drive Dashboard. It runs a predefined scan configuration — a chosen set of anti-malware engines, technologies, and target directories — so operators can start the intended scan in one click without configuring anything at scan time.
Administrators define this configuration once in Settings → Preferences → Smart Scan. Because the scan preset and its name are set centrally, every operator who presses the button runs the same scan, which enforces consistency and reduces scan time.
Smart Scan is the renamed and expanded version of the former Quick Scan feature. The Preferences page, the settings dialog, and the on-device LCD now use the name Smart Scan. The Dashboard button itself keeps the default label Quick Scan until you rename it (see below). Existing configurations are preserved.
Configure the Smart Scan Button
Go to Settings → Preferences. On the General and Technologies Settings page, find the Smart Scan card ("Scans critical system areas using selected security engines and scan options").
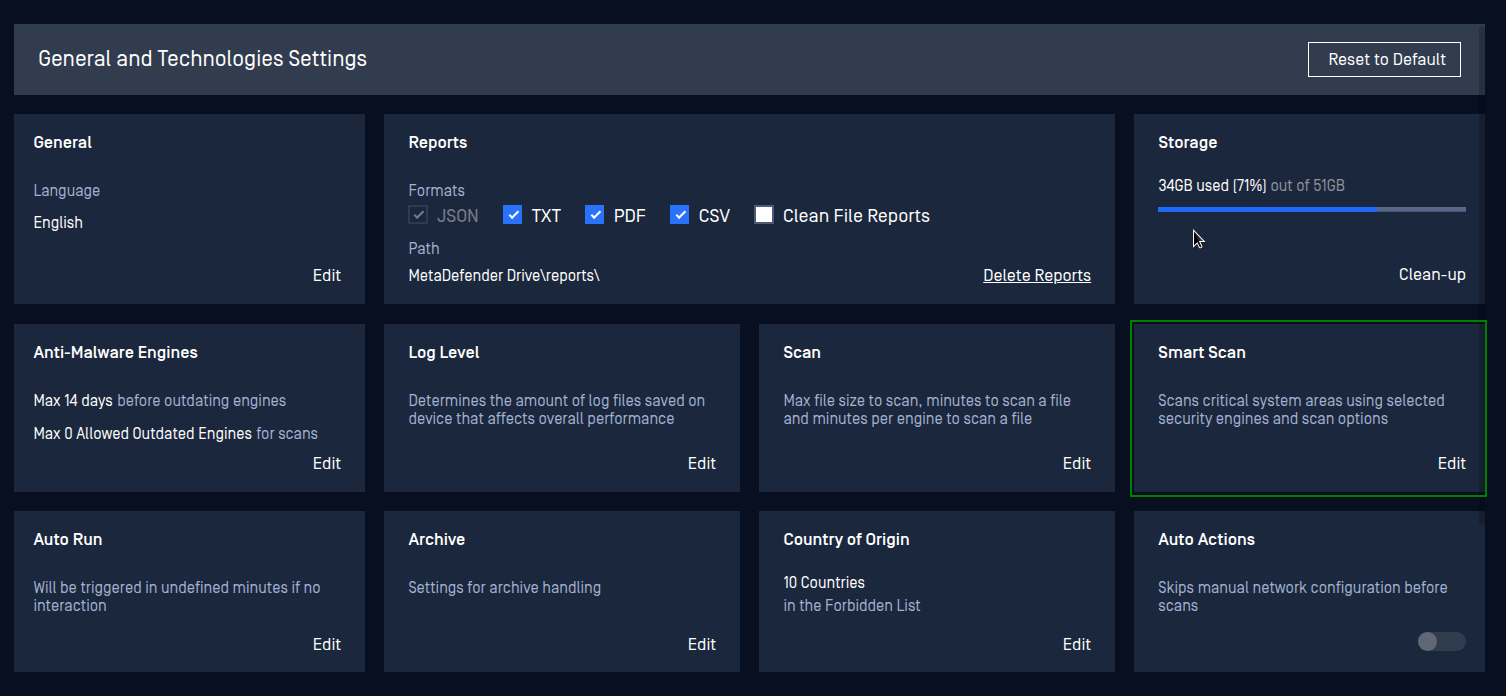
Adjust the options described below.
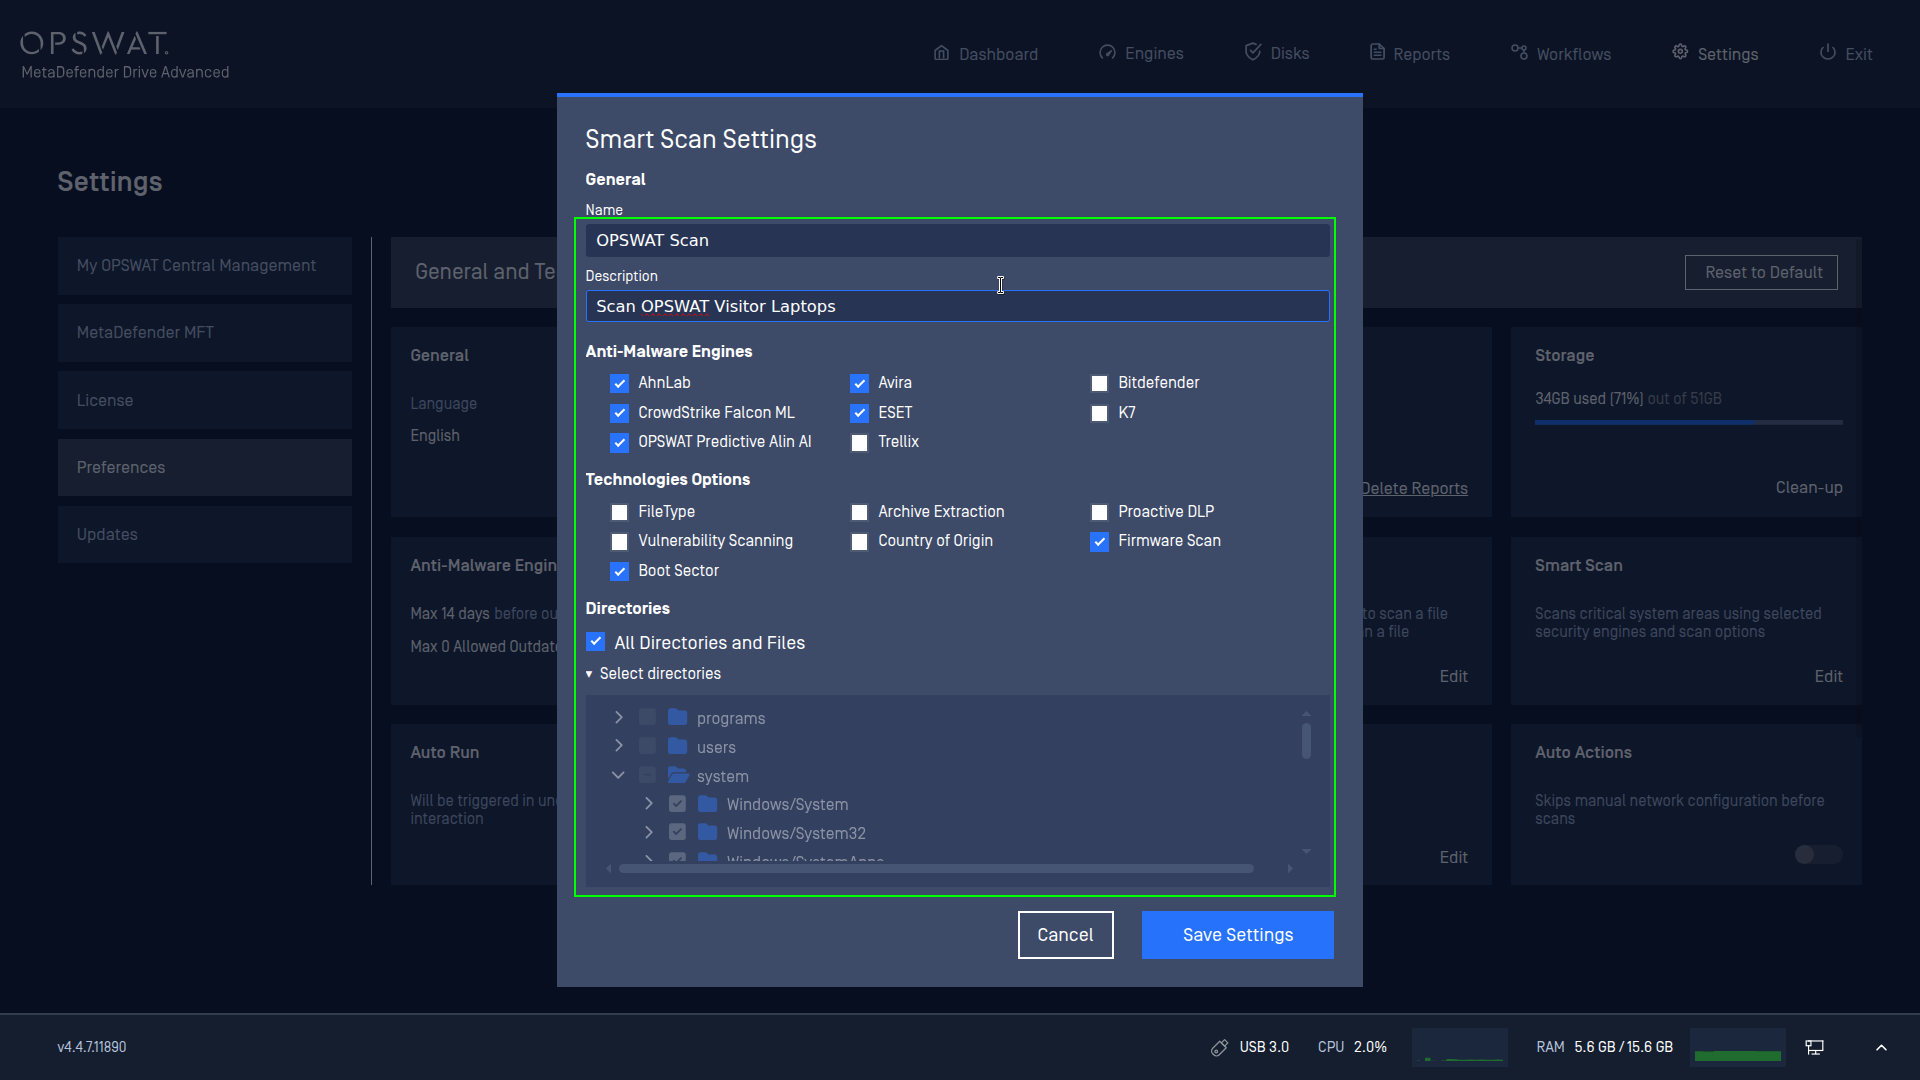
Click Save Settings to apply (or Cancel to discard).
General
Name — the title shown on the Dashboard card. Required, up to 20 characters.
Description — the subtitle shown under the name on the Dashboard card. Required, up to 100 characters.
Both fields are required (you cannot save an empty Name or Description) and accept letters, numbers, and spaces only.
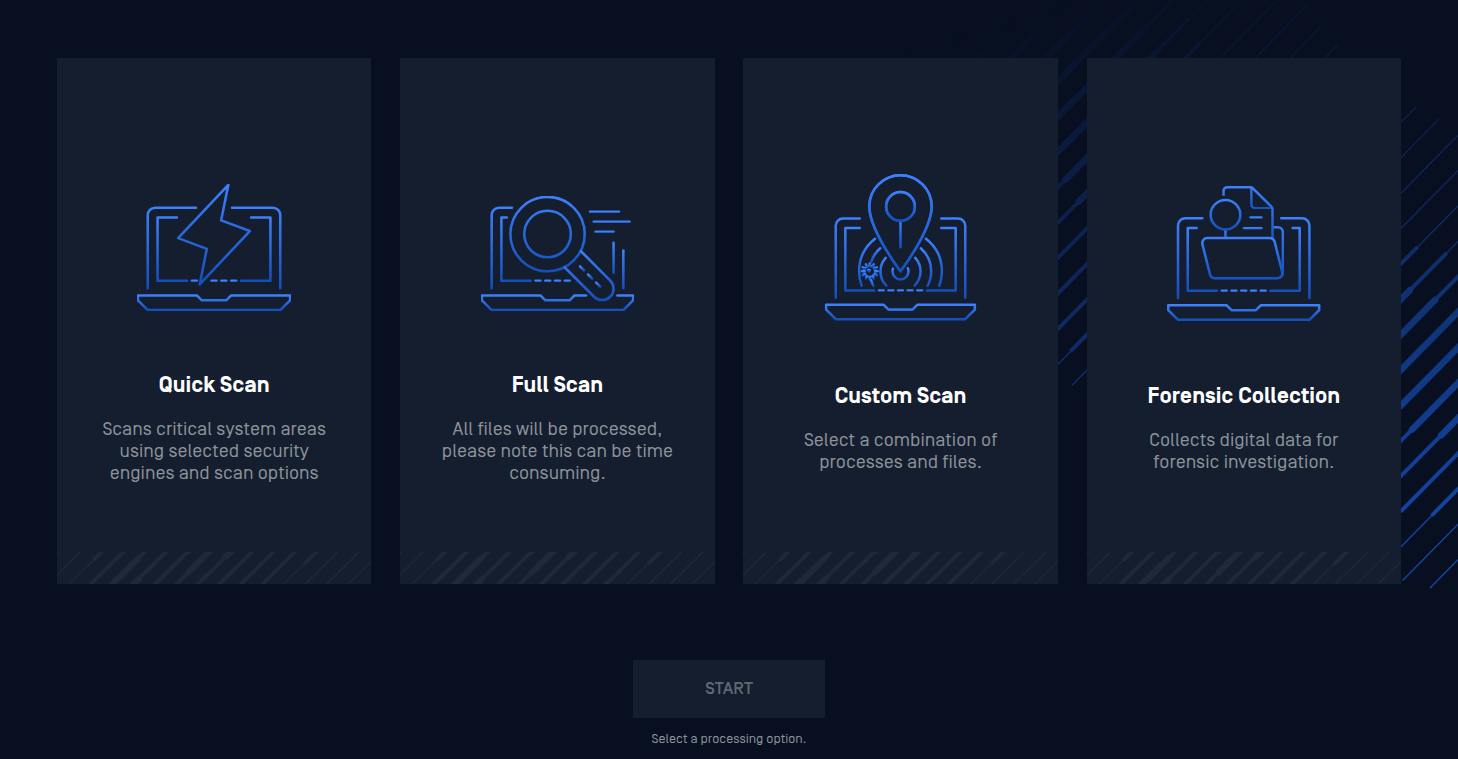
The Name you set becomes the label of the Dashboard button, and the Description appears beneath it. By default the button is named Quick Scan:
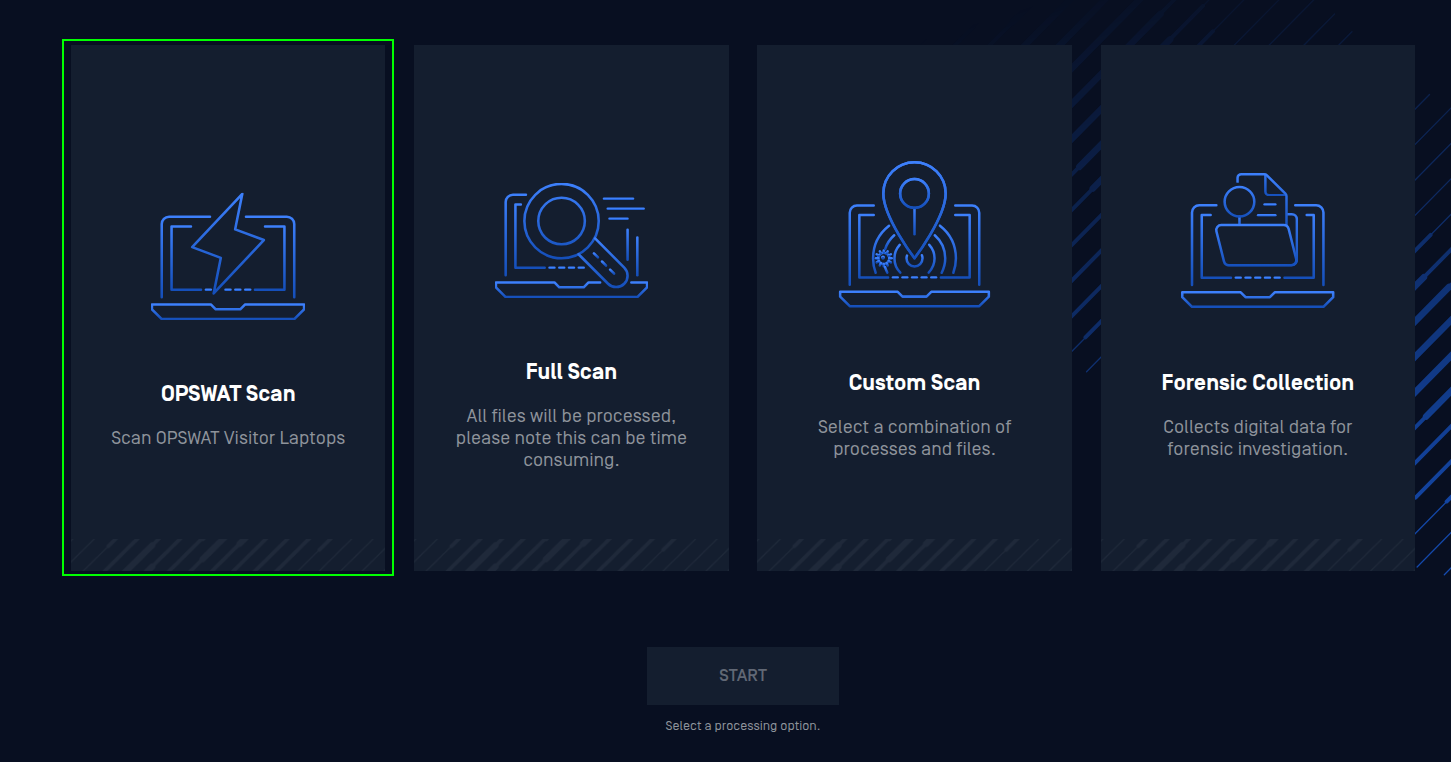
After you change the Name to, for example, OPSWAT Scan with the description "Scan OPSWAT Visitor Laptops" and click Save Settings, the same Dashboard button is renamed accordingly:
Anti-Malware Engines
Select or clear any licensed anti-malware engines to include in the scan. Only the engines your device is licensed for appear here — for example: AhnLab, Avira, Bitdefender, CrowdStrike Falcon ML, ESET, K7, OPSWAT Predictive Alin AI, and Trellix. Selecting fewer engines produces a faster scan; selecting more increases detection coverage.
Technologies Options
Enable the additional processing technologies to run alongside the anti-malware engines. Each is an independent checkbox:
FileType — verify and act on true file types.
Archive Extraction — extract and scan the contents of archive files.
Proactive DLP — detect sensitive information in files.
Vulnerability Scanning — check files and applications for known vulnerabilities.
Country of Origin — identify the country of origin of components.
Firmware Scan — inspect firmware.
Boot Sector — scan the boot sector.
Enable only the technologies your workflow requires.
Directories
Choose which locations the Smart Scan processes:
All Directories and Files — when checked, the whole target disk is scanned.
To scan specific locations instead, clear that checkbox and expand Select directories to choose folders from the directory tree (for example,
programs,users,system→Windows/System,Windows/System32, and so on).
Allow Smart Scan when the Centralized Profile is locked (OTP)
On devices running in OTP / admin mode, an Allow Smart Scan when the Centralized Profile is locked checkbox appears in the General section. When checked, operators can still run the Smart Scan button even while the device is locked by a centralized profile. This option is hidden when the device is not in OTP / admin mode (which is why it does not appear in the example screenshots).
When the device is managed by a Central Management profile, the Smart Scan settings are read-only on the device: the controls are disabled and the Save Settings button is not shown.
Run a Smart Scan from the Dashboard
Boot the target machine into MetaDefender Drive to reach the Dashboard.
Select the first card. It carries the name configured in Preferences — Quick Scan by default, or the custom name your administrator set (for example, OPSWAT Scan).
Click START.
The scan runs using the engines, technologies, and directories saved in Preferences. The card can be selected whether or not One-Time Password (OTP) protection is enabled on the device.
Default Configuration
Out of the box, Smart Scan uses these defaults:
Setting | Default |
|---|---|
Name | Quick Scan |
Description | Scans critical system areas using selected security engines and scan options |
Anti-Malware Engines | Avira and AhnLab enabled (no other engines) |
Technologies Options | Firmware Scan and Boot Sector enabled (FileType, Archive Extraction, Proactive DLP, Vulnerability Scanning, and Country of Origin disabled) |
Directories | All Directories and Files checked |
Allow Smart Scan when the Centralized Profile is locked | Checked (only appears when OTP/admin protection is enabled) |
By default, Smart Scan runs the Avira and AhnLab engines with Firmware Scan and Boot Sector enabled, targeting critical system areas — fast, while still covering firmware and boot-sector checks. Enable additional engines or technologies in Smart Scan Settings when broader coverage is needed.
Notes
Renamed from Quick Scan. The feature — the Preferences page, the settings dialog, and the LCD label — was renamed from "Quick Scan" to "Smart Scan". The Dashboard button keeps the default label "Quick Scan" until you rename it. Behavior and saved settings carry over.
Licensed engines only. Only anti-malware engines and technologies your device is licensed for can be selected.
OTP compatibility. The Smart Scan card remains available on the Dashboard whether OTP protection is enabled or disabled. When the device is managed by a centralized profile, operators run the scan but cannot modify its settings on the device.