Create OneLogin application
Access OneLogin and sign in.
On the navigation bar, click
Administrationto access administrator mode, then click onApplicationsto add a new application for integration.

Click
Add Appto add a new application.

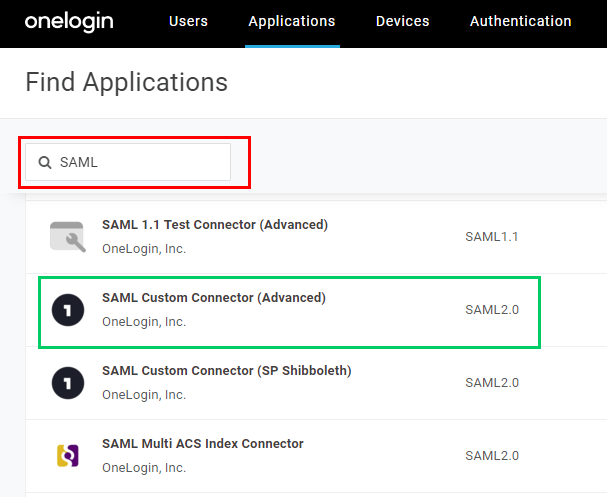
Enter "SAML" in the search box and select
SAML Custom Connector (Advanced)version SAML2.0 in the results panel.
In the new page, fill in
Display Namewith MDCore-SAML, for example, and clickSave.

Create SAML directory in MetaDefender Core
Sign in to MetaDefender Core.
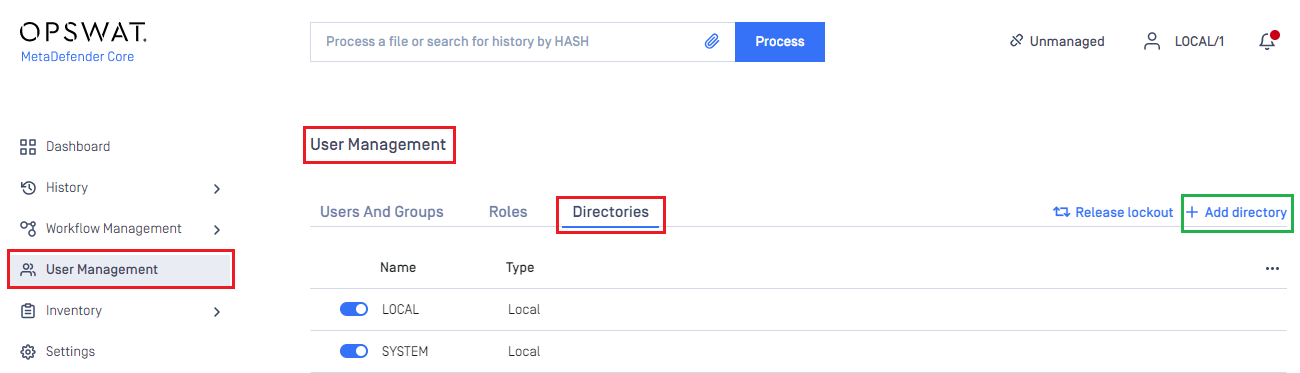
In the dashboard, click on
User Managementin the left sidebar.On
User Managementpage, selectDirectoriestab and clickAdd Directoryin the top right corner.
In
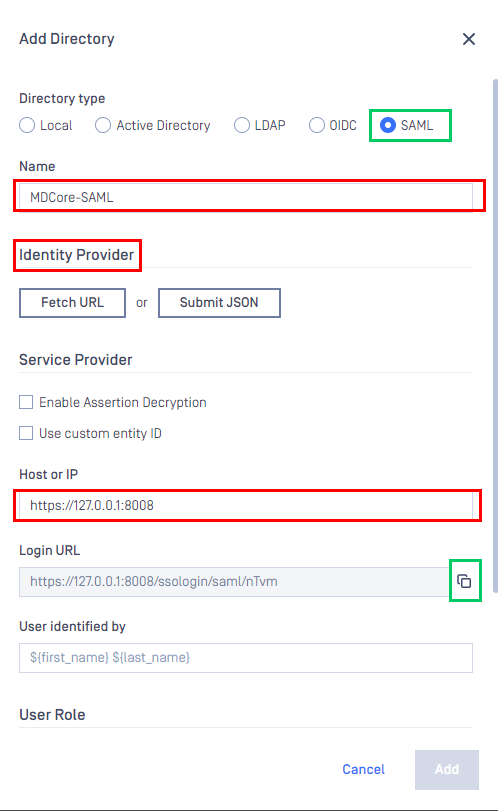
Add Directorypage, select SAML asDirectory type, and enter a name for the new directory, such as MDCore-SAML.In
Service Providersection, enterHost or IPwhere MetaDefender Core is hosted, for this example use https://127.0.0.1:8008.Copy the string generated under
Login URLand store it as reply_uri.
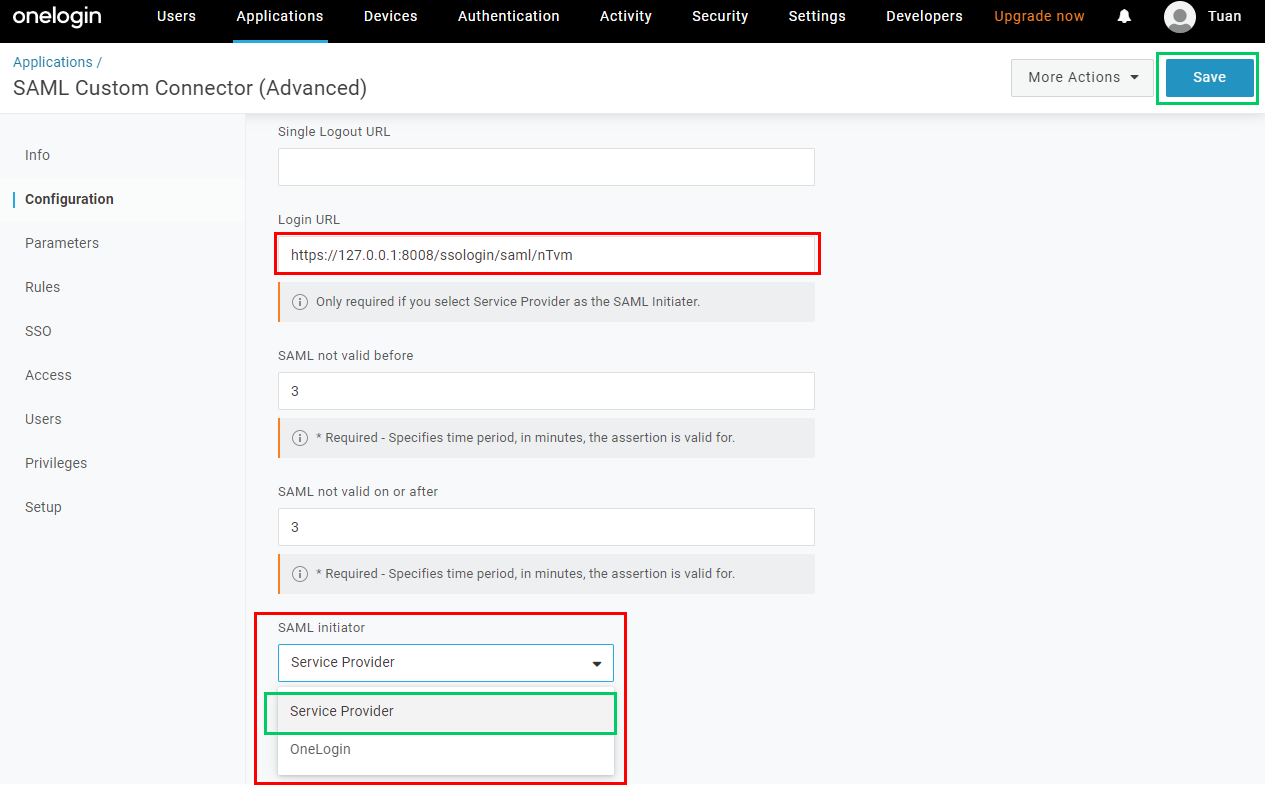
Complete configuration in OneLogin
In
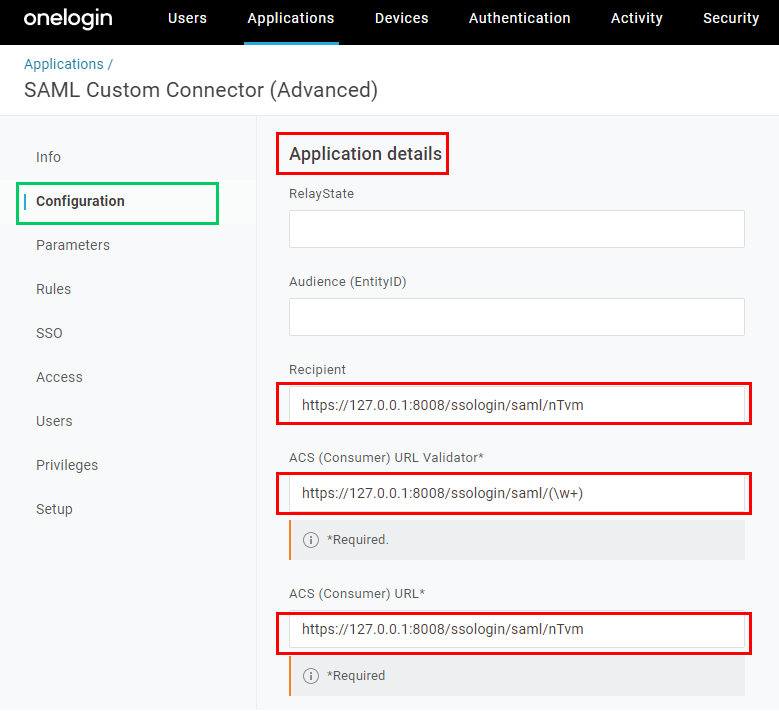
Applicationsscreen on OneLogin, selectConfigurationtab.In
Application Detailssection, fill inRecipientandACS (Consumer) URL*with theLogin URLcopied from MetaDefender Core. Fill inACS (Consumer) URL Validator*with a regular expression version ofLogin URL.
Expand
SAML Initiatorsection, selectService Provider, enter theLogin URLcopied from MetaDefender Core and clickSave.
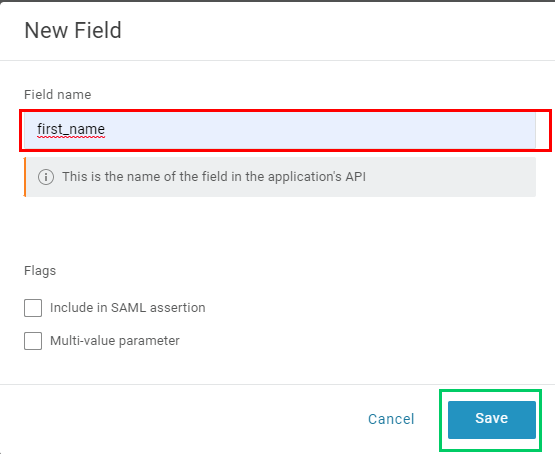
Select
Parameterstab and click the plus button to add more fields that will be used to identify the signed-in users in MetaDefender Core.

Fill in
Field namewith first_name and clickSave.
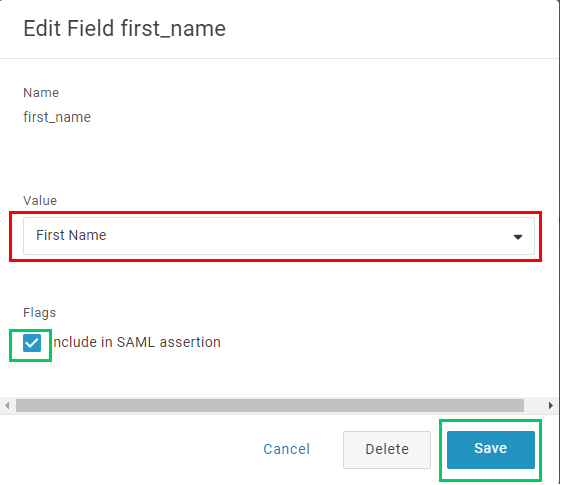
Expand
Valuesection, choose an appropriate attribute, First Name is an example. Then toggleInclude in SAML assertionand clickSave.
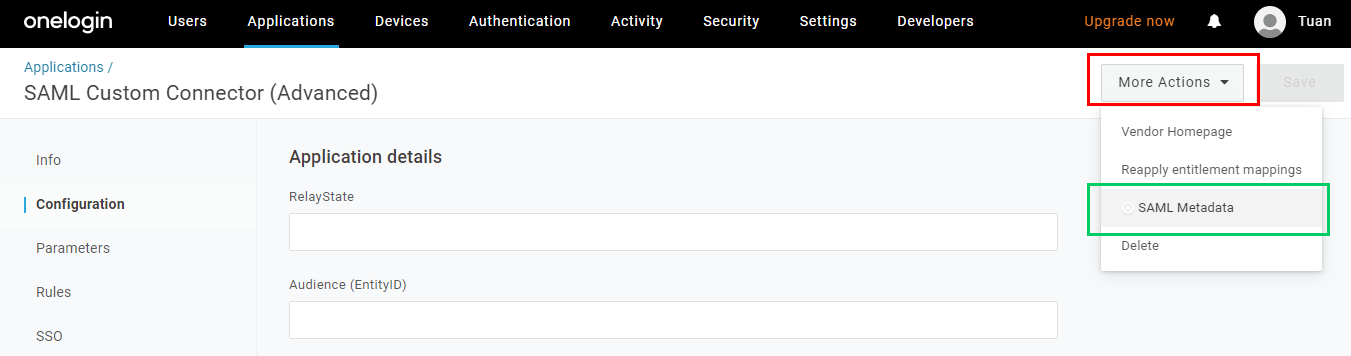
Click
Savein the top right corner.Drop
More Actionsdown and click onSAML Metadatato copy metadata_url.
Complete configuration in MetaDefender Core
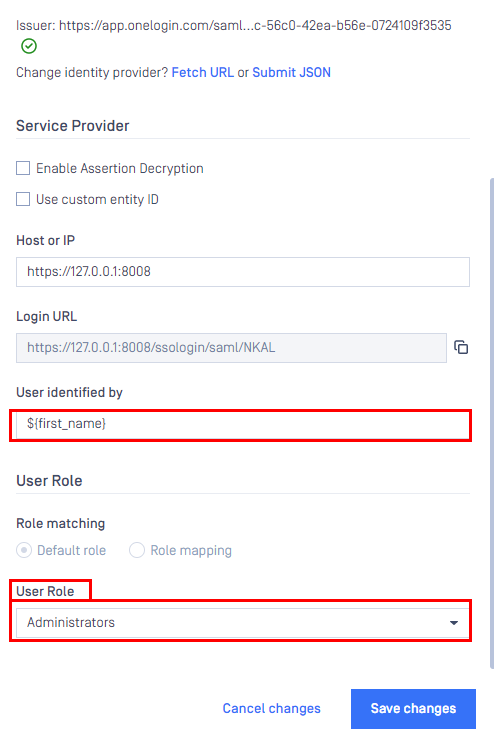
Switch back to MetaDefender Core. Under
Identity Provider, clickFetch URL, paste the value of metadata_url into the box below, clickOK, and wait a moment for MetaDefender Core to check and set OneLogin as its IdP.

Under
Service Provider, fill in ${first_name} in the box labeledUser identified by.Select
Default roleoption, choose the appropriate role to assign to users underUser Role, and clickAddto complete the settings in MetaDefender Core.
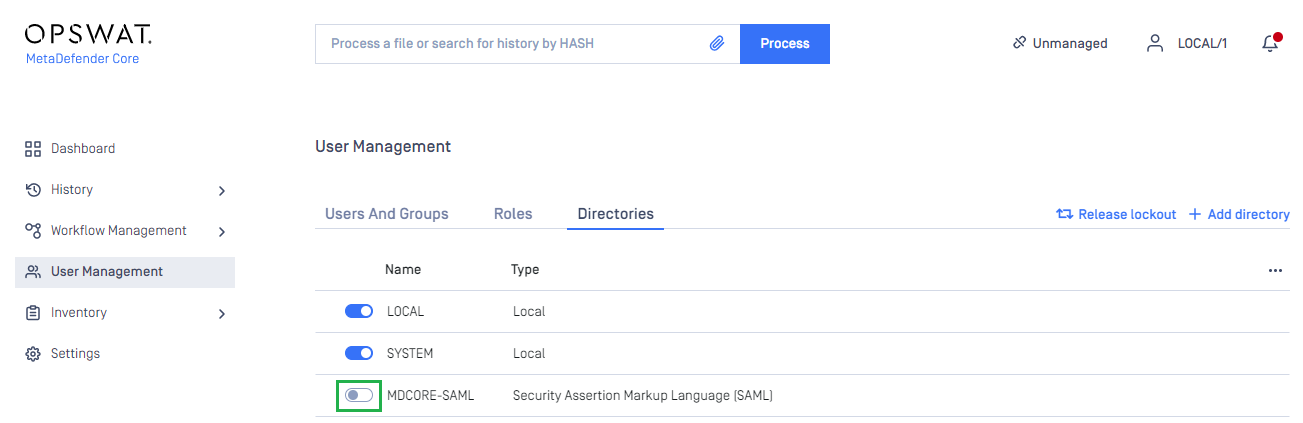
On
User Managementpage, toggle the new directory, MDCORE-SAML in this example. A dialog box will appear to confirm the action. OnceEnableis clicked , all sessions will expire immediately.
Test the integration
On the home screen of MetaDefender Core, click
Login; the user is redirected to OneLogin page.
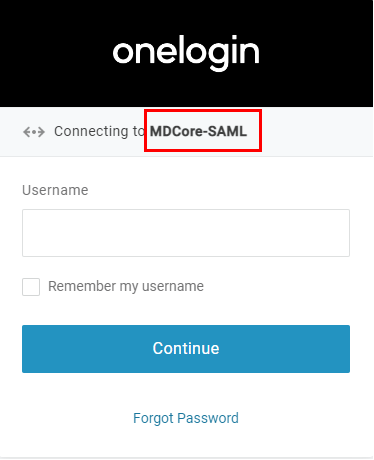
Sign in using the account registered with OneLogin.
If everything goes well, MetaDefender Core dashboard is displayed with the user identity in the top right corner.

Otherwise, access backup login page at
<mdcore-host>#/public/backuploginfor trouble shooting.
Test IdP-initiated login
Sign in to OneLogin management page.
From the portal menu, navigate to MDCore-SAML and click on the icon.
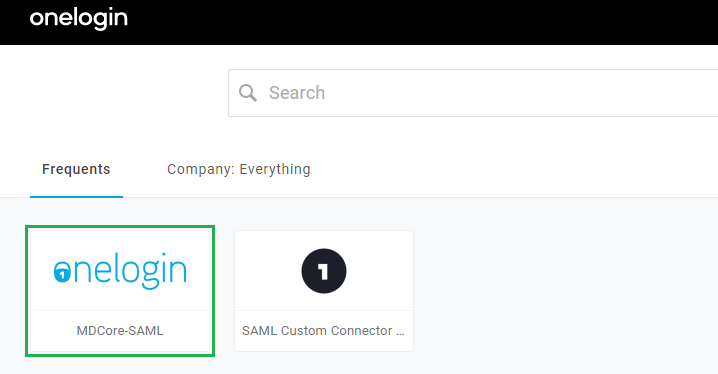
If everything goes well, the user is redirected to MetaDefender Core dashboard with the user identity in the top right corner.

Otherwise, access backup login page at <mdcore-host>#/public/backuplogin for trouble shooting.