Integrating Okta Single Sign-On (SSO) with OPSWAT Central Management allows users to authenticate using Okta, improving security and simplifying access control. Here is how to do it:
Configure Okta as the Identity Provider (IdP)
Log in to Okta Admin Console
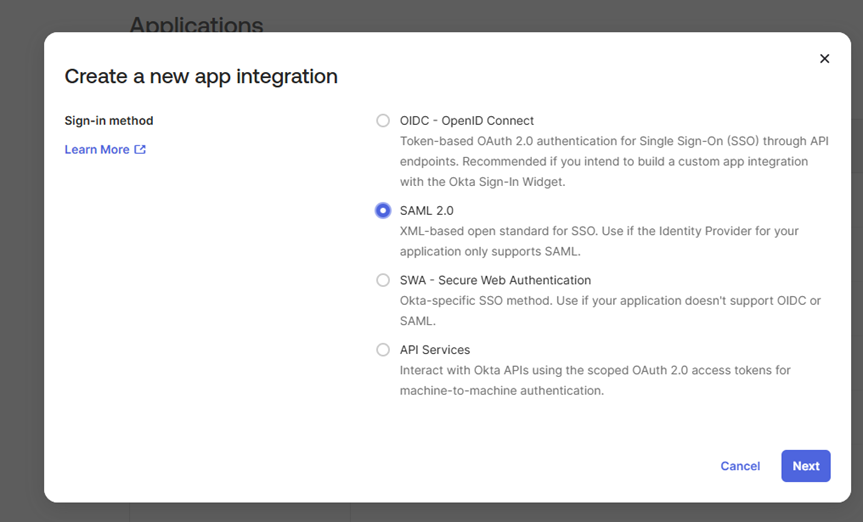
Navigate to Applications > Create App Integration.
Choose SAML 2.0 as the sign-in method.
Click Next to configure the integration.
Set Up SAML Configuration
In the General Settings, enter an App name (e.g., "OPSWAT Central Management").
In SAML Settings, configure:
Single sign-on URL: This is the ACS (Assertion Consumer Service) URL from OPSWAT Central Management. You should be able to get this URL by logging to Central Management --> Settings --> Integrations --> Single sign-on --> Enable Single Sign on and the URL should be at the bottom of the page:

Audience URI (SP Entity ID): Use the Entity ID provided by OPSWAT. You can put the URL of OPSWAT Central Management.
Name ID Format: Choose EmailAddress.
Application username: Set to Email.
After creating the application, go to settings of the application then go to Sign on and do the following to get the files to configure OPSWAT Central Management later
Download from the IdP the xml file in the Metadata URL
Download from the IdP the certificate in the Signing Certificate section

Go to Assignments tab then assign the people or groups that can access to [the OPSWAT Central Management.](the OPSWAT Central Management.)
Configure OPSWAT Central Management as the Service Provider (SP)
Login to OPSWAT Central Management as an admin
Navigate to Settings --> Integrations --> Single sign-on and check Enable Single Sign On
Upload the XML and the certificate downloaded above.
Modify the Logout URL to be your Okta organization URL
After finishing the configuration, you can now login to OPSWAT Central Management from the Okta Dashboard.
If Further Assistance is required, please proceed to log a support case or chatting with our support engineer.