Title
Create new category
Edit page index title
Edit category
Edit link
Add a new user directory
The User Management page > User Directories tab offers administrator users ability to manage user directories for their users and groups. To add a new user directory, an administrator user clicks Add User Directory then select a user directory type, Local, Active Directory or Single Sign-on (SSO). Depend on type of a user directory, the administrator user needs to fill in different information to complete.

Local
Follow these steps to add a Local user directory
- On The User Management page > User Directories tab, click Add User Directory button, select Local option
- Fill in the required fields
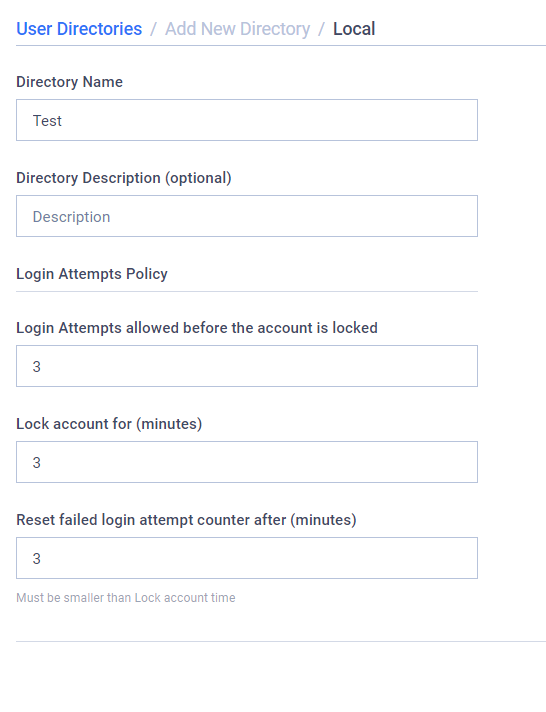
Directory Name: The name of the new local user directory.
Directory Description (optional): The description of the new local user directory.
Login Attempts Policy: Limit login attempts after certain number of consecutive failures over a certain time period.
- Login Attempts allowed before the account is locked: The amount of consecutive login failures allowed before the account is temporary locked. The default setting is 3 attempts.
- Lock account for (minutes): The length of time in minutes that the account will be locked for. The default setting is 5 minutes.
- Reset failed login attempt counter after (minutes): The length of time in minutes before the counter keeping track of the number of consecutive login failures is reset to 0. The default setting is 5 minutes.
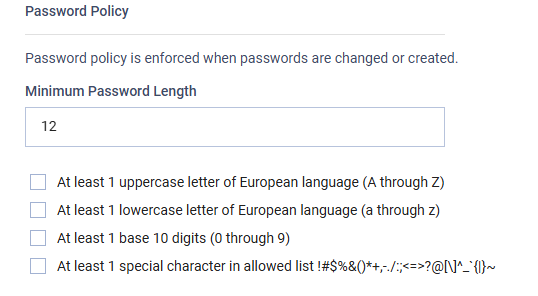
Password Policy: Policies that are applied to passwords. Please note that these policies only apply when creating a new user or when modifying an existing user.
- Minimum Password Length: The minimum character length of the password.
- The following requirements are also available:
- At least 1 uppercase letter of European language (A through Z)
- At least 1 lowercase letter of European language (a through z)
- At least 1 base 10 digits (0 through 9)
- At least 1 special character in allowed list !#$%&()*+,-./:;<=>?@[]^_`{|}~
- Confirm and Save: Click Add button to confirm your choice.
Active Directory
Follow these steps to add an Active Directory user directory
- On The User Management page > User Directories tab, click Add User Directory button, select Active Directory option
- Fill in the required fields
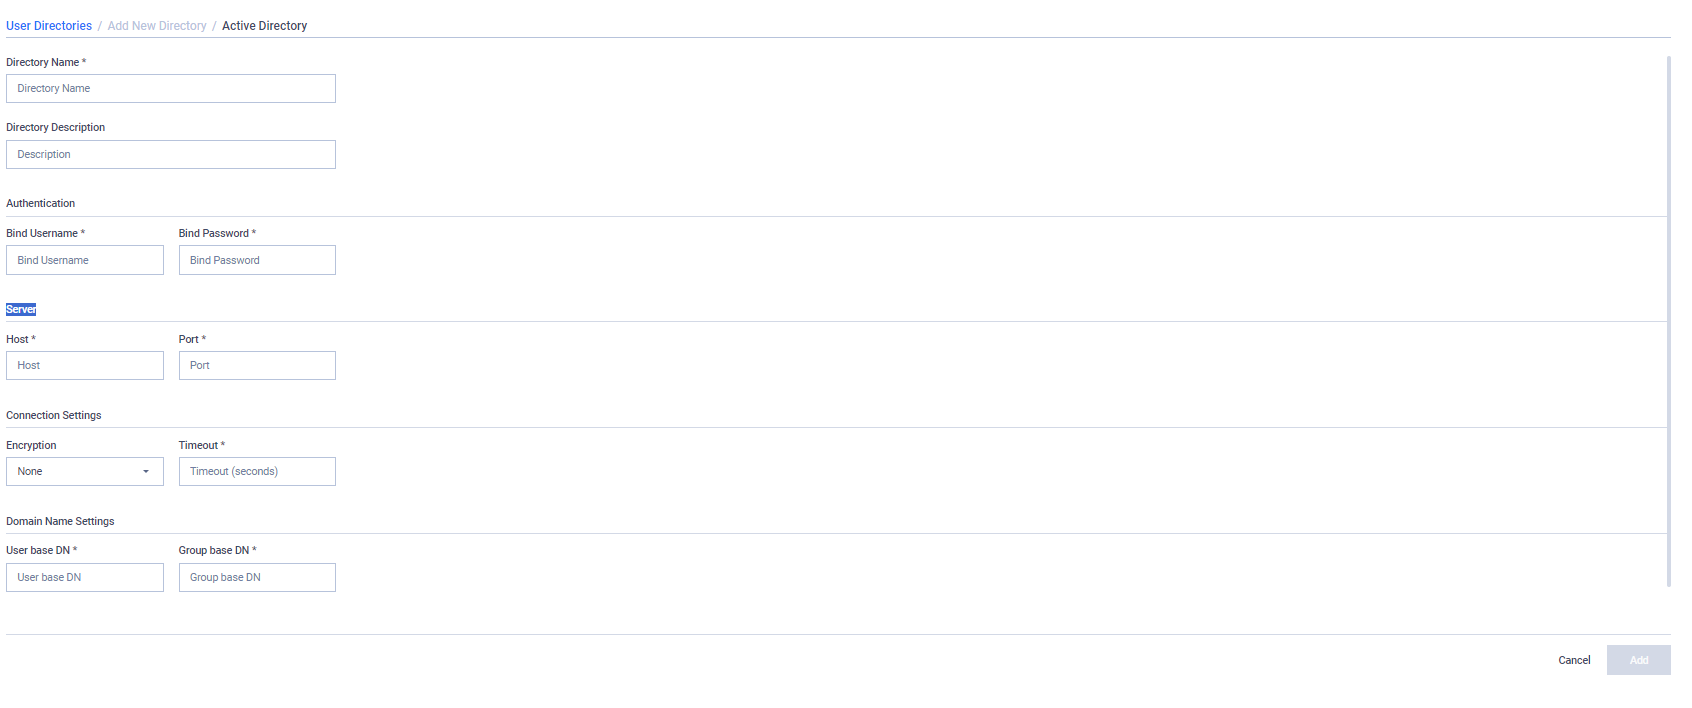
Directory Name: a name of the new local user directory.
Directory Description: a description of the new local user directory.
Authentication:
- Bind Username/Password: a credentials used to authenticate with the Active Directory server.
Server:
- Host/Port: an address of your active directory server.
Connection Settings:
- Encryption: a transit encryption protocol used to connect to the Active Directory server. Currently, only TLS and StartTLS are available in addition to None.
- Timeout: a maximum duration, in seconds, that My OPSWAT On-premises will wait for a response from the Active Directory server for all operations. If the operation exceeds this time limit, it will be terminated to prevent system hang-ups or delays
Domain Name Settings:
- User/Group base DN: a distinguished name used to search for users/groups when an administrator user adds Active Directory users/groups.
- Confirm and Save: Click Add button to confirm your choice.
Single Sign-on (SSO)
Follow these steps to add an Single Sign-On (SSO) user directory to seamlessly integrate with your Identity Provider:
- On The User Management page > User Directories tab, click Add User Directory button, select Single Sign-On (SSO) option
- You can import the required fields directly from an XML metadata file supplied by your Identity Provider. Simply click the clip icon in the 'Import configuration from XML Metadata file' and choose an appropriate xml file. The system will automatically populate the corresponding fields with the available information contained within the file. You still need to fill in Directory Name and Directory Description.
- OR if you skip step #2, you can fill in the required fields manually
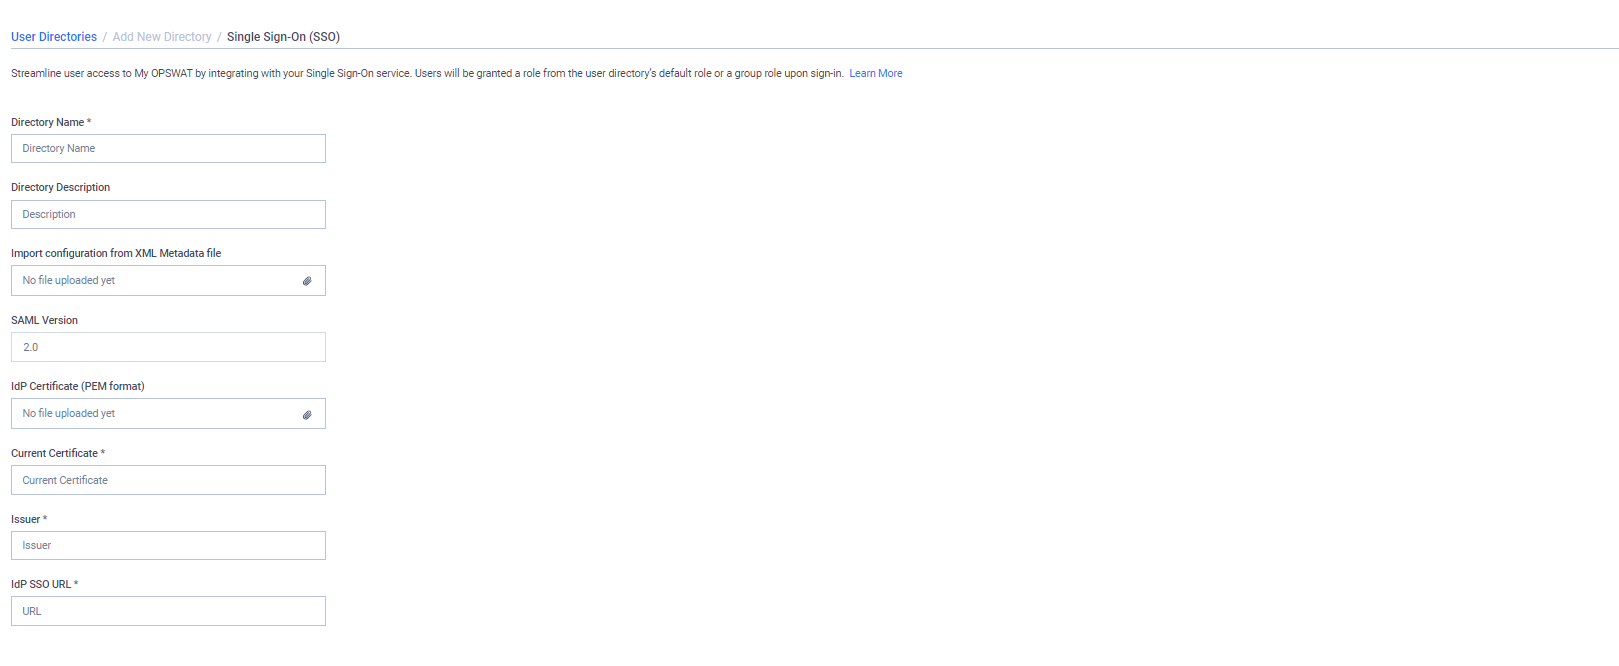
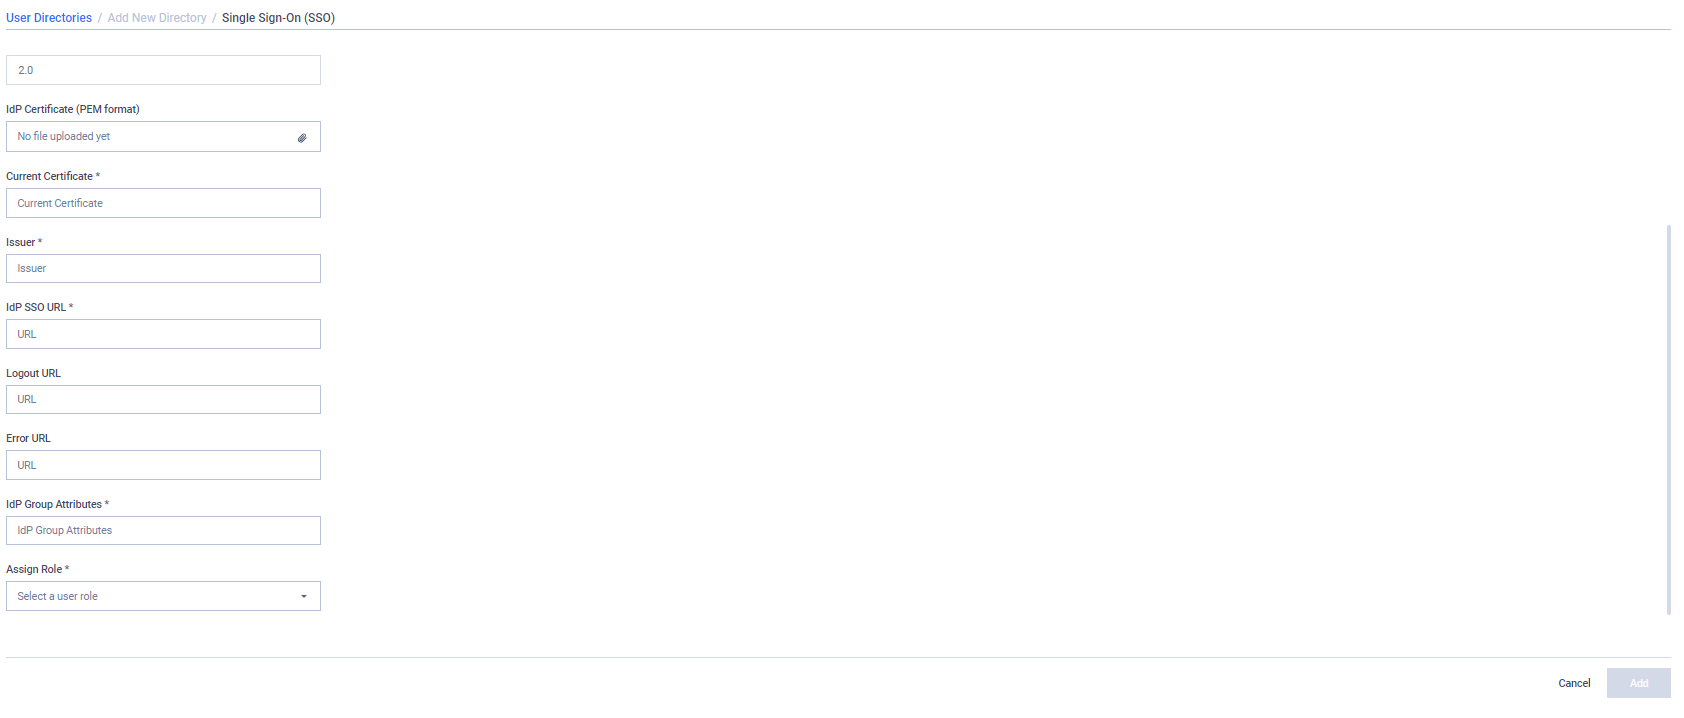
- Directory Name: a name of the new SSO user directory.
- Directory Description: a description of the new SSO user directory.
- IdP Certificate (PEM format): a certificate (in .pem format) provided by your IdP used to verify the authenticity of a SAML assertion.
- Current Certificate: The content of the certificate uploaded in IdP Certificate.
- Issuer: an IdP issuer provided by your Identity Provider.
- IdP SSO URL: an URL provided by your Identify Provider for user authentication.
- Logout URL: an URL provided by your Identify Provider for logout.
- Error URL (optional): an URL used for a custom error page. When we could not authenticate a user, we will redirect to this URL if available; otherwise, a user will land into our error page.
- IdP Group Attributes: an attribute name used by your Identity Provider to indicate the group memberships of a user.
- Assign Role: a default role will be assigned to a user when the user signs in to My OPSWAT On-premises console if the user doesn't belong to any IdP groups added to My OPSWAT On-premises.
- Confirm and Save: Click Add button to confirm your choice.

