
This documentation is based on Citrix ADC VPX version NS13.0 build 79.64.nc and is the minimum configuration required to integrate Citrix ADC and MetaDefender ICAP Server.
Prerequisites
Citrix ADC VPX is installed and licensed
MetaDefender ICAP Server is installed and license is activated
For installation and configuration quick guidelines see: 1. Quick Start with MetaDefender ICAP Server. For detailed instructions see: 2. Installing or Upgrading MetaDefender ICAP Server and: 3. Configuring MetaDefender ICAP Server.
MetaDefender ICAP Server must have a valid license to function correctly. For license configuration details see 2.4. MetaDefender ICAP Server Licensing
MetaDefender Core is installed and license is activated
Web browser access to the Citrix ADC web GUI. (Please refer to the Citrix documentation for details on how to access the ADC VPX GUI. This guide was written with a presumption that you have already completed the device management configuration on the ADC VPX device and it is currently functioning as a proxy.)
Integration Steps
Create an ICAP load balancing service
Navigate to Configuration > Traffic Management > Load Balancing > Services and click Add.
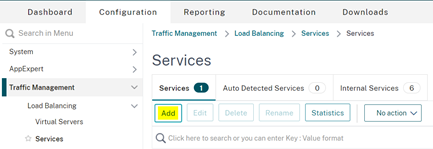
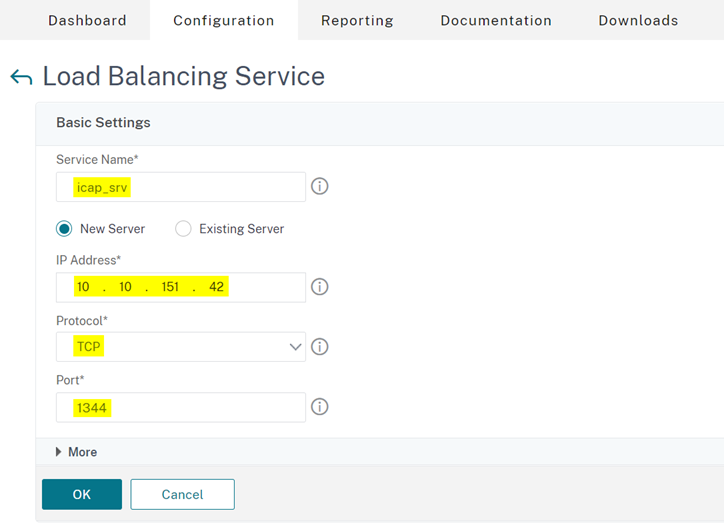
In the Services page, enter the service details for the MetaDefender ICAP server.
Service name: icap_srv
IP address: <IP of your MD ICAP Server>
Protocol: TCP
Port: 1344
Create an HTTP/SSL load balancing virtual server
Navigate to Load Balancing > Virtual Servers. Add a load balancing virtual server of type HTTP/SSL. Or, you can select an existing virtual server and click Edit.
After entering the virtual server basic details, click OK, then Continue.
In the Advanced Settings section on the right, click Policies.
Within the Policies section, click the Pencil icon to edit an existing Content Inspection policy, or the “+” symbol to create a new one.
On the Choose Policy page, select Content Inspection. Click Continue.
In the Policy Binding section, click + to add a Content Inspection policy.
Create ICAP Policies for REQMOD (scan file uploads)
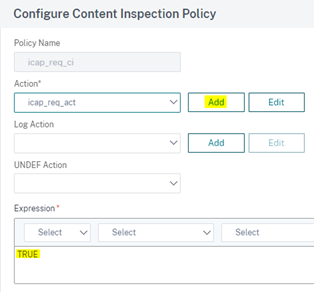
In the Create/Configure Content Inspection Policy page:
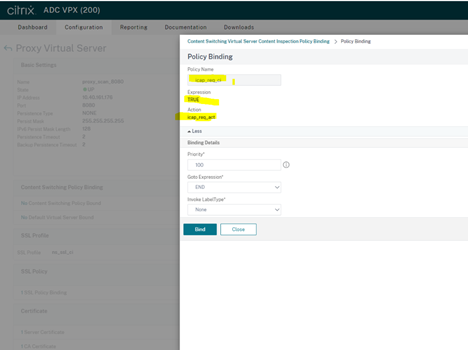
Policy Name: icap_req_ci
Action: icap_req_act
In the **Action _field, click _Add to add an ICAP action.
Enter _TRUE _in the Expression Editor
Create ICAP Actions and Profiles for REQMOD
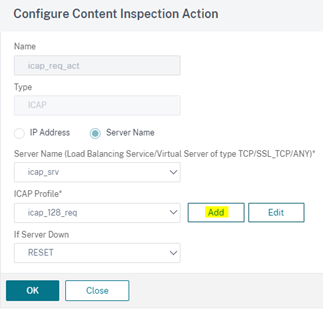
In the ICAP Profile section, click Add to create an ICAP Profile
Server Name: icap_srv
ICAP Profile: icap_128_req
In the Create/Configure ICAP Profile section, enter:
ICAP Profile Name: icap_128_req
Preview Length: 5000
URI: OMSScanReq-AV
Mode: REQMOD
Insert ICAP Headers: "X-Client-IP: "+CLIENT.IP.SRC+"\r\n" (Note: Include both the leading and trailing quotation marks. This allows the Client IP to be displayed in the MetaDefender ICAP Server History page)

Click Create.
In the Create Content Inspection Action page, click Create.
Click Bind.
Create a RESPMOD Policy (scan file downloads)
In the Create/Configure Content Inspection Policy page:
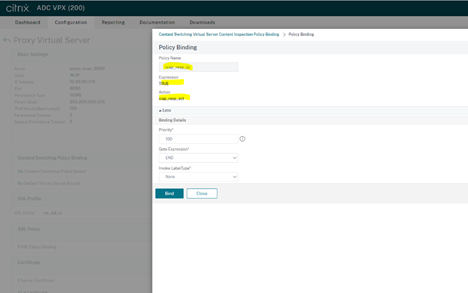
Policy Name: icap_resp_ci
Action: icap_resp_act
In the Action field, click Add to add an ICAP action. Enter “TRUE” in the Expression Editor.
Create ICAP Actions and Profiles for RESPMOD
In the ICAP Profile section, click Add to create an ICAP Profile
Server Name: icap_srv
ICAP Profile: icap_128_resp
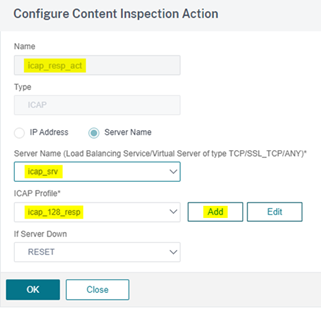
In the Create/Configure ICAP Profile section, enter:
ICAP Profile Name: icap_128_resp
Preview Length: 5000
URI: OMSScanResp-AV
Mode: RESPMOD
Insert ICAP Headers: "X-Client-IP: "+CLIENT.IP.SRC+"\r\n" (NOTE: Include the leading and trailing quotation marks. This setting is optional. See note at the end of this document.)
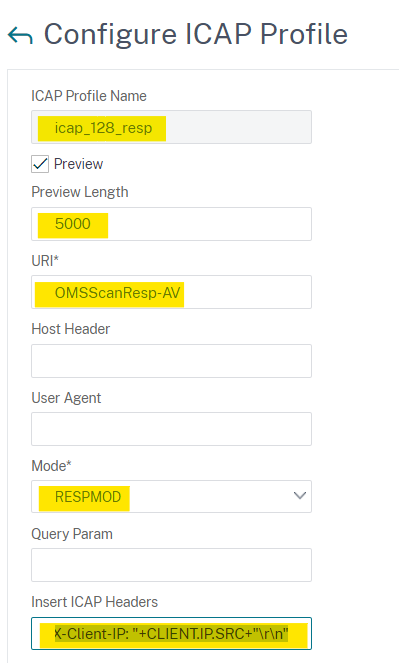
In the Create Content Inspection Action page, click Create. Click Bind. When prompted to enable the Content Inspection feature, click Yes. Click Done.
Navigate to Security → SSL Forward Proxy → Proxy Virtual Server
Click SSL Profile in the Advanced Settings on the right
In the SSL Profiles section, click Add
Name: ns_ssl_ci
Enable SSL Sessions Interception
Click OK
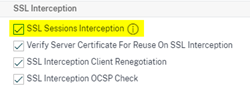
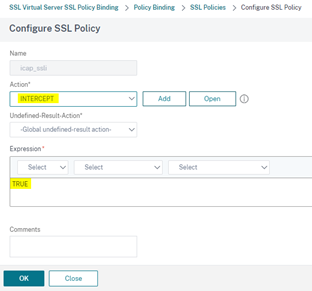
Create anSSLPolicy
In the Configure SSL Policy:
Action: Intercept
Enter “TRUE” in the Expression Editor
Click OK
Bind the SSL Policy to a Virtual Server Content Inspection Policy
This is an optional step which allows for encryption of traffic between the ADC and ICAP server by creating a Virtual Server with type SSL_TCP.
Request policy:
Response policy:
Note: In Step 6.b. there is an option to add ICAP Headers for RESPMOD. Adding this string would allow for the client’s HTTP URI to be displayed in the MetaDefender ICAP Server History page. However, the version of ADC tested for this integration (NS13) doesn’t include HTTP-request information when delivering data to the ICAP Server in RESPMOD. In this case, only HTTP-Response details are sent to ICAP server.