Overview
Peripheral Media Protection is one of the key features of MetaDefender Endpoint, designed to safeguard endpoints from USB-borne threats. It scans peripheral and removable devices for potential malware before they are made accessible, blocking any malicious files from accessing endpoint devices and critical environments. This feature provides proactive and comprehensive protection, offering peace of mind by stopping USB-based attacks at the point of entry.
User guide for Administrators
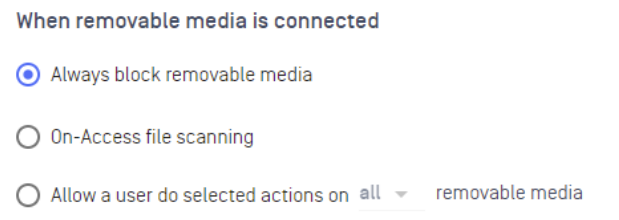
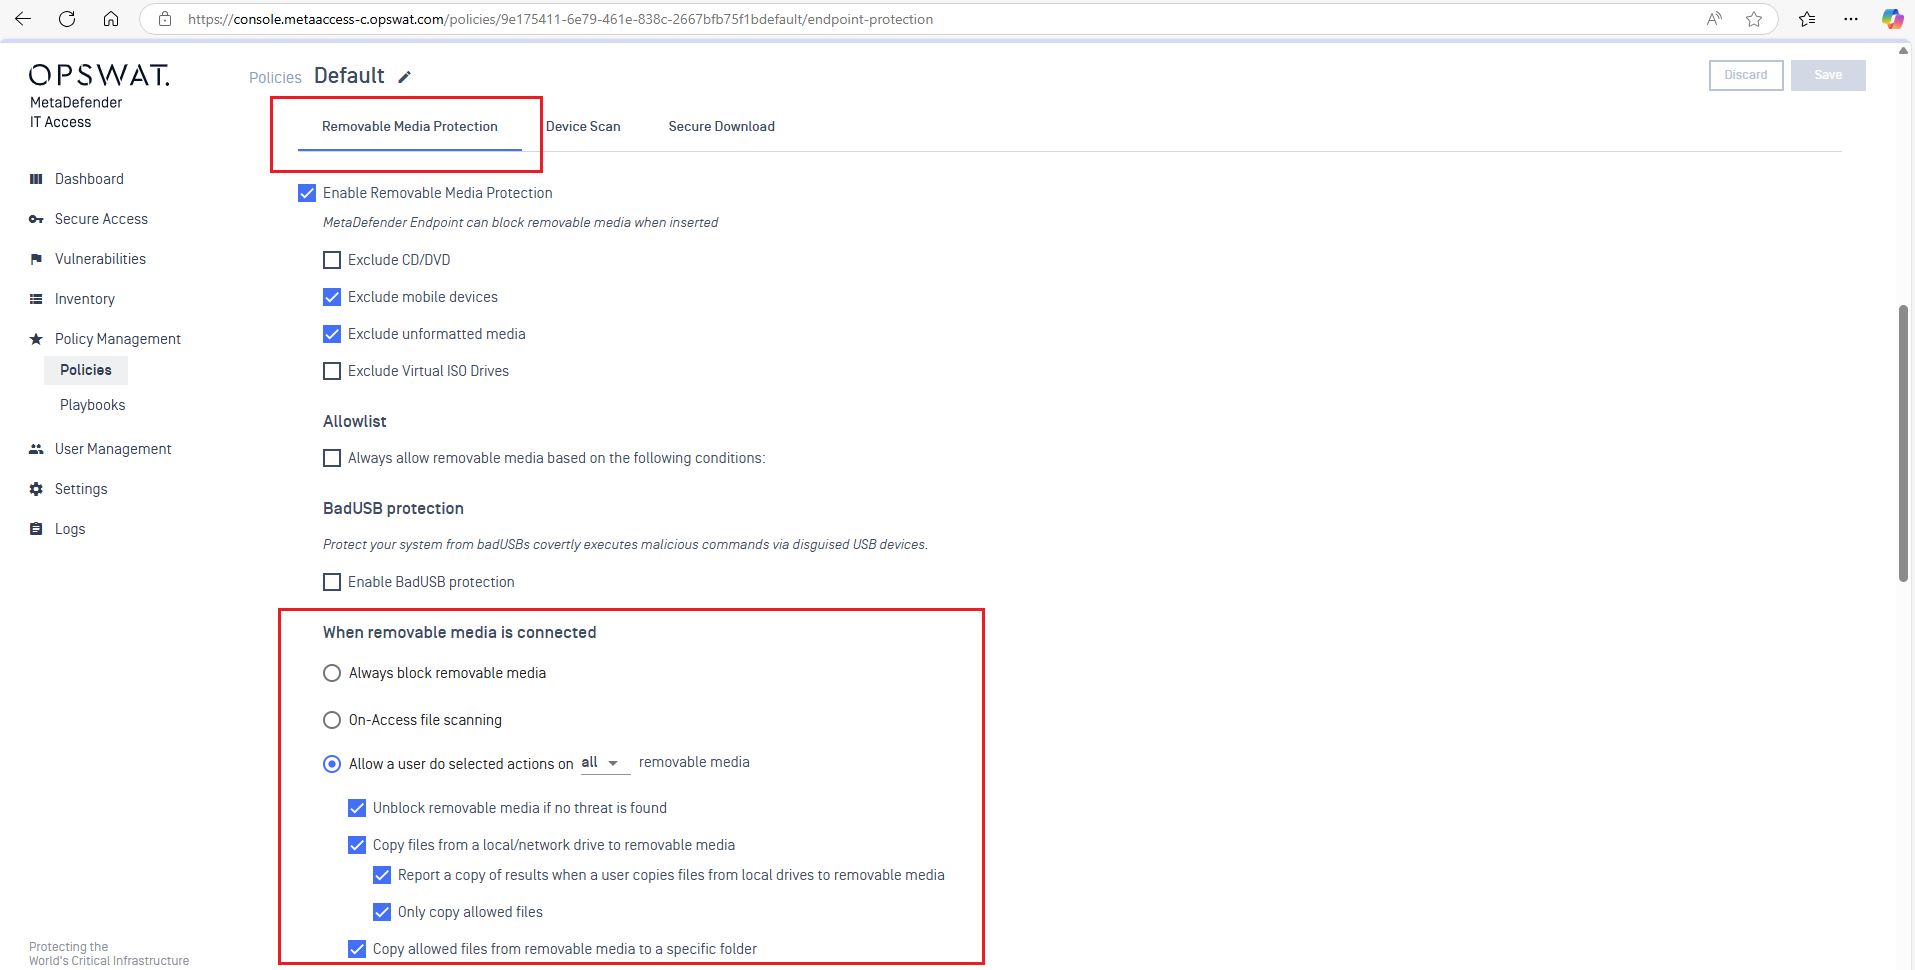
This feature has two different modes that are controlled and set via the administrator management console.
Full block mode
Always block removable media
Allow users to do selected actions
On-Access file scanning
To set the mode for the feature, administrators can follow the steps below:
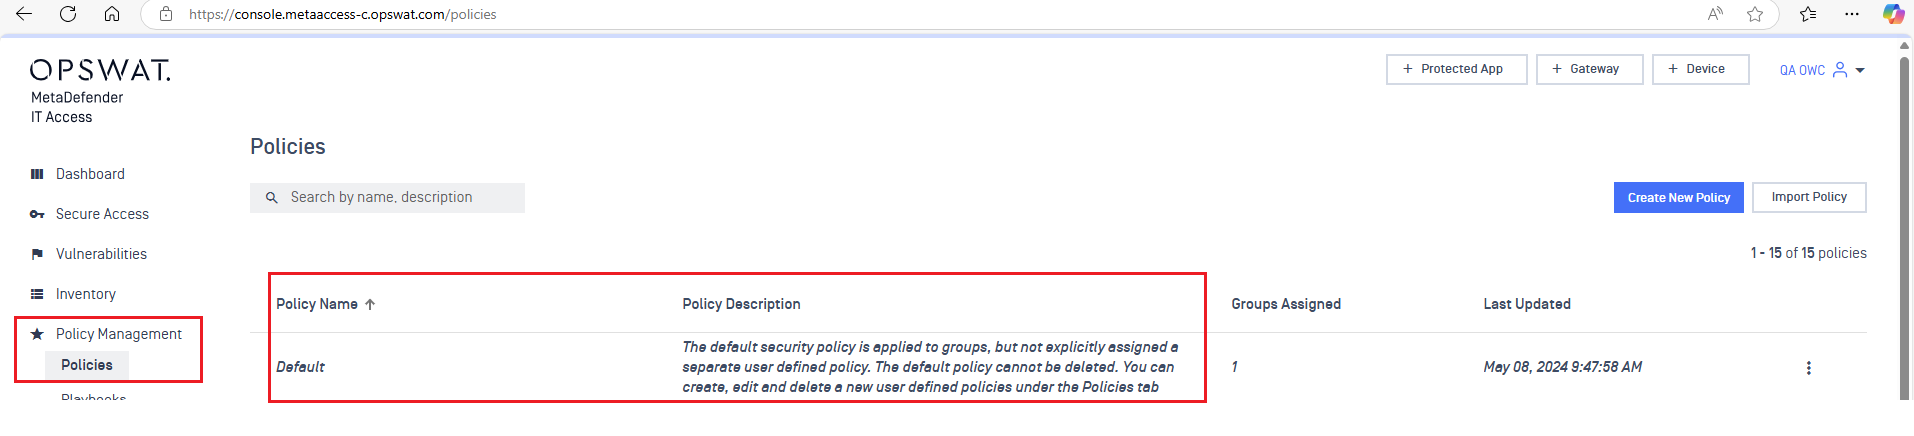
Step 1: Log in to the console management system
Step 2: Choose Policy Management > Policies. Then click on the policy group you would like to make changes to
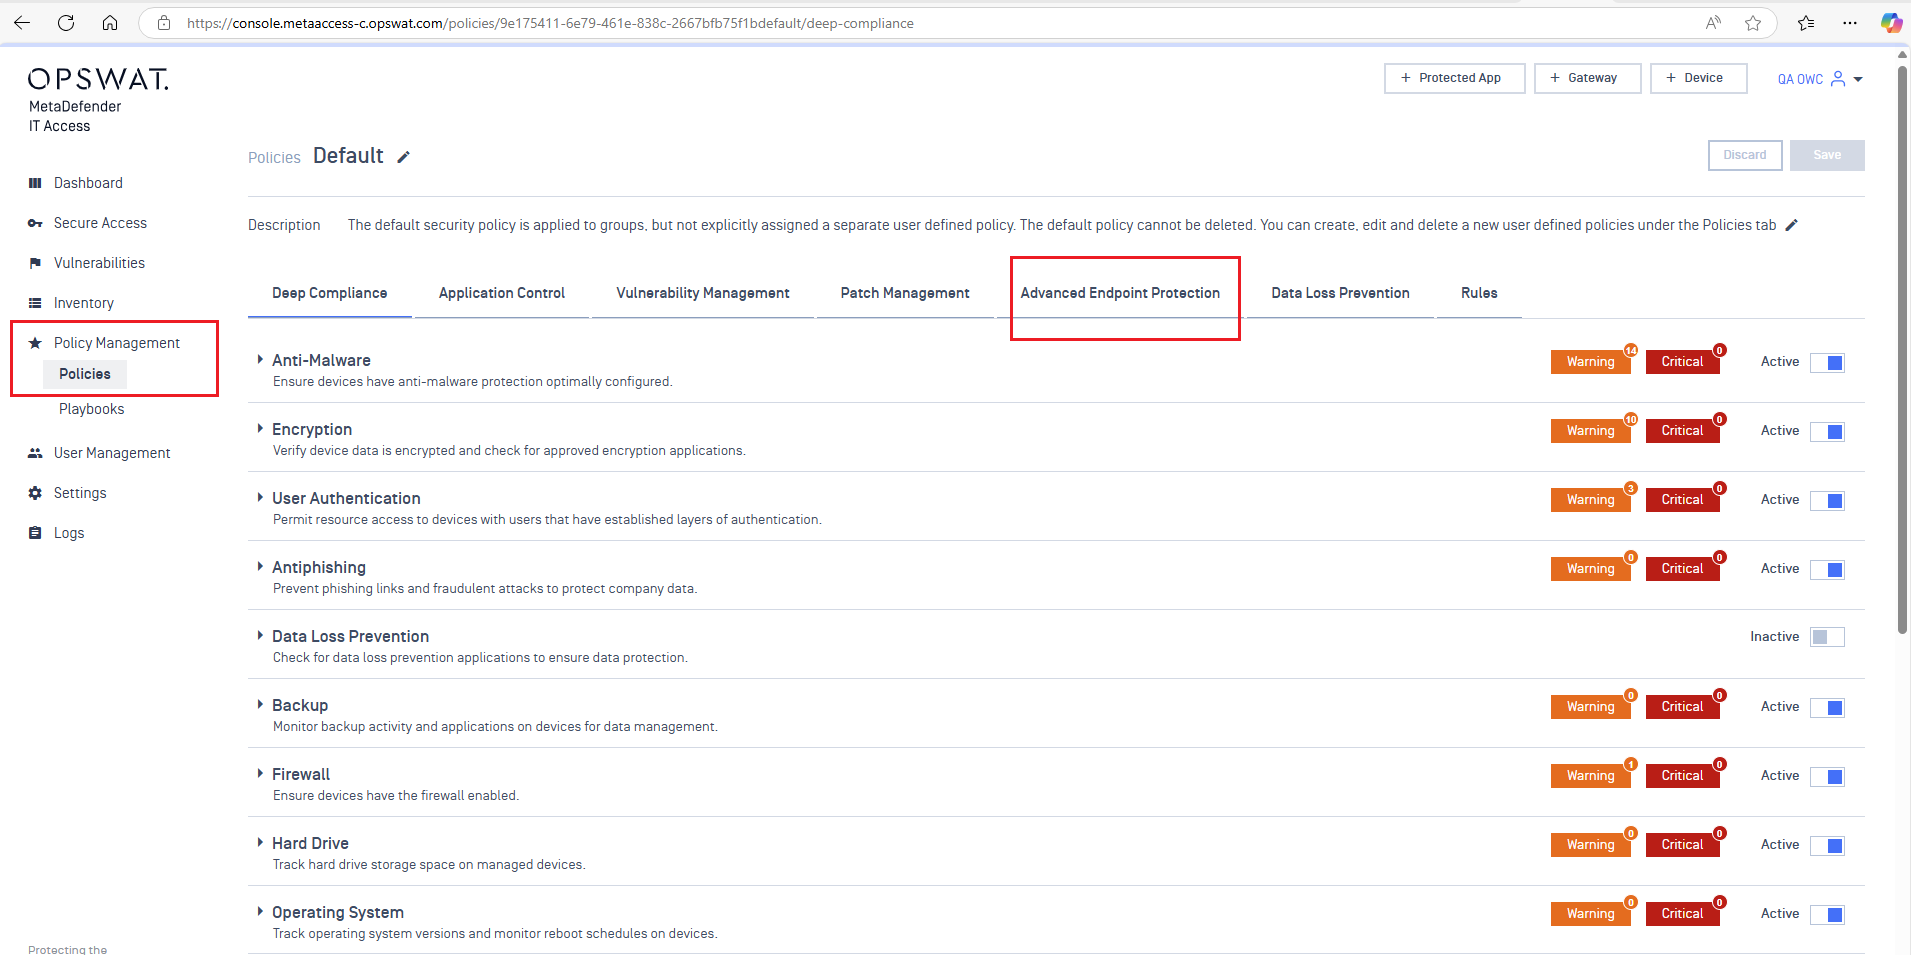
Step 3: Choose Advanced Endpoint Protection > Enable Threat Detection for Windows
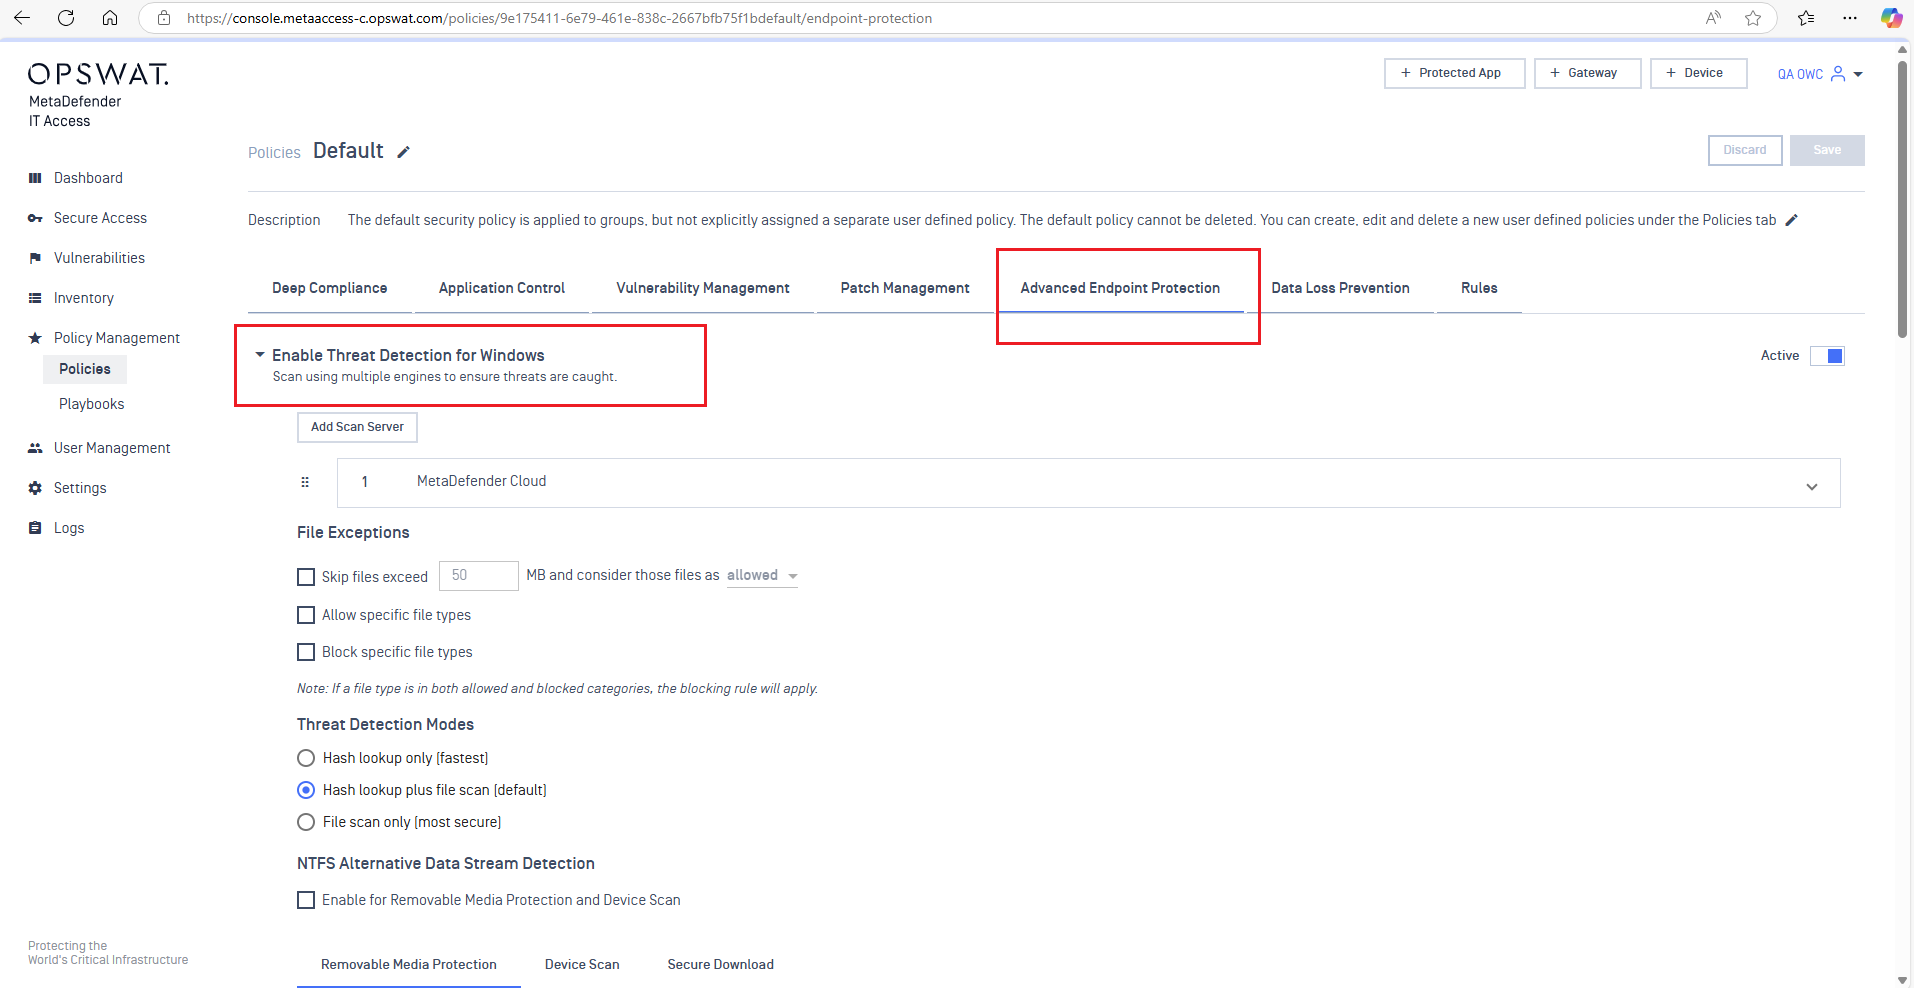
Step 4: Scroll down to the Removable Media Protection tab. Keep scrolling to the section titled When removable media is connected , and select the mode to enable in the policy.
User guide for end users
Mode: On-Access file scanning
Access files from the USB
To access files from peripheral devices, users can choose to scan selected files that they wish to work on or scan the entire USB. Once the files are found to be clean, users can access the files as usual. To perform a scan, simply follow the steps below:
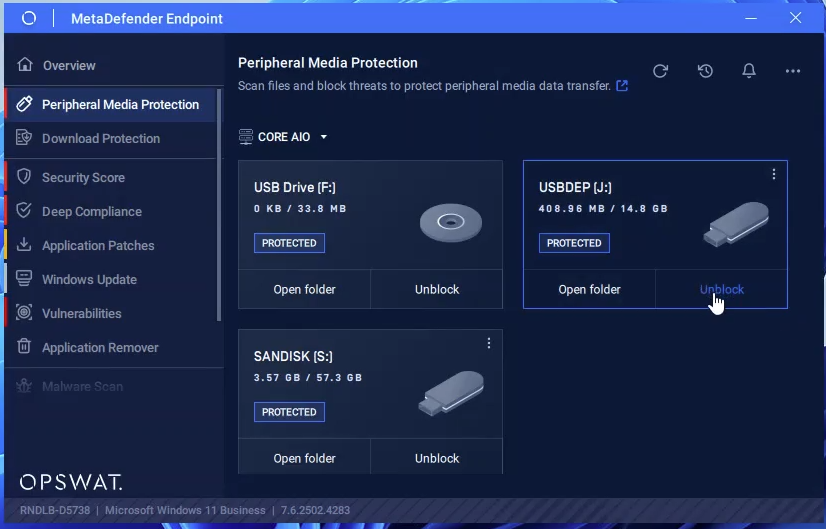
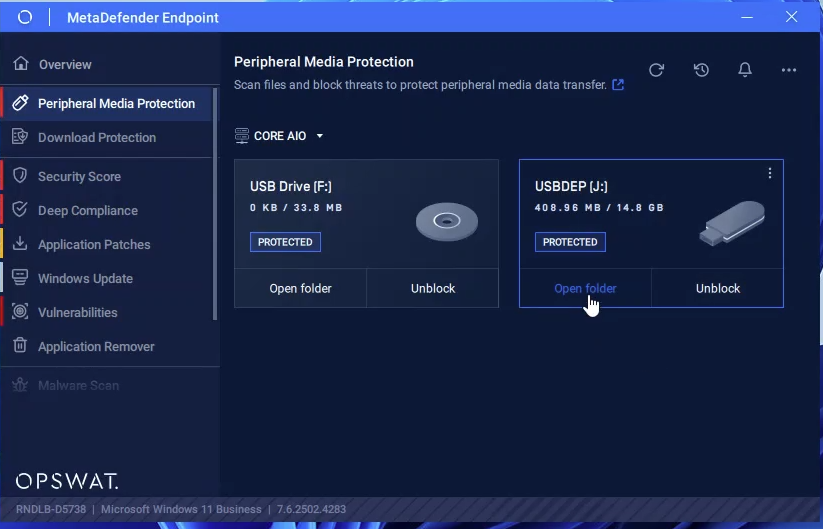
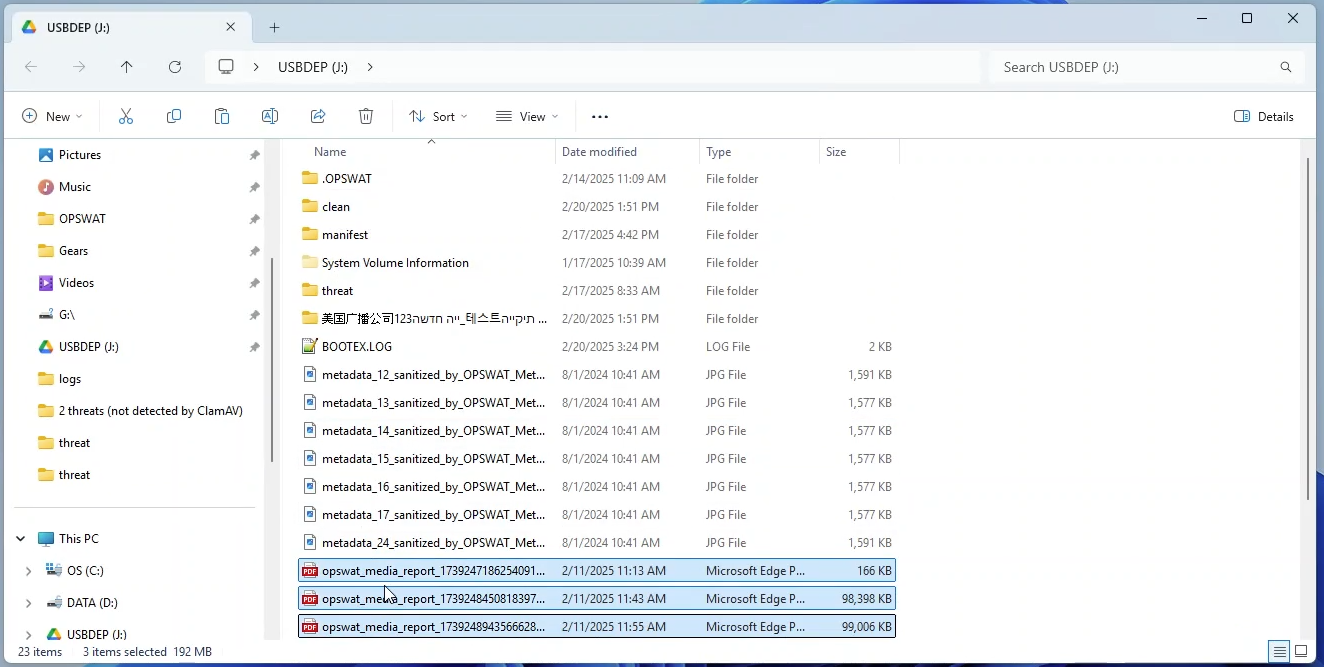
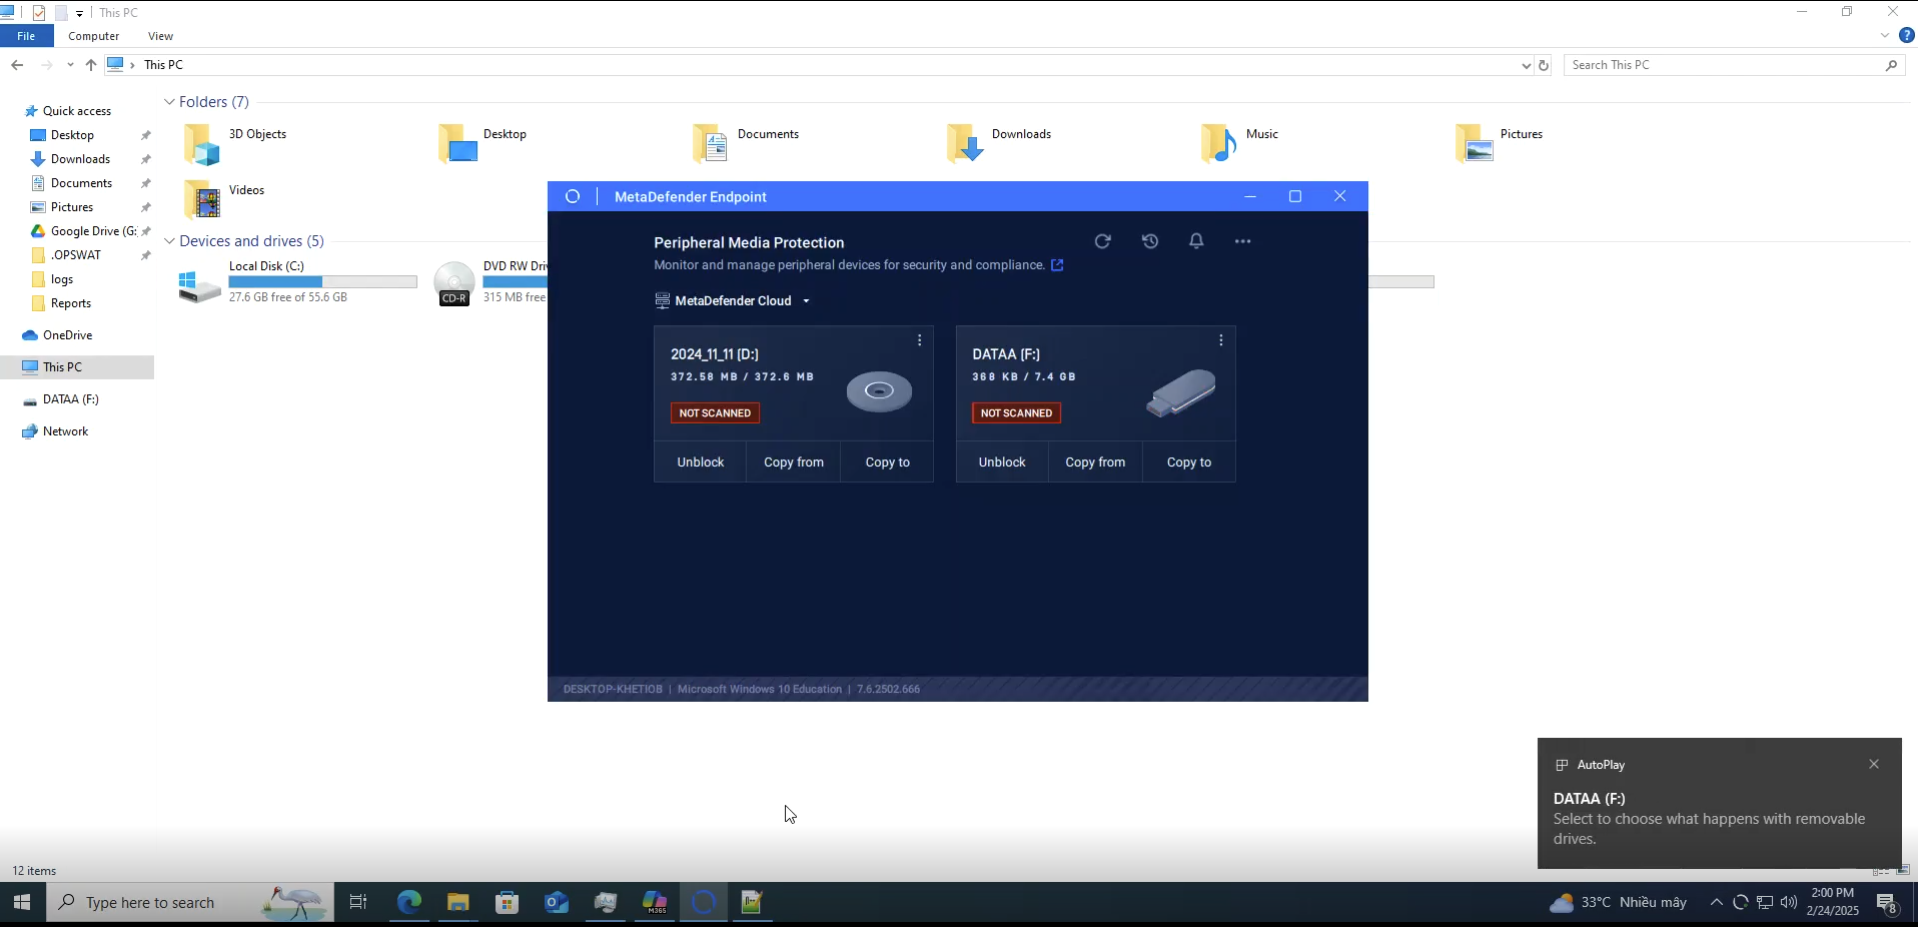
Step 1: Plug in the peripheral device into the endpoint’s port and open MetaDefender Endpoint. Select the Peripheral Media Protection section. Choose the peripheral device you would like to access:
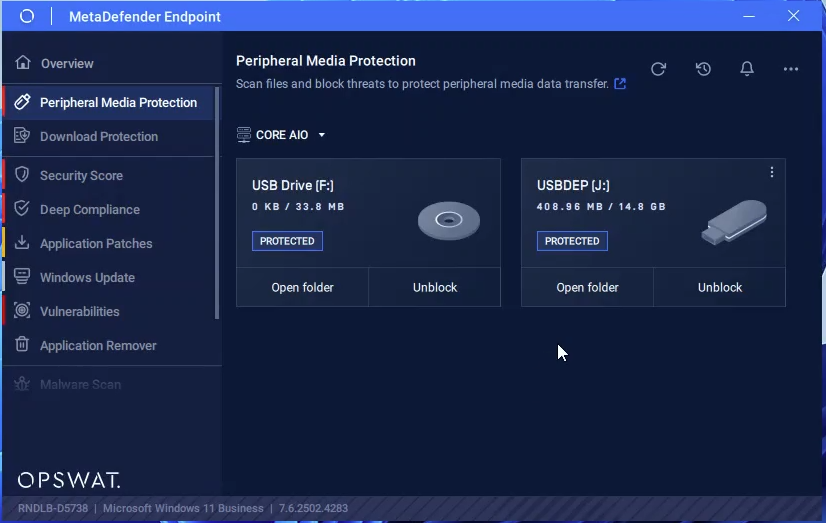
Step 2: To access files from peripheral devices, users can choose to scan selected files they wish to work on or scan the entire USB.
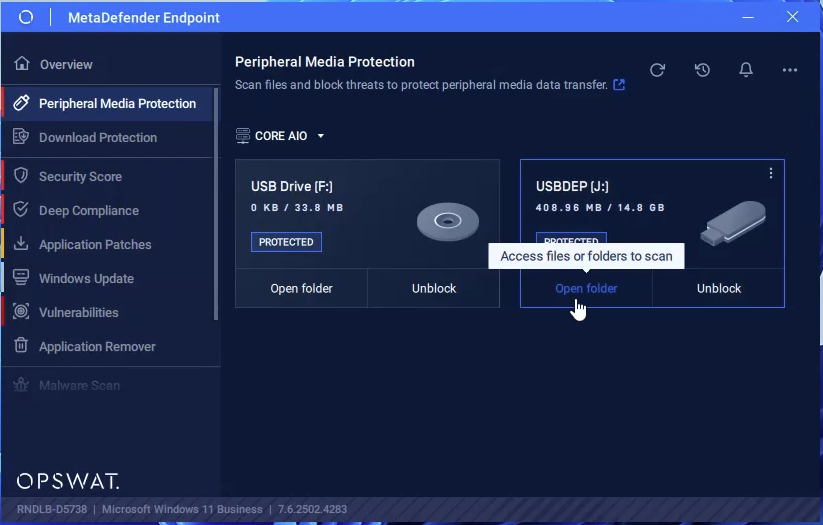
Choose Open folder to scan selected files or Unblock to scan the entire device.
Case 1: Access selected files
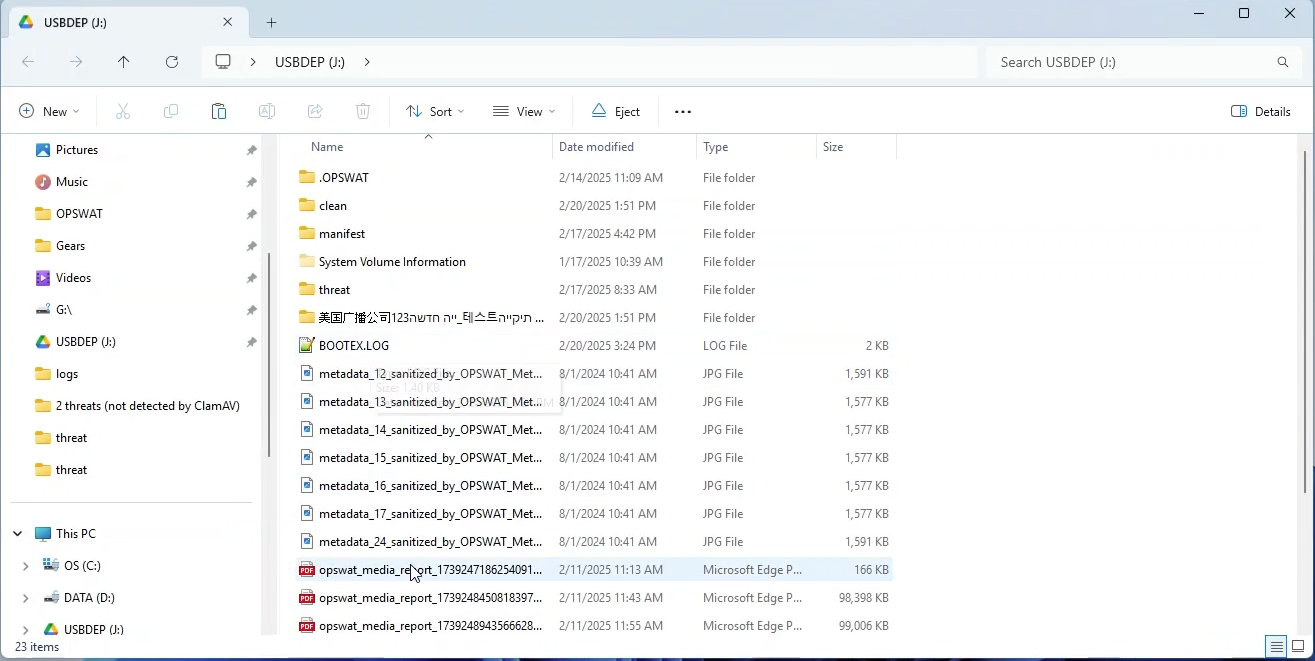
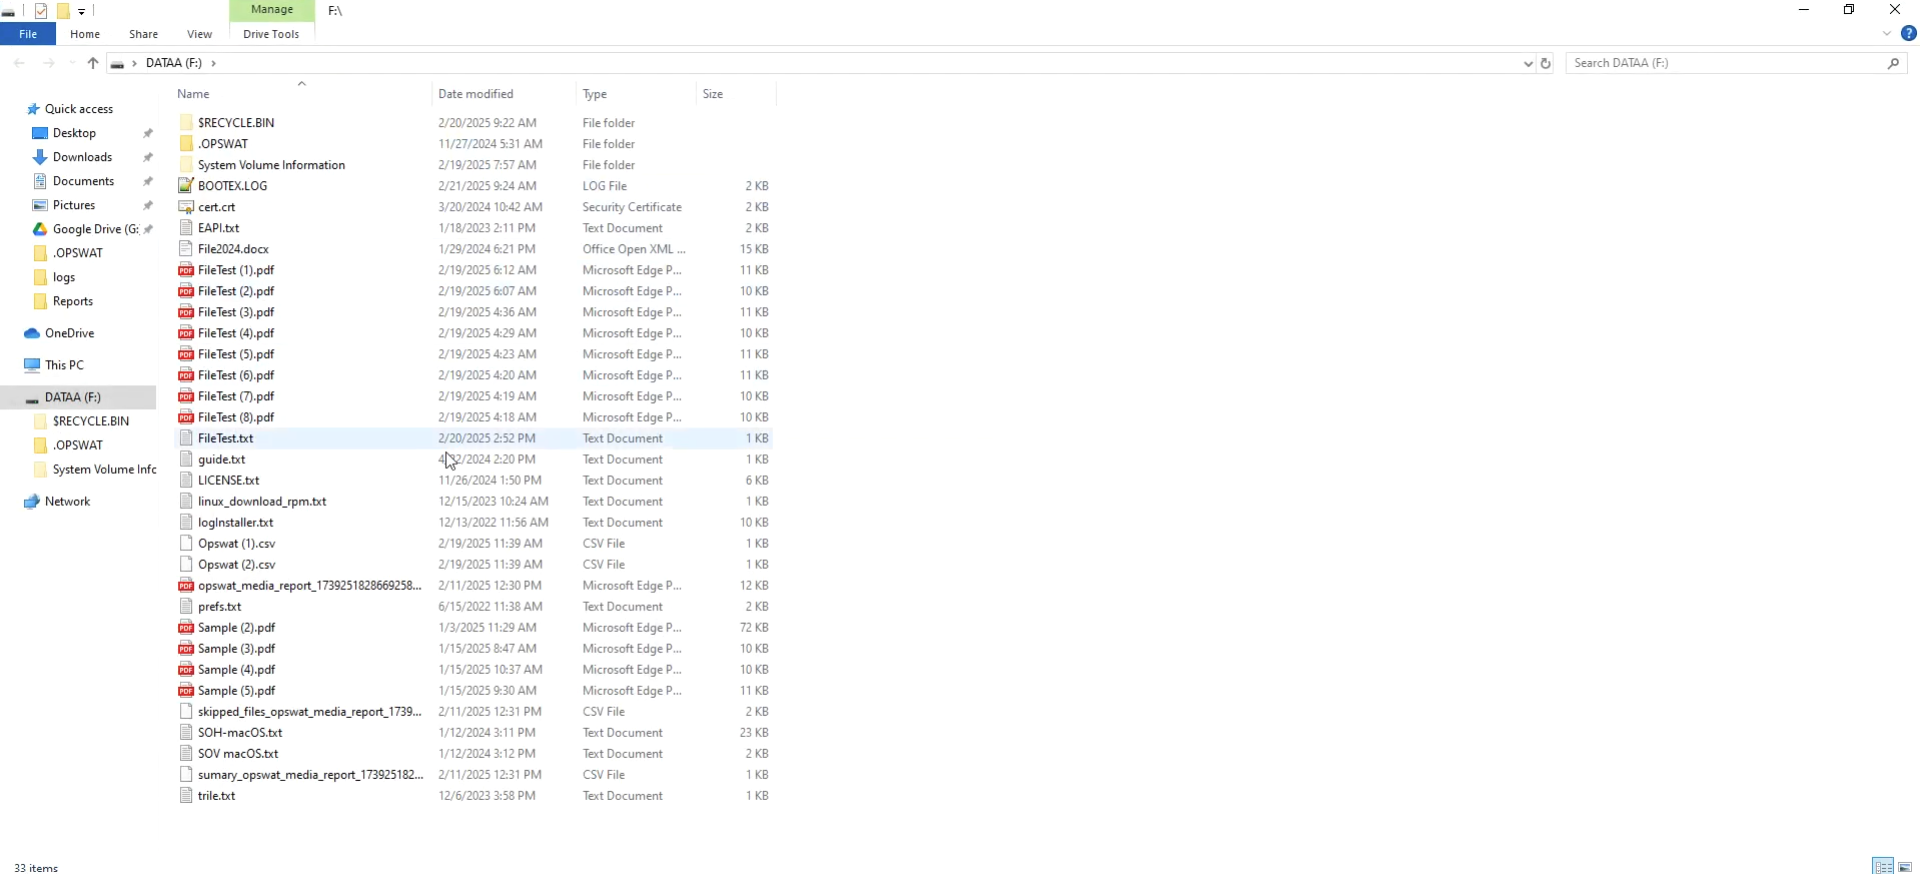
Through the user interface of MetaDefender Endpoint, clicking Open folder, will open Windows Explorer and display the device’s folder.
Choose the file(s) you would like to access.
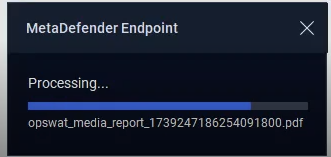
Every file will be scanned before its execution or access.
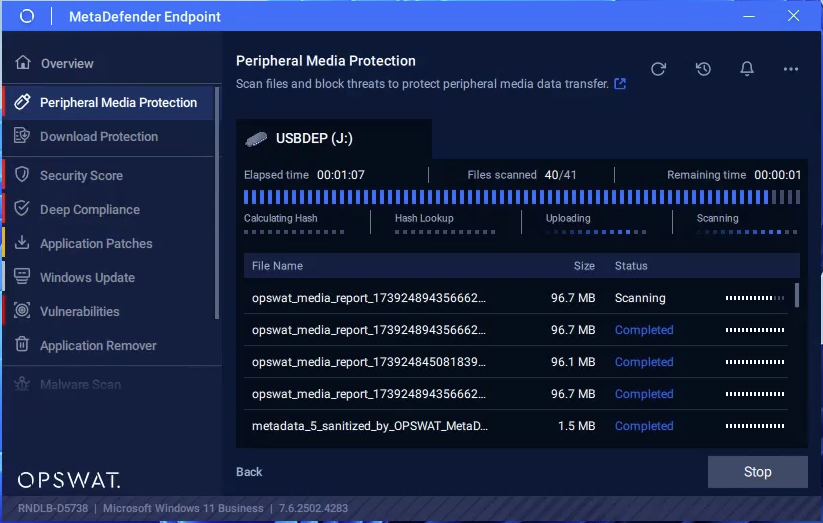
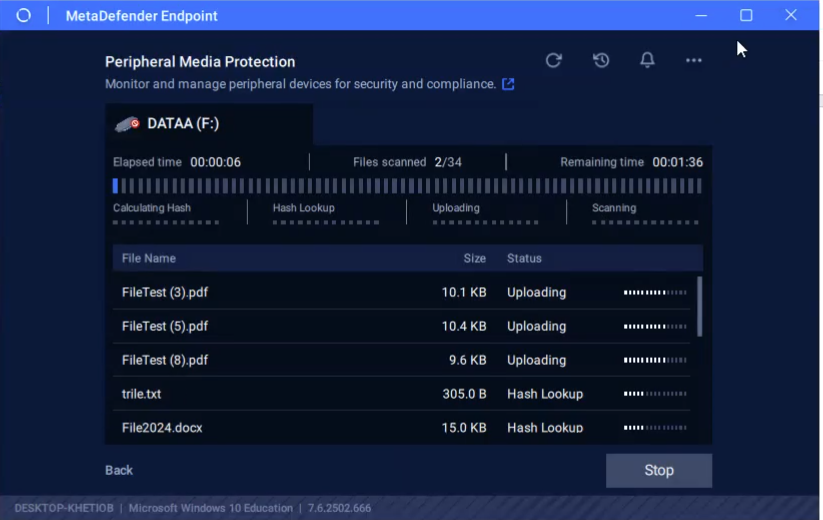
Wait for the scan process to complete:
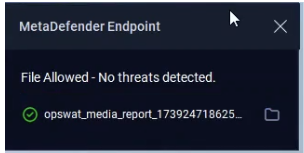
If the file is clean (i.e., no threats detected), user can access the file as usual:
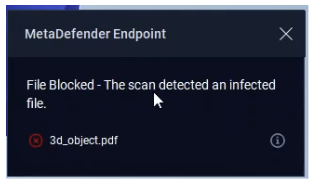
If the file is deemed a threat, it will be blocked. The status will be reflected in the user interface of the MetaDefender Endpoint for the users’ awareness:

Case 2: Scan the entire device
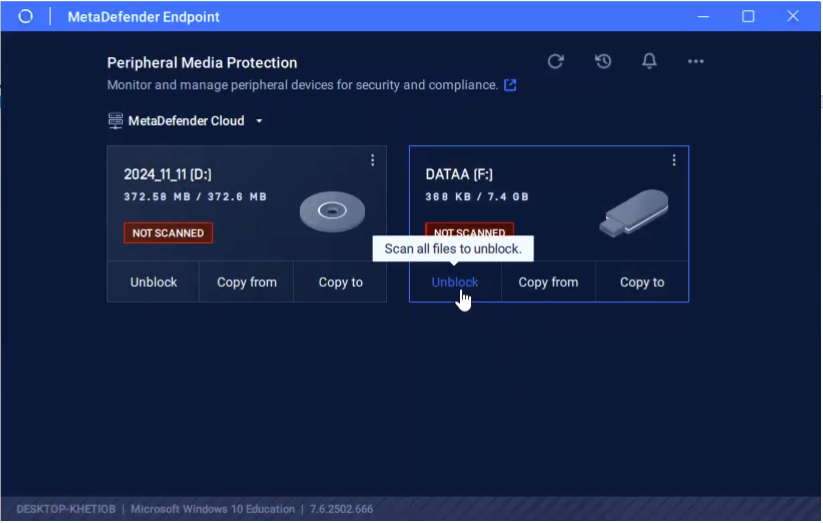
Through the user interface of MetaDefender Endpoint, click Unblock. This will initiate the scan process.
Wait for the scan process to complete.
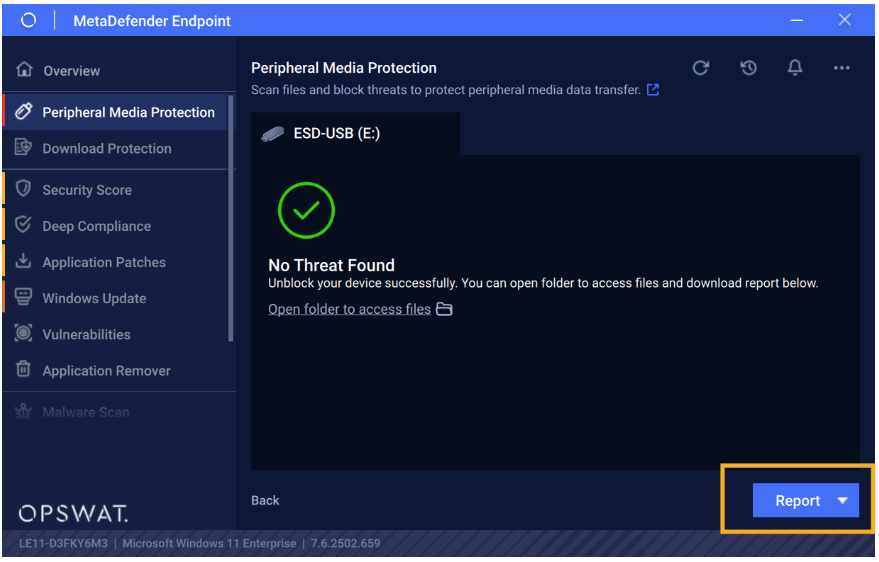
When the scan is complete and no threat is found, users can either look at the scan report by clicking Report, or continue using the device as-is.
If a threat is found, the device will be remained blocked. User can view the scan report for more details.
Copy files from the USB
Step 1: Plug in the peripheral device into the endpoint’s port and open MetaDefender Endpoint. Select the Peripheral Media Protection section. Choose the peripheral device you would like to copy files from and click Open folder.
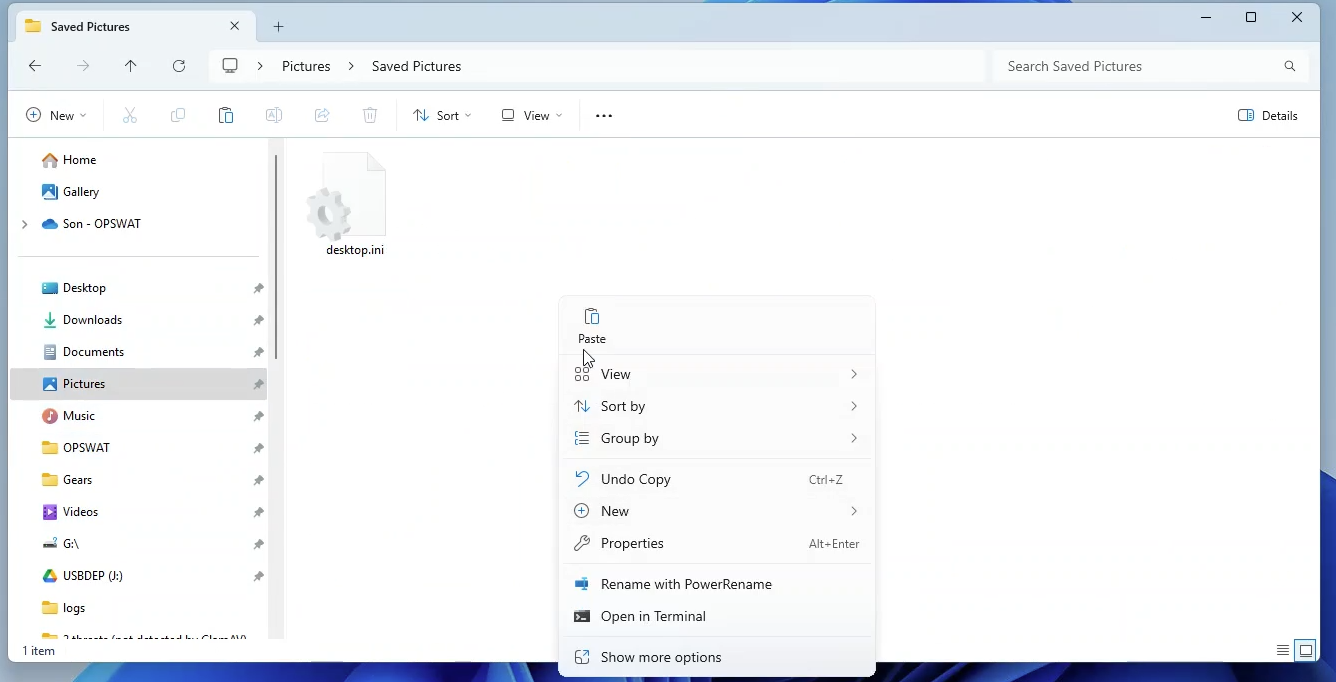
Step 2: Windows Explorer will display, select the file(s) you would like to copy to the local drive, then right click >> Copy .
Step 3: Choose the destination folder in local drives you would like to copy the file(s) to, then right click >> Paste.
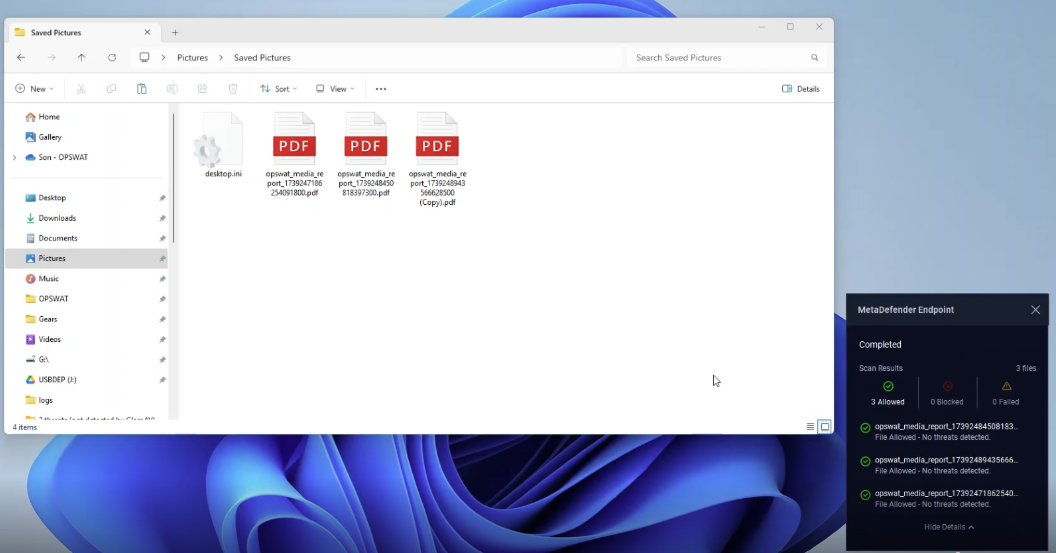
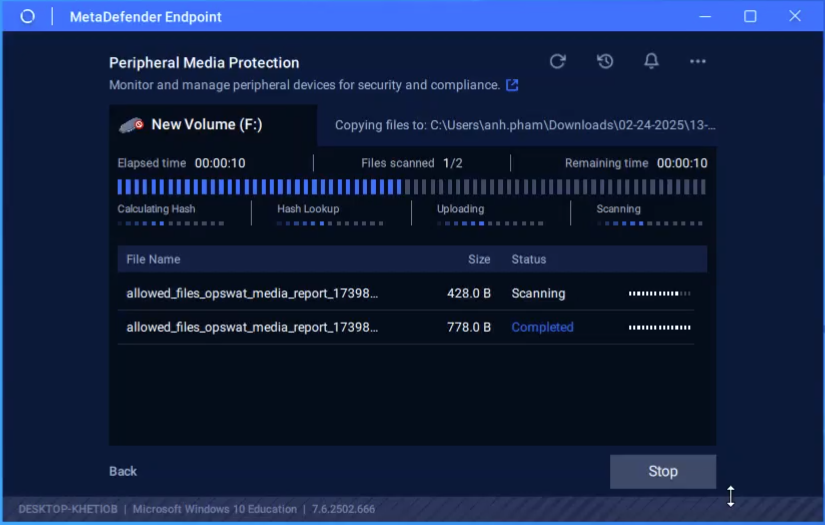
Step 4: The scan process will be triggered, wait for it to complete.
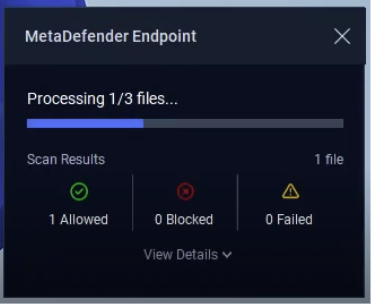
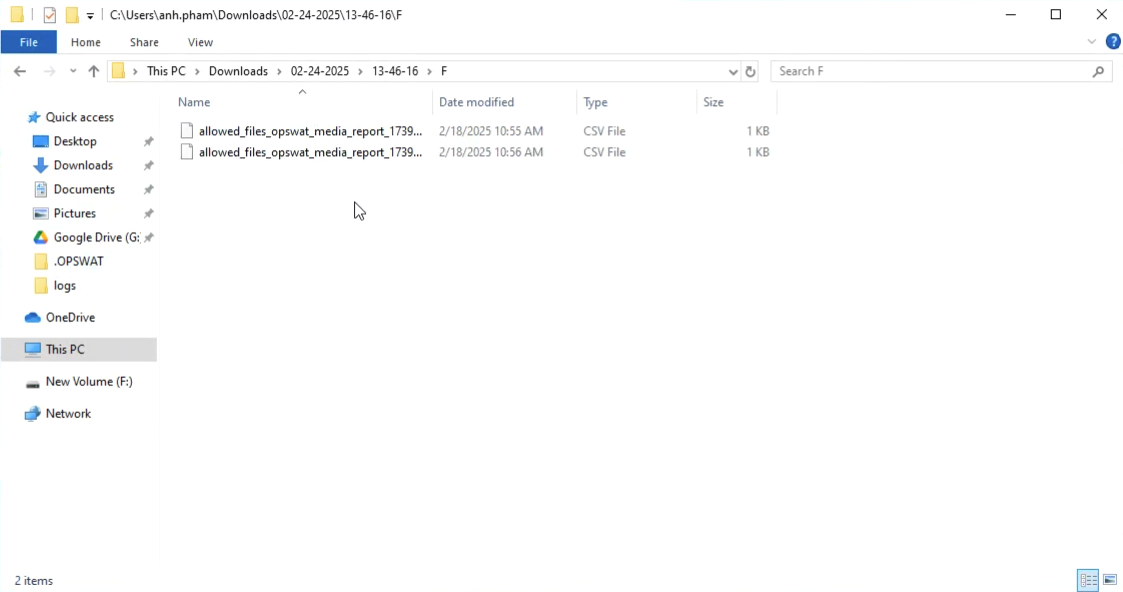
Step 5: Once the scan is complete, clean (allowed) file(s) will be copied to the local drives and accessible to the user.
Mode: Full block
Unblock a device
Step 1: Plug in the peripheral device into the endpoint’s port and open MetaDefender Endpoint. Select the Peripheral Media Protection section.
Step 2: Click Unblock to start the scan process.
Step 3: Wait for the scan process to complete.
Step 4:
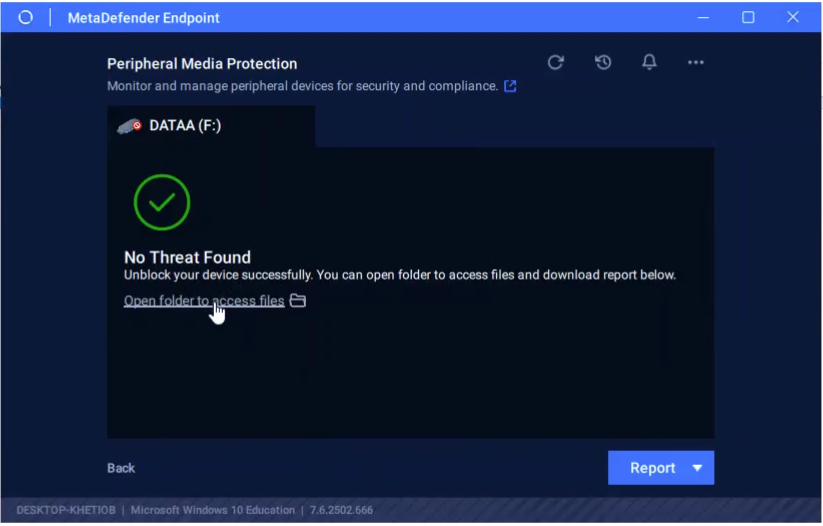
Case 1: Unblock successful
Once the scan is complete and no threat is found, the device is deemed clean and accessible to the user.
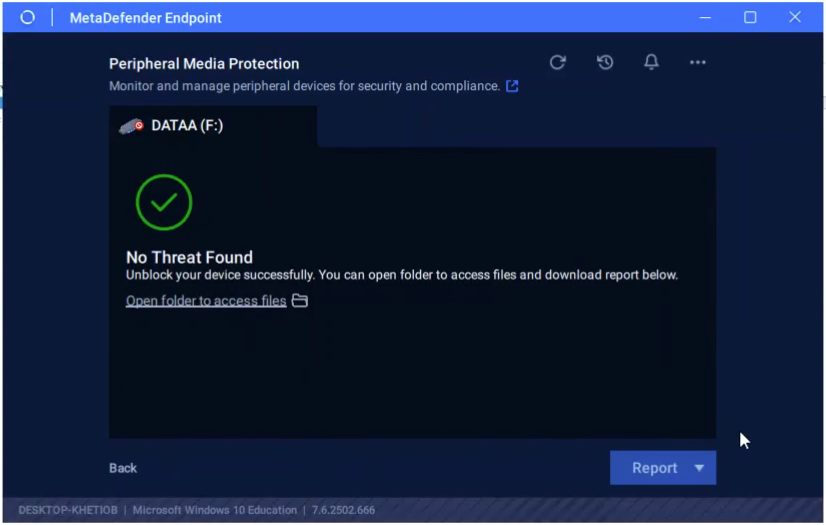
A pop-up notification will display in the bottom right corner of the screen, indicating that the peripheral media device is now accessible.

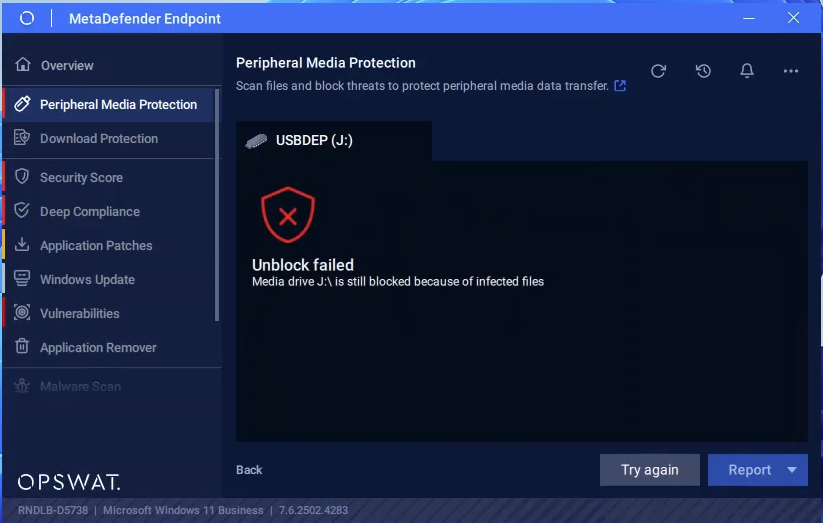
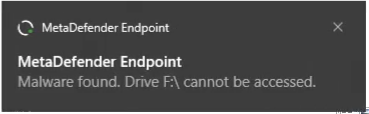
Case 2: Unblock failed
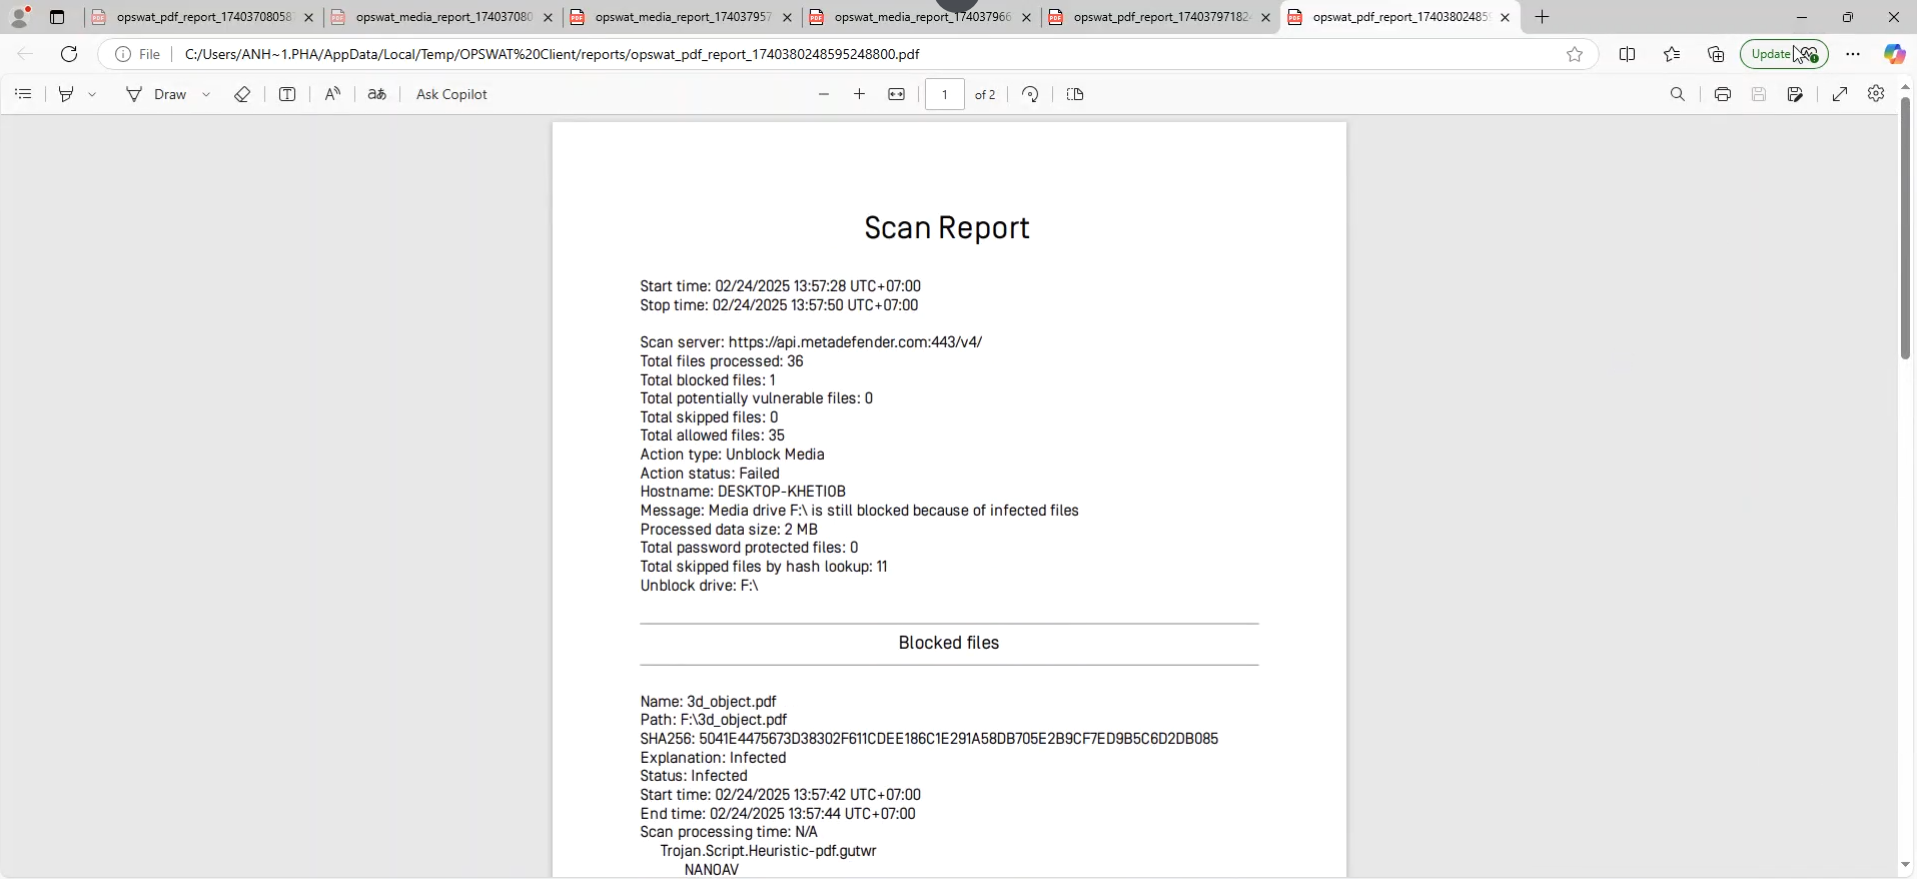
After scanning, if the media contains malicious content, it is blocked and users will NOT be able to access the media device or its contents.

Simultaneously, a pop-up notification will also show at the bottom right corner of the screen, indicating the status of the scan.
A scan report with details of blocked files, potentially vulnerable files, etc. will display for users to have more information on the device.
Step 5: If the device is safe and accessible, to access the folder or the files in the device, users can click Open folder to access files directly from the interface of MetaDefender Endpoint or from native applications (Windows Explorer, Word, Excel, etc...).
Step 6: Users can access the scan report by clicking the Report button

Copy files from the USB
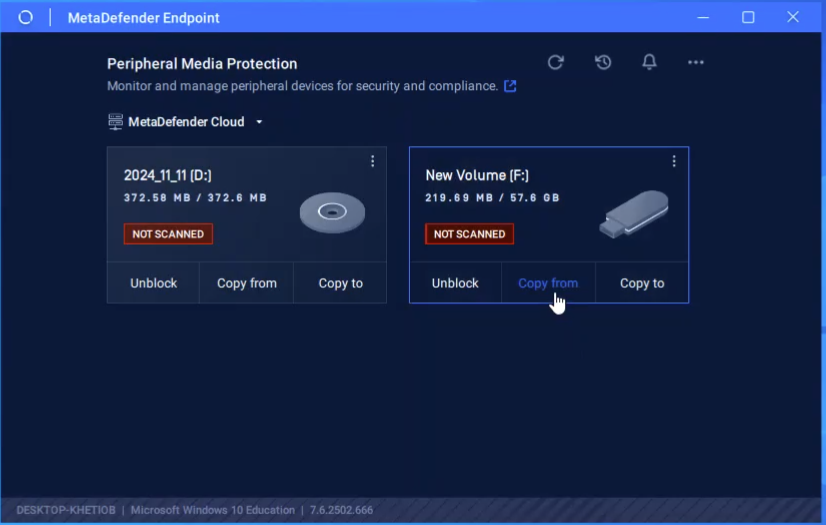
Step 1: Plug in the peripheral device into the endpoint’s port and open MetaDefender Endpoint. Select the Peripheral Media Protection section. Choose the peripheral device you would like to copy files from and click Copy from.
Step 2: Click on the + icon to expand the view of folders and files of the peripheral media device.
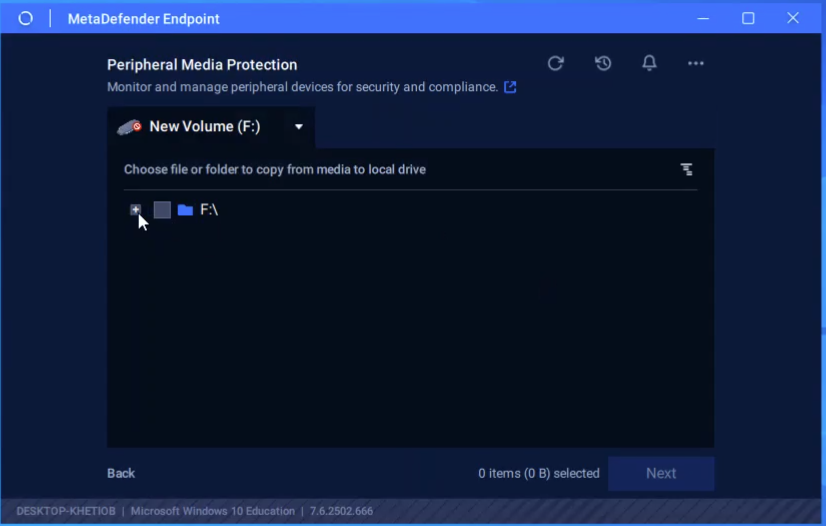
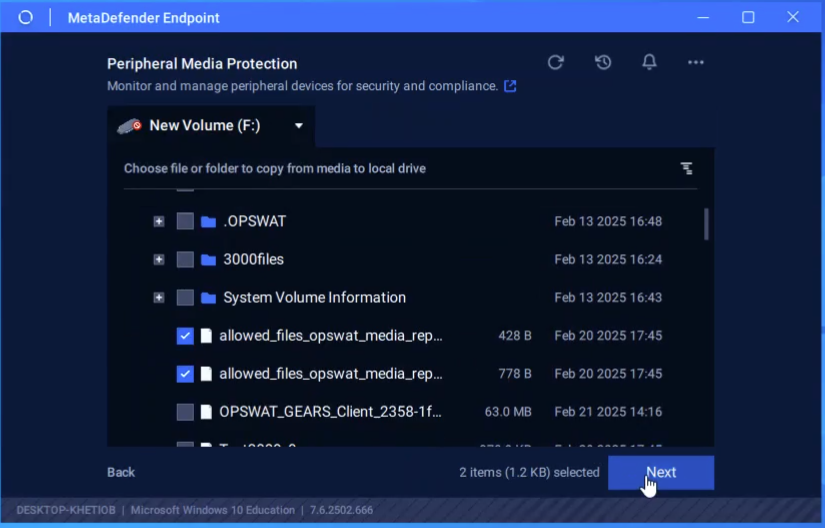
Step 3: Select files or folders to copy from the media to the local drive. Then click Next.
Step 4: Click Copy.
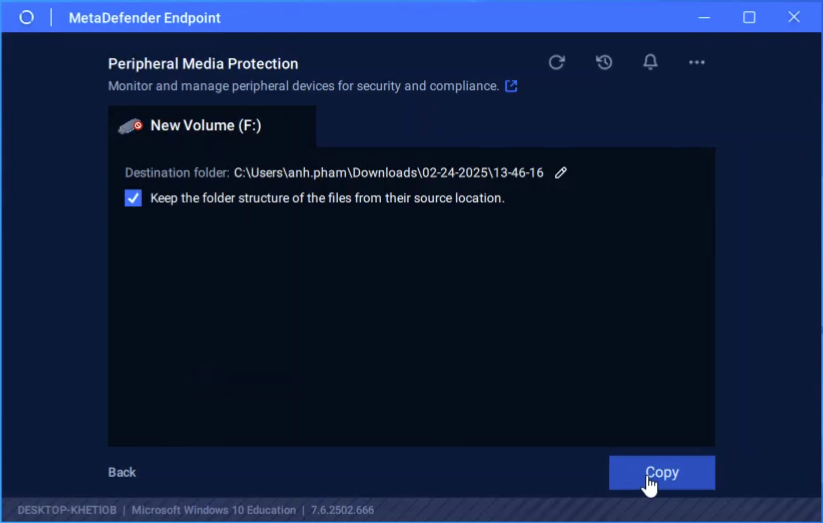
Step 5: By clicking Copy, MetaDefender Endpoint triggers the scan process, to ensure the file or folder are safe before copying.
Step 6: Once the scan is complete, any file/folder that is safe will be copied and the user can access them by clicking on Open folder to access files directly from the interface of MetaDefender Endpoint or from native applications (Windows Explorer, Word, Excel, etc.).

A pop-up notification will also display at the bottom right of the screen, indicating that the files/folders were copied successfully.
Step 7: User can access files through native applications if they’re found clean.
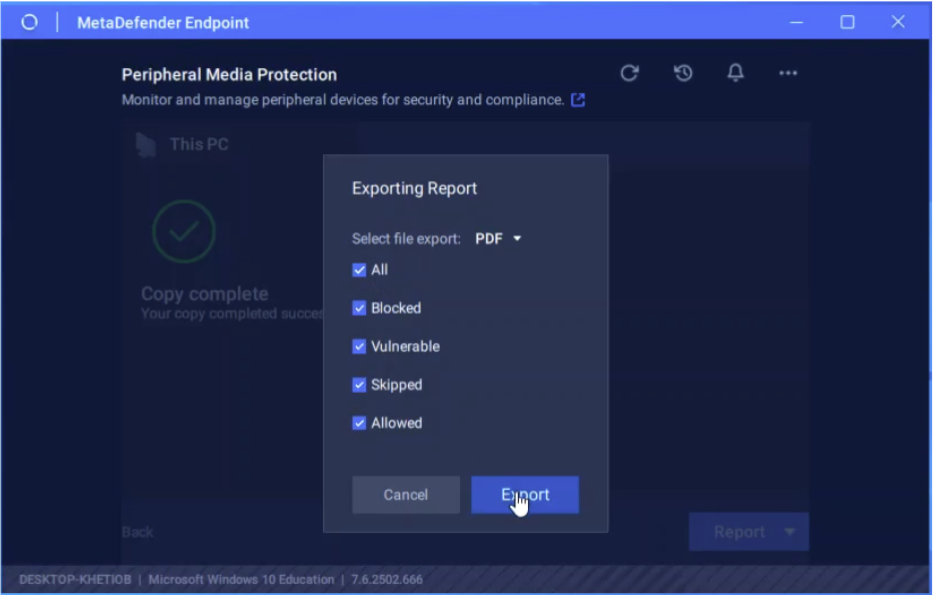
Step 8: Users can export and access the scan report by clicking Report, then choose the preferred file format: PDF or CSV.
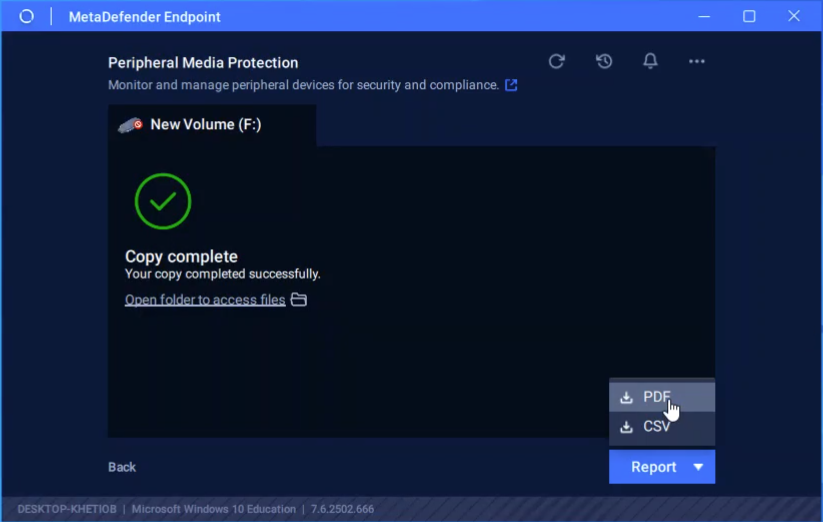
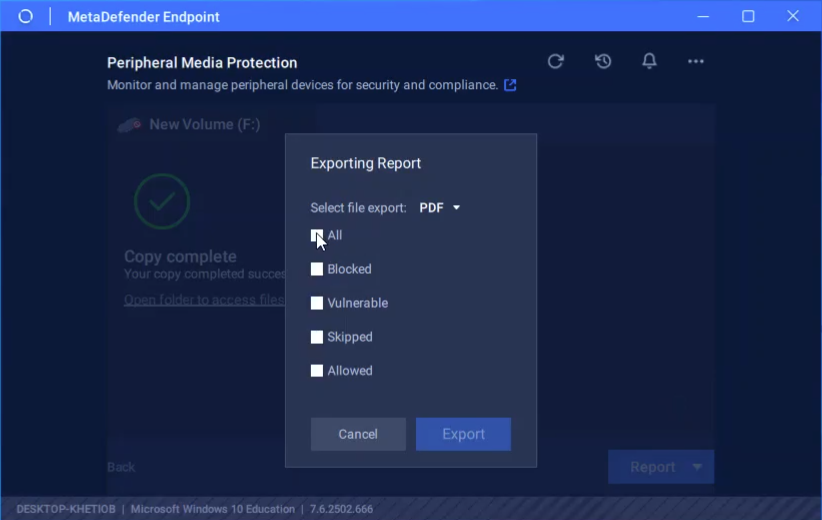
Step 9: Users can also customize the information to be included in the report. Once done, click Export.

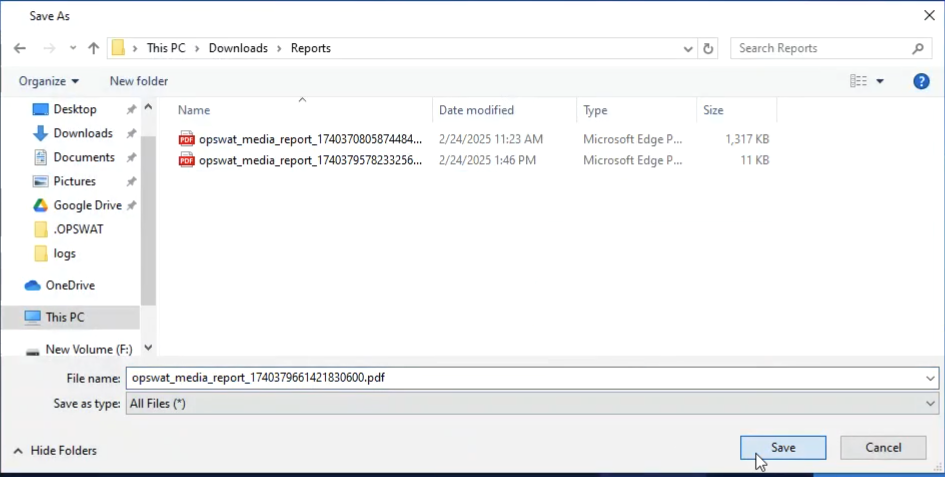
Step 10: Choose the destination to save the report.
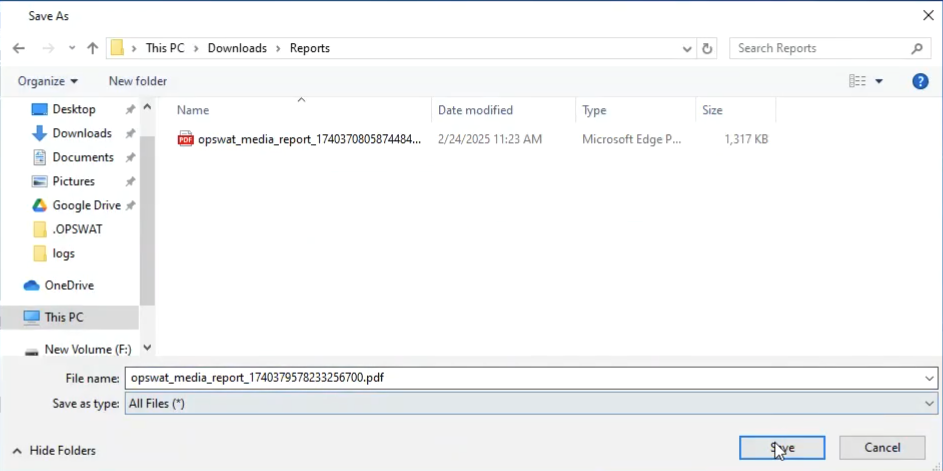
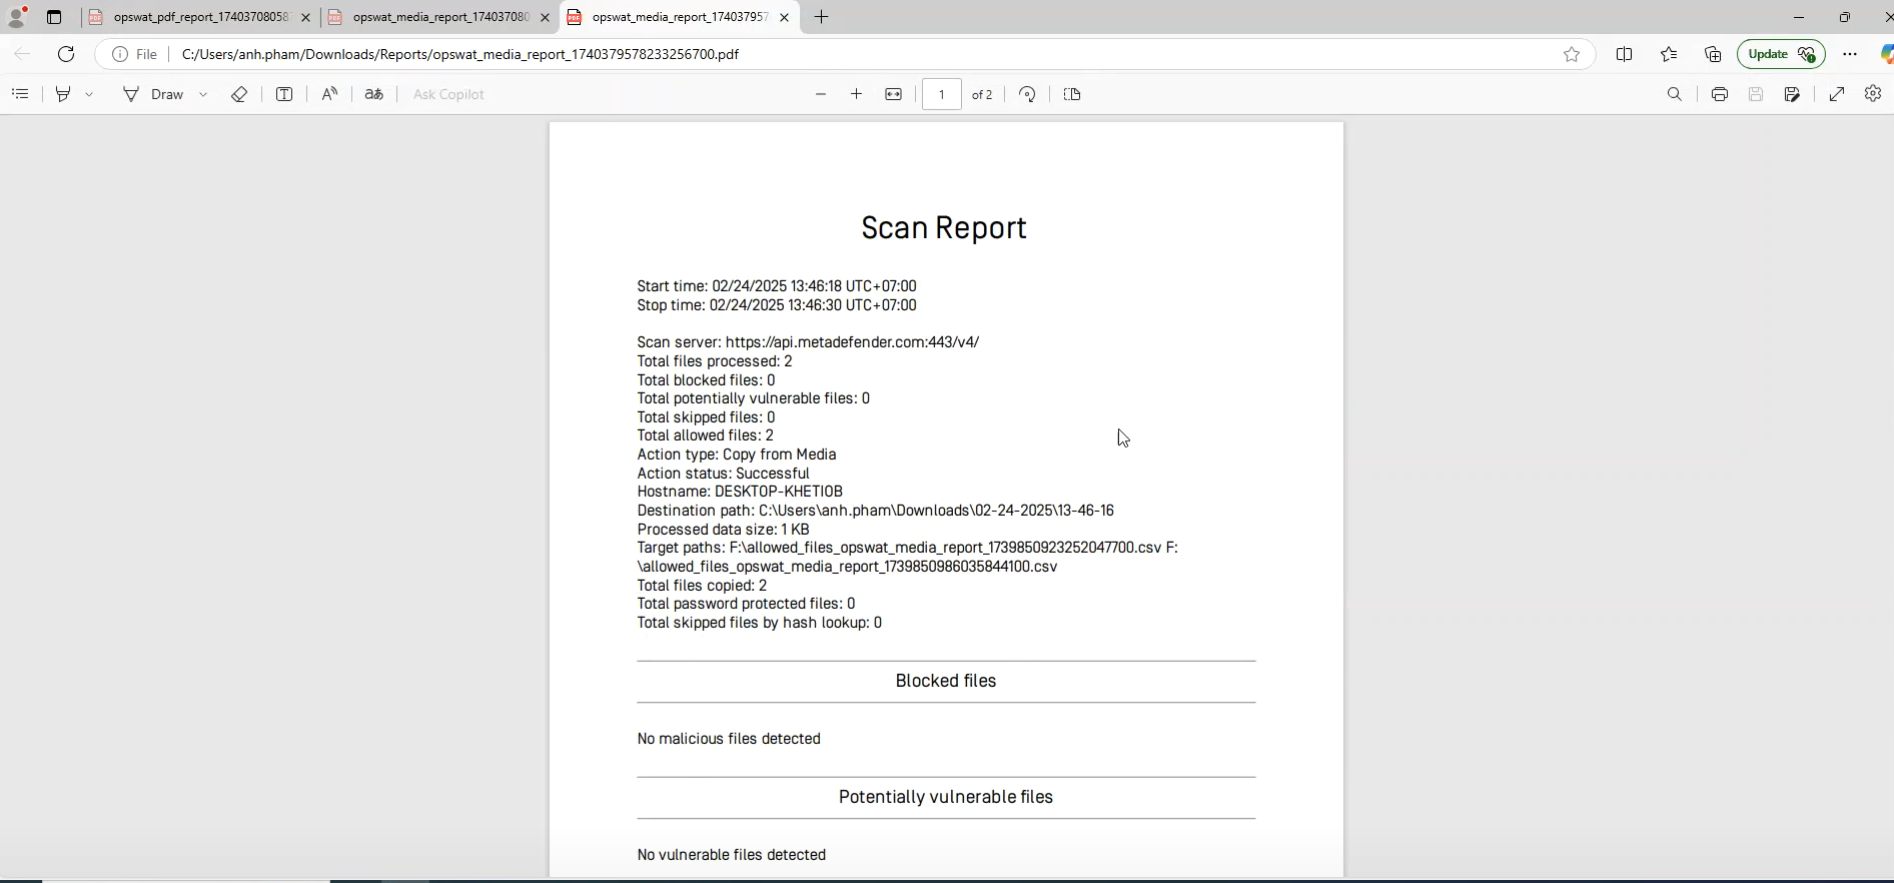
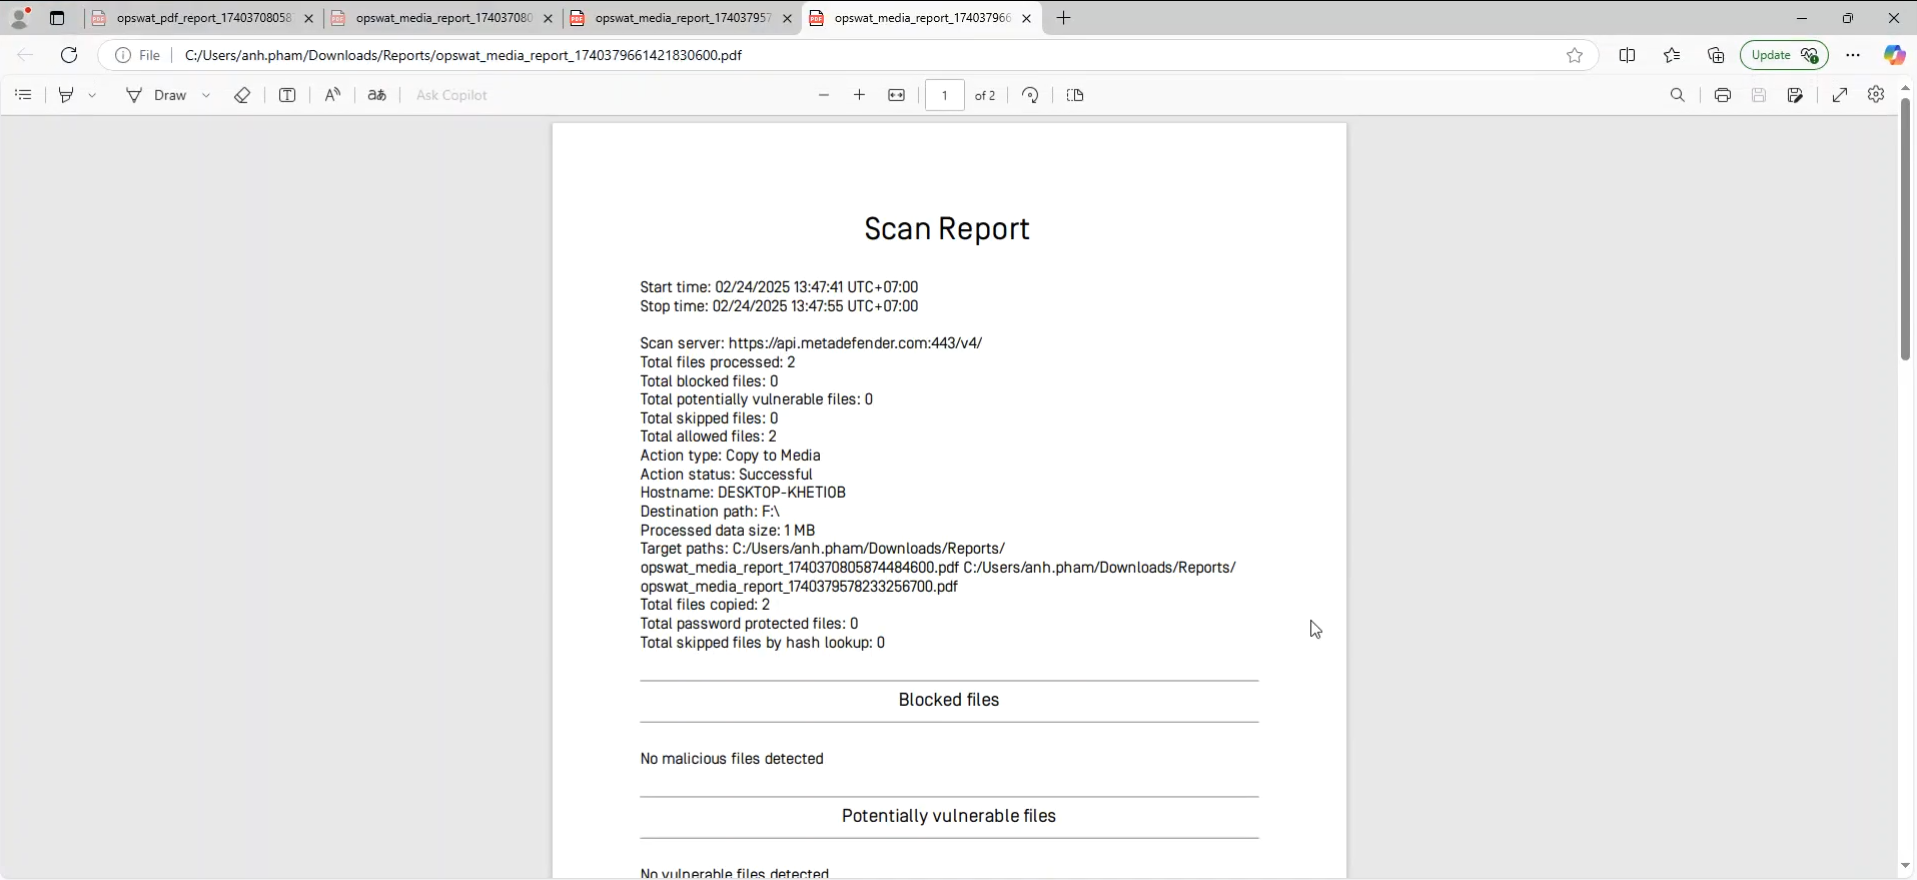
Step 11: The report will show up automatically once saved successfully.
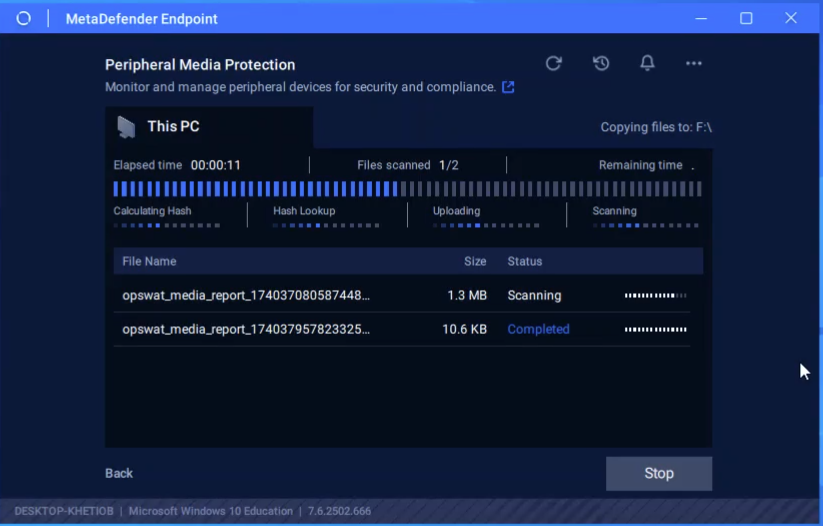
Copy files to the USB
Step 1: Plug in the peripheral device into the endpoint’s port, and open MetaDefender Endpoint, navigate to the Peripheral Media Protection feature. Choose the peripheral device you would like to copy files from and click Copy to.

Step 2: Choose the file or folder to copy from the local drive to media. Users can do this by choosing the local drive directly from the user interface of MetaDefender Endpoint or clicking Open File Explorer to work locally in Windows Explorer.
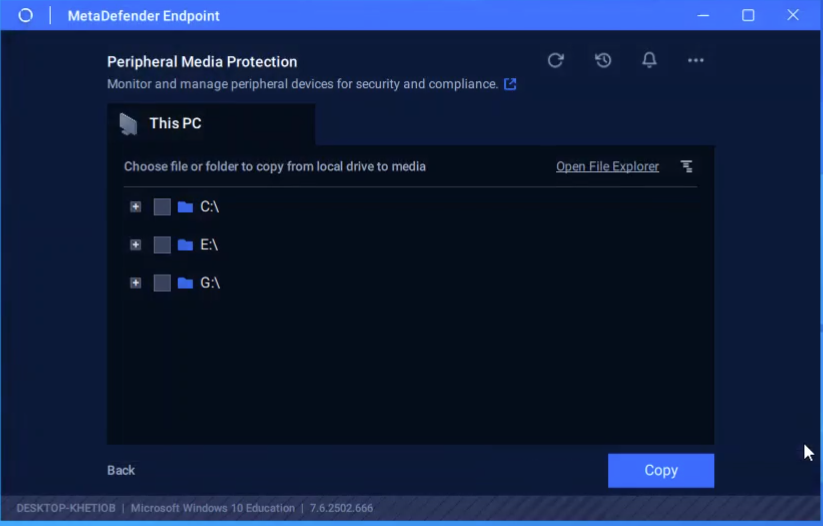
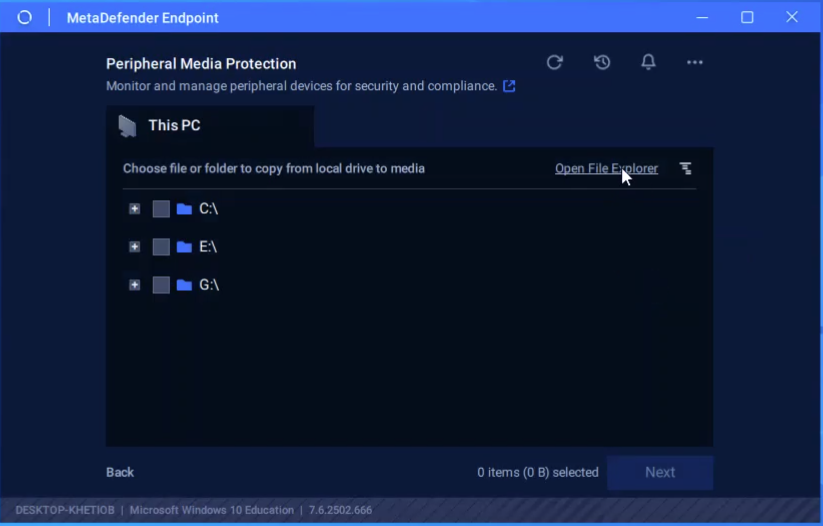
Step 3: Choose the file or folder and click Copy.
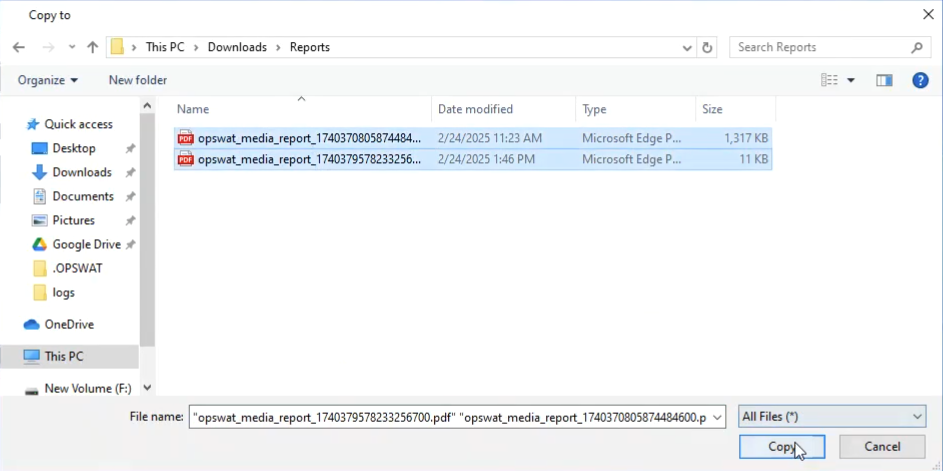
Step 4: Click Copy to proceed.
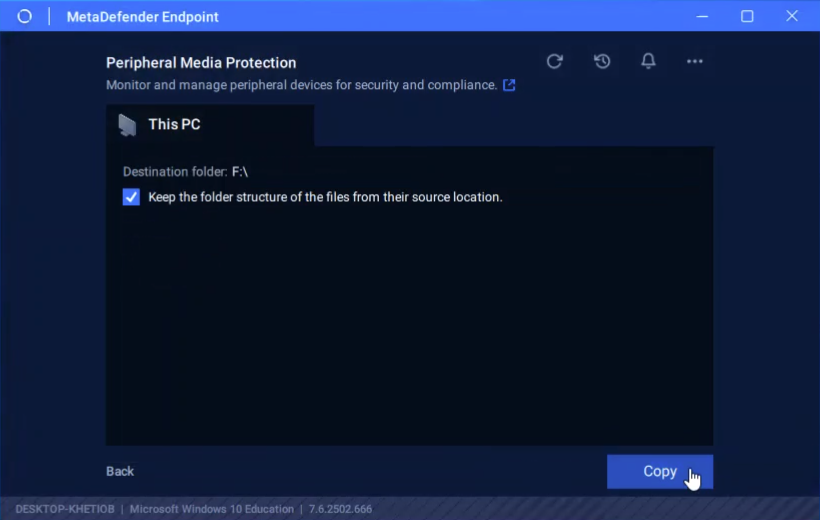
Step 5: Wait for the scan progress to complete.
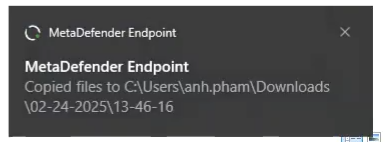
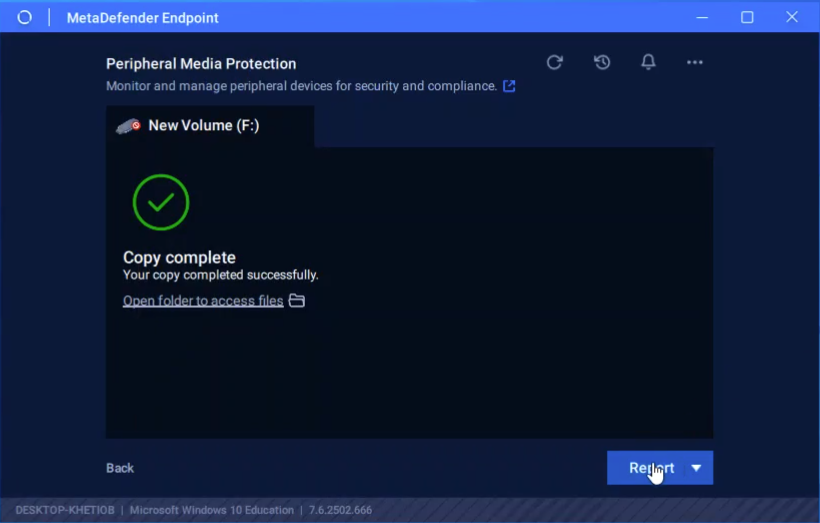
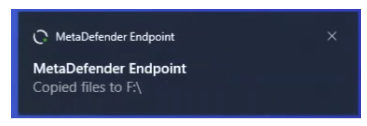
Step 6: Once the scan is complete, users will be notified that files/folders were copied to the USB.
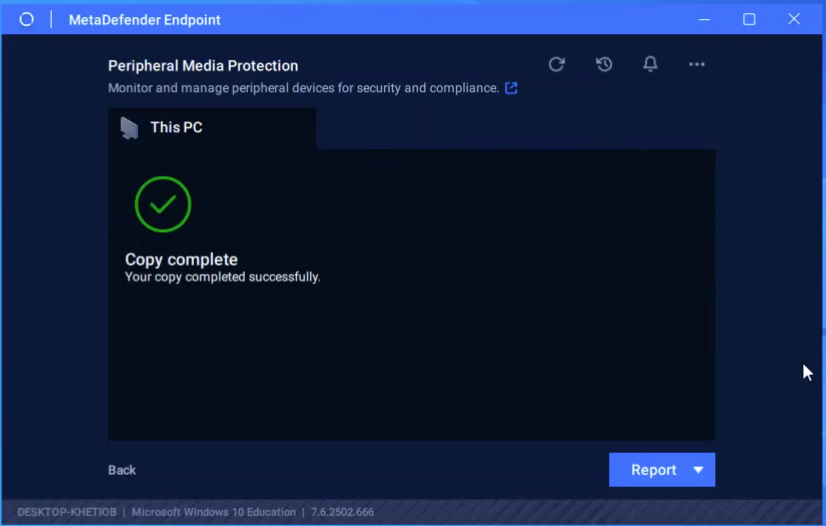
Step 7: Users can export and access the scan report by clicking Report and choose the preferred file format: PDF or CSV.
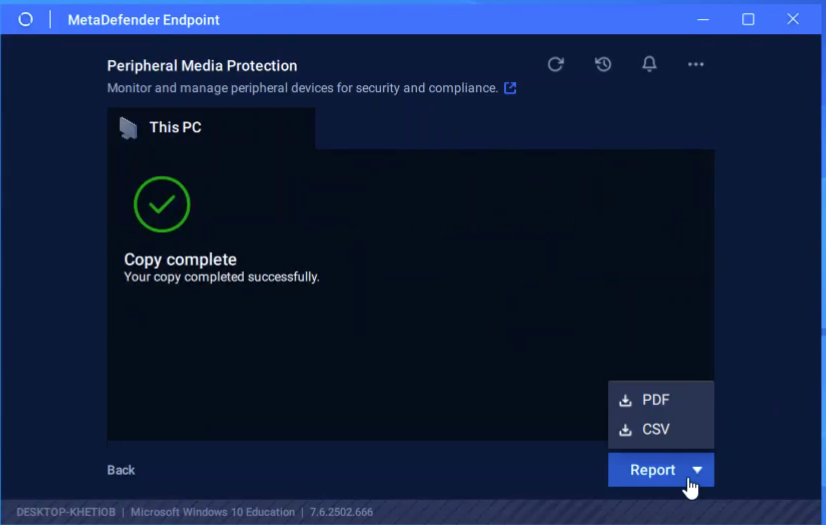
Step 8: Users can also customize the information to be included in the report. Once done, click Export.
Step 9: Choose the destination to save the report and it will open automatically.
MetaDefender Endpoint's peripheral media protection provides strong defenses for non-administrative users. Administrative accounts, however, can still perform some actions with minimal restriction.