What's this feature about?
With the Managed File Transfer feature, MetaDefender Endpoint helps you automate your file transfers and provides advanced security. This feature offers a secure file transfer workflow on critical networks and has streamlined the user experience in document management, making the process of accessing and downloading scanned files seamless and efficient.
User guide for administrators
Enable the feature
The Managed File Transfer needs to be enabled beforehand by administrator for users to access and use on endpoints. To do this, administrators can log in to the console management system and either enable/disable the feature from Global Setting OR Device Groups Setting following the steps below:
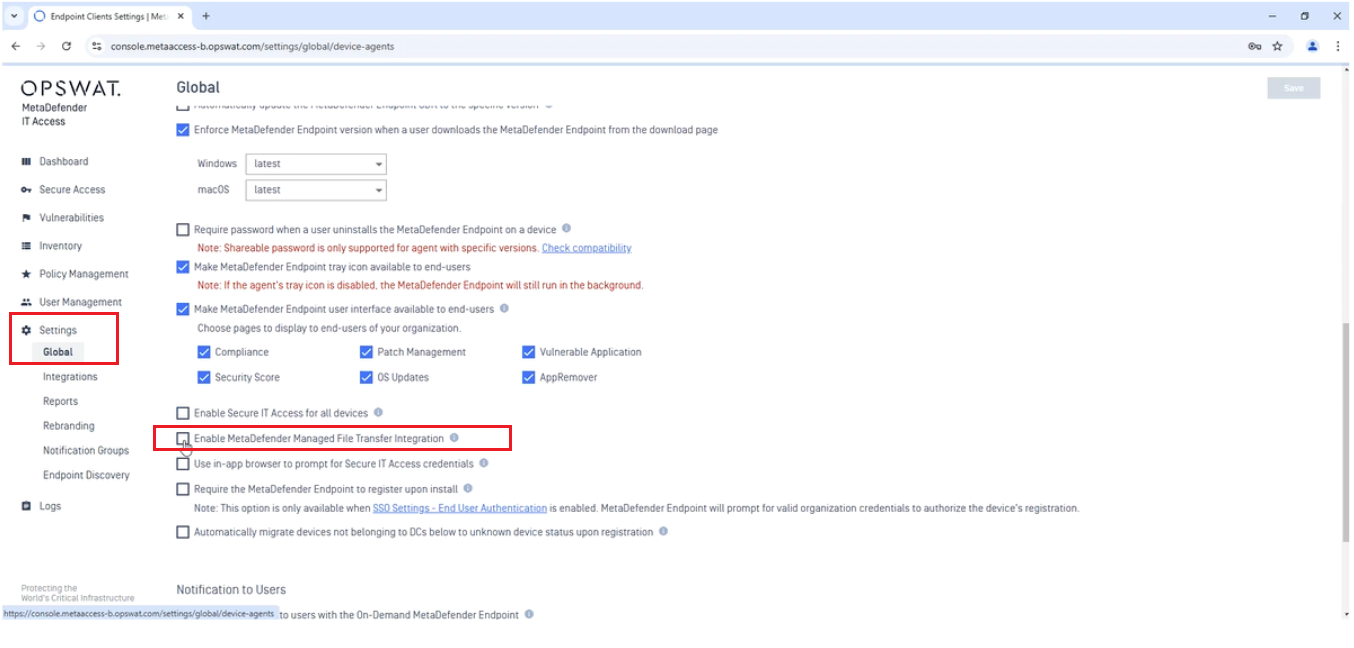
- Global Setting: Navigate to the Global tab under the Setting section and check the box that says Enable MetaDefender Managed File Transfer integration.
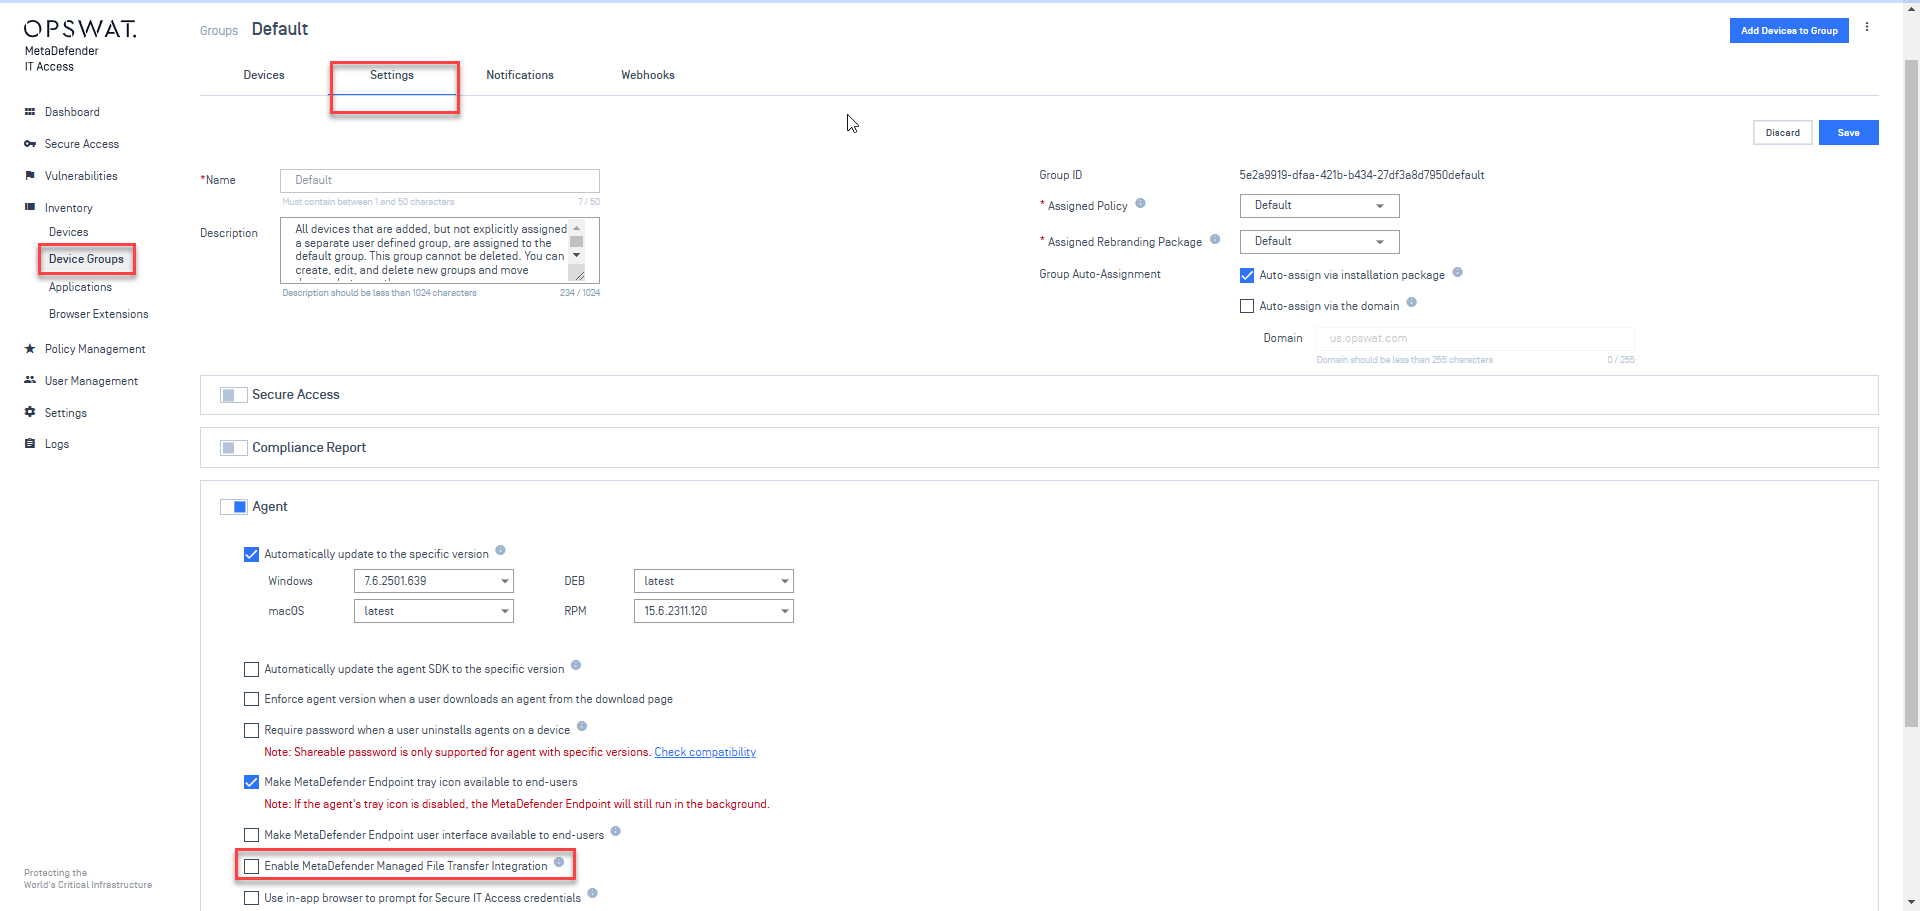
- Device Groups Setting: Navigate to the Device Groups tab under the Inventory section and check the box that says Enable MetaDefender Managed File Transfer integration.
Once the feature is enabled via the console management by administrators, users can start uploading or downloading files through the Managed File Transfer feature at ease. __
Enable uploading files feature
Furthermore, to allow users to upload files from their peripheral and removable media devices, administrators can also manage and enable this via console management under Policies setting.
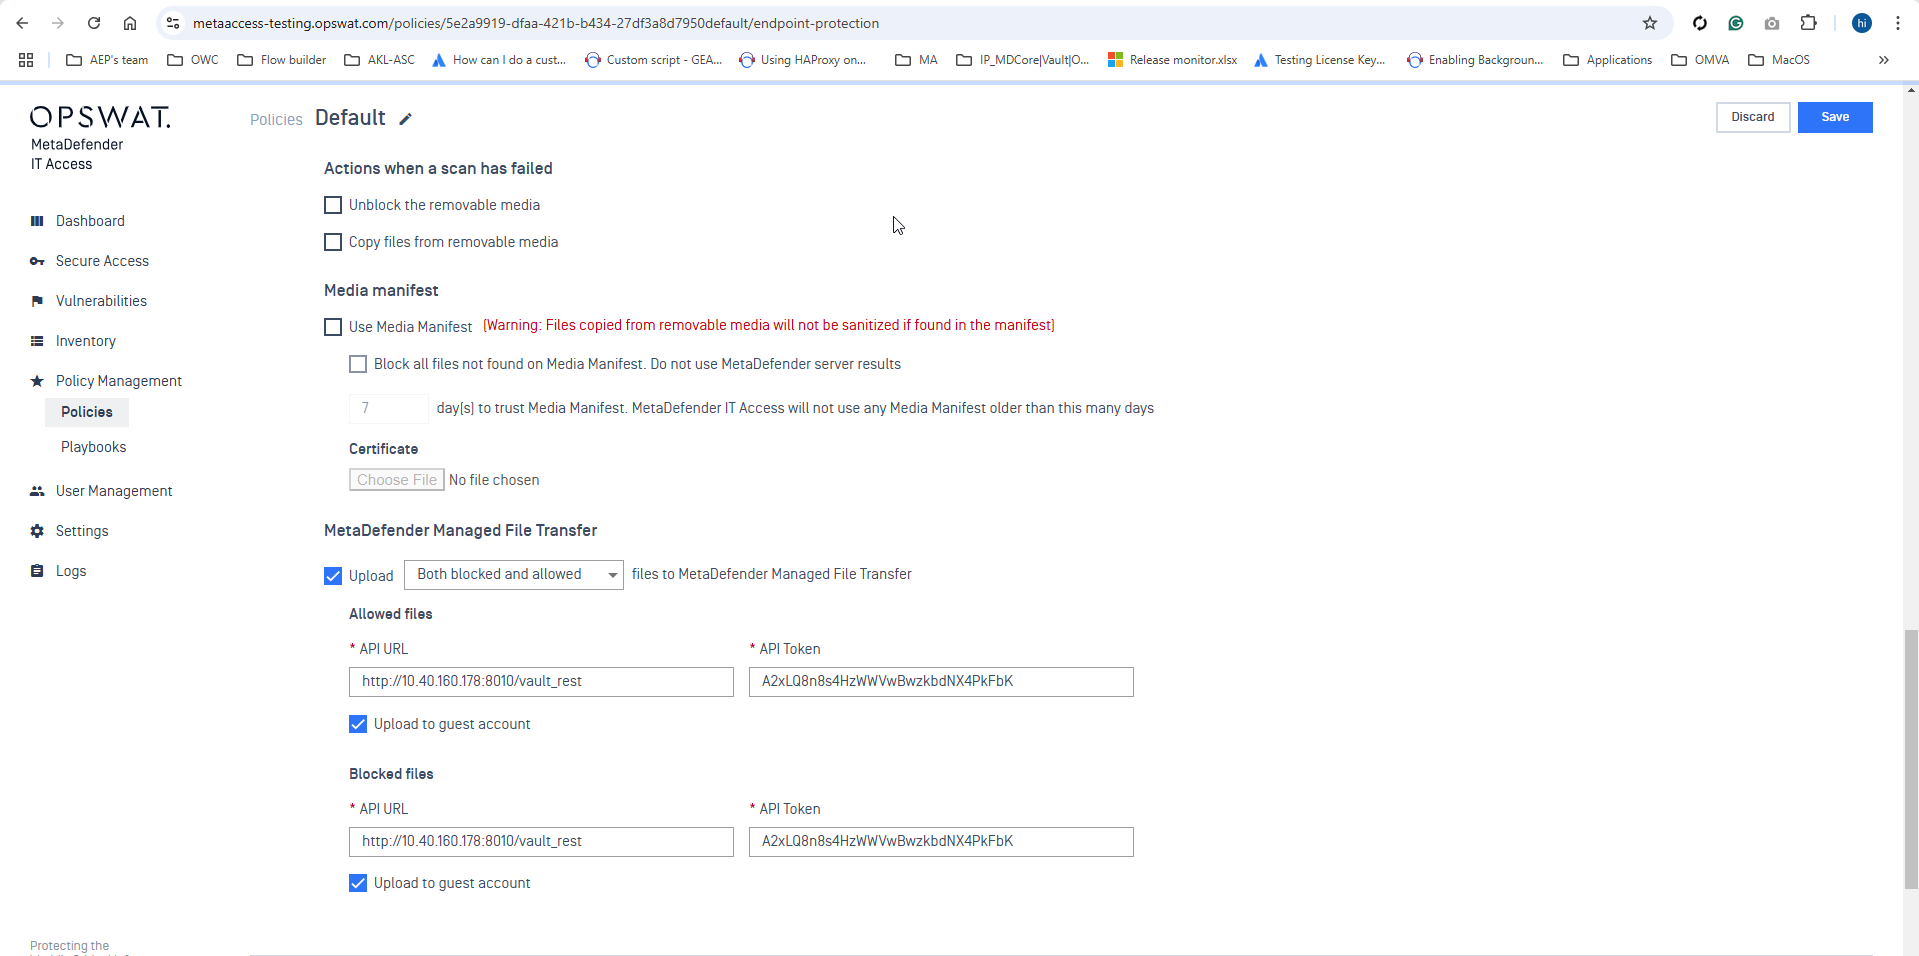
Disable the feature
To disable the feature, administrators can follow the same steps in console management to uncheck the box for disablement.
Create a guest user account for transferring files with third parties
To enable seamless and secure file transfer with third parties, administrators can create new guest user using Managed File Transfer server page and set the expiration date for the user. To do so, simply follow these steps:
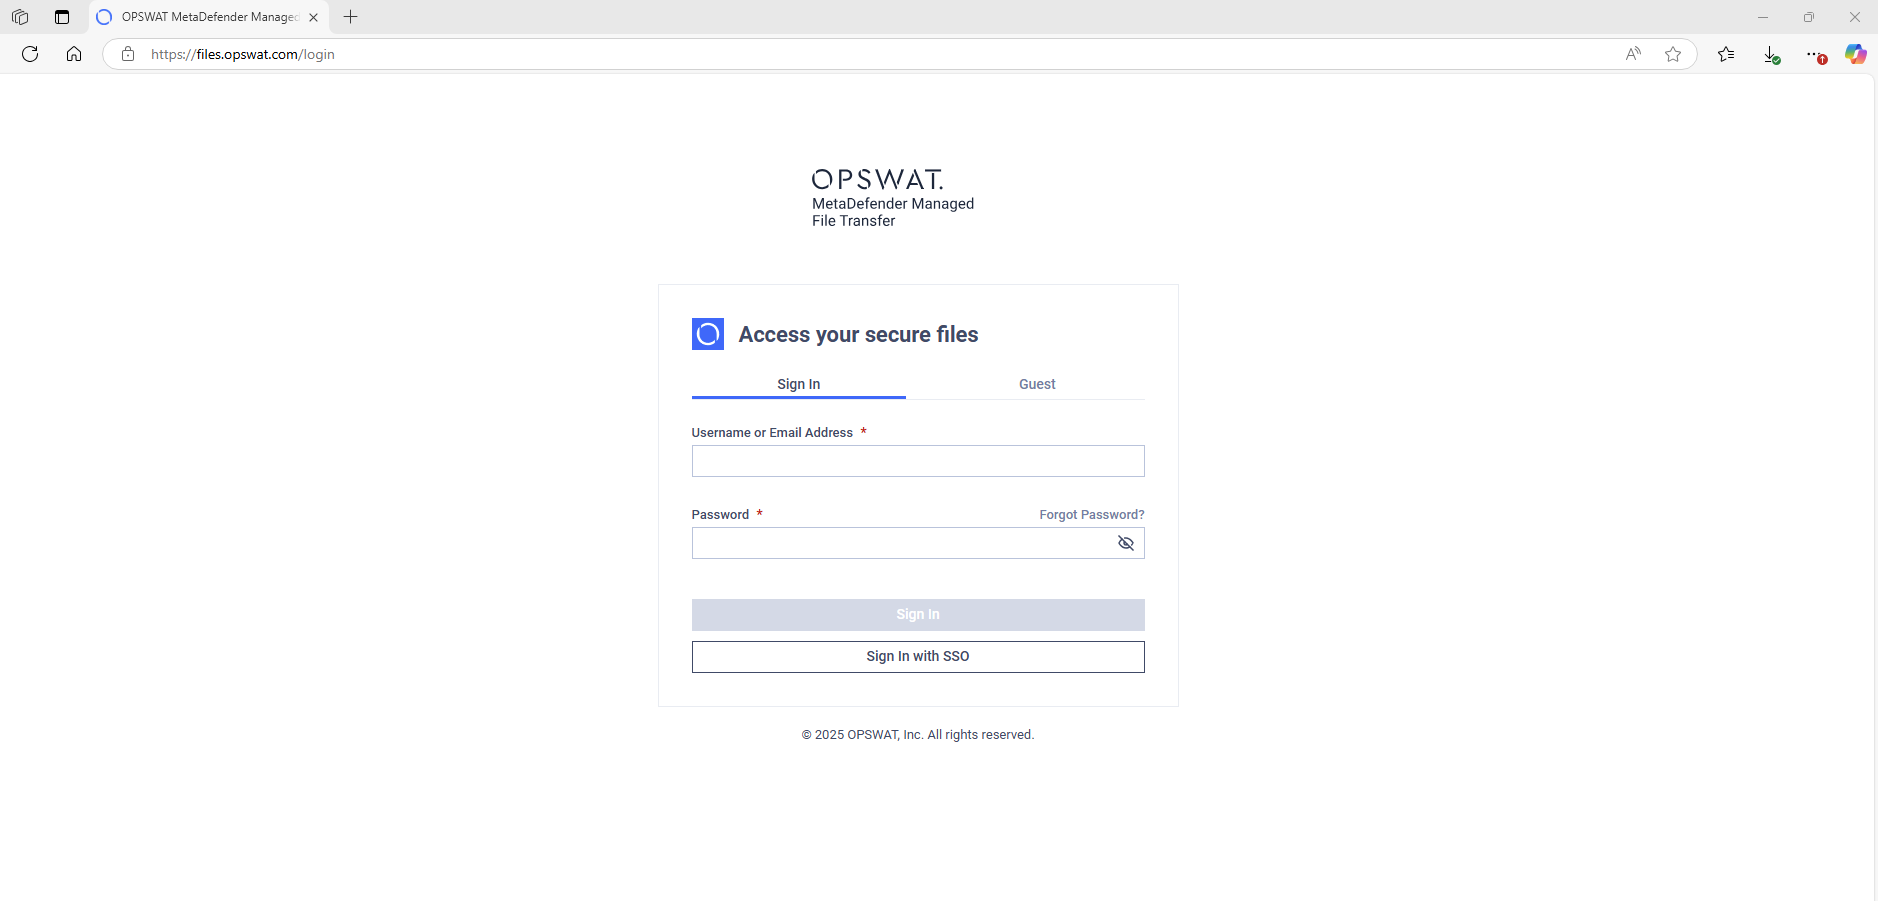
Step 1: Log in to https://files.opswat.com
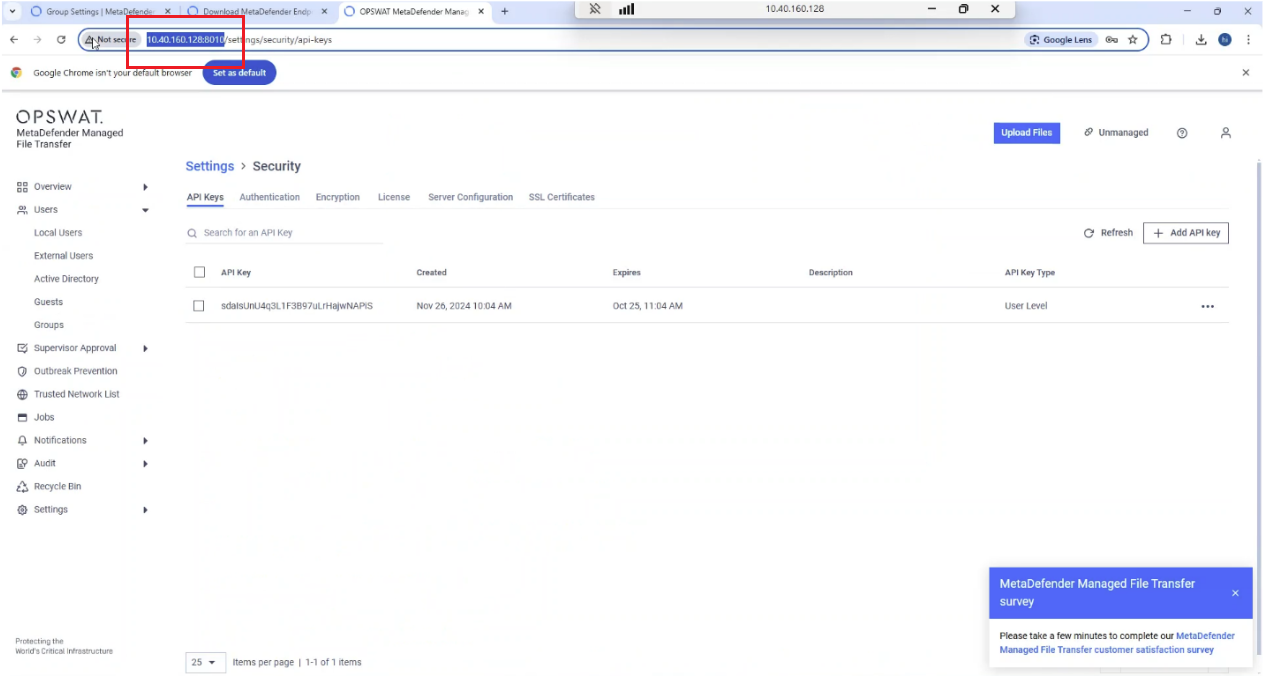
Step 2: After login, go to Users -> Guests and Create a Guest User
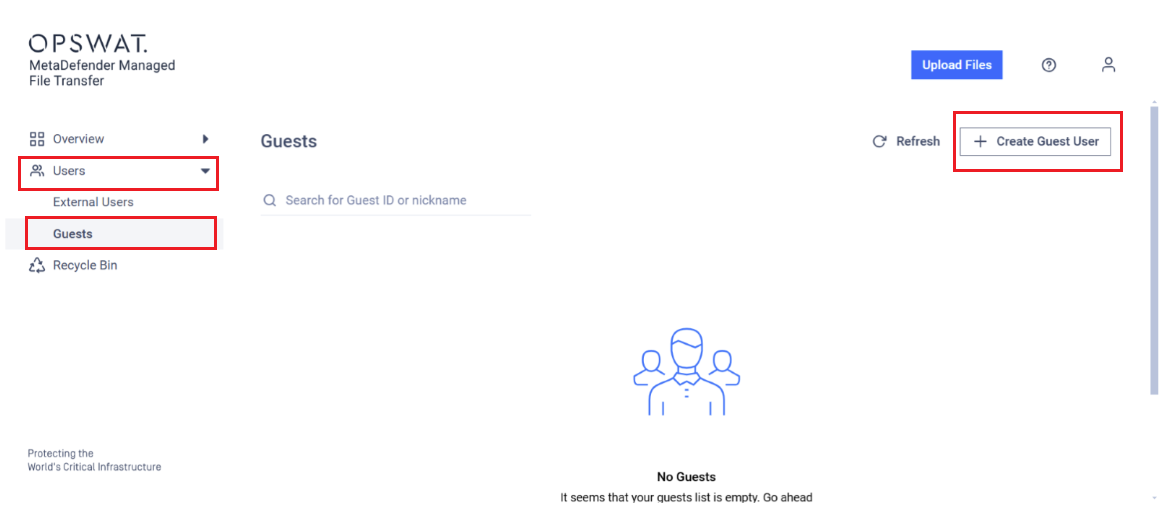
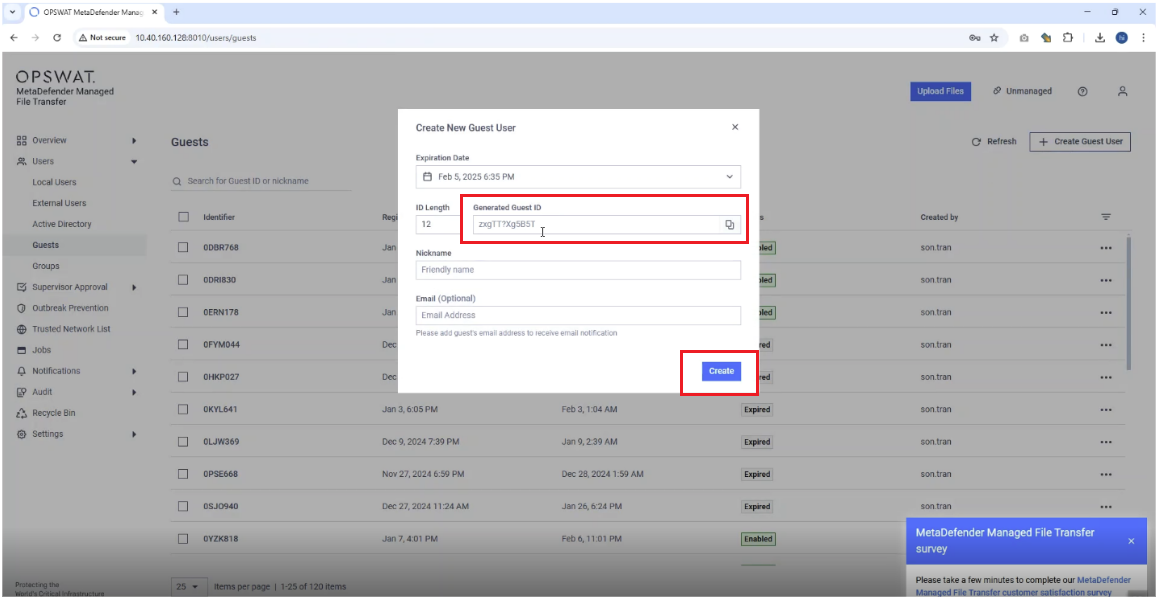
Step 3: Create a new Guest User and set expiration date for the user, then copy its Generated Guest ID. Click Create
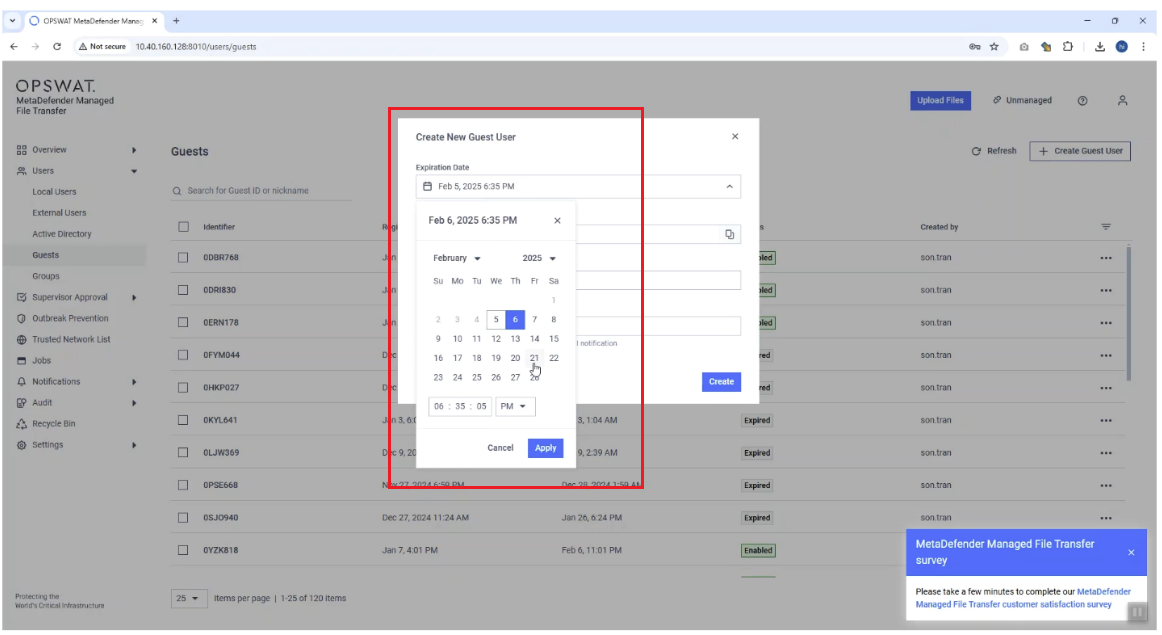
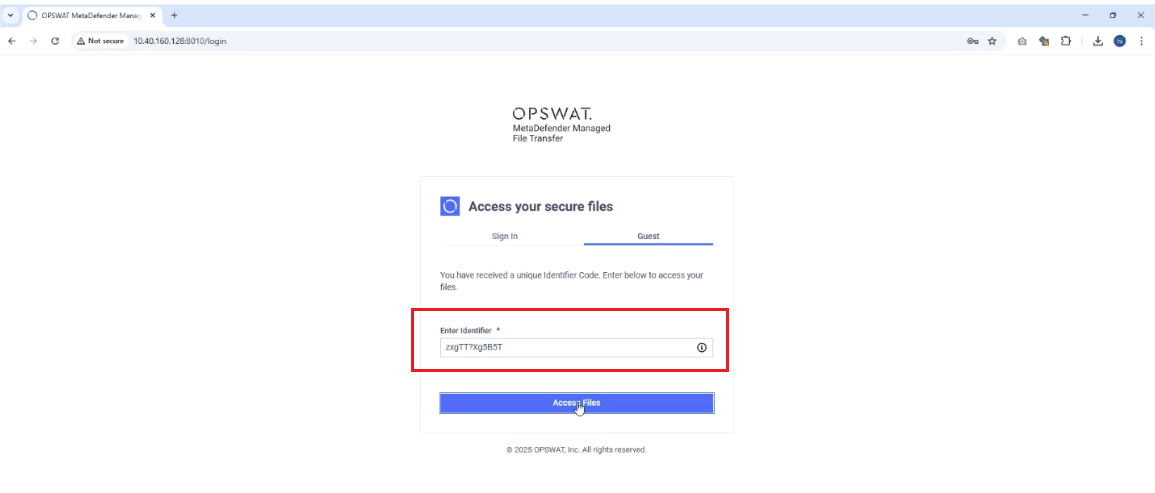
Step 4: Users can now log in using the copied Guest ID. Simply paste the copied ID to the Enter Identifier field
User guide for end users
Upload files from peripheral and removable media to Managed File Transfer
Users can upload files from peripheral and removable media such as USB drives to the Managed File Transfer. To do so, simply follow the steps below:
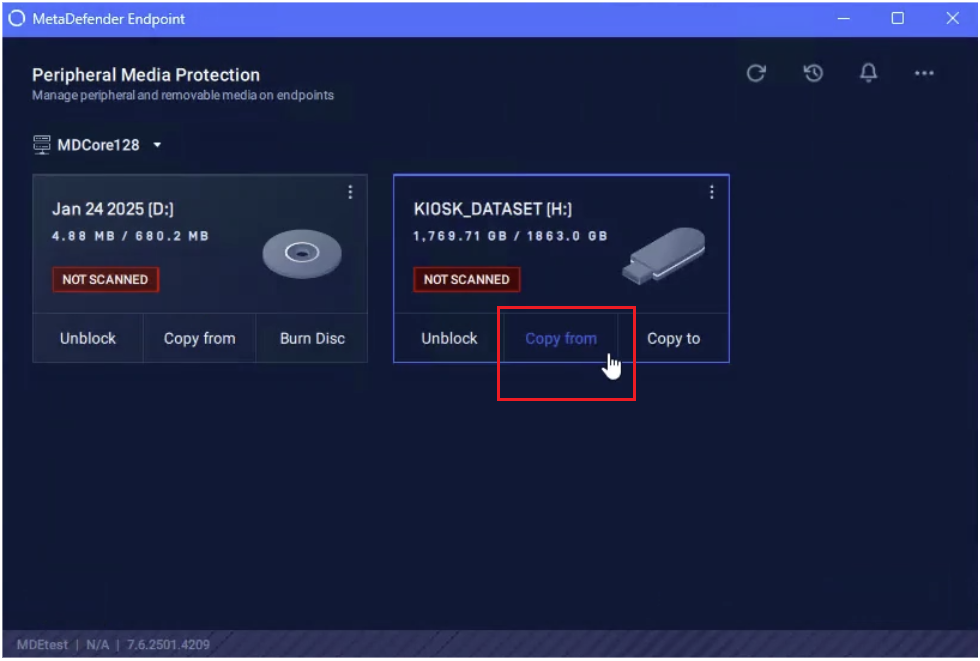
Step 1: Navigate to the Peripheral Media Protection feature on MetaDefender Endpoint. Choose the media that you wish to copy data from.
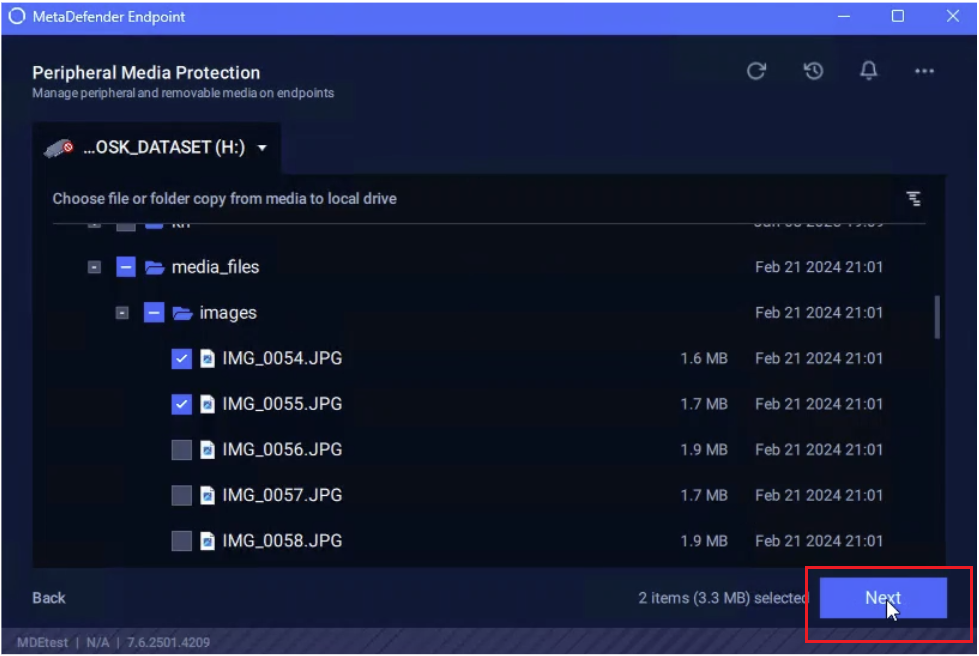
Step 2: Choose file or folder to copy from media to local drive.
Step 3: Wait for the process to be completed. If the feature of uploading files to Managed File Transfer is enabled, the files will be automatically uploaded to Managed File Transfer. This means that files will be both copied to local drives and uploaded to Managed File Transfer at the same time, ensuring seamless file transfer with no interruption or hiccups.
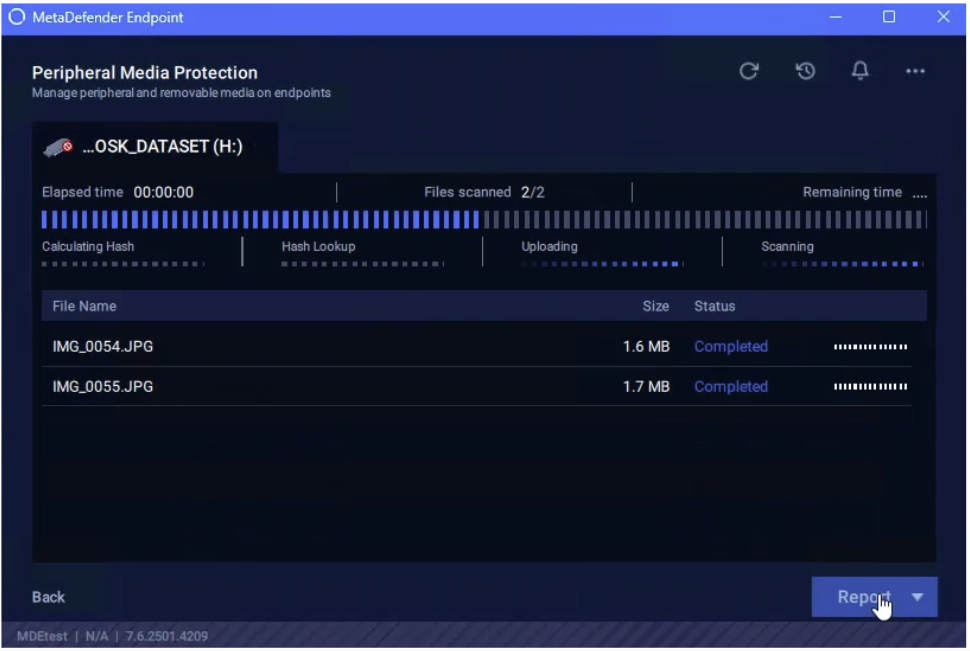
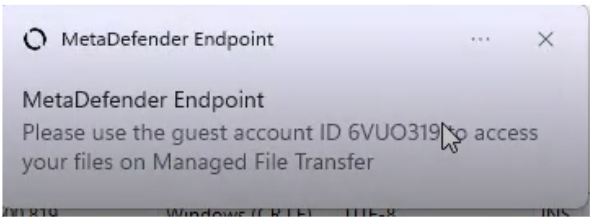
Step 4: Once uploaded, MetaDefender Endpoint will send a pop-up notification to announce the completion of the process and provide the Guest ID, which is required in accessing and downloading files. Guest ID is also viewable to administrators on the Managed File Transfer server.
Upload files to Managed File Transfer server using Guest ID
Users can upload files directly to the Managed File Transfer server. To do so, simply follow the following steps:
Step 1: Log in to https://files.opswat.com .
Step 2: Users can now log in using the copied Guest ID. Simply paste the copied ID to the Enter Identifier field
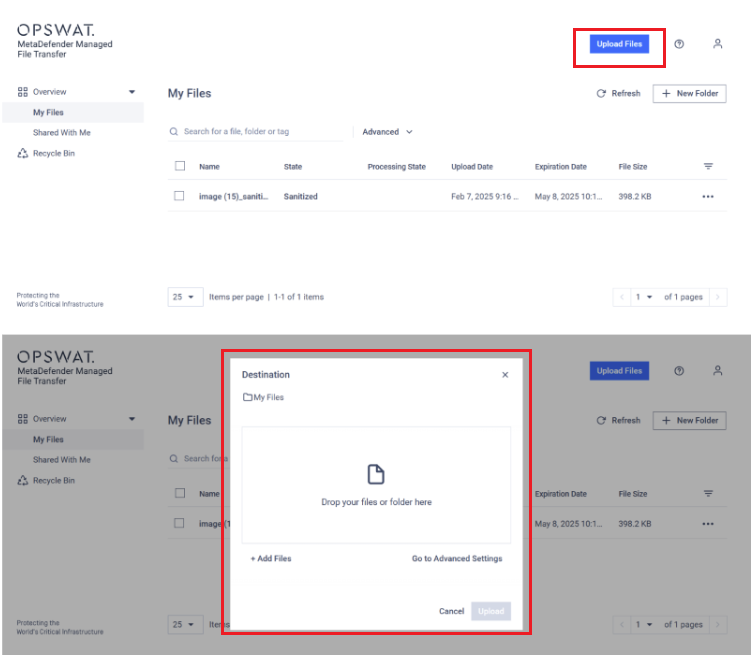
Step 3: Once logged in, click Upload Files and choose files or folder to upload
Download allowed files from Managed File Transfer
Once the files are uploaded to the Managed File Transfer, users can view and access them using details such as Guest ID and Server URL provided by admins or file uploaders.
While all uploaded files are viewable on Managed File Transfer, only allowed files can be downloaded by the users.
To download allowed files, simply follow the steps below:
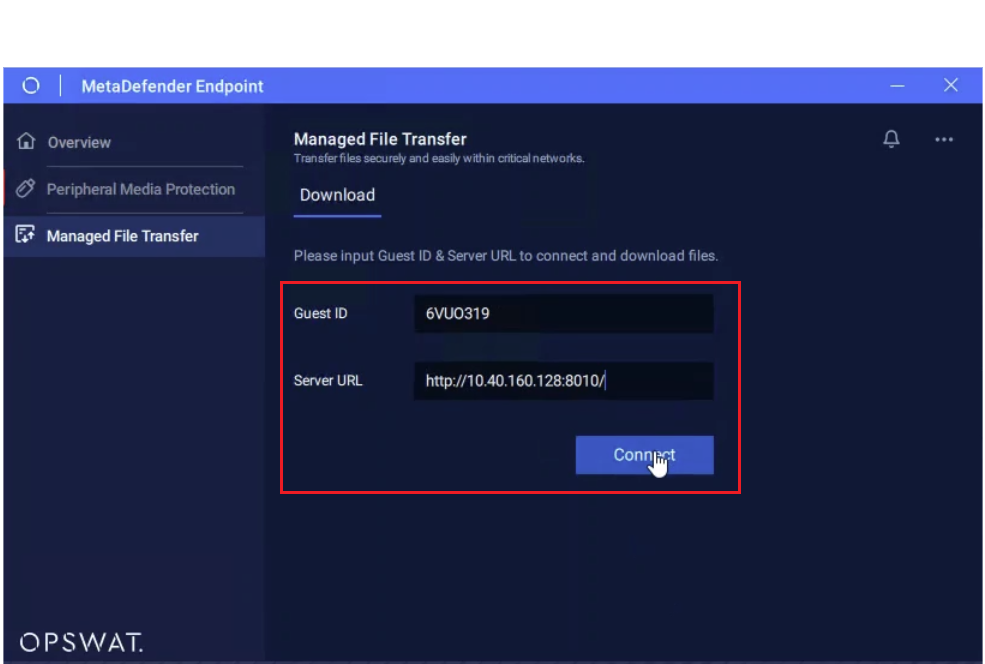
Step 1: Users need to collect the Guest ID and Server URL to be able to access the folder. These details are managed by administrators and can be provided using the Managed File Transfer server.
Step 2: Enter the Guest ID and the Server URL.
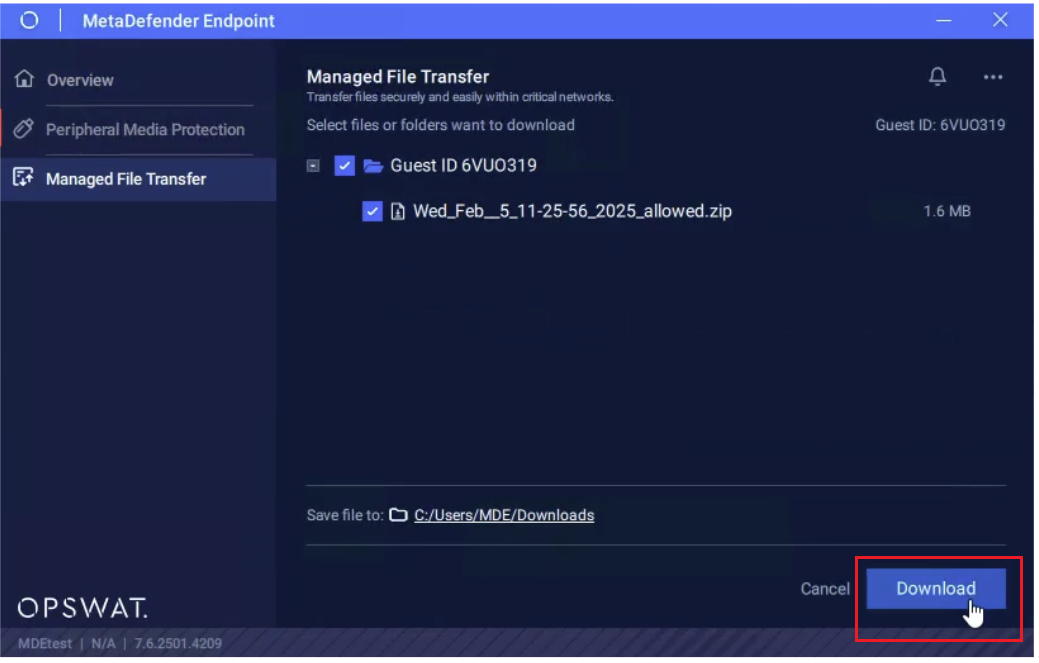
Step 3: Once the process is complete, users can view the files right at the MetaDefender Endpoint user interface. Simply click the + button to collapse and view the full file list.

Step 4: Choose the file you wish to download and click Download.
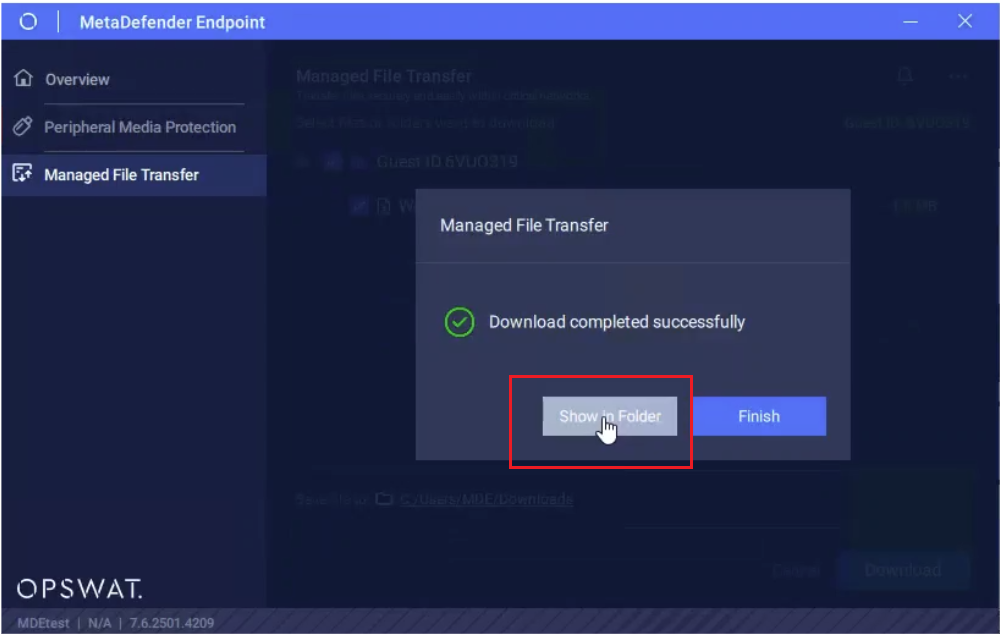
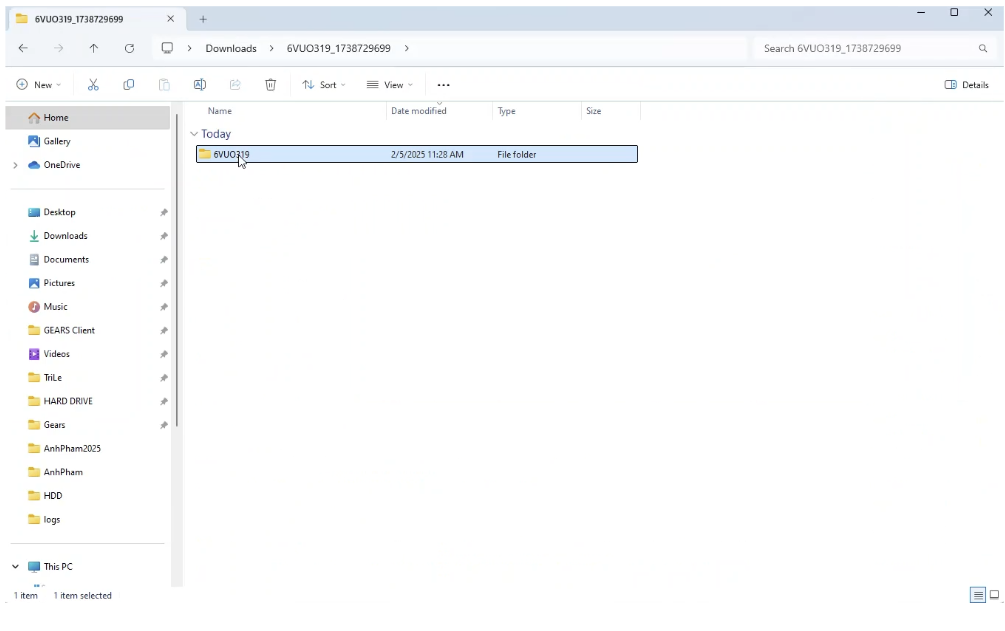
Step 5: Once the download is completed, users can choose Show In Folder to access the files.