Preparing MetaAccess NAC to process SAML authentication
Before beginning, contact OPSWAT support and request that the SAML authentication feature be enabled on your appliance. Also tell them what Identity Provider you intend to use so they can make the necessary remediation resources available to quarantined users.
Only continue once you receive confirmation from OPSWAT support that SAML integration has been enabled on the MetaAccess NAC appliance.
Identity Provider Configuration
The exact steps for adding a Service Provider will vary by Identity Provider. The steps below use Okta.com, but your Identity Provider may have slightly different steps.
Navigate to your Okta organization dashboard as a user with admin privileges. Then click "Admin" in the upper right.
Click "Application", select "Applications".

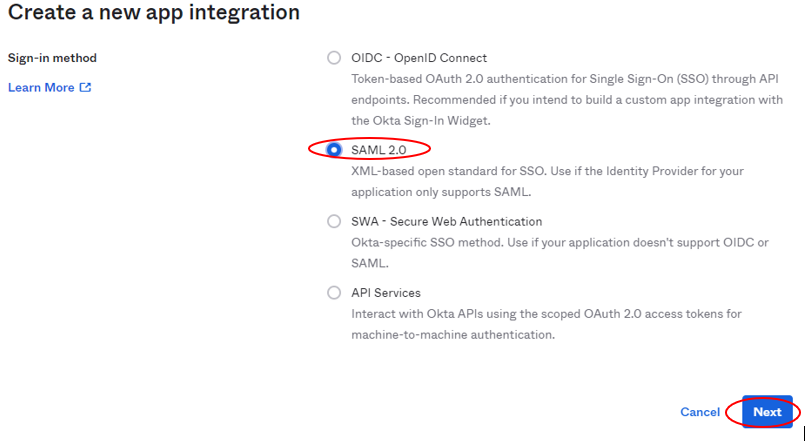
On the next page, click "Create App Integration", select "SAML 2.0" on the dialog this brings up, then click "Next".
On the "General Settings" page set "App Name" to "MetaAccess NAC" and upload a custom logo if you would like. Then click "Next".

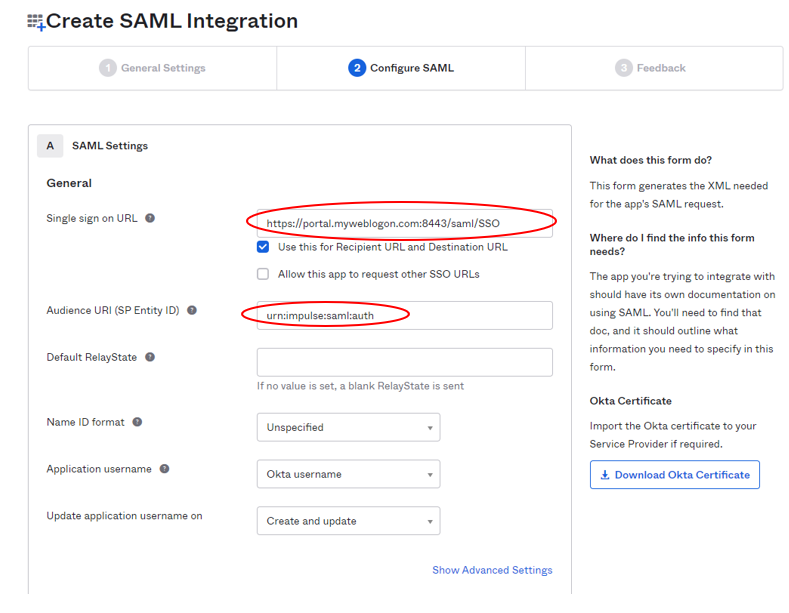
On the "SAML Settings" page, set "Single sign on URL" and "Audience URI (SP Entity ID)" to the values you get from the MetaAccess NAC "Service Provider Configuration" tab. (See "Service Provider Configuration" tab after "MetaAccess NAC Configuration" step 1). Then scroll to the bottom and click "Next"
On the "Feedback" page, choose the best answer for you and, then "Finish" on the next page.
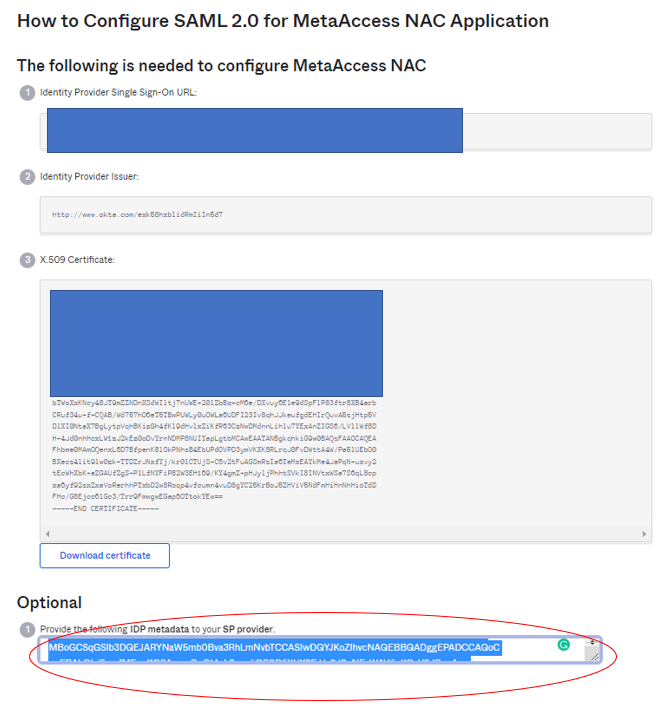
Click "View Setup Instructions" to be taken to the page where we'll get the last piece of information we need to finish setting up the MetaAccess NAC SAML configuration.
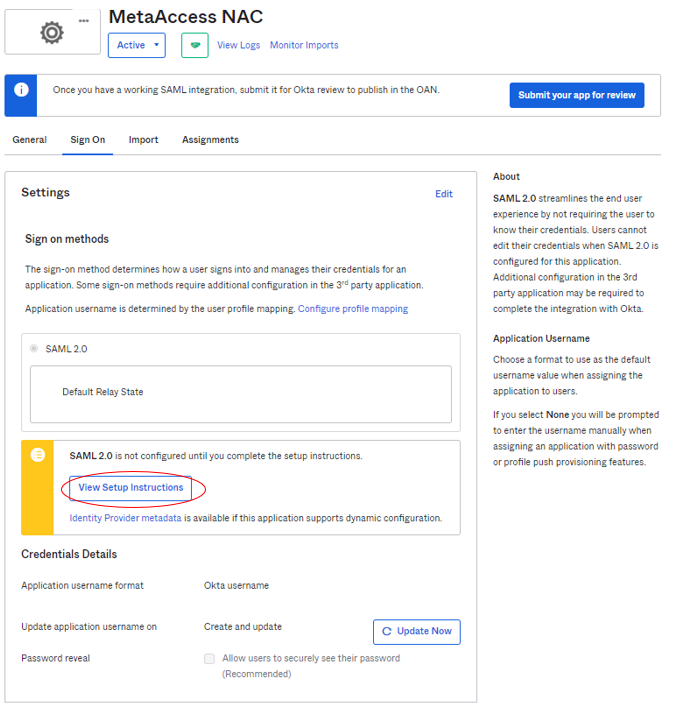
Scroll to the bottom of the page to find a text box referred to as the IDP "metadata", and MetaAccess NAC will use this to configure itself to use this particular Identity Provider. Copy all of the text from the text box and save it to a .xml file.
MetaAccess NAC Configuration
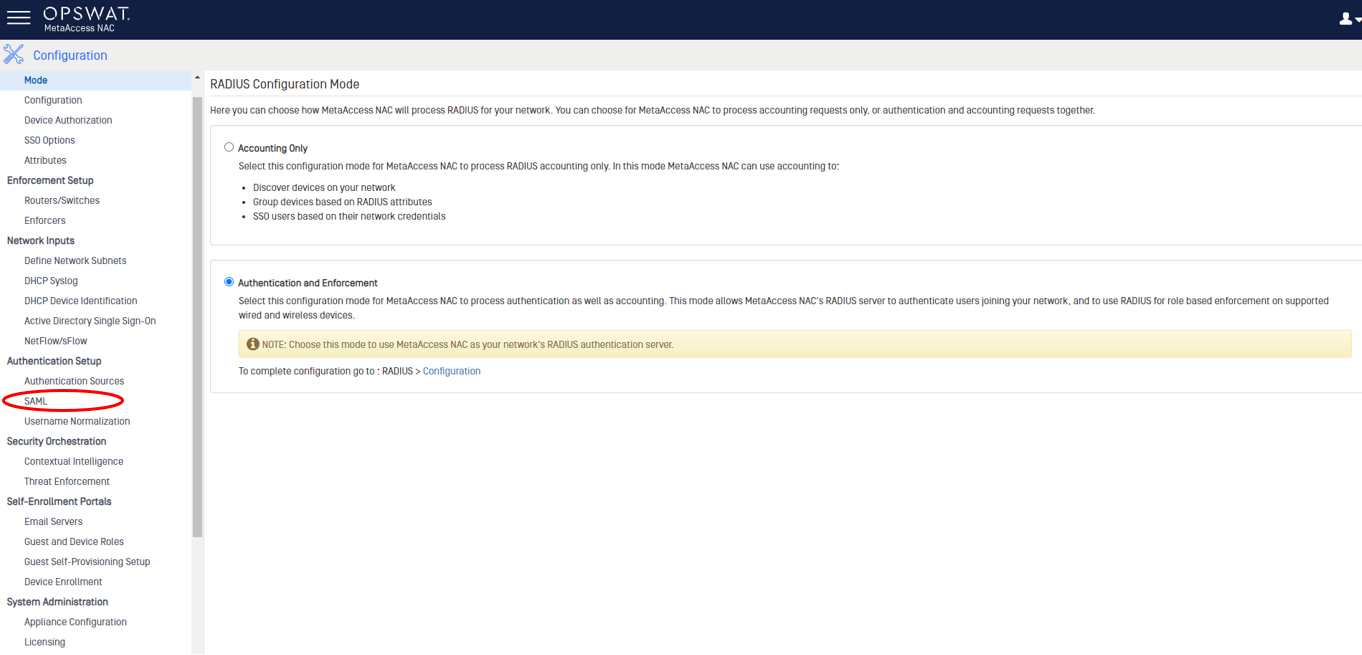
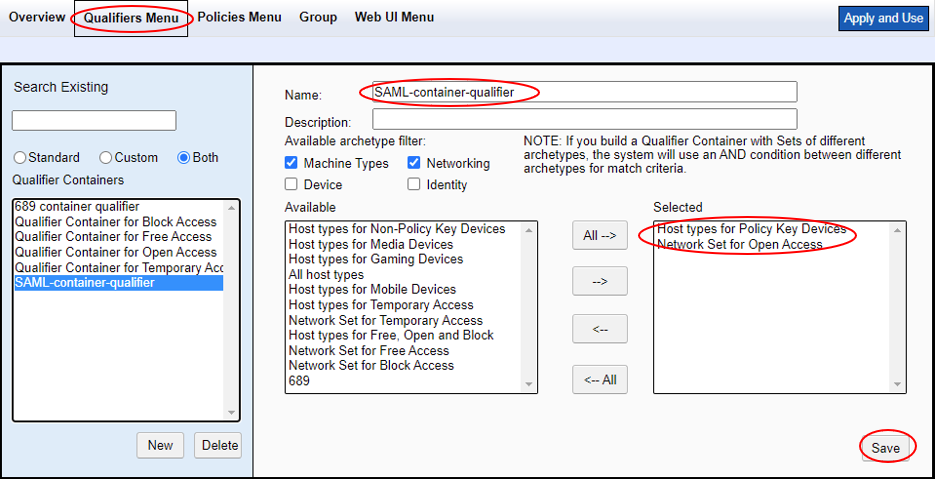
In the MetaAccess NAC UI, under "Configuration" > "SAML" > "Identity Provider Configuration", click on the "New IDP" button.
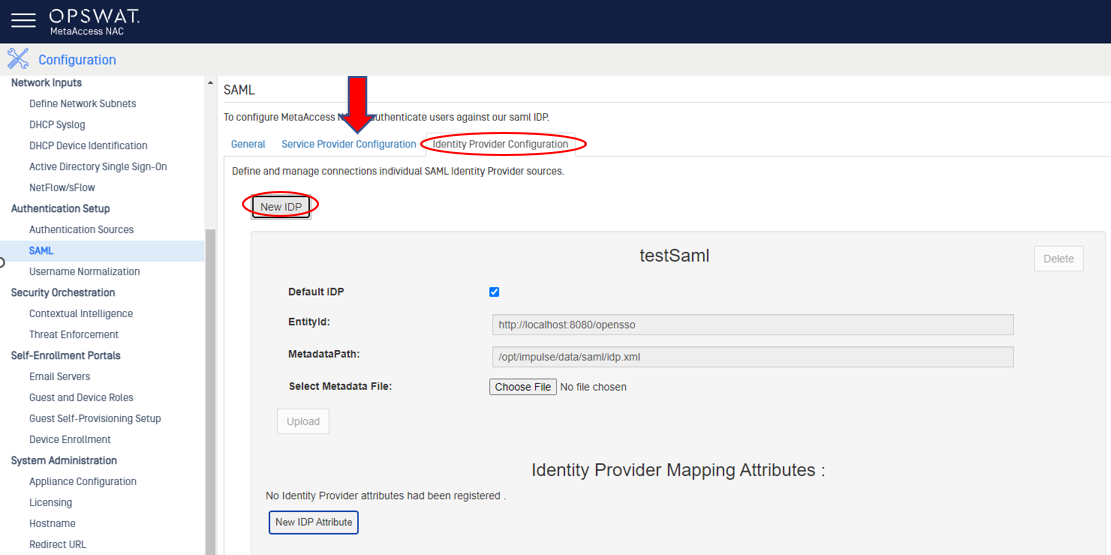
Give the new Identity Provider a name, check the "Default IDP" box, select the .xml file with the metadata you got from your Identify Provider, and click Upload.

(Optional) Click "Delete" on the "testSaml" IDP panel.
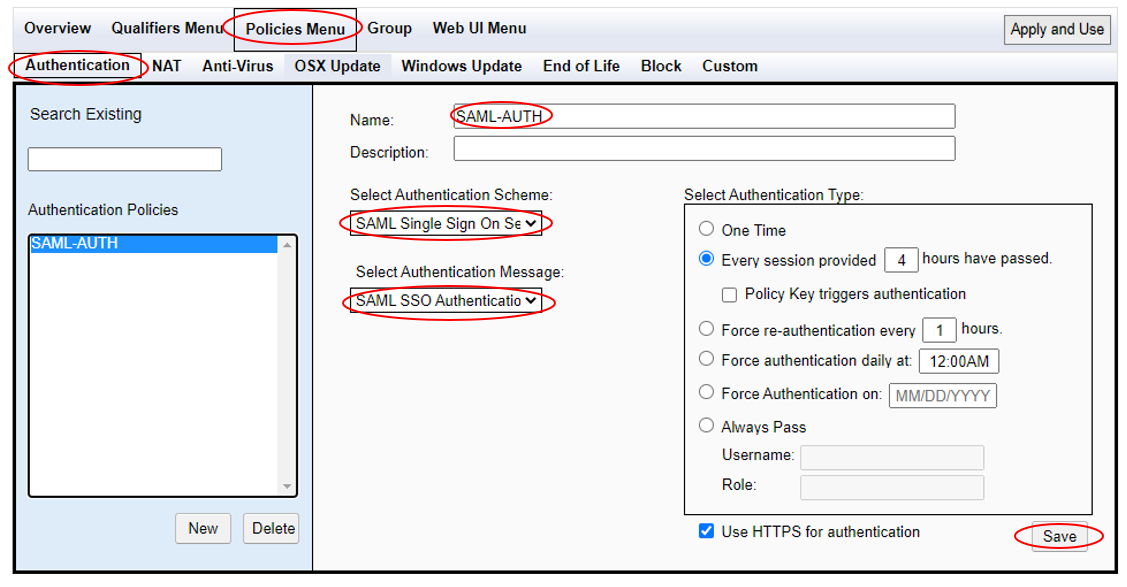
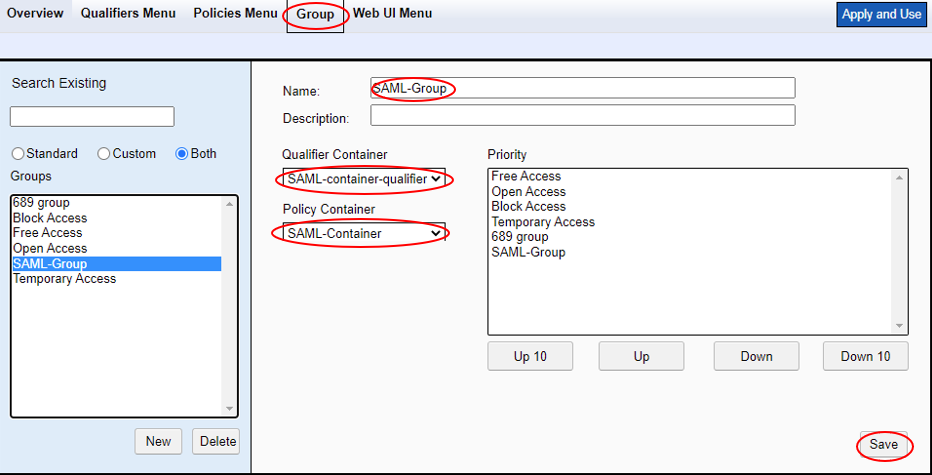
End users can now be required to authenticate with the SAML IdP by creating an authentication policy pointed at the "SAML Single Sign On Service" authentication source. Any user in a group using this authentication policy with have to visit the IdP site as often as specified in the policy, however, note that if the IdP settings require users to re-authenticate less often than the NAC policy settings, users may not actually have to enter credentials on the IdP site to pass the NAC policy.

Step 4. Test The Integration
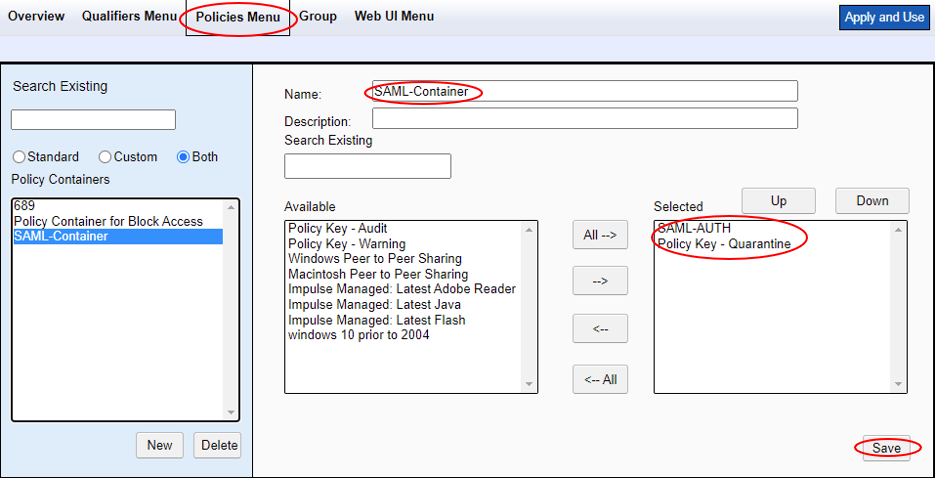
You should have a policy group in MetaAccess NAC that requires users authenticate against SAML. When a device is online and is put in that group, it should be presented with a captive portal that requires they authenticate against the SAML IDP.