This article applies to all MetaDefender IT Access products deployed on Windows, macOS, Linux, Android and iOS systems.
MetaDefender IT Access allows IT/Security administrators to manage and ensure compliance through their small to vast networks of endpoint devices, with minimal effort and complexity.
To streamline administration, admins can allocate endpoint devices to groups or categories that are associated with unique policies and security levels.
How to create a new group
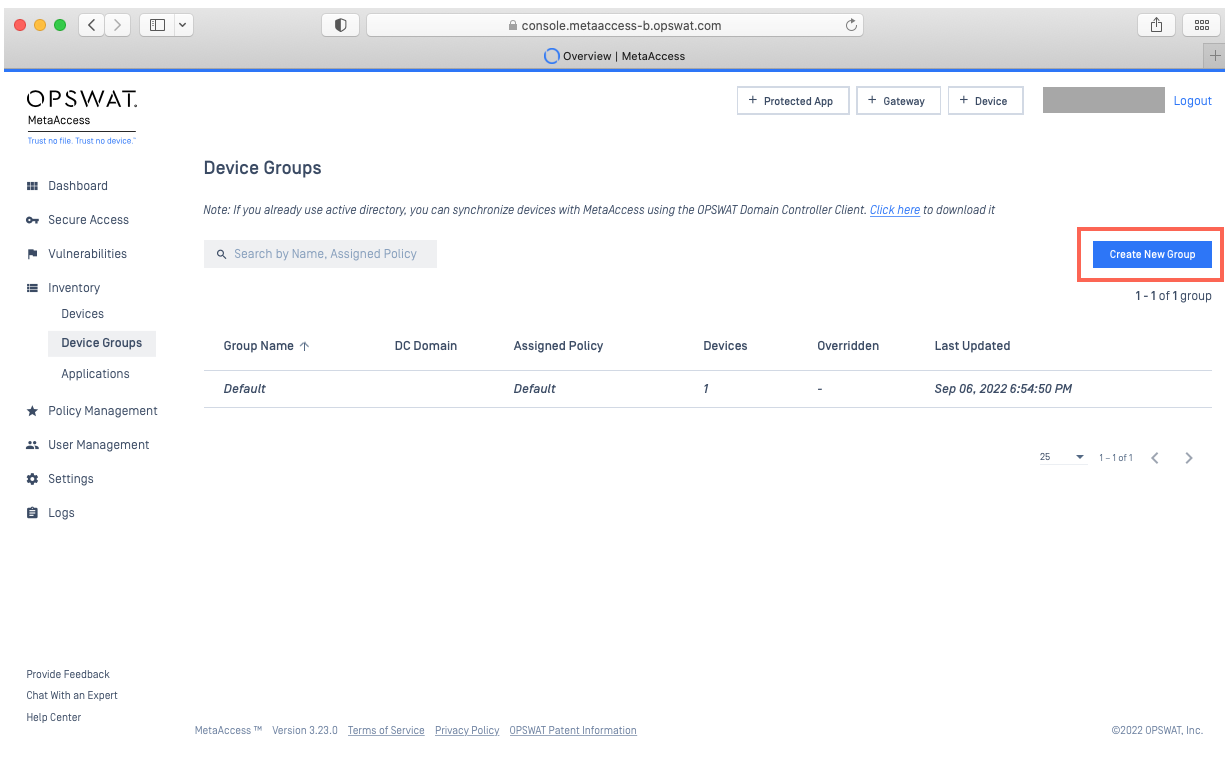
- Log into your MetaDefender IT Access Console and navigate to Inventory>Device Groups.
- Click on the Create New Group button, as illustrated in the screenshot below.
- Fill in the group name and assign a policy and rebranding package (if applicable). Notification and Webhook settings are not required during the group creation process, and can be updated at a later stage.
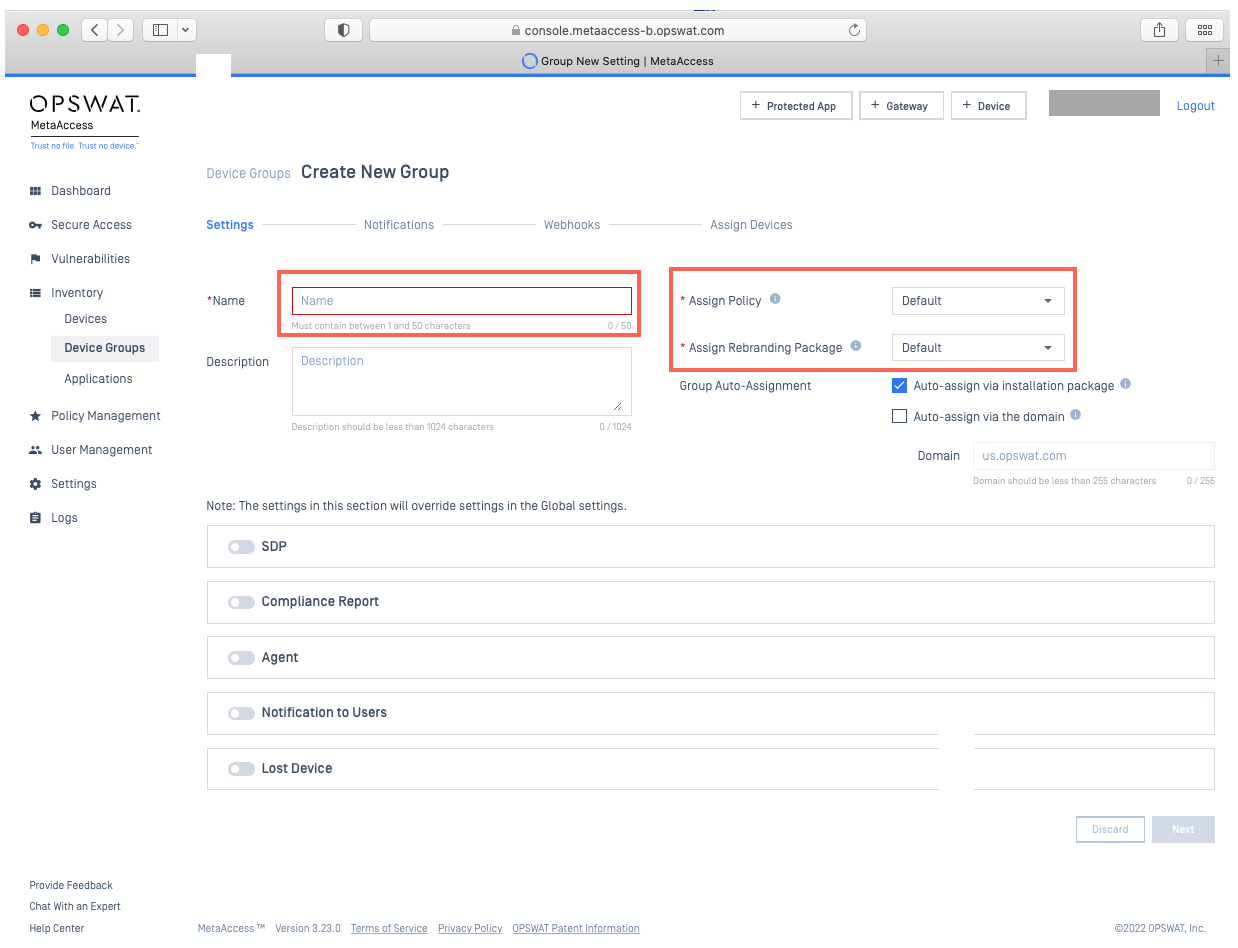
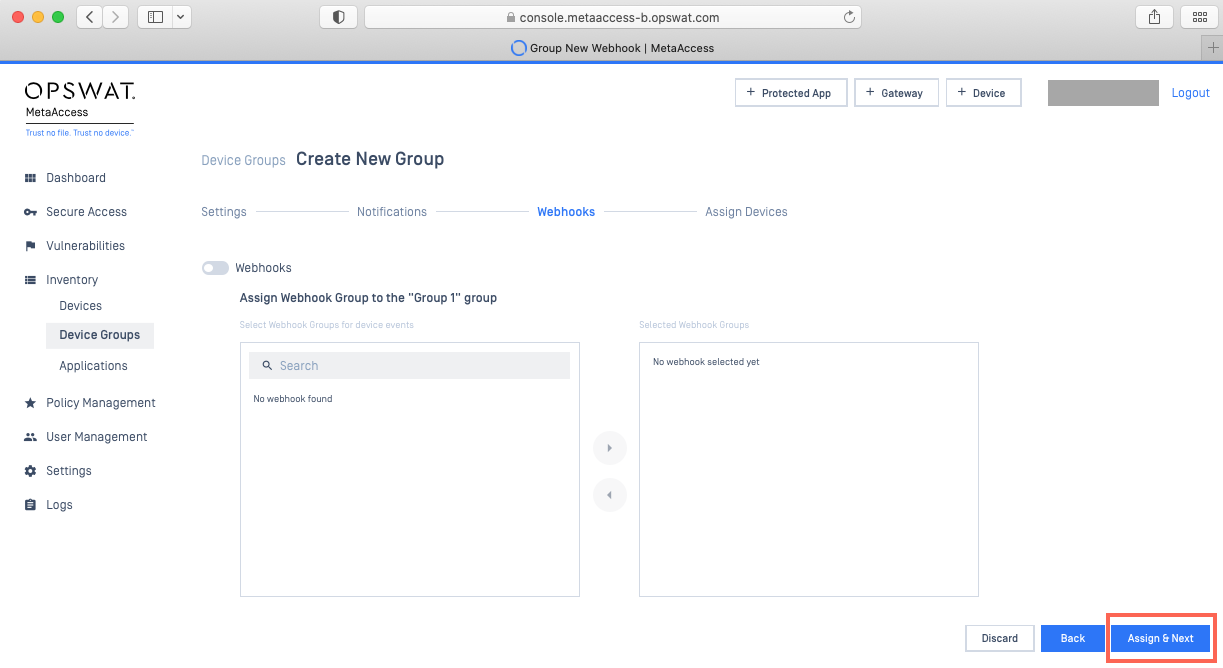
- For now, click Next or Assign & Next in the lower right-hand corner of the page until you reach the Assign Devices page, as illustrated in the screenshots below.
- On the Assign Devices page, use the search field or Filter button (illustrated in the screenshot below) to search the device inventory for the required devices, or simply browse the list.
- Once located, check the selection box alongside each device to be added to the group, also illustrated in the screenshot below.
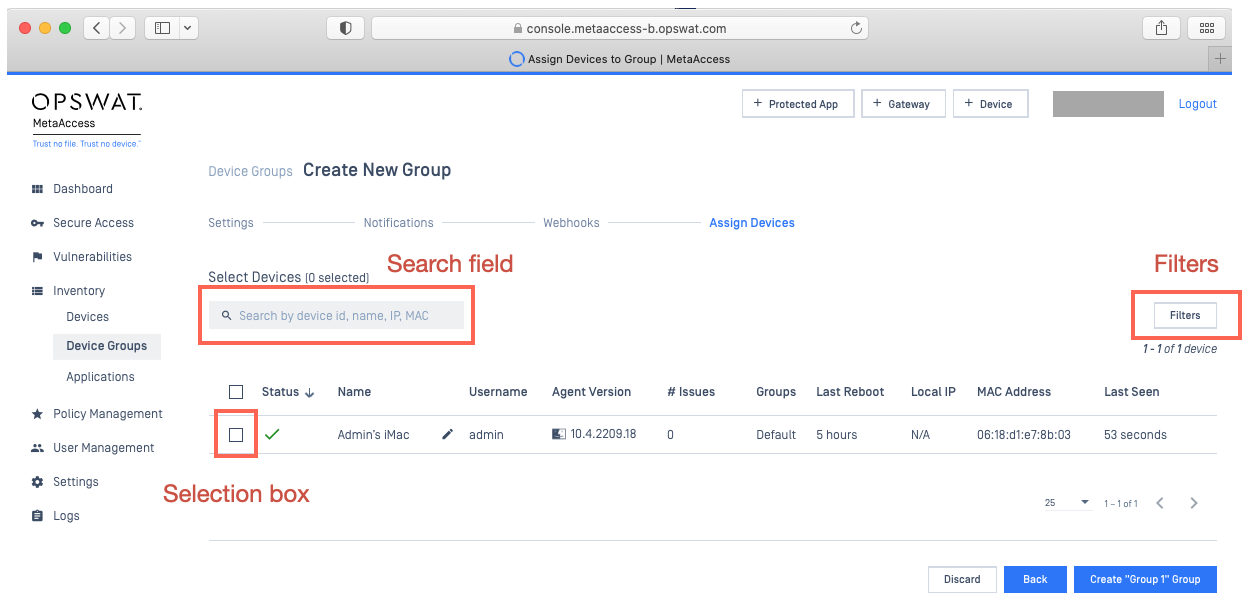
- Finally, click the Create Group button to apply your settings, and enter your PIN to confirm, if prompted.
How to update a group
- Log into your MetaDefender IT Access Console and navigate to Inventory>Device Groups.
- Click on the group you would like to update to access the device group details, then click on the Settings tab.
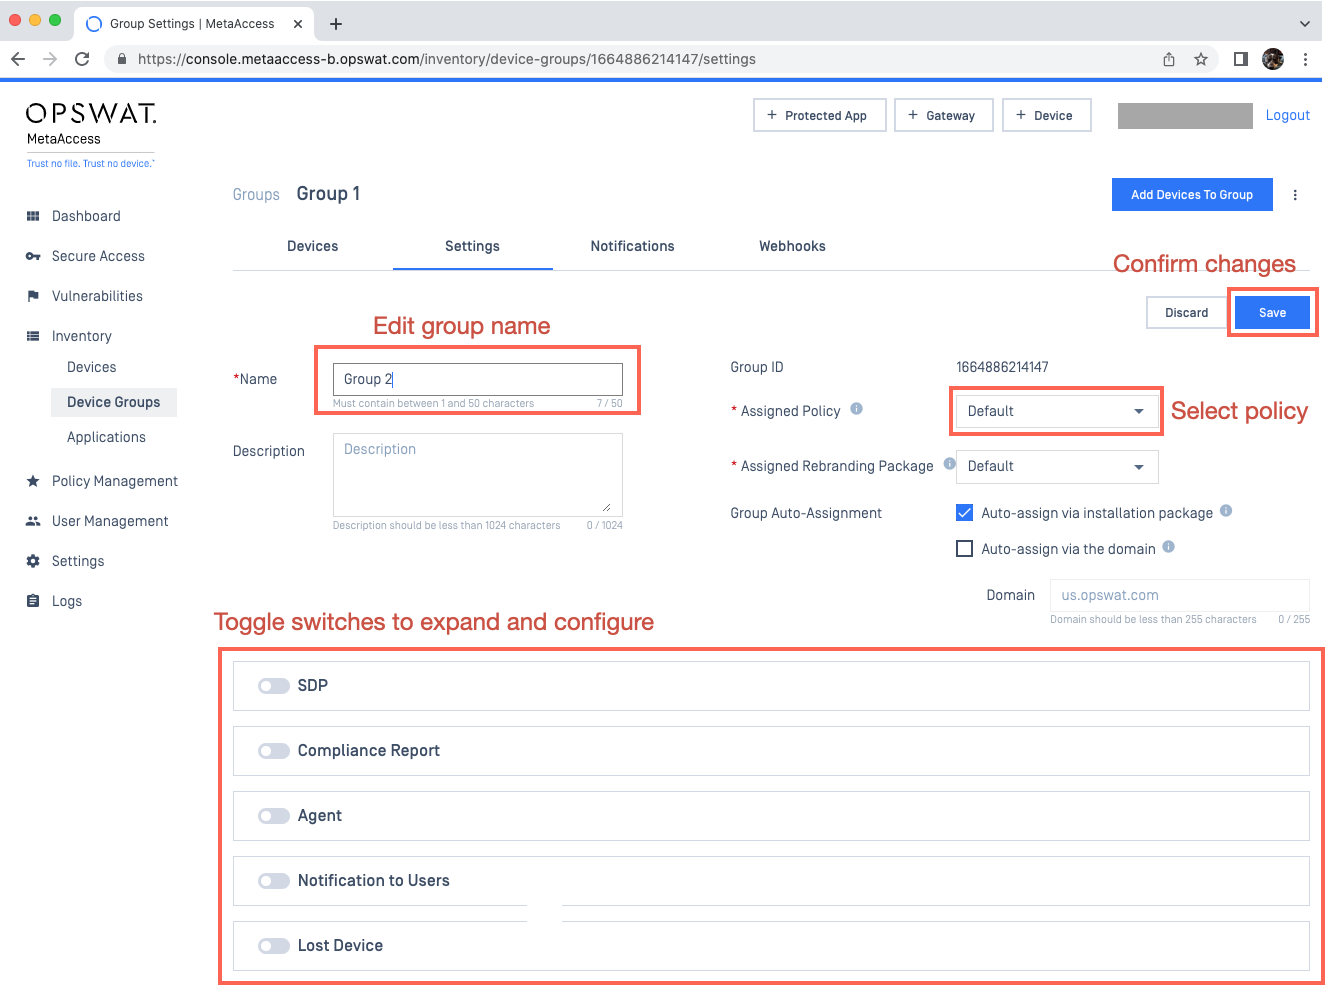
- To update the group name,simply change the name in the Name field, as illustrated in the screenshot below.
- To assign a new policy to the group, expand the option menu alongside Assigned Policy, then select the policy you’d like to apply, as illustrated in the screenshot below.
- To configure additional settings, toggle the switches to their enabled state, as illustrated in the screenshot below.
- Once configured, confirm your change by clicking Save and entering your PIN as prompted.
Following a group policy update, MetaDefender IT Access will reassess the device status of all devices in the group, to confirm whether they are fully equipped to apply the rules associated with the new policy.
How to assign devices to a group
To assign new devices to an existing group, there are three options.
- Option 1: manually via the Device Groups list
- Option 2: manually via the Devices list (Windows and macOS only)
- Option 3: automatically enroll devices to a group
Option 1: via the Device Groups list
- Go to MetaDefender IT Access Console and navigate to Inventory>Device Groups.
- To assign new devices to the group, click the Add Devices To Group button in the top right-hand corner of the page, as illustrated in the screenshot below.
- Next, check the selection boxes alongside the devices you wish to add.
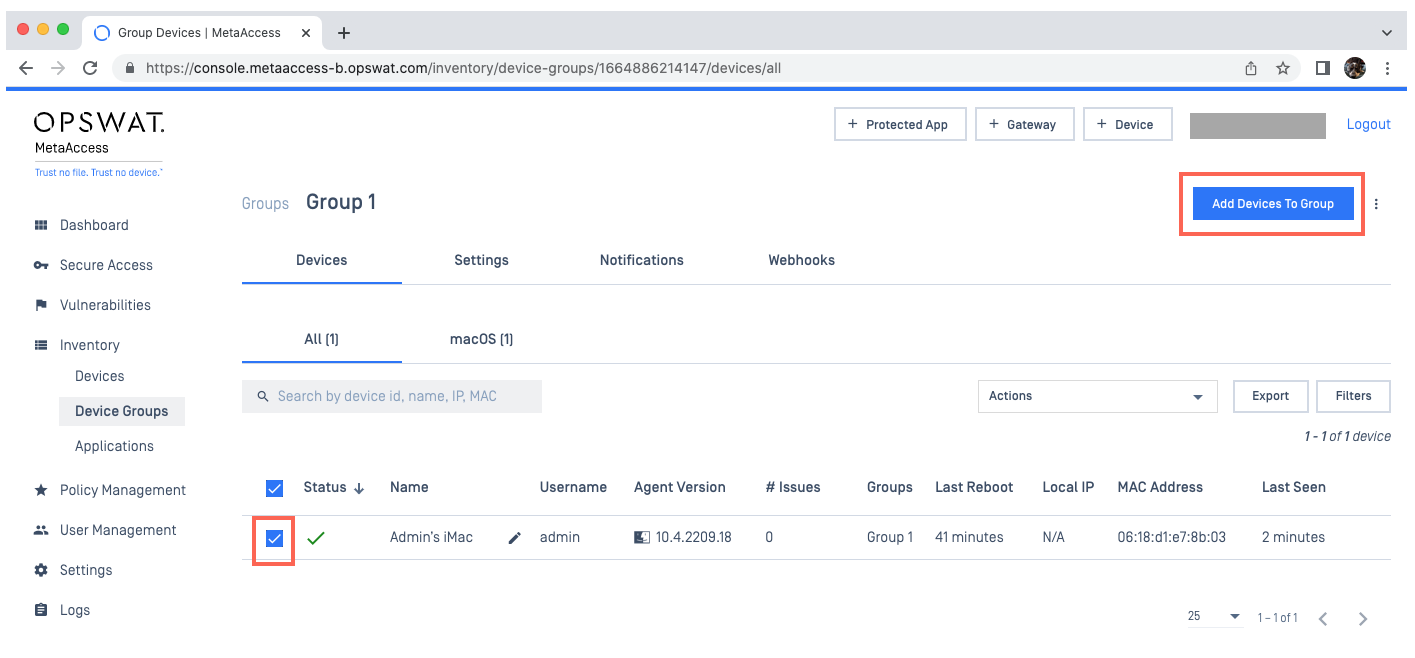
- Confirm your changes by clicking the Add Devices To Group button, which will now be in the bottom right-hand corner of the screen.
Option 2: via the Devices list (for Windows and macOS devices only)
To assign devices to the group from the MetaDefender IT Access Console>Inventory>Devices list:
- Go to MetaDefender IT Access Console>Inventory>Devices.
- Use the Search field or Filter button to narrow down your options (if required).
- Once located, check the selection boxes alongside the required devices, as illustrated in the screenshot below.
- Expand the Actions option menu in the top right-hand corner of the page, also illustrated in the screenshot below.
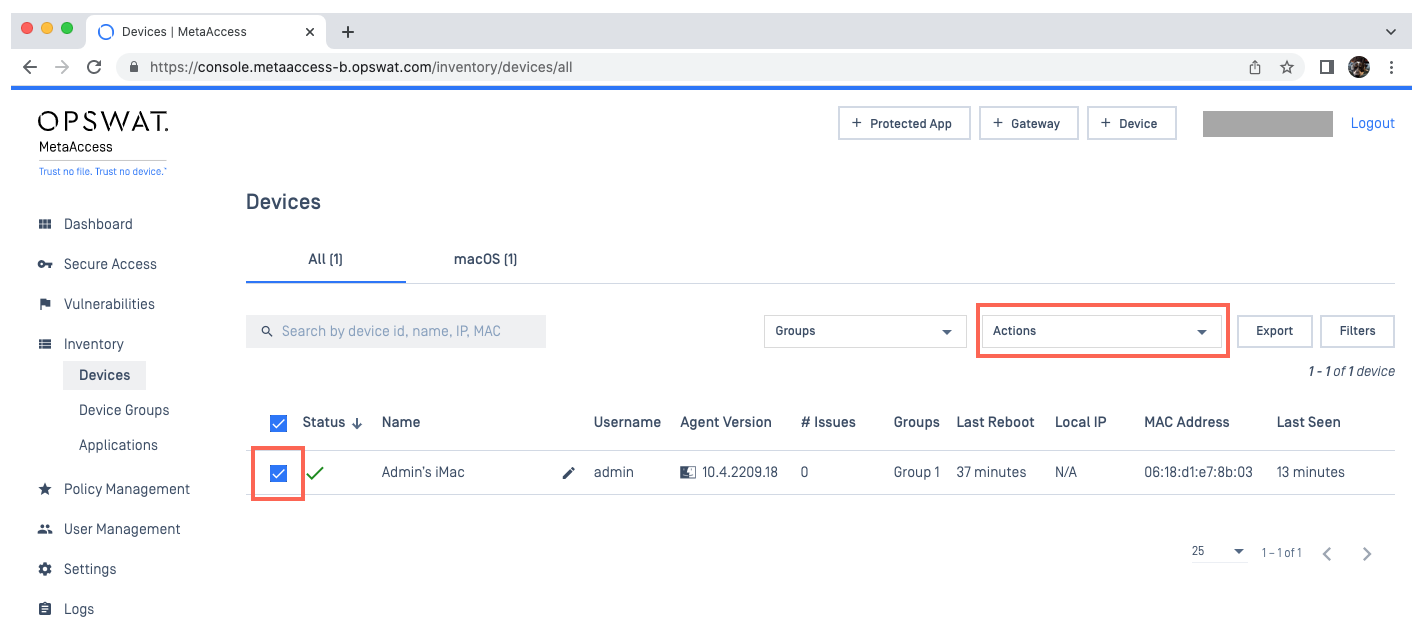
- Select the Assign to Group option.
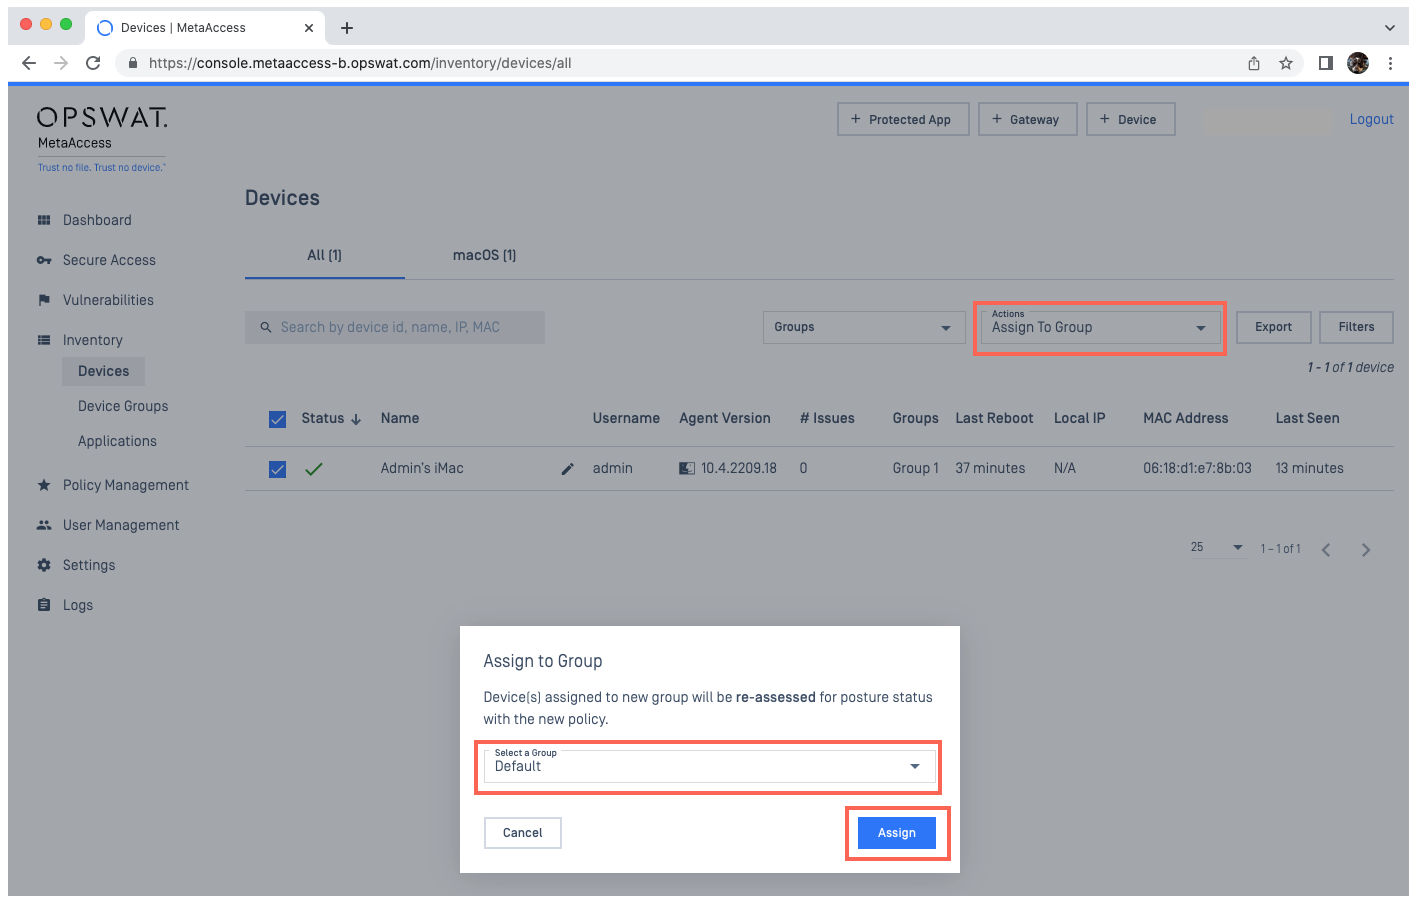
- In the pop-up, select the appropriate group from the option menu.
- Confirm your selection by clicking the Assign button, as illustrated in the screenshot below.
Option 3: automatically enroll devices to a group
This option allows administrators to enroll devices to a specific group automatically, via device installation package or device domain.
To enroll devices to a group via installation package:
- Log into your MetaDefender IT Access Console and navigate to Inventory>Devices.
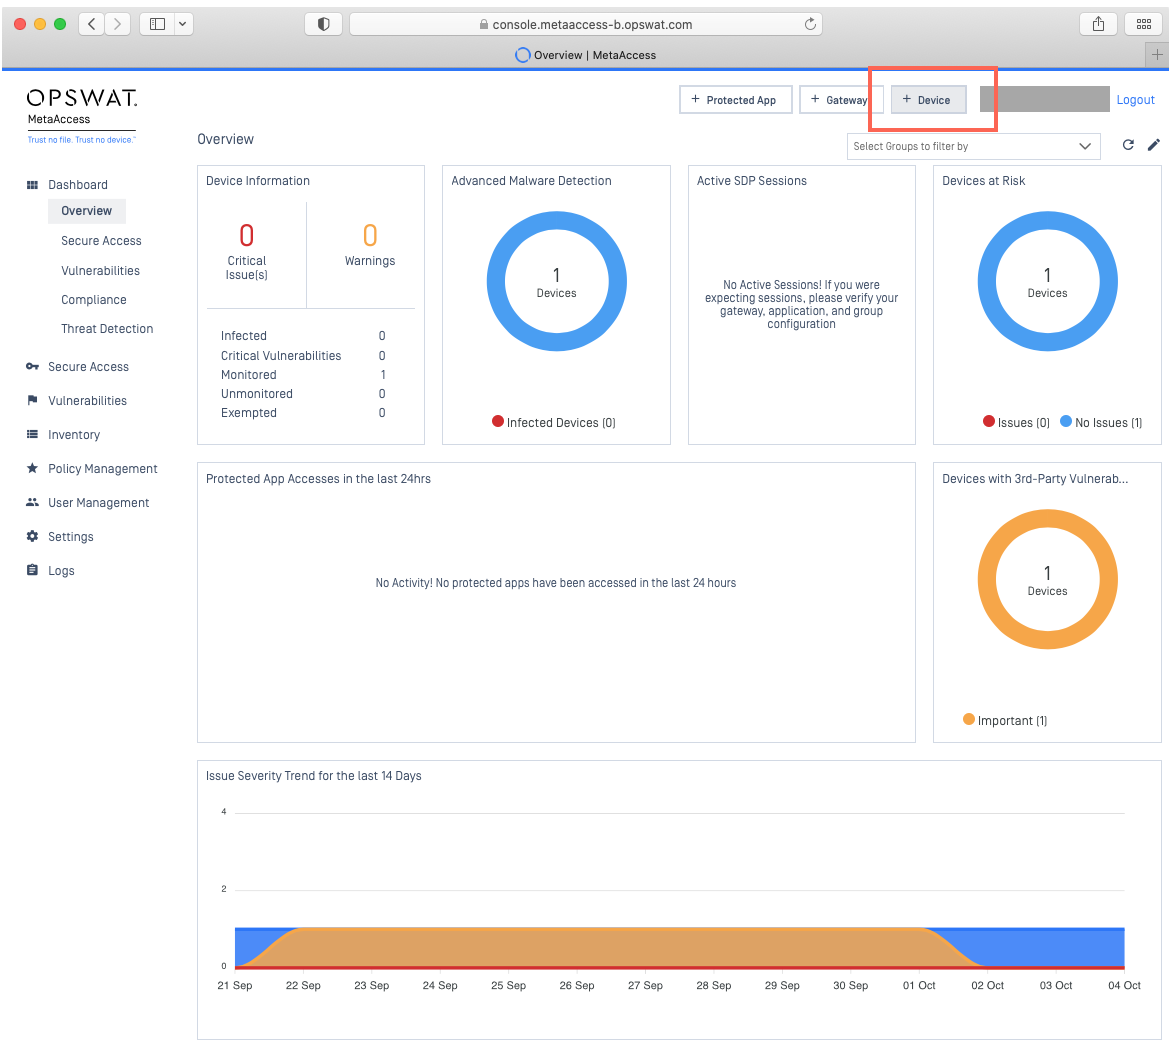
- Click the +Device button in the top right-hand corner of the screen, as illustrated below.

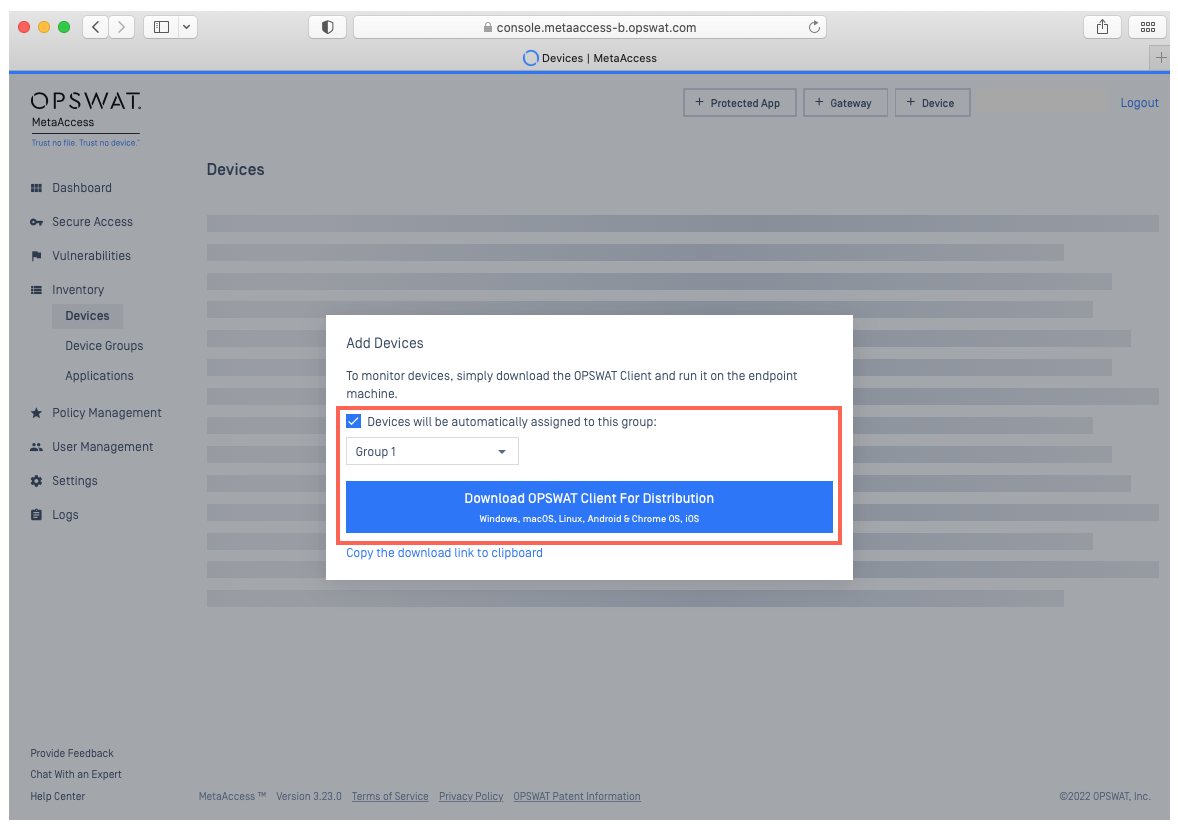
- In the pop-up window, check the Devices will automatically be added to this group box, then select the appropriate group from the option menu, and click the Download link, as illustrated below.

To learn more about this option, please Read This.
For Android and iOS devices, the GroupID can be entered when the device is enrolled to an account.
To look up a GroupID:
- Log into the MetaDefender IT Access Console and click the +Device button in the top right-hand corner of the screen, as illustrated below.
- In the pop-up window, check the Devices will automatically be added to this group box, then select the group for which you’d like to look up the GroupID.
- Click the Download link, as illustrated below.
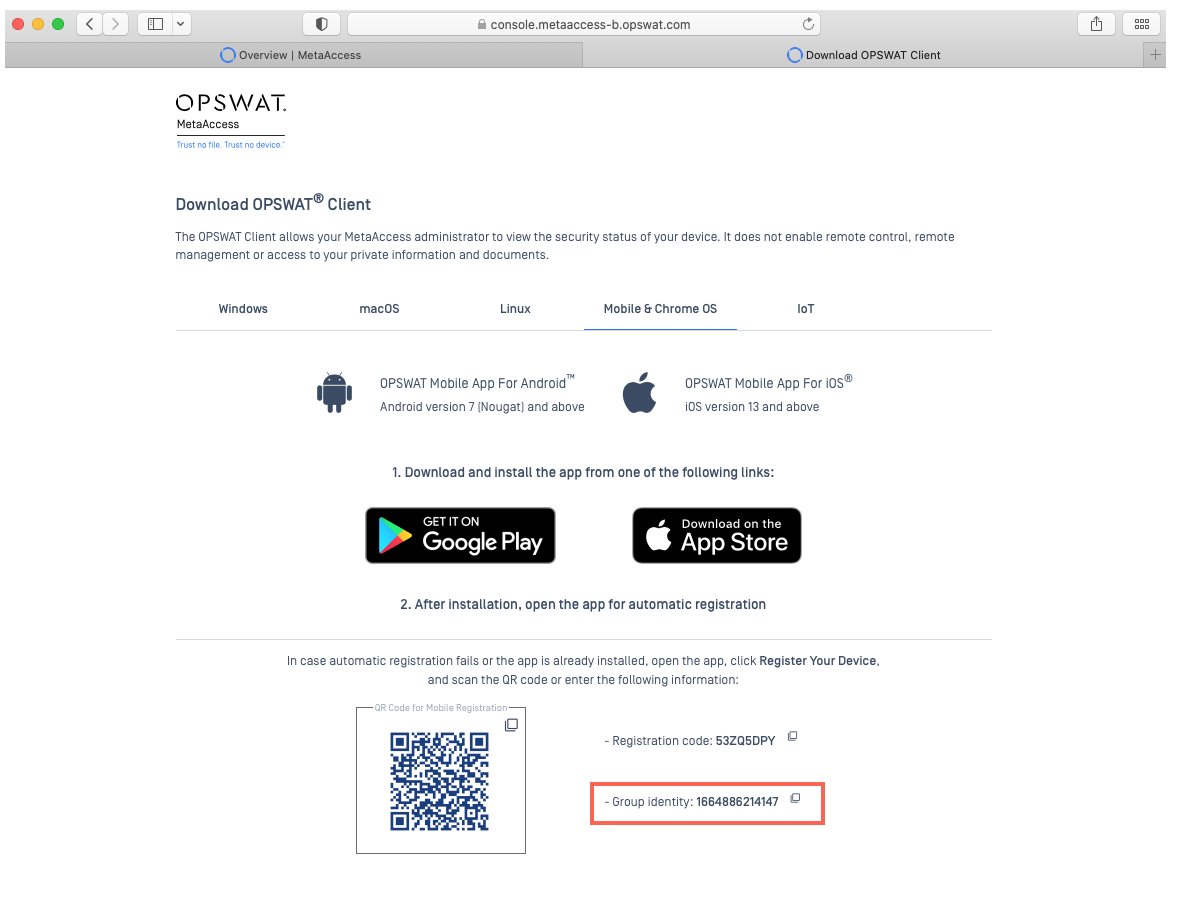
- You will be redirected to the device group download page, where you should click on the Mobile & Chrome OS tab to view the Registration Code and Group Identity alongside the Captcha at the bottom of the page. See the screenshot below.
How to retrieve a list of devices in a specific group via oAuth API
Administrators can use the Get Devices API, but filtered with the Group ID parameter within the request body. This will retrieve a list of all devices within the specified group.
To learn more, please Read This and This.
If you have followed the instructions above but are having difficulty Managing Your Endpoint Devices By Groups, please open a Support Case with the OPSWAT team via phone, online chat or form, or feel free to ask the community on our OPSWAT Expert Forum.