
When Kiosk failed to upload files to Microsoft SharePoint or OneDrive, issues could be caused by misconfigurations. Including:
Unable to login to Kiosk UI via SSO due to the users haven't been assigned to the Enterprise Application
Missing redirect URI for OAuth2.0
Missing API permissions (Sites.ReadWrite.All, Users.Read)
Missing Office 365 license or the license does not cover SharePoint or OneDrive
When adding or changing Office 365 license, it may take some time for the changes to take effect
Invalid input when configuring SharePoint or OneDrive in Kiosk WebMC (e.g missing "/" for relative path)
Please verifying all potential causes above, and collect the Support Package if you still encounter issues uploading files to SharePoint or OneDrive
1. Enable Microsoft Entra ID with API Integration
Step 1. From Kiosk WebWC, select Workflows, under Employee Workflows, select Set Default Login Method. Enable SSO Microsoft Entra ID. Please refer to Microsoft Entra ID Integration for details
Step 2. For SharePoint and OneDrive integrations, enable API integration
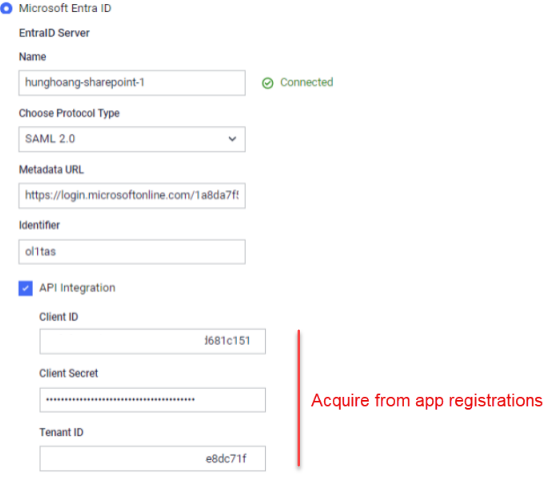
Follow the instruction to acquire the following information from app registrations
Client ID
Client Secret
Tenant ID
Notes: API Integration option must be enabled to configure SharePoint or OneDrive as storage
Step 3. Open the Enterprise Application created at step 1. Expand Security, select Permissions, click on app registration
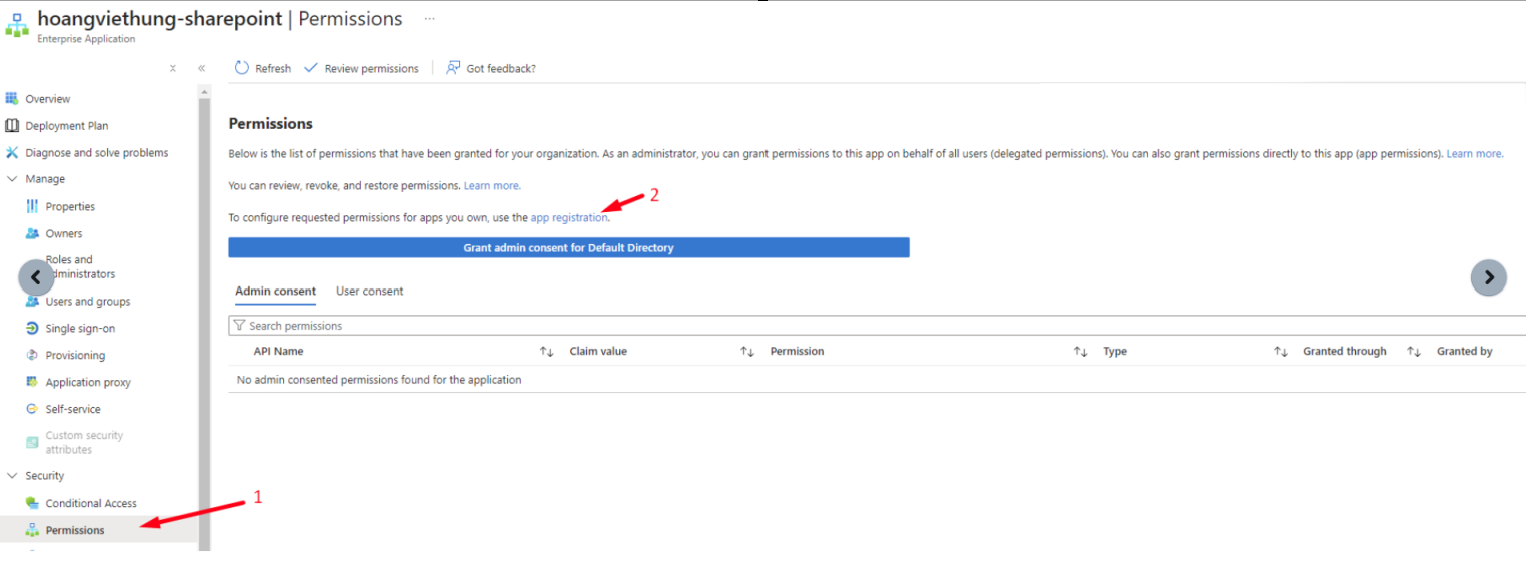
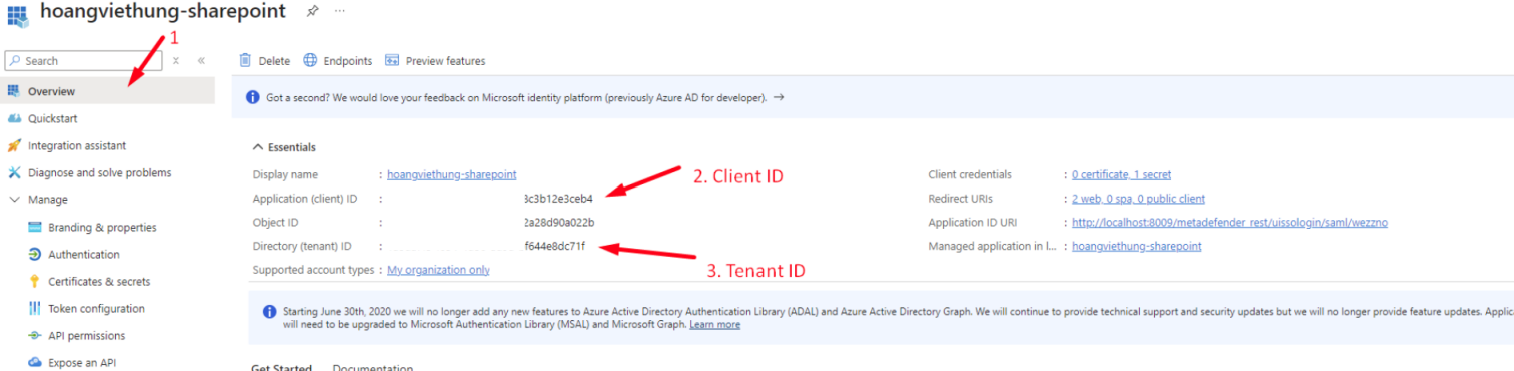
Step 4. From app registration page, select Overview. Here you can find Client ID and Tenant ID
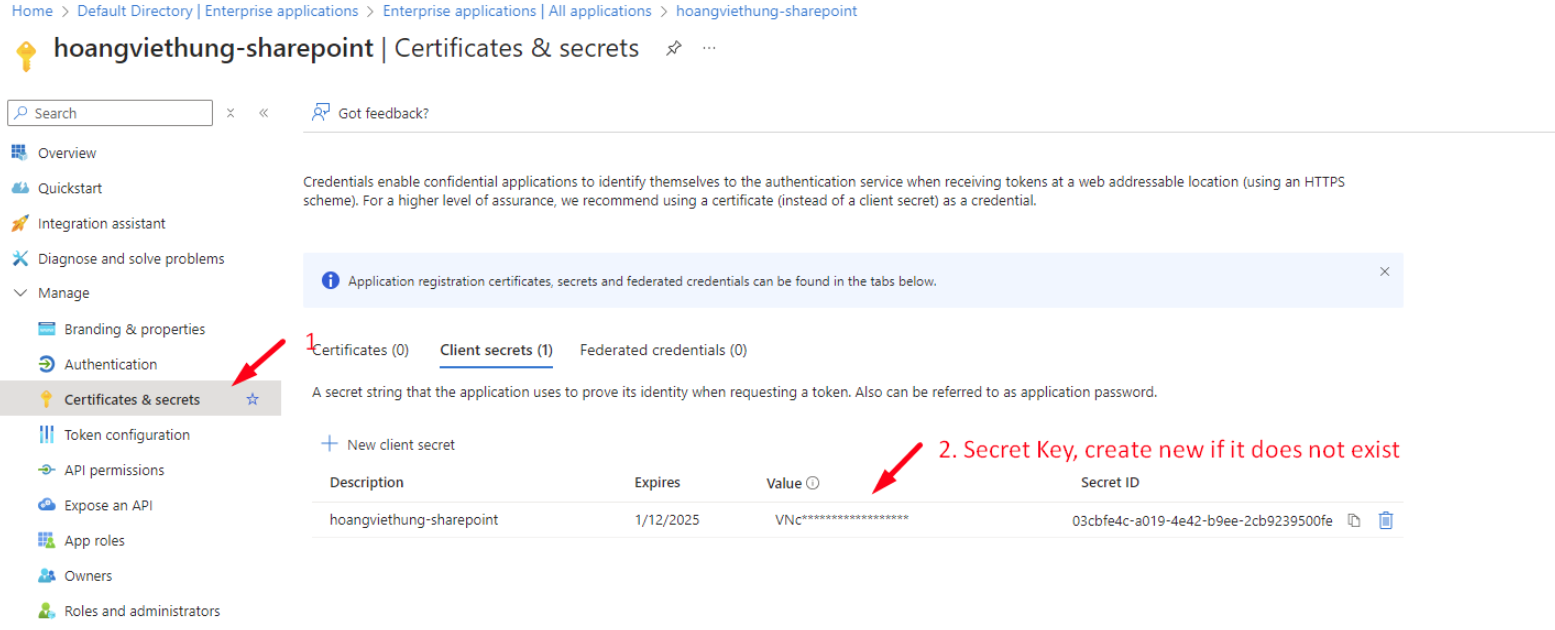
Step 5. Expand Manage, select Certificates & secrets, select Clients secrets. Here you should find Secret Key. Please create a new client secret if one does not exist.
Notes: You MUST assign users to the Enterprise Application to allow them to login via SSO. Please follow Enterprise Entra ID Integration for setup details
2. Verify the Office 365 license on users
Step 1. Go to https://admin.microsoft.com/ to access Microsoft 365 Admin Center
Step 2. Expand Users, select Active users, select the user(s), select License and apps, enable Microsoft 365 Business Standard. Click Save changes
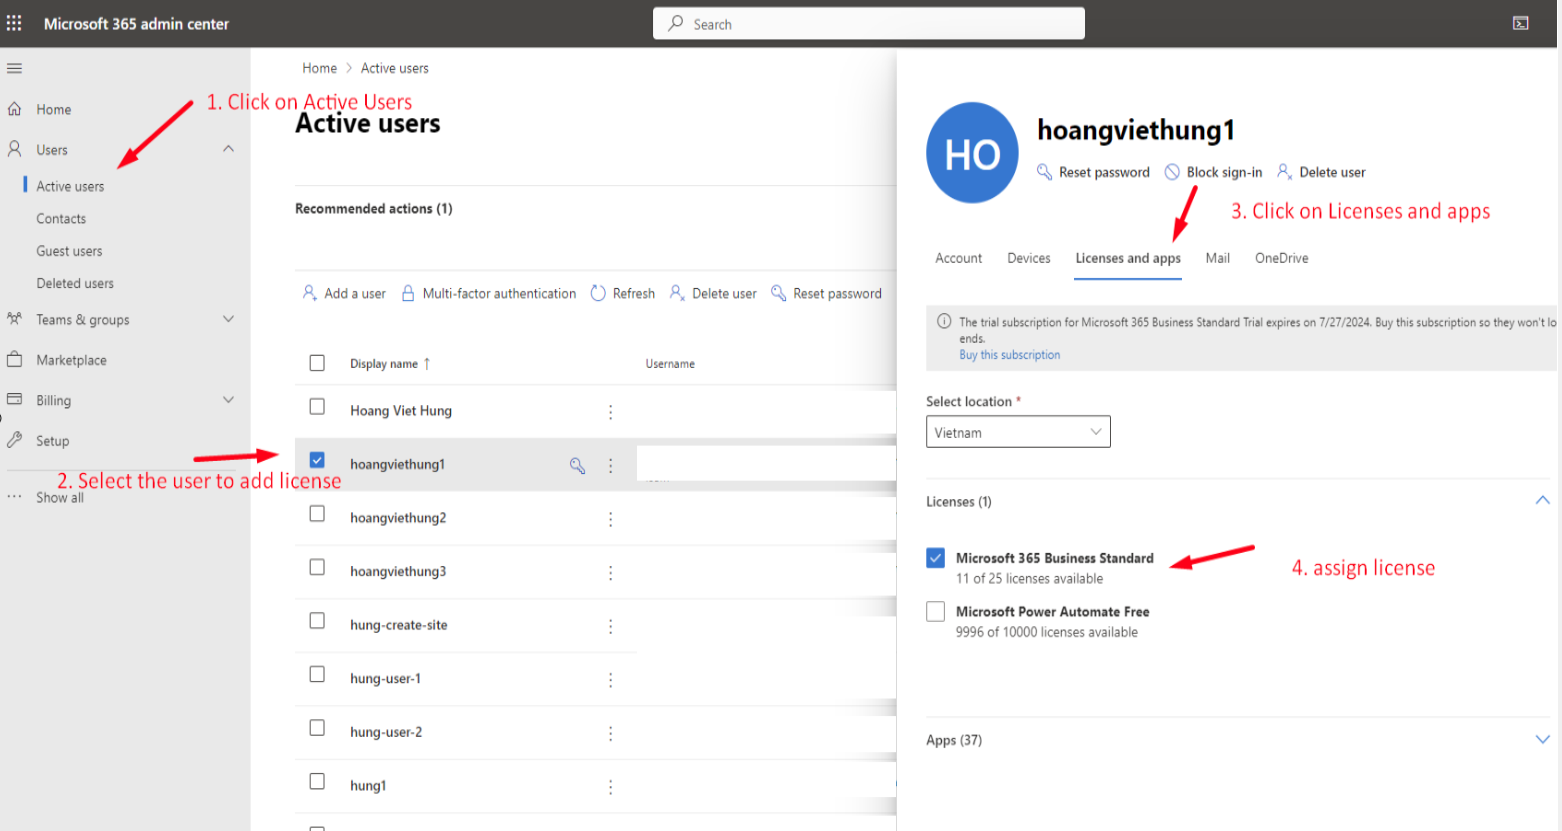
After assigning Microsoft 365 license Business Standard for user, it may take about 10 minutes for the changes to take effect.
If the user account doesn't have license, you will encountered the following error message in Kiosk service log:
"message":"You do not have access to create this personal site or you do not have a valid license"
3. Configure Redirect URI for Oauth2.0
For authorization before uploading files to SharePoint or OneDrive, you need to configure Redirect URI in app registration
Step 1. In app registration, click on Redirect URI link to add a new URI
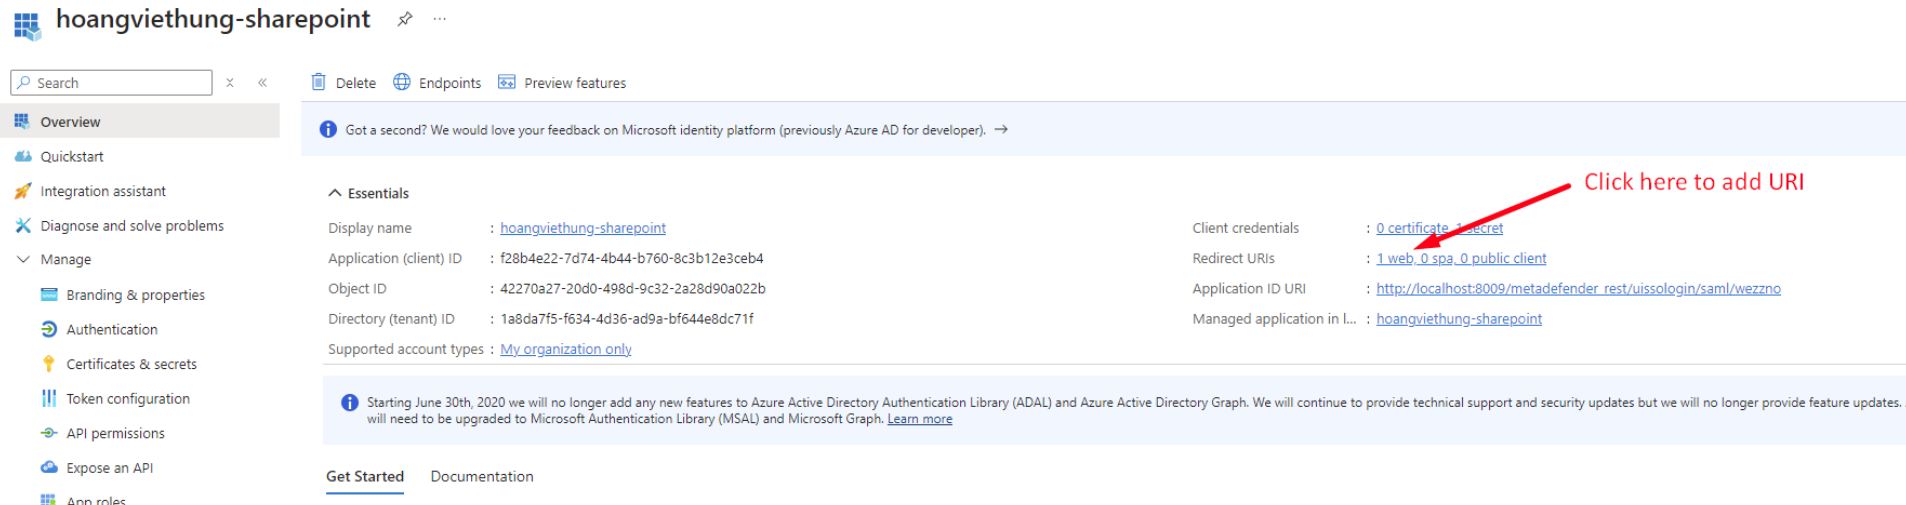
Step 2. Put in the Redirect URI. Click Save
<http/https>://localhost:<port>/metadefender_rest/oauth2/hook
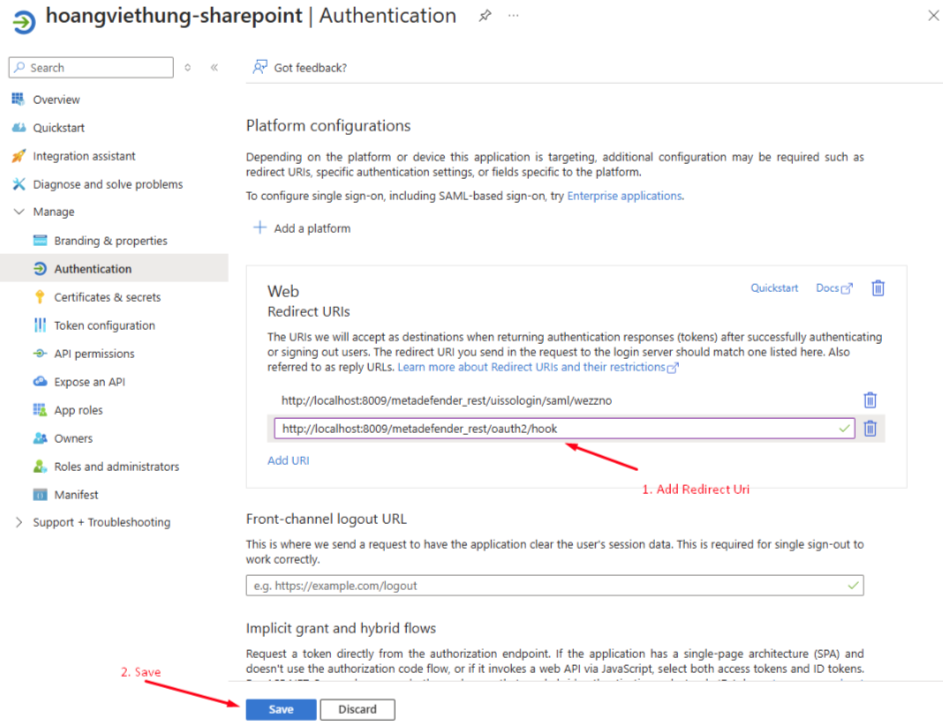
4. Grant API permissions that needed to upload files to SharePoint or OneDrive
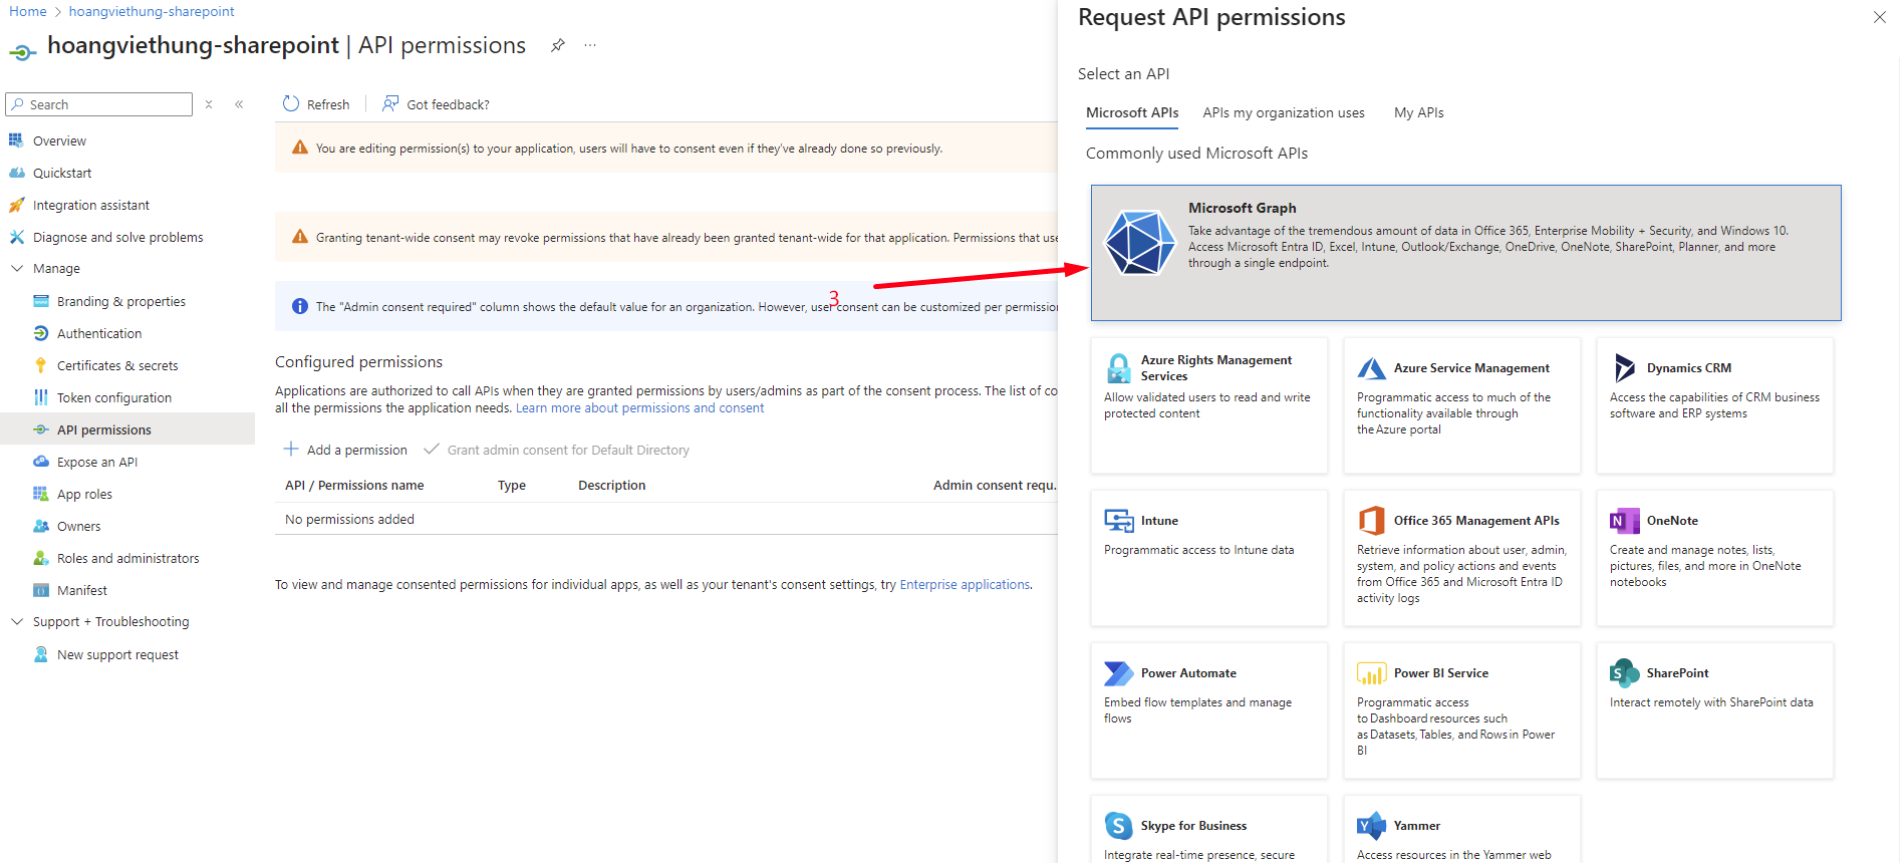
Step 1. From app permissions, expand Manage, click on API permissions. Click Add a permission
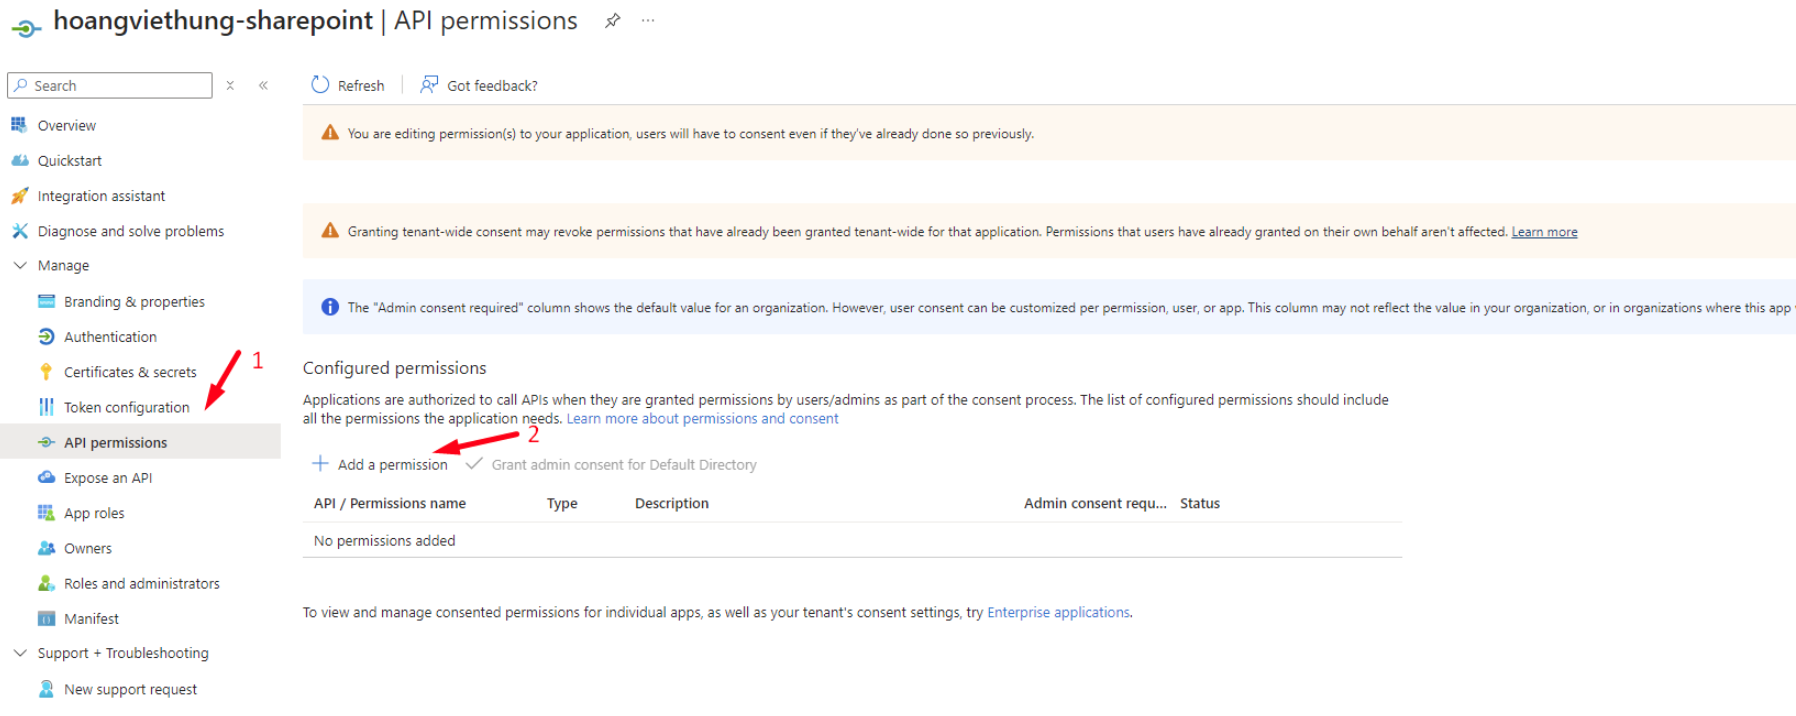
Step 2. Select Microsoft Graph
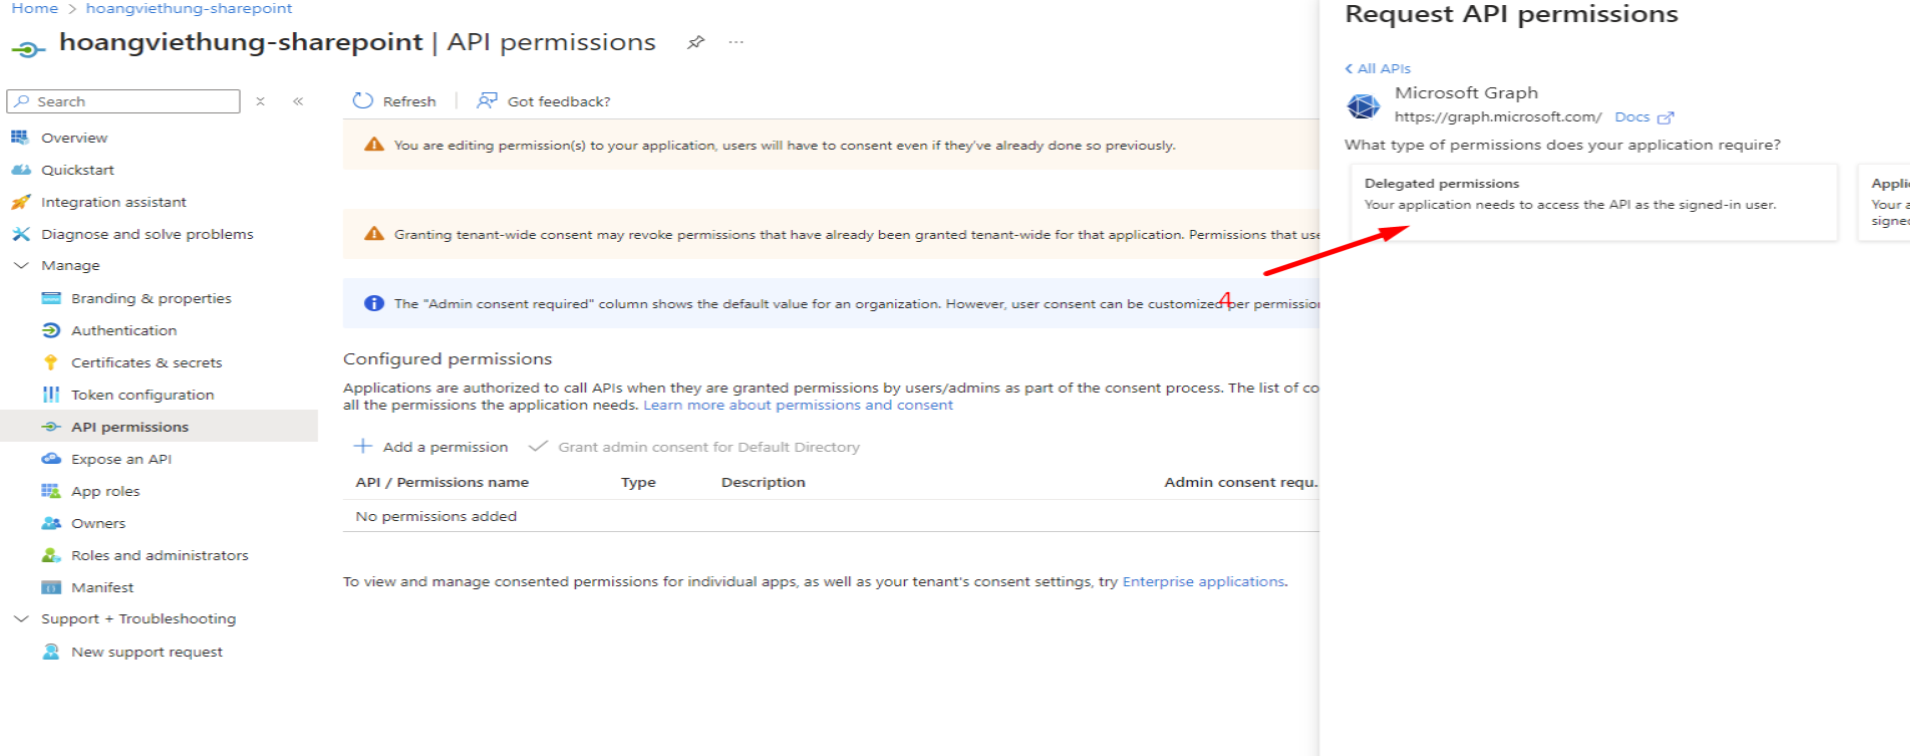
Step 3. Select Delegated permissions
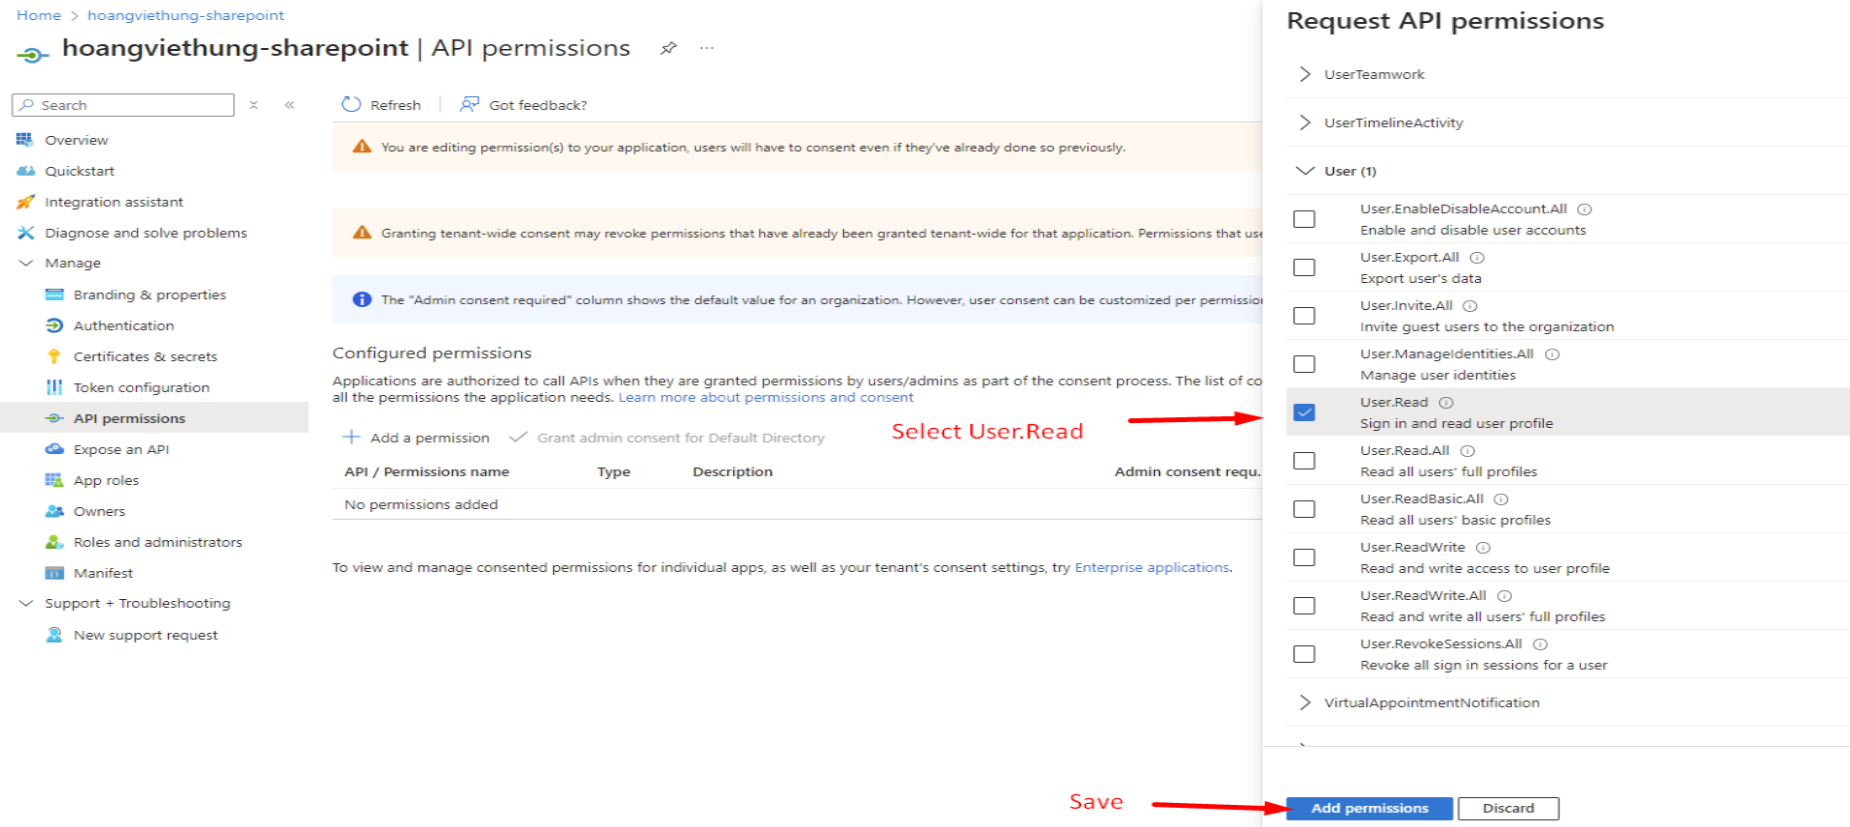
Step 4. Expand Sites. Enable Sites.ReadWrite.All permission

Step 5. Expand User. Enable User.Read permission
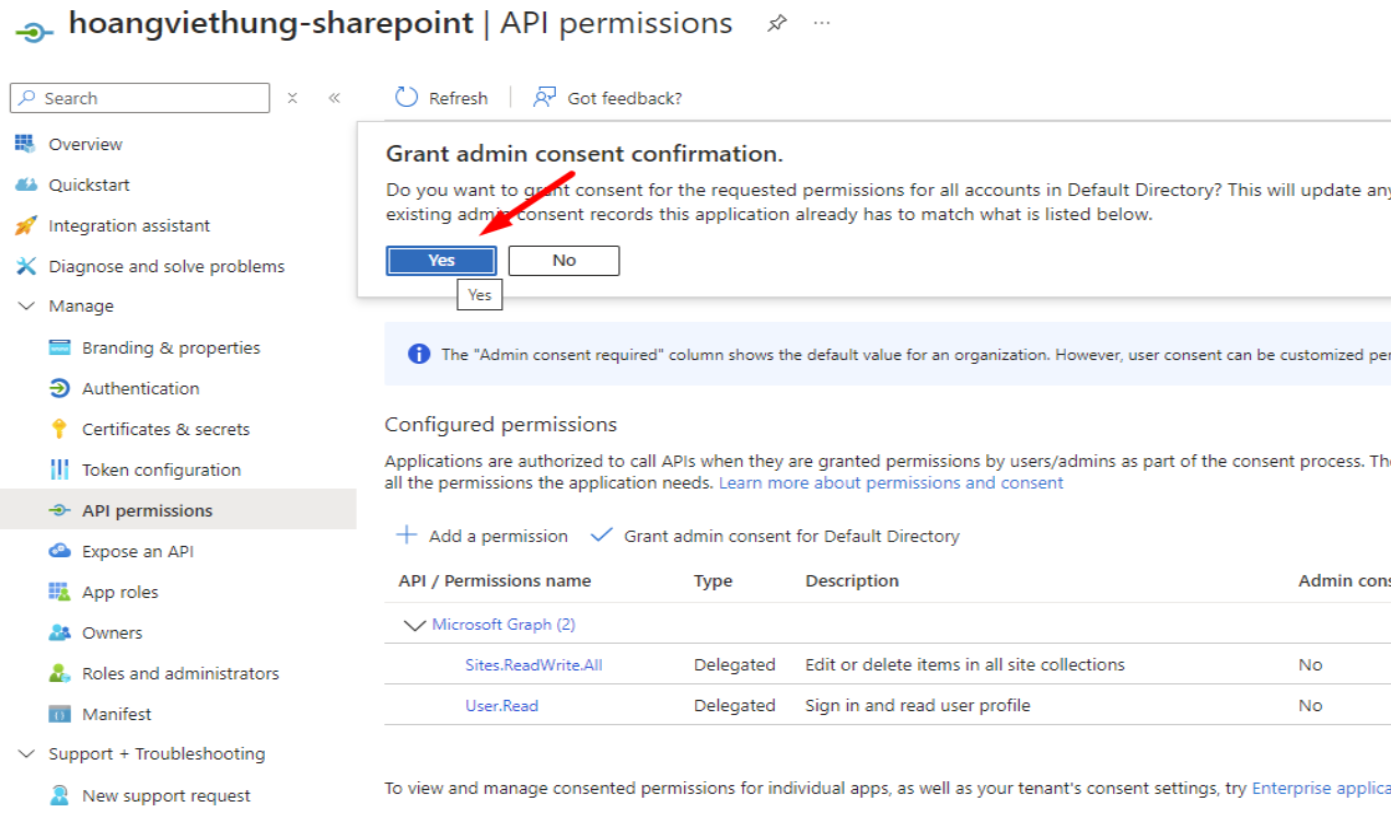
Step 6. Back to API permission page, click on Grant admin consent for Default Directory
It is important to enable Grant admin consent for Default Directory
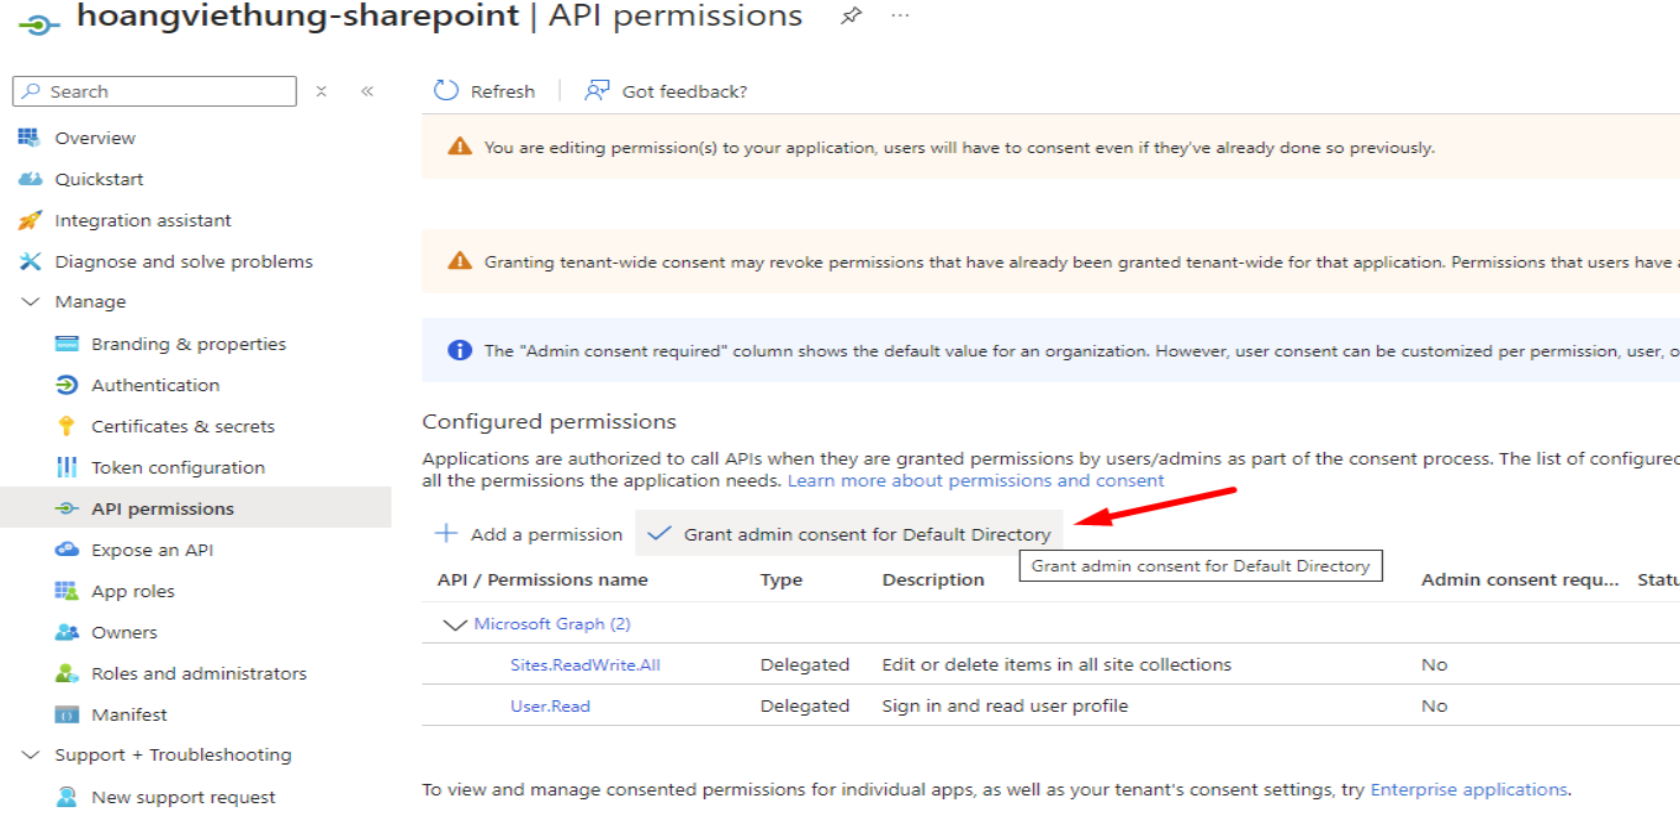
When a popup appears, select Yes to enable the setting
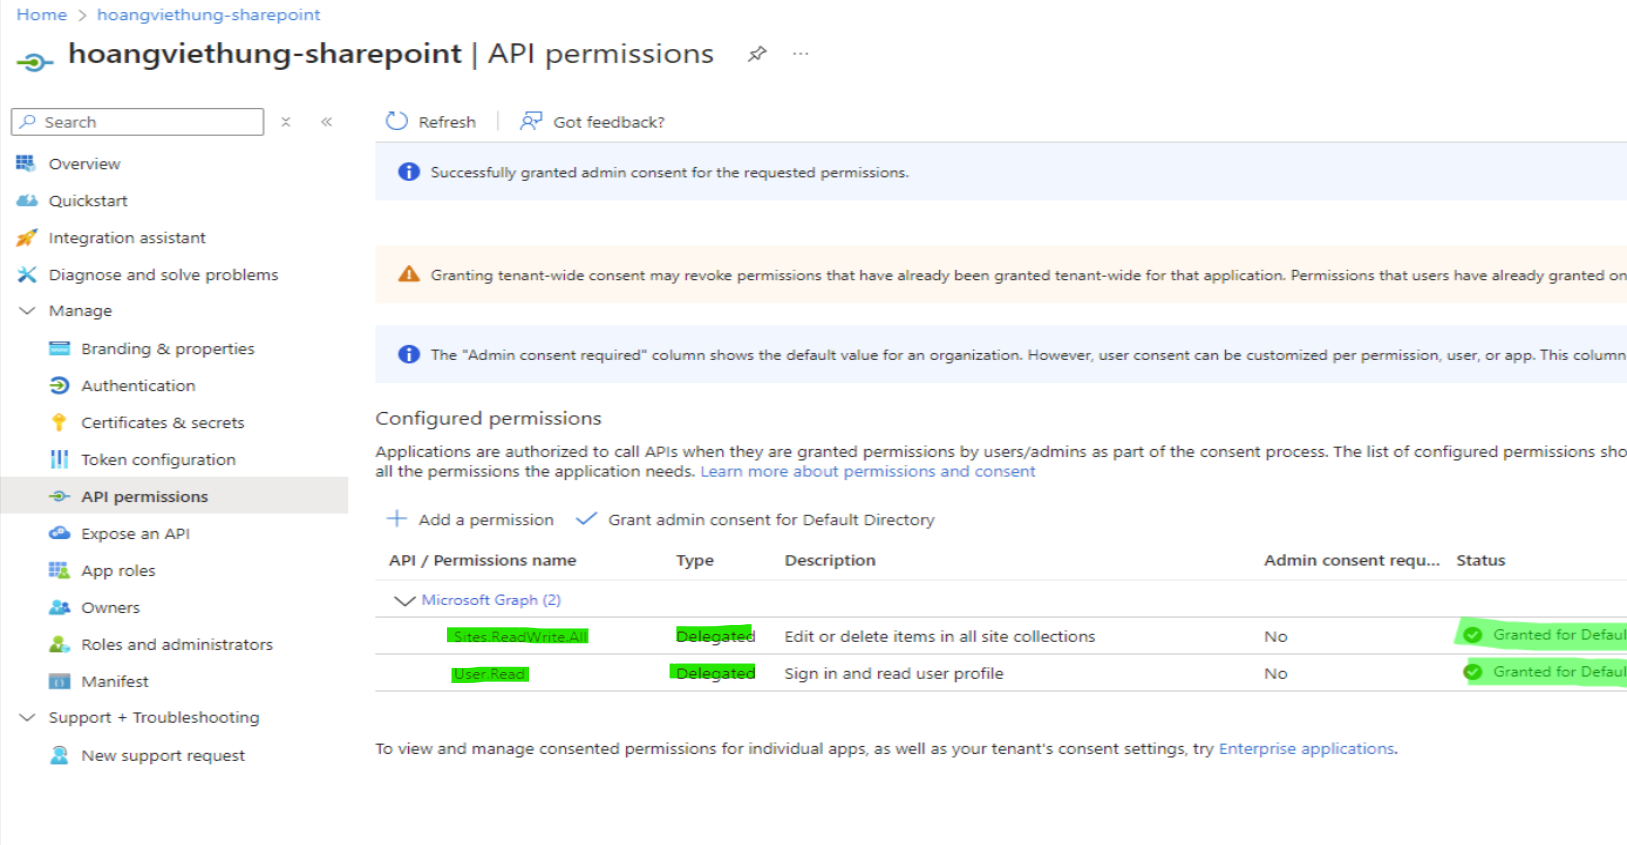
Step 7. After adding permissions and enable Grant admin consent for Default Directory. You should have a summary page similar as below
5. Configure Kiosk WebMC to upload processed files to OneDrive
Step 1. From Kiosk WebMC, go to Workflows, select Employee Workflow, Select File Handling
Blocked Files: to copy blocked files to OneDrive
Allowed Files: to copy allowed files to OneDrive
Assuming we want to copy allows files to OneDrive. Expand Allowed Files, Select Copy to Secondary Location, Select OneDrive
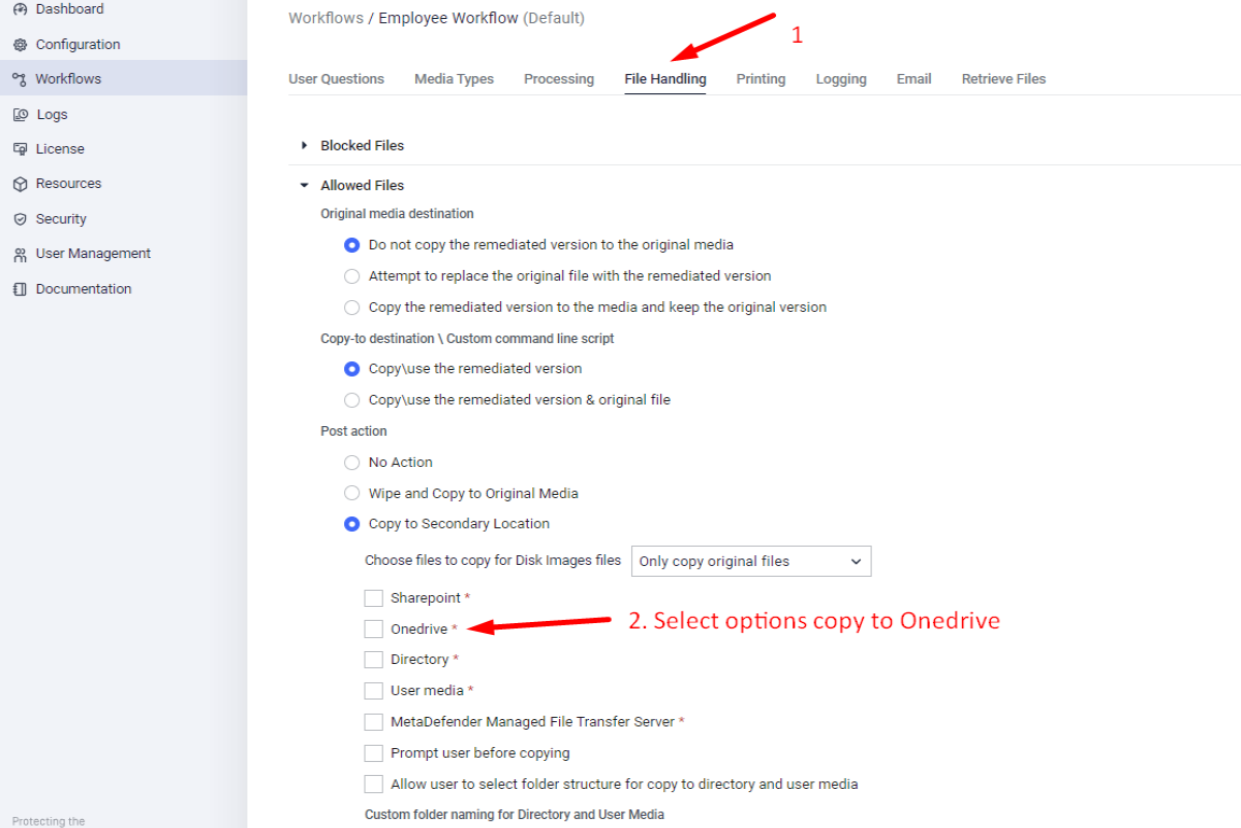
Step 2. Provide the information
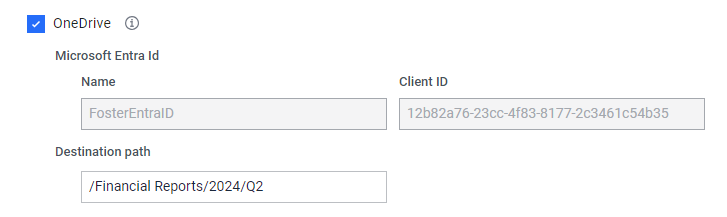
Microsoft Entra ID: Select the profile created above.
OneDrive folder name: Provide the format of OneDrive folder name where you would like the files to be uploaded. Variables can be used for dynamic naming, for example, [username], [date], [time], etc.
Destination Path: The relative path where the uploading folder will be stored.
/Financial Reports/2024/Q2 as example from the screenshot above
Destination Path supports %%%% and %%%userresponse#%%% variables, please refer to Directory Naming for more information.
If you want to upload files into the user's personal folder. Please enter Root, or leave this field empty
Example of OneDrive folder name format
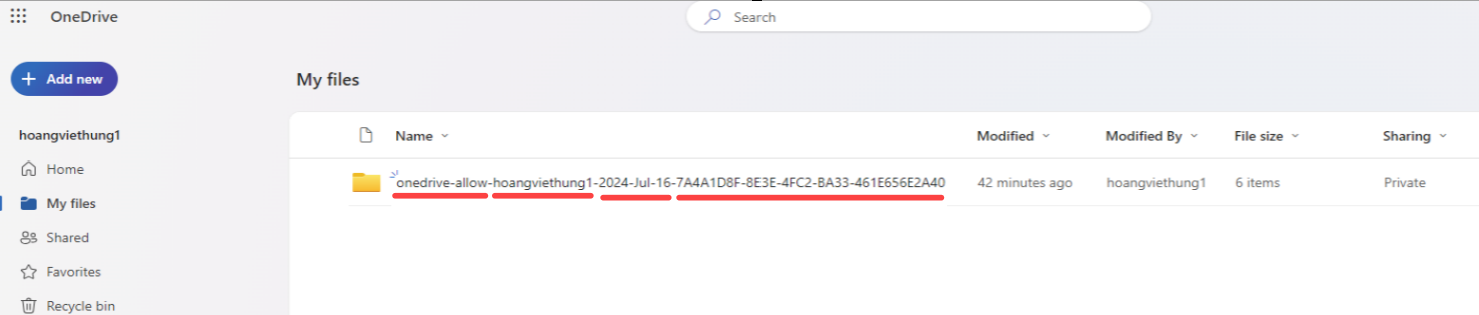
Example of OneDrive folder name format
6. Configure Kiosk WebMC to upload processed files to SharePoint
When uploading files to SharePoint as a member of the site, only the file owner can see their files. However, the site owner can also see the files.
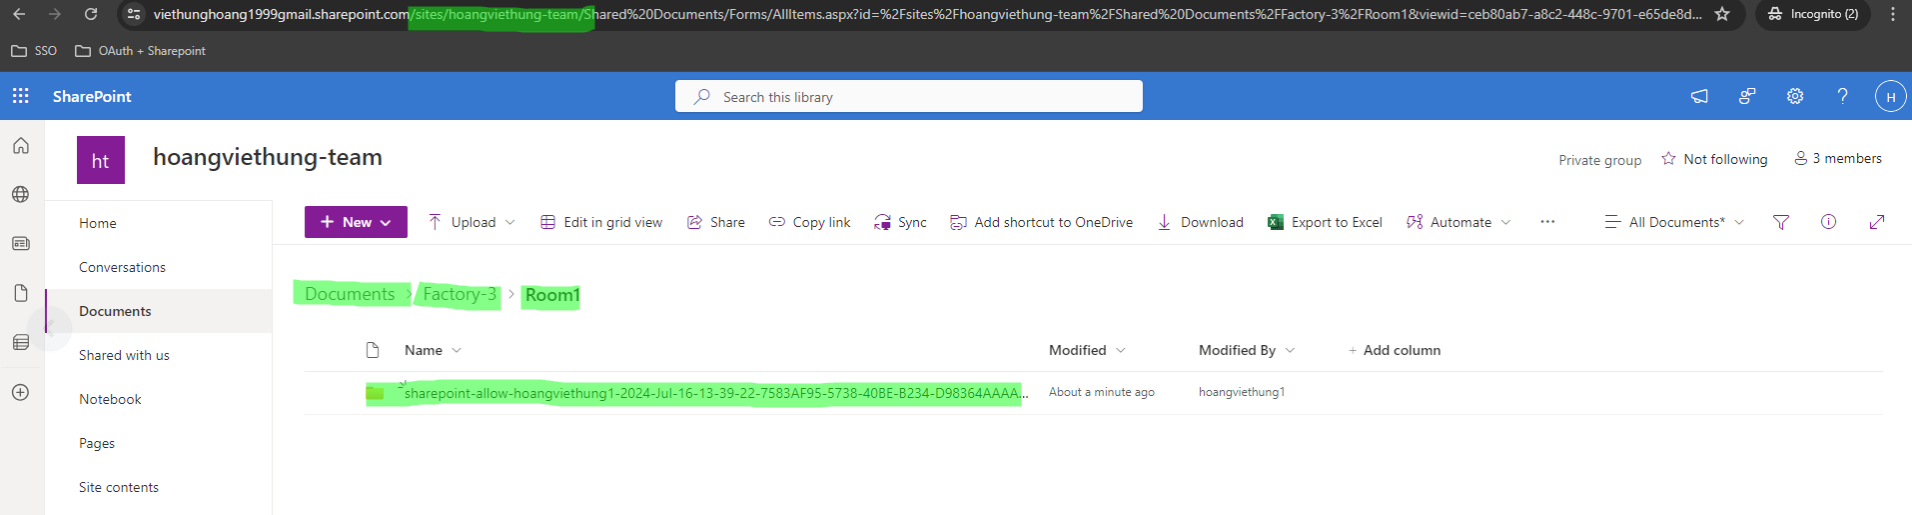
Step 1. Acquire SharePoint Site information
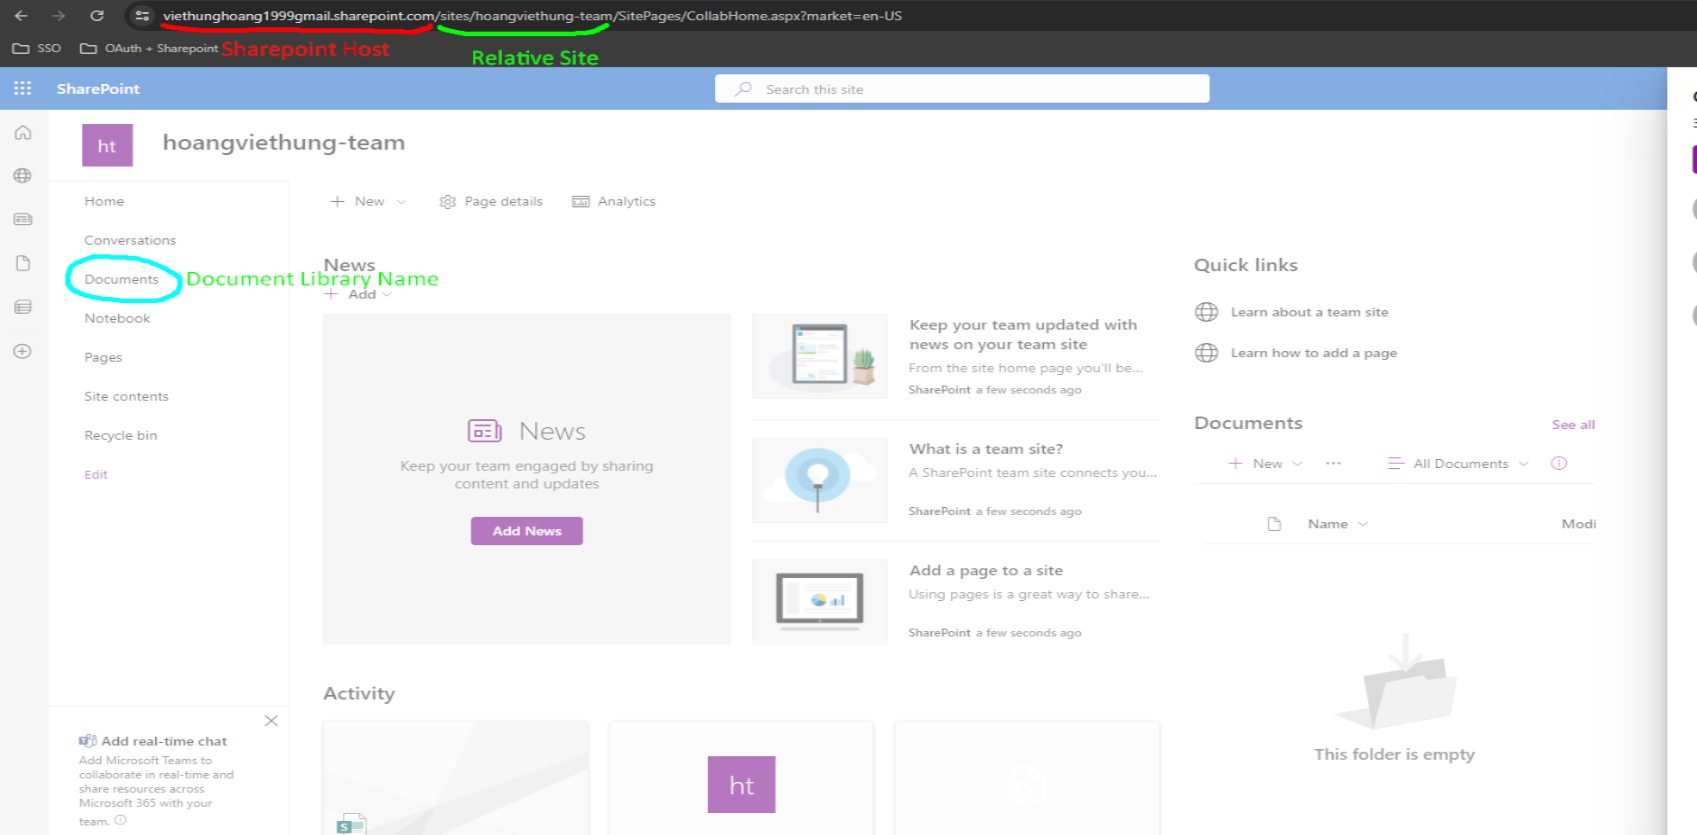
Based on the information from the screenshot:
SharePoint Host Domain: viethunghoang1999gmail.sharepoint.com as example from the screenshot
Current Site Relative Path: /sites/hoangviethung-team as example from the screenshot
Document Library Name: Documents as example from the screenshot
Step 2. Configure Kiosk WebMC to upload processed file to SharePoint
From Kiosk WebMC, go to Workflows, select Employee Workflow, Select File Handling
Blocked Files: to copy blocked files to SharePoint
Allowed Files: to copy allowed files to SharePoint
Assuming we want to copy allows files to SharePoint. Expand Allowed Files, Select Copy to Secondary Location, Select OneDrive
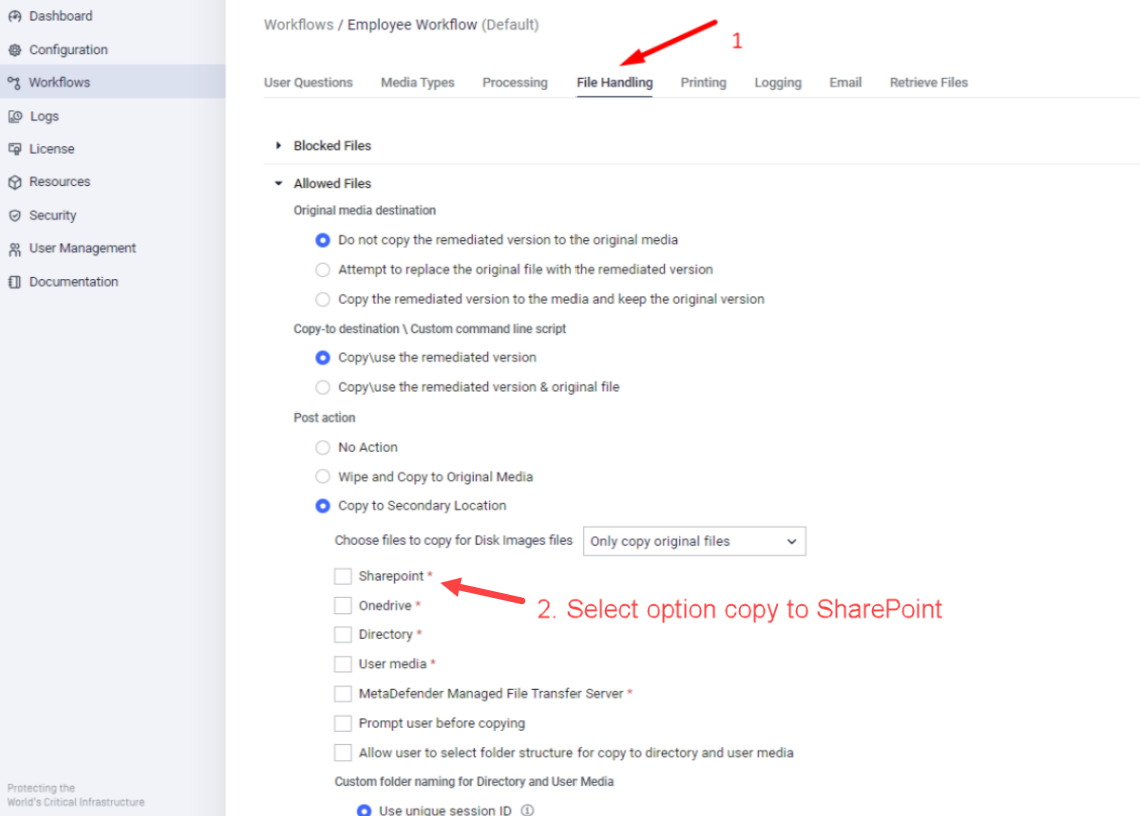
Step 2. Provide the information
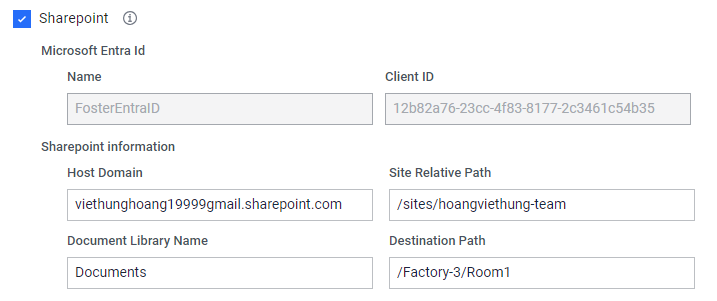
Microsoft Entra ID: select the created profile
Host Domain: Provide SharePoint Domain name
viethunghoang1999gmail.sharepoint.com as example from the screenshot above
Site Relative Path: Relative path to the site
/sites/hoangviethung-team as example from the screenshot above
Document Library Name
Documents as example from the screenshot above
Destination Path: The relative path from the root of the document library where the uploading folder will be stored
/Factory-3/Room1 as example from the screenshot above
Destination Path supports %%%% and %%%userresponse#%%% variables, please refer to Directory Naming for more information.
If you want to upload files into the root of the document library. Please enter Root, or leave this field empty
Example of successful upload to SharePoint
Comparison of Site Owner vs Site Member access levels
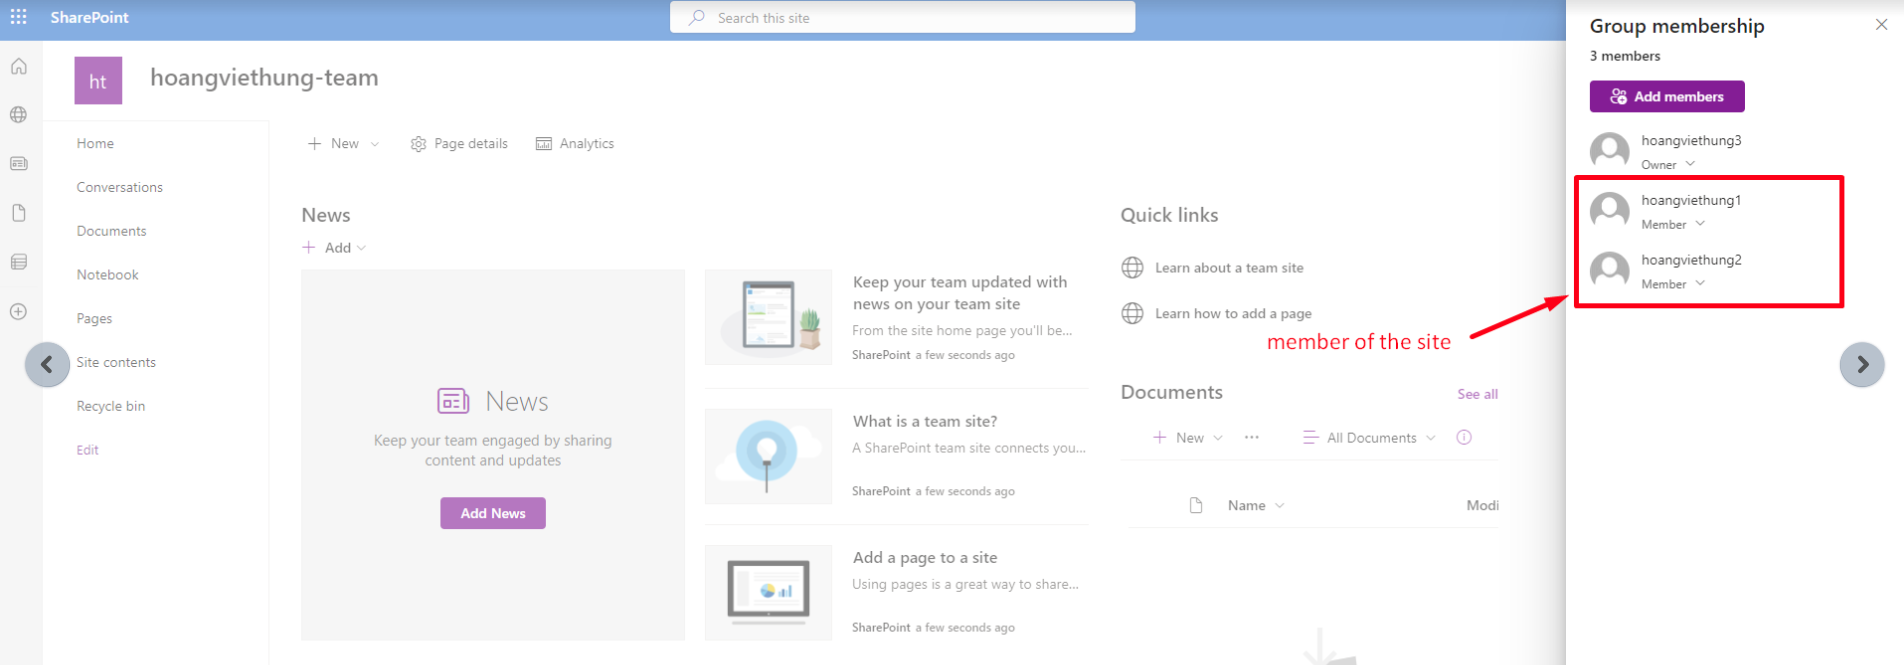
Group membership as example from the screenshot
hoangviethung3 is site owner
hoangviethung1 is site member
hoangviethung2 is site member
When a file is uploaded to SharePoint by a site member (hoangviethung1), only the file owner (hoangviethung1) can view and access the file. Other site member (hoangviethung2) cannot see or access the files. However, the site owner (hoangviethung3) can view and access all files, including those uploaded by other site member (hoangviethung1 for example)