
This document provides instruction on how to disable Windows Update on your system.
The instruction is provided as general guidance. Depending on your environment and group policies in place, some steps may vary or behave differently. Always consult with your IT or system administrator before making changes.
Windows Update is disabled by default on the Kiosk Hardened Image. Each monthly release of the image already includes the latest Windows security updates. Kiosk devices (Kiosk Tower, Desktop, Mobile, and Mini) can receive these updates either automatically or manually:
It is strongly recommended to keep automatic Windows updates enable, especially if you're not using the Kiosk Hardened Image. Disabling Windows Update without an alternative update mechanism in place may leave the system exposed to security vulnerabilities.
Disable Windows Update and Update Orchestrator Services
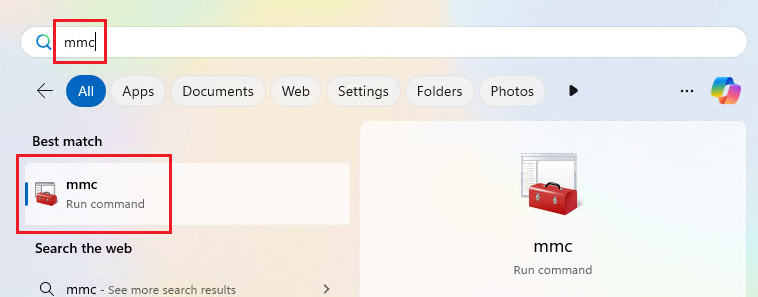
Step 1. Open Microsoft Management Console (MMC)
Go to the Start menu, type mmc, and open it with Administrator permissions
Step 2. Add the Services Snap-in
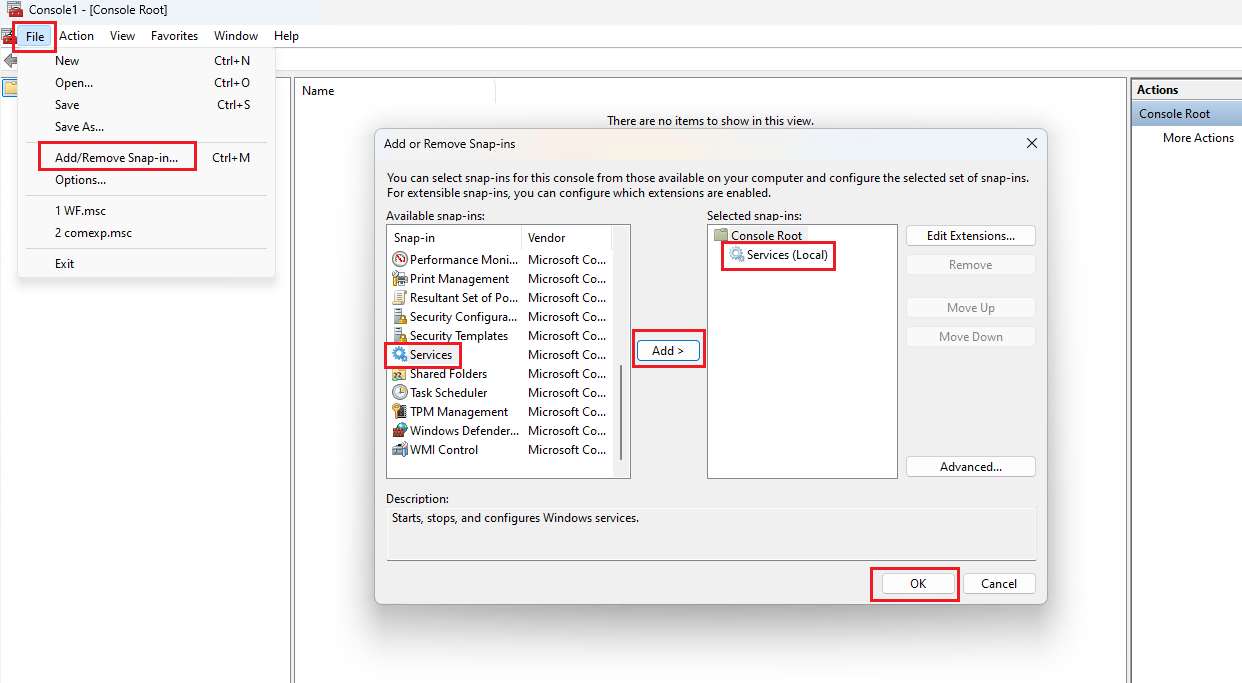
In the MMC window, select File, select Add/Remove Snap-in.
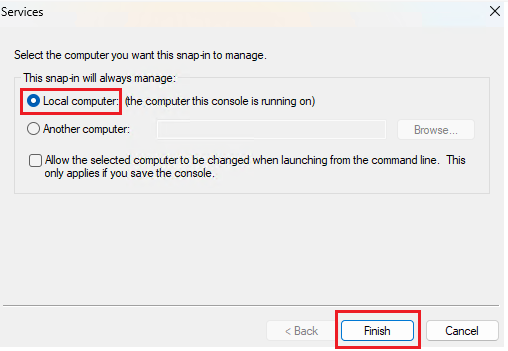
From the list, select Services and click Add. A popup Window will appear, select Local computer, click Finish. Then, click OK.
Step 3. Disable the Windows Update service
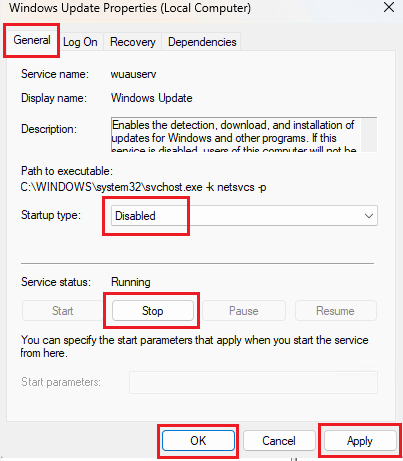
In the Services list, find Windows Update service. Right-click on it and select Properties.
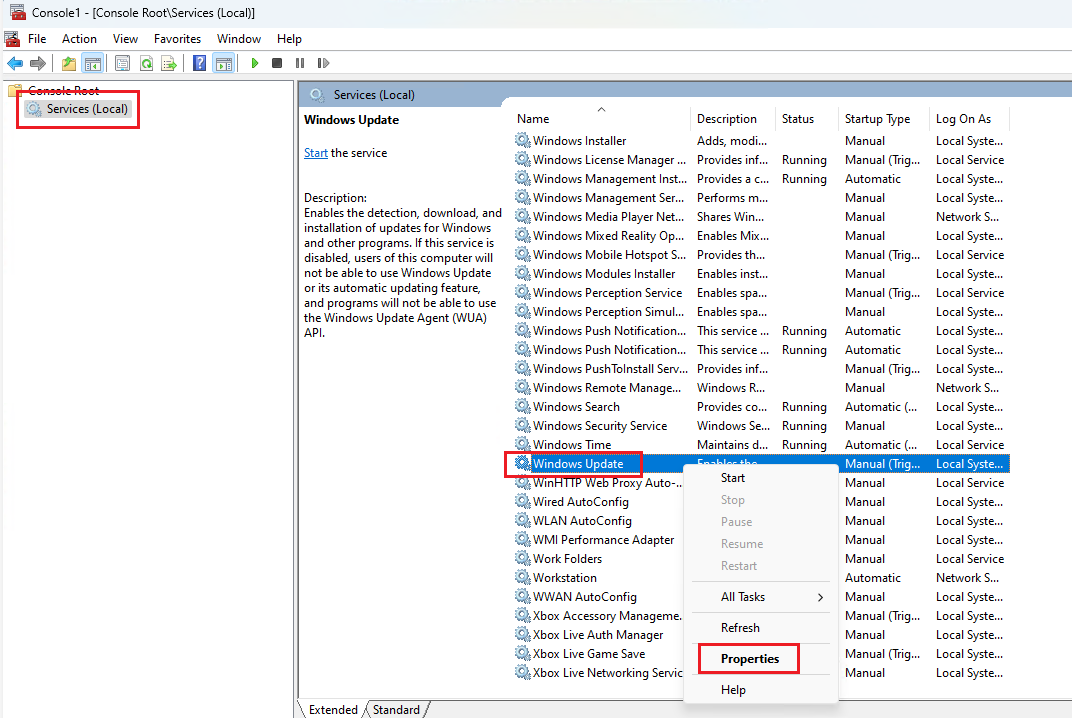
Under the General tab, set Startup type to Disabled.
Click Stop to halt the service, then click Apply and OK.
Step 4. Disable Update Orchestrator service
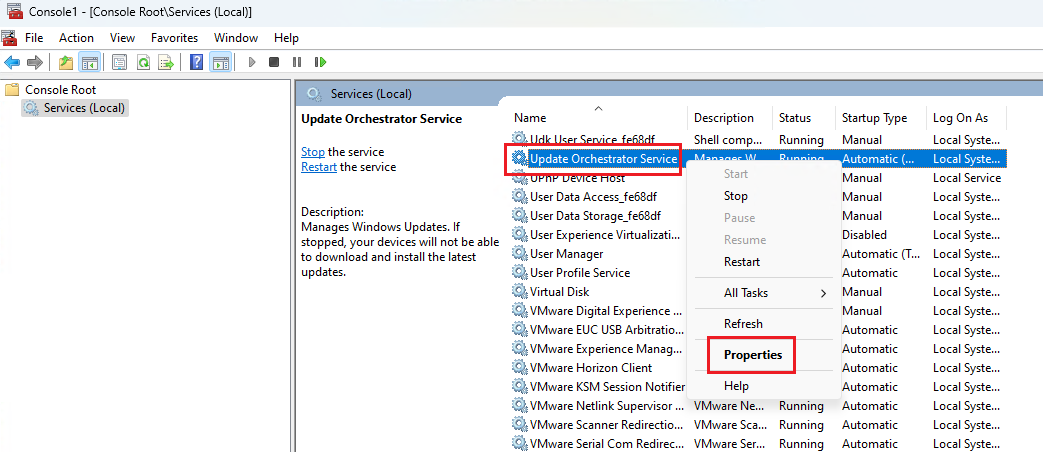
Still in Services list, find Update Orchestrator Service. Right-click on it and select Properties.
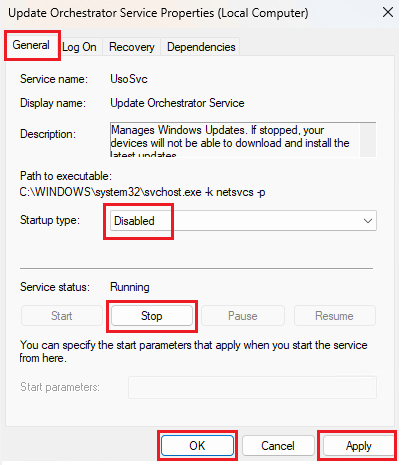
Under the General tab, set Startup type to Disabled.
Click Stop to halt the service, then click Apply and OK.
Prevent Windows Update from being automatically re-enabled
Step 1. Rename Registry Keys
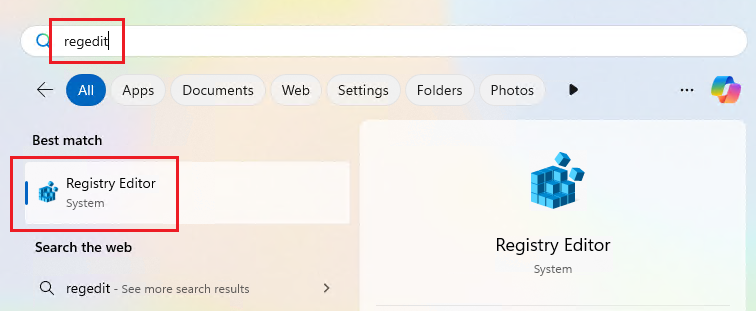
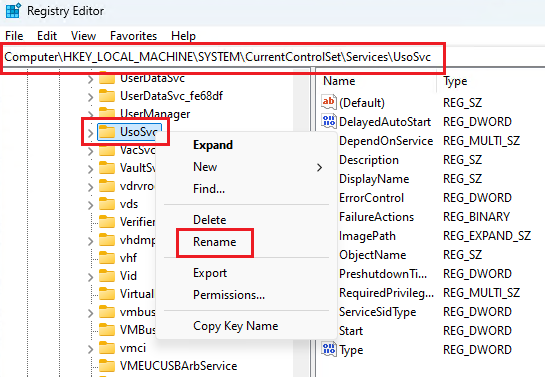
Go to Start menu, type regedit, and open it with Administrator permissions
Navigate to
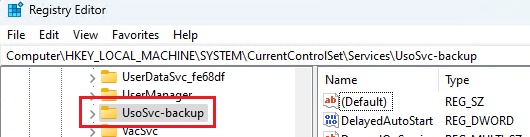
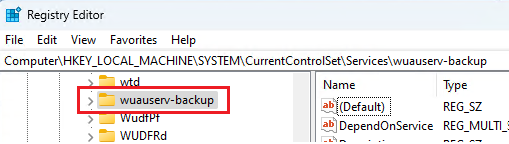
HKEY_LOCAL_MACHINE\SYSTEM\CurrentControlSet\Services.Rename the following registry keys:
usoSvctousoSvc-backupwuauservtowuauserv-backup
Step 2. Reboot the Kiosk system
Restart the system to apply the changes.
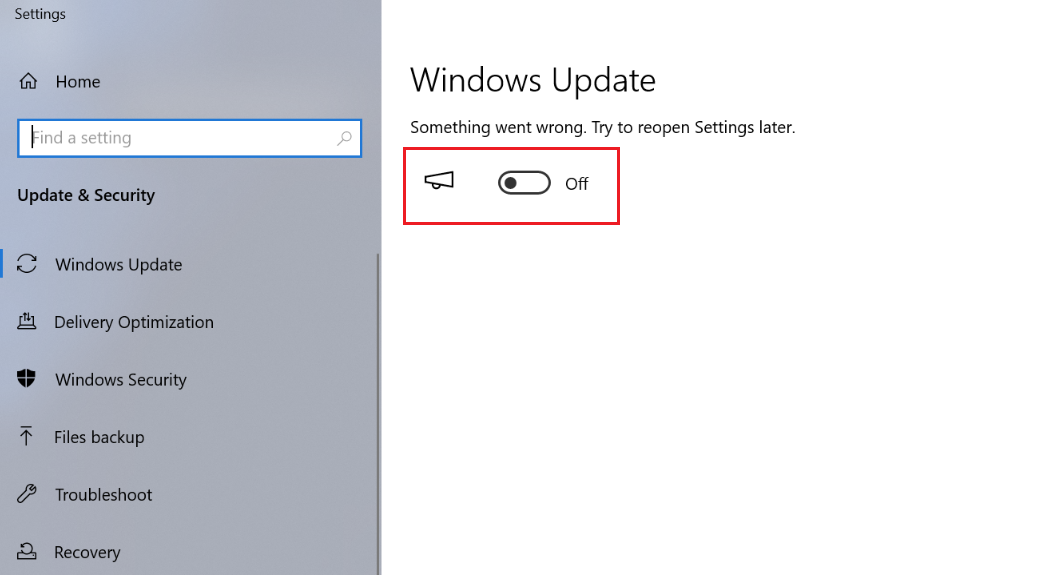
Step 3. Verify Windows Update status
After reboot, go to Start menu, type Windows Update settings , and open it. Verify to ensure the Windows Update was disabled
Prevent removed services from being registered by DCOM
Step 1. Run registry with Administrators permissions, and navigate to HKEY_LOCAL _MACHINE\SOFTWARE\Classes\CLSID{B91D5831-B1BD-4608-8198-D72E155020F7}
Step 2. Right click on the key, select permissions
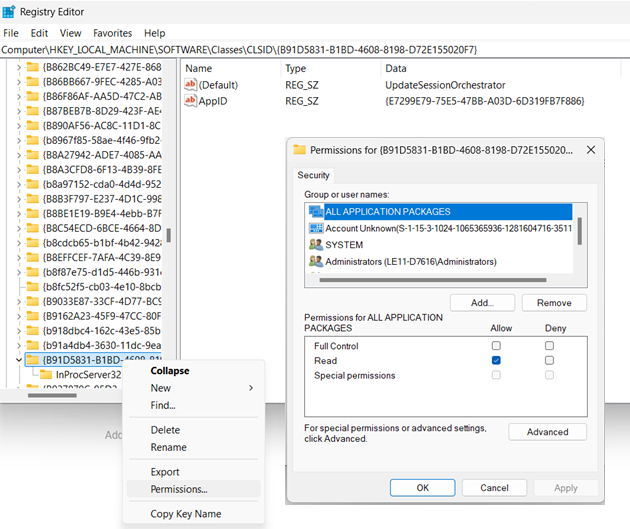
Step 3. Click on Advanced. Under Advanced Security Settings, Click on Change the owner
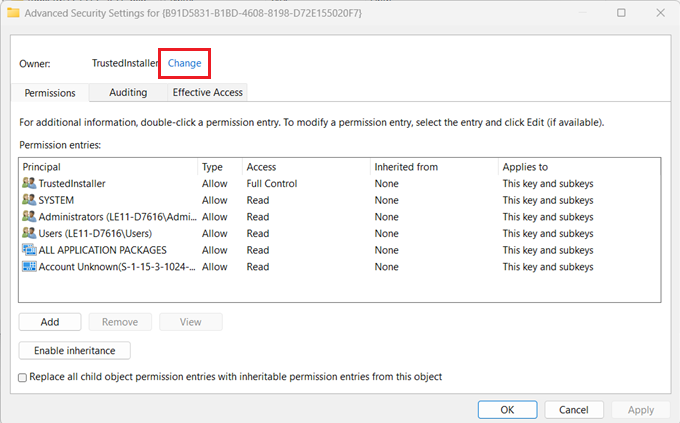
Step 4. Input BUILTIN\Administrators under object name, click Check names to verify the username, click OK to save the setting. Make sure you select Replace owner on subcontainers and objects, click Apply
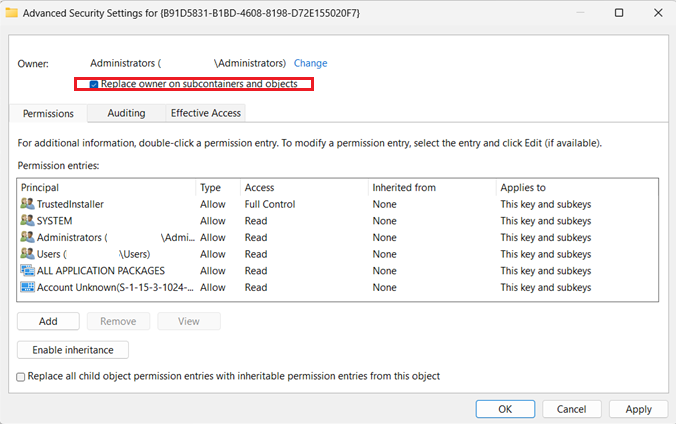
Step 5. Rename the key to HKEY_LOCAL_ MACHINE\SOFTWARE\Classes\CLSID{B91D5831-B1BD-4608-8198-D72E155020F7}_backup
Step 6. Repeat step 2-4 to change the permissions of the key back to NT Service\TrustedInstaller
Step 7. Repeat the step 2-5 to change the key name HKEY_LOCAL_ MACHINE\SOFTWARE\Classes\CLSID{e60687f7-01a1-40aa-86ac-db1cbf673334} to HKEYLOCALMACHINE\SOFTWARE\Classes\CLSID{e60687f7-01a1-40aa-86ac-db1cbf673334}_backup