Title
Create new category
Edit page index title
Edit category
Edit link
How do I deploy a hardened Kiosk image onto a USB flash drive to create dedicated MetaDefender Kiosk Hardware?
This article applies to all MetaDefender Kiosk V4 releases deployed on Windows 7/8/8.1 or 10 systems.
- A PC running Windows 7/8/8.1 or 10, on which any MetaDefender Kiosk V4 release is deployed.
- A USB flash drive with a storage capacity of at least 32GB.
In order to streamline deployment of MetaDefender Kiosk onto a number of systems that will be used as dedicated Kiosk hardware, OPSWAT recommends that you create a bootable flash drive containing the hardened Kiosk image for deployment.
We will no longer be packaging the Install.WIM file in a WinPE Bootable USB from version 4.6.4
Below, you will find a VHD of a WinPE Bootable USB that simply needs to be applied to a USB via Rufus (packaged in the zip with the VHD). The steps are simple:
- Download the link to the WinPE Image and use Rufus to apply it to a USB
- This will create two partitions. The boot partition and the WIM partition.
- Download the Install.WIM for your model in My OPSWAT Portal and simply copy the WIM file to the WIM partition on the USB and you will have your bootable USB for reimaging a Kiosk.
This saves space, time and resources for both OPSWAT and the customer for downloading images.
Creating the Kiosk deployment flash drive
To create your MetaDefender Kiosk deployment flash drive, follow the steps below:
- Download and extract the Kiosk hardened image archive file.
- Navigate to the extracted folder.

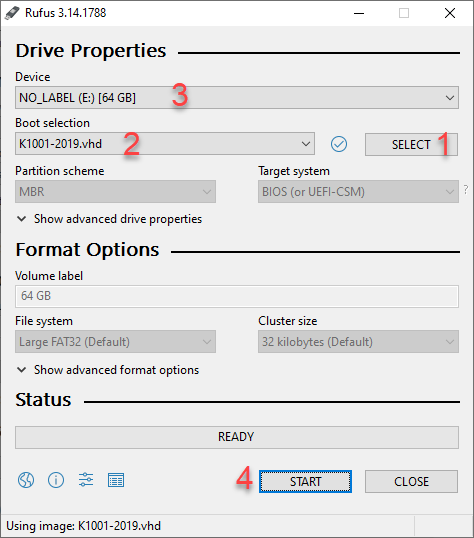
- Run the rufus-3.14.exe file, following the steps numbered in red on the screenshot below:
- Press Select button.
- Select the vhd file under the extracted folder.
- Select the available USB flash drive.
- Press START Button.
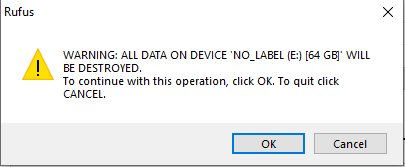
The USB flash drive will now be formatted, so any data on the drive will be lost.
- Select OK to confirm the format.
- The setup process takes around 20 minutes to complete.
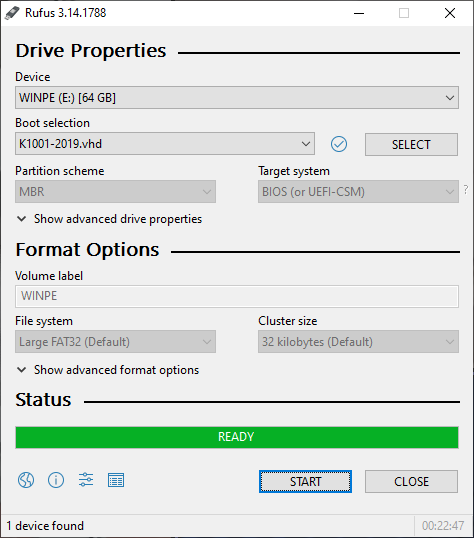
You can now use this Kiosk deployment USB drive to flash any device with the hardened Kiosk image.
Flashing a device with the bootable Kiosk USB drive
To install MetaDefender Kiosk on a new device by using your newly created Kiosk deployment flash drive, do the following:
- Insert the deployment USB into the device of your choice.
- Boot the device from the OFF state, and initiate the relevant keyboard shortcut to enter the system BIOS or One-Time Boot Menu.
This keyboard shortcut will vary based on the device’s motherboard manufacturer.
- One in the BIOS or Boot Menu, select the deployment USB as the boot device, but ensure that you are booting into UEFI mode (as illustrated in the screenshot below) or the image will not boot properly.
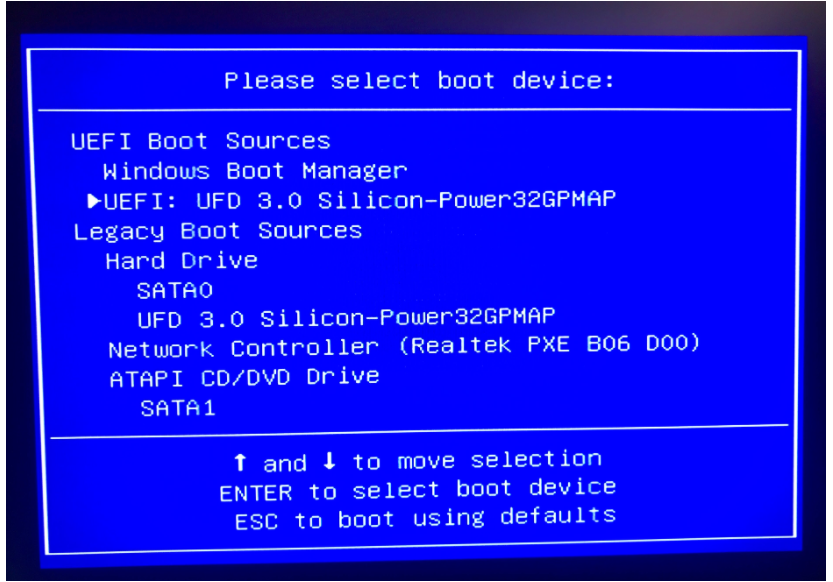
- Press enter to apply your settings.
- The PC will now boot up using the newly created Kiosk flash drive.
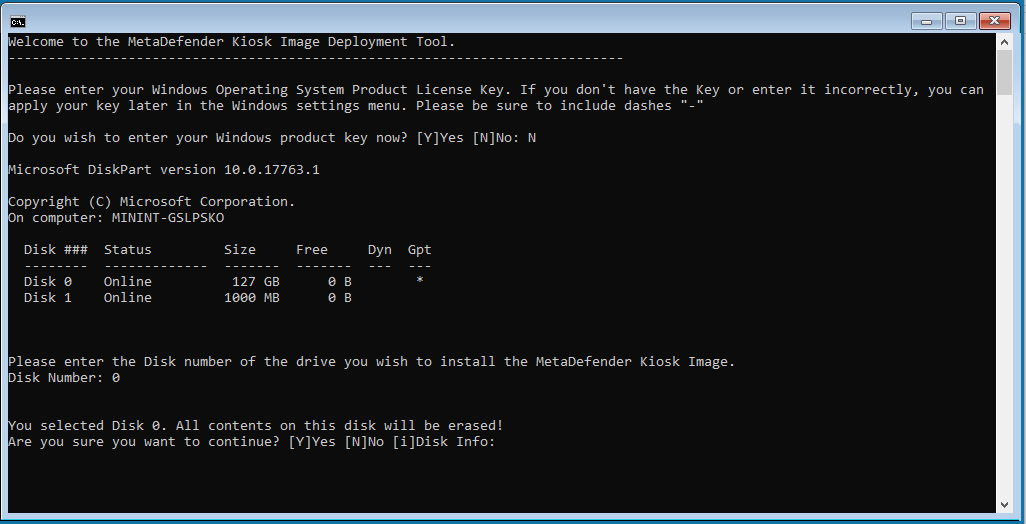
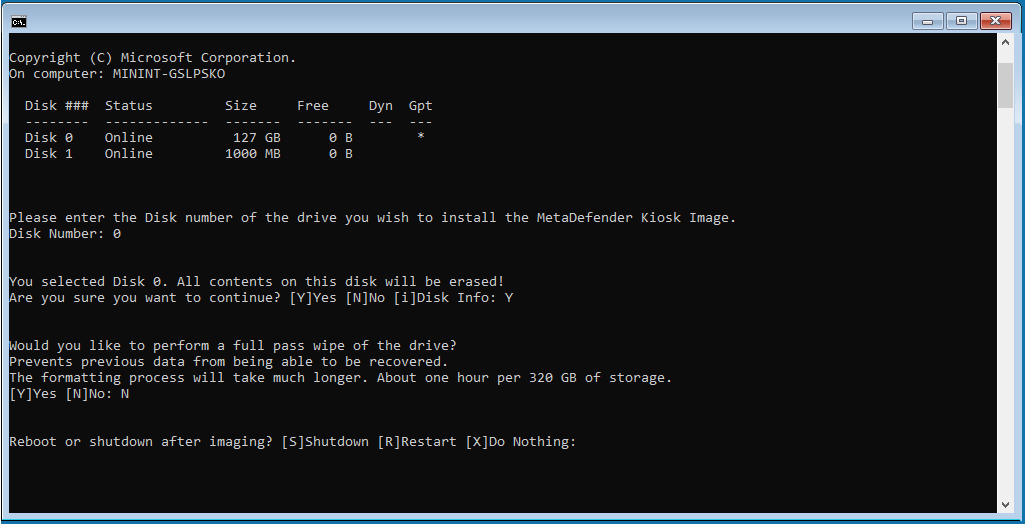
- Follow the on-screen command prompt questions:
- Enter your Windows license key, if available.
- Select the drive on which to install the image, bearing in mind that all data on that drive will be wiped.
- Choose whether or not to do a full-pass wipe, bearing in mind that a full-pass wipe will take considerably longer.
- Choose whether or not to restart the device once install is complete.
Post Installation Actions
Change default log-in information for the local windows account:
- Username: KioskUser
- Password: Opswat1234!
To activate MetaDefender Core, you will need to run the Setup Wizard on MetaDefender Core, as follows:
- Go to http://localhost:8008 and follow the Wizard in order to create an account and activate MetaDefender Core.
Connect Kiosk to MetaDefender Core by following the instructions Here.
To activate MetaDefenderKiosk, you will need to run the Setup Wizard on MetaDefender Kiosk, as follows:
- Go to http://localhost:8009/ and follow the Wizard in order to create an account and activate MetaDefender Kiosk.
Finally, accept any changes from baseline in the Kiosk UI.
If you have followed the instructions above but are Unable To Install And Run MetaDefender Kiosk Using A Bootable Kiosk Flash Drive, please follow these instructions on How To Create a Support Package, before creating a support case or chatting with our support engineer.

