
This article applies to all MetaDefender ICAP releases deployed on Windows and Linux systems.
Create OIDC directory on MD ICAP
Sign in to MetaDefender ICAP.
In the dashboard, click on
User Managementin the left sidebar.On
User Managementpage, selectDirectoriestab and clickAdd Directoryin the top right
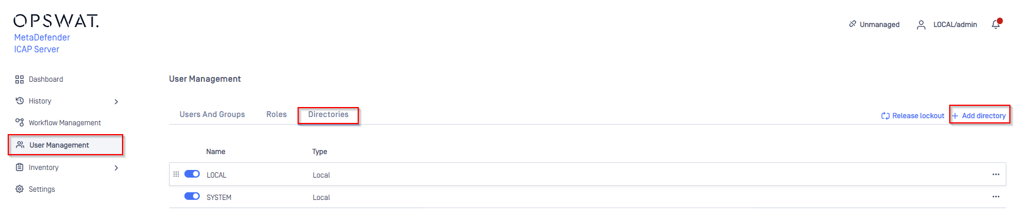
In
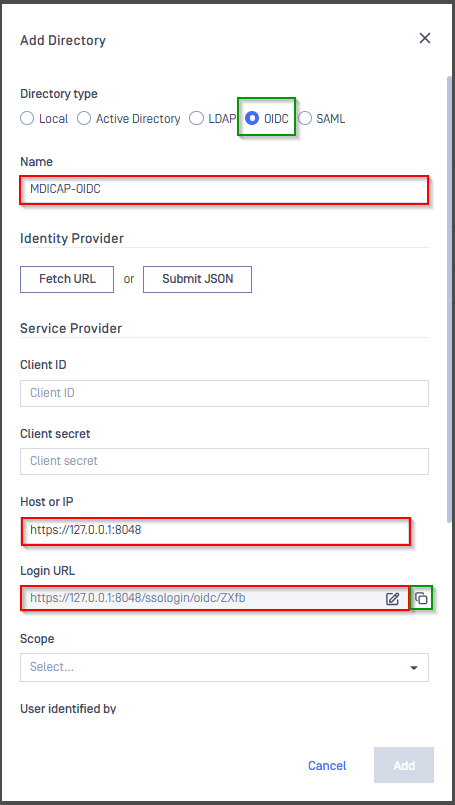
Add Directorypage, chooseOIDCinDirectory Type, fillNamefor the new directory, MDICAP-OIDC for exampleFill
Host or IPwhere MD ICAP is hosting, https://127.0.0.1:8048 for this exampleCopy string generated under Login URL and store to redirect_uri
Create and configure OIDC application on PingOne
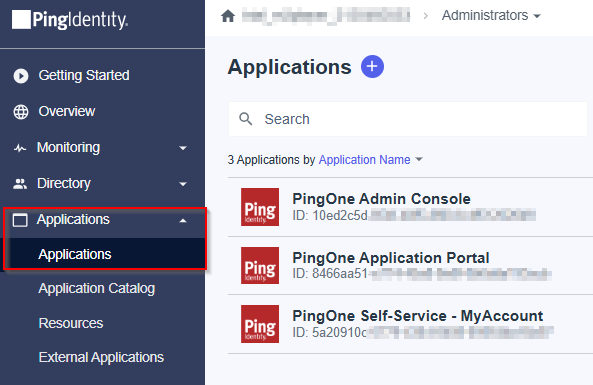
In the PingOne Overview page, navigate
Applicationson sidebar
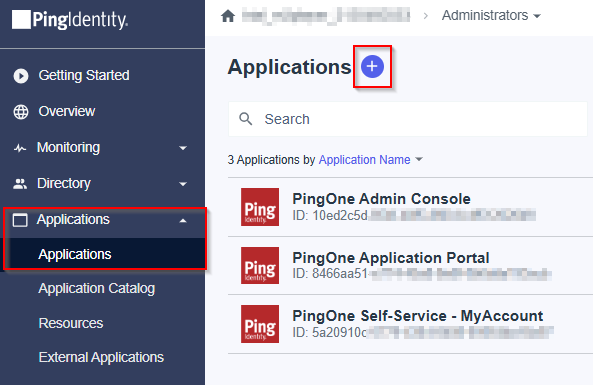
Click the plus button to add a new application.
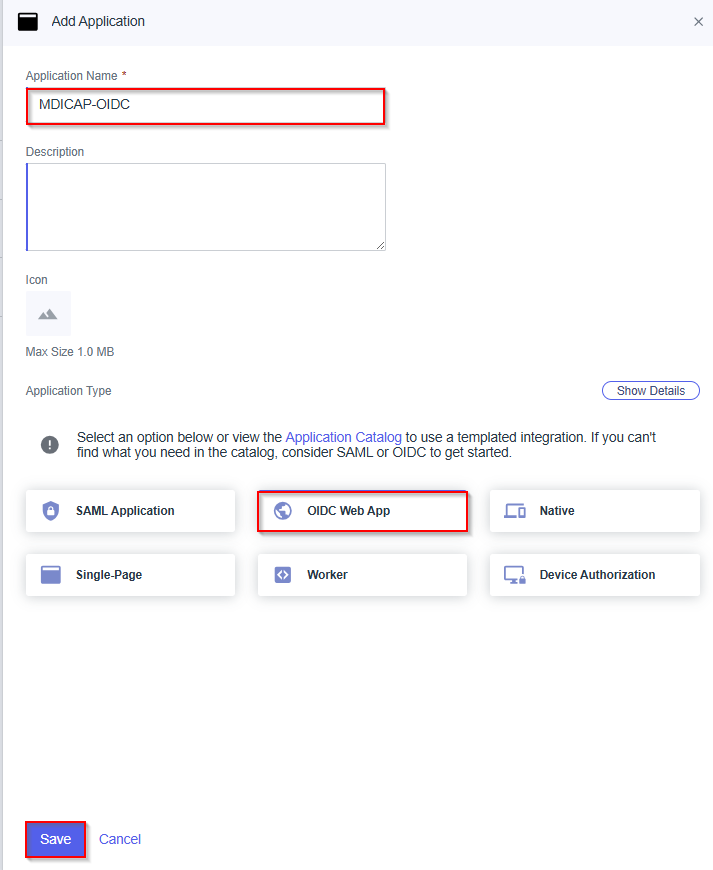
Enter the application name, MDICAP-OIDC as an example, choose
OIDC Web AppforApplication Type, and clickSave.
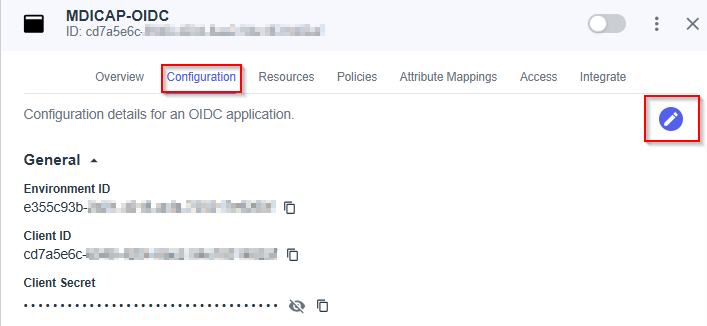
Select
Configurationtab, hit Edit button
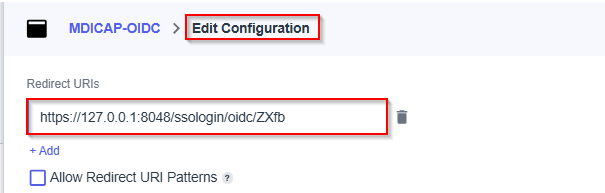
In
Edit Configurationpage, navigate toRedirect URIsand paste redirect_uri to the box below, then hitSave
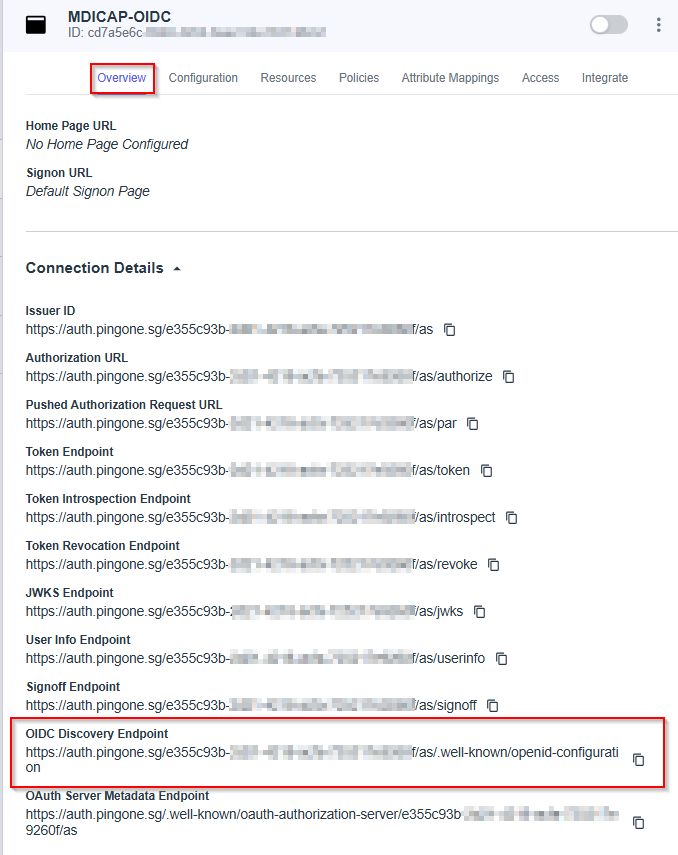
In
Overviewtab, navigate toOIDC Discovery Endpoint, copy the link below and store to metadata_url
Select
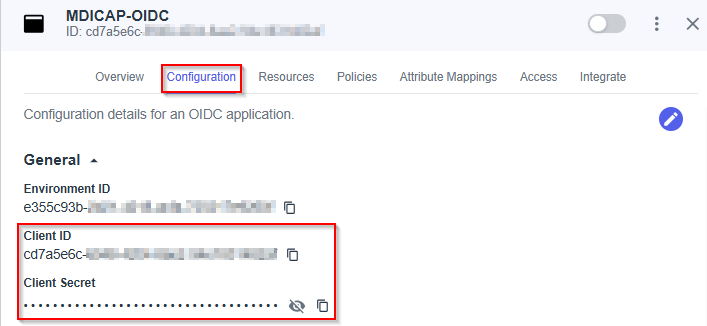
Configurationtab, expandGeneralsection, navigate toClient IDandClient Secret, copy and store them in client_id and client_secret.
__
Select
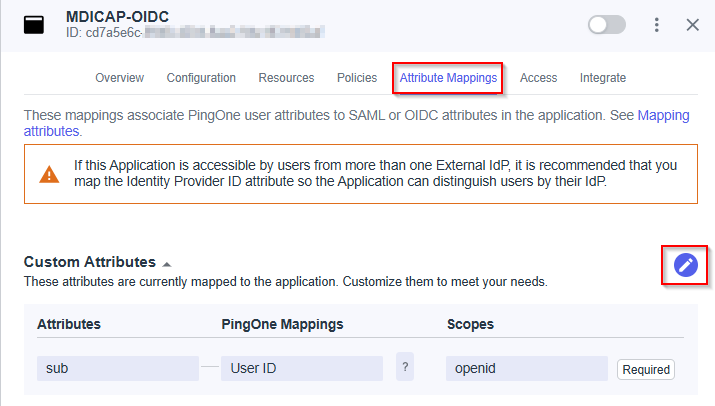
Attribute Mappingstab and hit Edit button
In
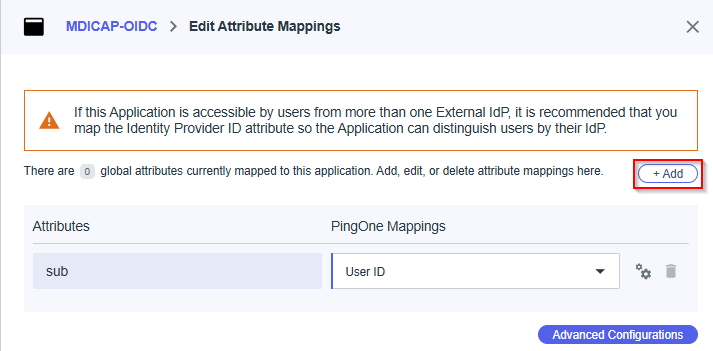
Edit Attribute Mappingspage, hitAddto add new mapping
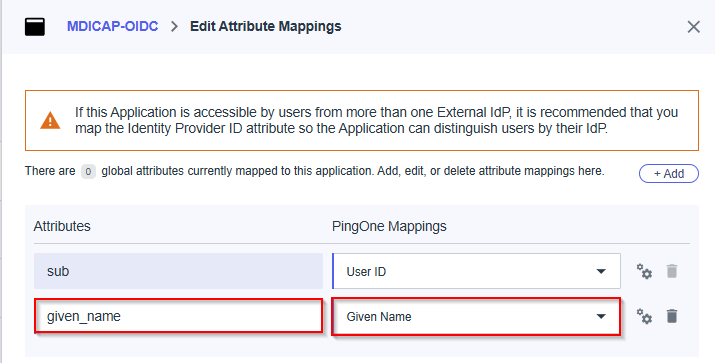
In this step, we make a mapping from the key name used by MD ICAP and the name exported by PingOne. For example, we set given_name mapped to Given Name exported by PingOne. Later on, given_name is used by MD ICAP to identify the login user
Fill attribute name, given_name in this example, select item Given Name in PingOne Mappings and hit Save to complete
Enable the new application on PingOne
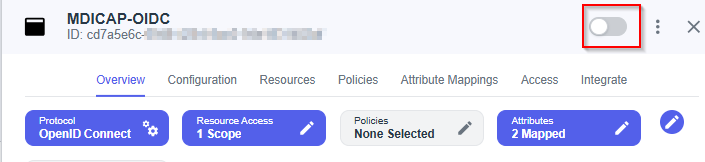
Complete configuration on MD ICAP
Switch back to MD ICAP, under
Identity Provider, hitFetch URL, paste metadata_url to the box under, and then hitOK, which requests MD ICAP to check and set PingOne as its IDP if succeed
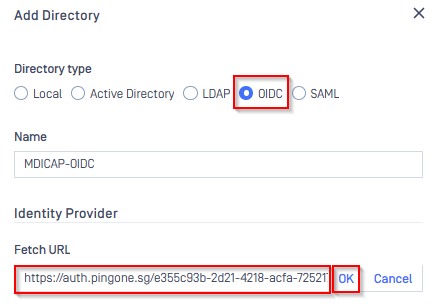
Under
Service Provider, paste client_id and client_secret to boxes underClient IDandClient secretrespectivelyFill ${given_name} in the box under
User identified bySelect
Default roleoption, choose the role to assign to login user underUser Roleand hitAddto complete setting on MD ICAP.
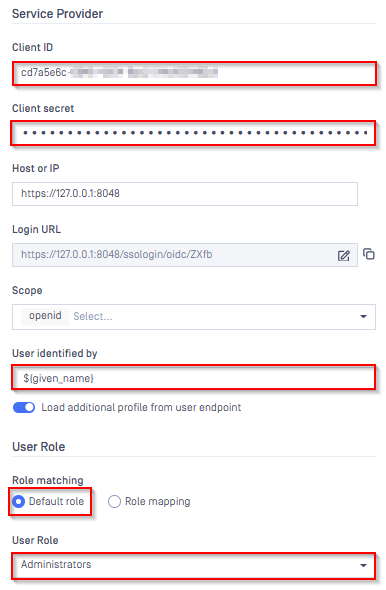
Note: When we successfully fetch, Scope default will be selected is OPENID
In
User Managementpage, toggle the new directory, MDICAP-OIDC in this example. A dialog box is shown to confirm the action.
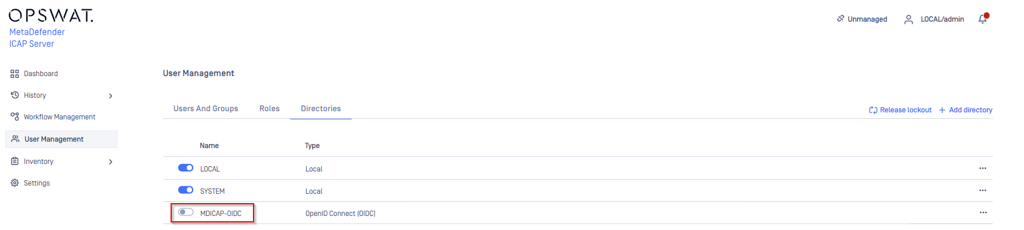
Test the integration
In Home screen on MD ICAP, the user is redirected to login page having “Sign-In with SSO” option
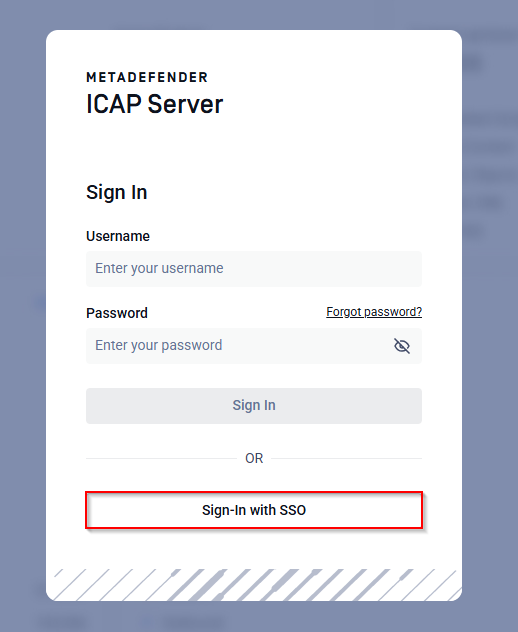
Select
Sign-In with SSOand Select Directory to LoginMDICAP-OIDCin this example
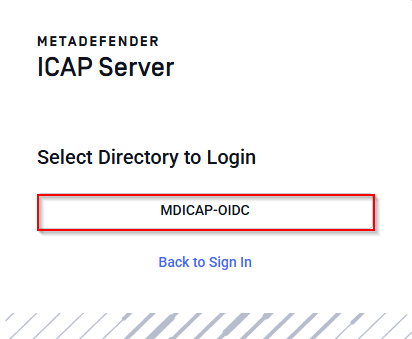
Result Sign on using IDP authentication
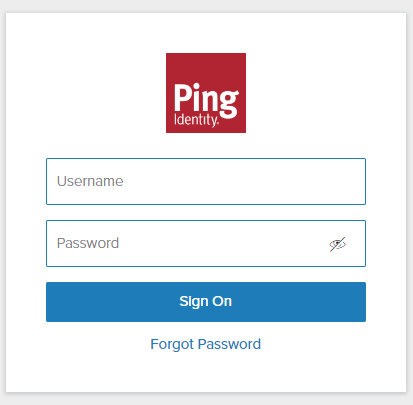
Login by the account registered to PingIdentity
If everything goes right, MD ICAP dashboard is shown with user identity set at the top right corner

Otherwise, access back login page at
<mdicap-host>#/public/loginand sign in using the local administrator account for troubleshooting purposes.
If Further Assistance is required, please proceed to log a support case or chatting with our support engineer.