The deployment options vary depending on what are the number of instances where MetaDefender ICAP Server will be installed.
Options:
Single Instance deployment of MetaDefender Core and MetaDefender ICAP Server
Multi-Instance with Autoscaling for MetaDefender Core and single instance of MetaDefender ICAP Server.
OPSWAT provides a terraform project to deploy MetaDefender ICAP Server and MetaDefender Core in different instances using Azure services.
Prerequisites and Requirements
Azure knowledge: This guide assumes familiarity with Azure Services
Azure account: needs permission to create Azure Services that appear in the diagrams in Architecture Examples in CSPs
Tools installation: Terraform
Single Instance Deployment
For a single deployment of MetaDefender Core in Azure you can use this example to test this deployment type, besides the MetaDefender VM instance, additional resources are being generated and set up.
Deploy using Terraform
OPSWAT provides a terraform project to create the infrastructure needed to deploy
Locally clone the metadefender-csp repository and go to Azure/single-vm-deployment
Modify terraform.tfvars with the desired options
LICENSE__KEY_CORE_ required if wanted to have the MetaDefender Core instance activated automatically
APIKEY_GENERATION=true to have the apikey generated by terraform
There is one general section and one section for each product that is supported using this Terraform project
Run terraform init and apply. Check the resource to be created, after that enter "y"
Deploy using Azure portal
For having MetaDefender Core in a Single Azure VM as showed in Single Azure VM Architecture it is needed to follow the next steps
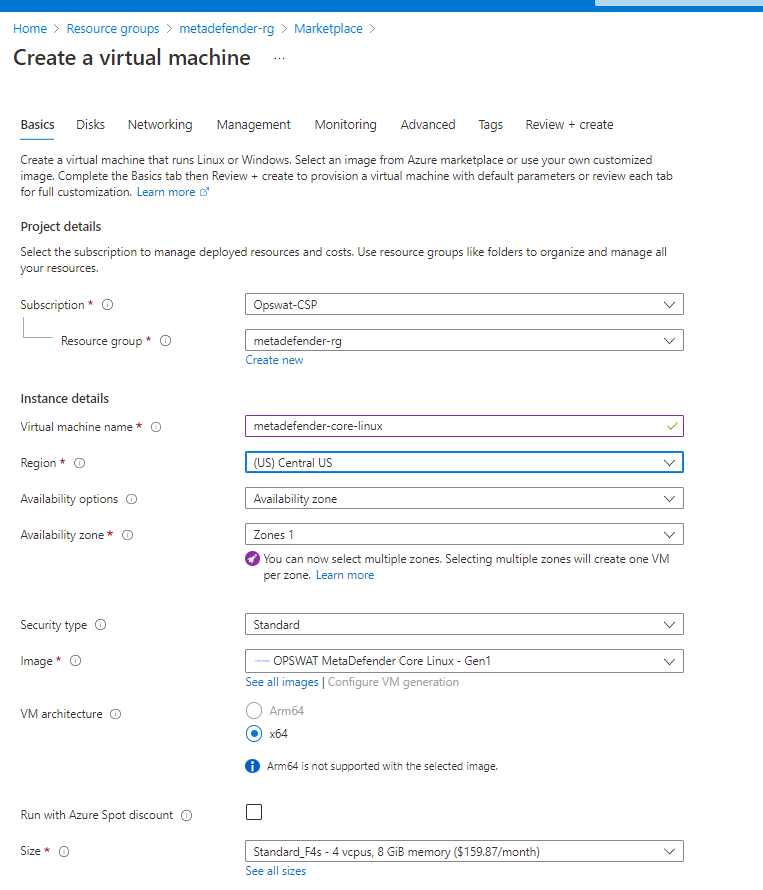
1. Create Resource Group
Go to you Azure account and create a new resource group (we will refer to it as "metadefender-rg")
2. Create Azure VM
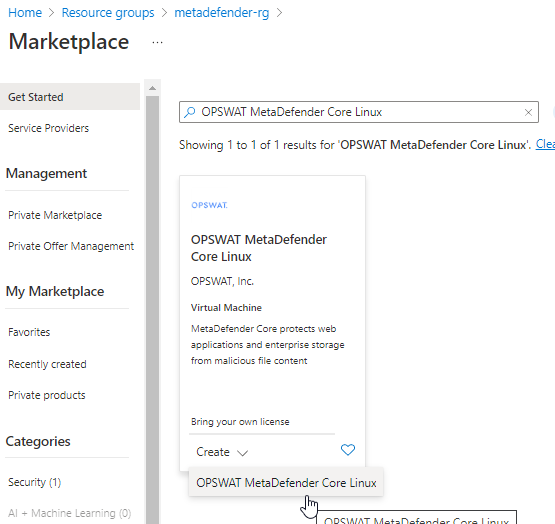
Inside the resource group click on create resource and search for "OPSWAT MetaDefender ICAP Server"
Input the vm name and select the size based on General System Requirements
Under Administrator Account section select the desired way to access to the VM. For this guideline we will generate a public key to access to it
3. Storage Configuration
Storage step can be skipped.
In general there's no need for additional storage by MetaDefender ICAP Server.
4. Network Configuration
Change public IP to None in case you do not want to access from internet.
Select the Virtual network and Subnet in case you already have them created, if not leave it to create them
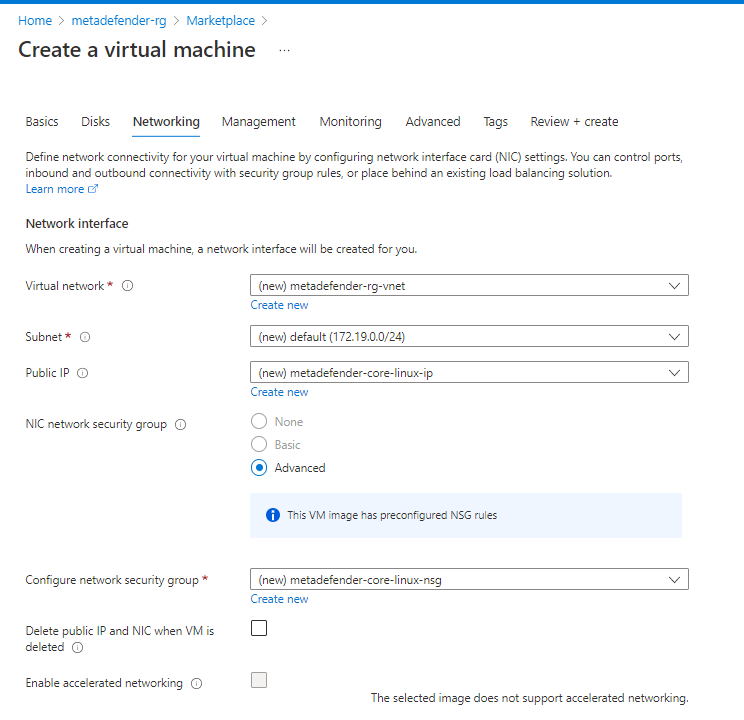
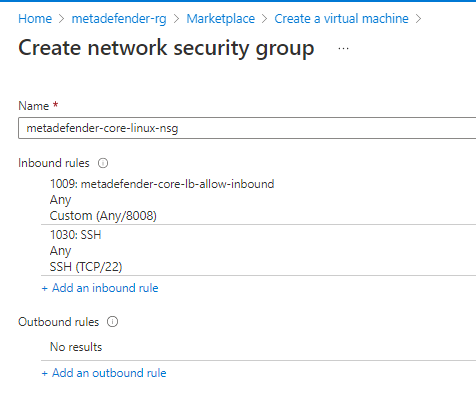
Create Security Group adding rules for 8008 and SSH
Under Load Balancing section as it is a single vm it is not really needed but it can be used to set up a health check using the /readyz endpoint
5. Review & Create the VM
Under Management, Monitoring, Advanced and Tags there are not any configuration different from the default ones that are needed to be selected. So customize it as it is needed for each use case.
After creating it will show you a window to download the private key to access to the VM in case that option was selected for accessing
Multiple VMs Deployment
Deploy using Terraform
OPSWAT provides a terraform project to create the infrastructure needed to deploy
Locally clone the metadefender-csp repository and go to Azure/single-vm-deployment
Modify terraform.tfvars with the desired options
LICENSE__KEY_CORE_ required if wanted to have the MetaDefender Core instance activated automatically
APIKEY_GENERATION=true to have the apikey generated by terraform
There is one general section and one section for each product that is supported using this Terraform project
Run terraform init and apply. Check the resource to be created, after that enter "y"