Before you begin
Before you begin the installation, ensure that your On-premise environment meets the System Requirements
Access to the hypervisor (vSphere/ESXi 7.0, 8.0, VirtualBox )
Network information: IP, subnet, gateway, DNS (for static IP)
NTP connectivity for time synchronization
SSH key (recommended) or temporary password for secure login
Security best practices:
Change all default passwords immediately after the first login
Prefer SSH key authentication; only enable password authentication temporarily if strictly needed, and disable it afterwards
Restrict SSH access to admin networks via ACLs/firewalls
OVA deployment
Download the My OPSWAT Central Management On-Prem Virtual Appliance [OVA] from My OPSWAT.
Import/Deploy the OVA into virtualization systems.
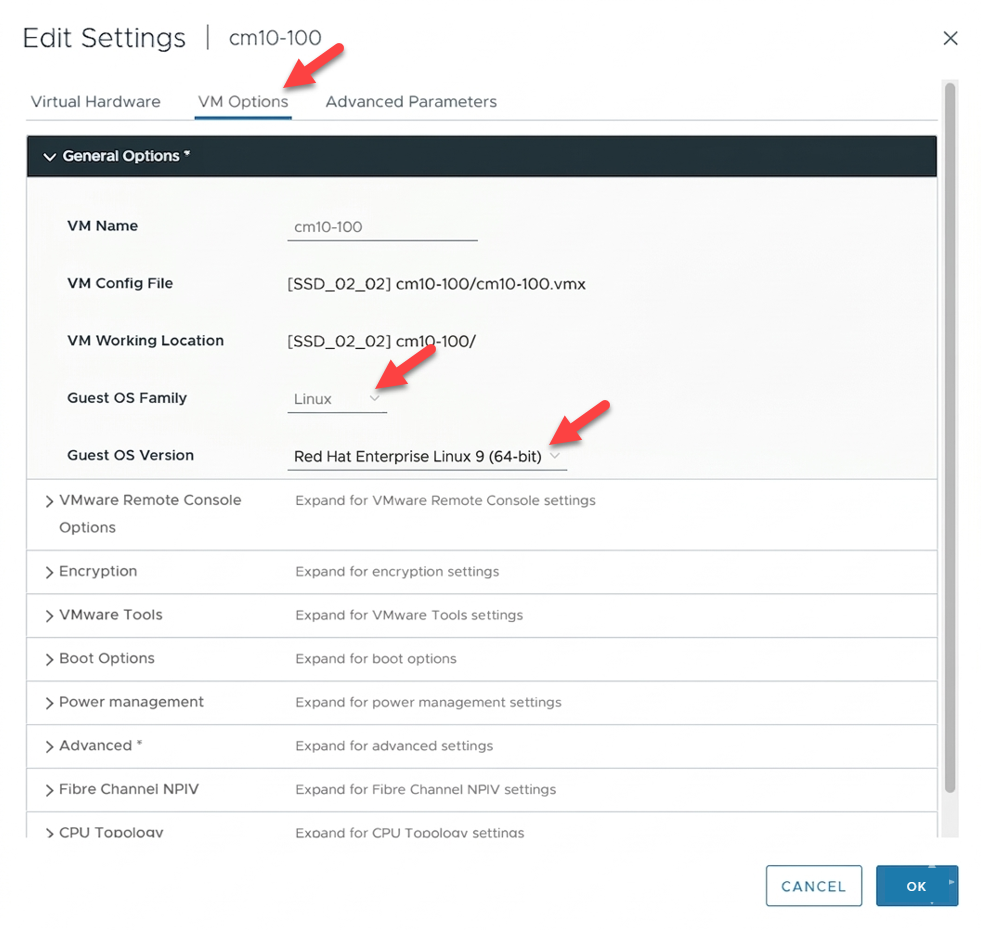
VMware ESXi/vSphere: Select “Deploy OVF Template”, point to the OVA file, follow the wizard, and choose the appropriate datastore, network, storage, and the guest operating system is Red Hat Enterprise Linux 9 (64-bit) or a more recent version.
Assign VM resources: CPU, RAM, and disk size according to the recommendations.
Connect the VM NIC to the appropriate management network; ensure Internet egress (if required) and access to necessary internal services.
Enable hypervisor time synchronization (if available) to assist with initial time sync.
First boot and login
Power on the VM and open the console from the hypervisor, wait for 4-5 minutes as the system initializes.
Log in using the default account provided with the OVA (ocm/ocm123).
Give the VM a static IP address. This form will default to the IP address assigned by DHCP, but you can set it to whatever makes sense for your environment.
Immediately after logging in, change the administrator password and configure SSH key‑based access to harden security.
Initial setup (initialization)
Run the following steps in order. Commands require sudo privileges.
During init-filesystem.sh, the system may ask to confirm SELinux relabel. Answer “yes” to ensure correct security labels before application services start.
Starting services (start targets)
After the VM reboots and you log in again:
Post‑installation checks
Services: Confirm
systemctl status mocm-all.targetfor main targets/services showsactive.Network: Ping gateway/DNS, test name resolution, and verify connectivity to required internal/external endpoints.
Time:
chronyc trackingortimedatectlshould show stable NTP sync.Disk: Use
df -hto confirm expected capacity and mount points.
Access the User Interface
Once all services are up and running, you can access the Setup wizard via your web browser:
URL:
<server_ip>:9000/loading
(Replace <server_ip> with the actual IP address of your mocm server.)