You need a security dongle inserted in the server which configuration you want to change, RED or BLUE.
NetWall Diode default IP
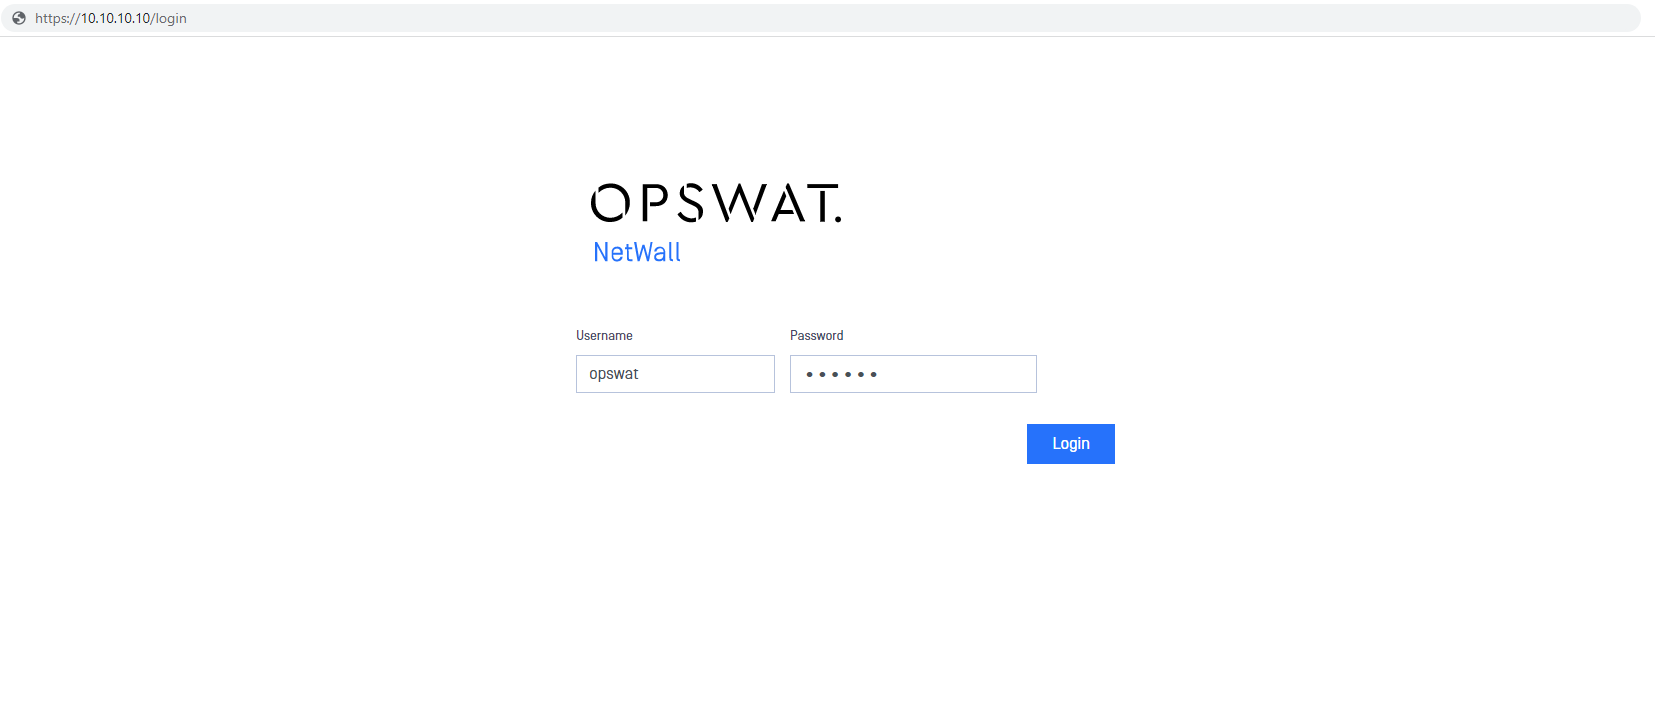
Netwall Diode comes with a default IP of 10.10.10.10 to access the management UI. This is applicable for both sides BLUE and RED, so notice that you have to configure both sides.
Configure a laptop/desktop with a 10.10.10.X network address. Open a web browser and type https://10.10.10.10 to access the web UI. Once in the login page, insert valid user/password.
Default credentials are opswat/a1aaaa. Please, change it as soon as possible
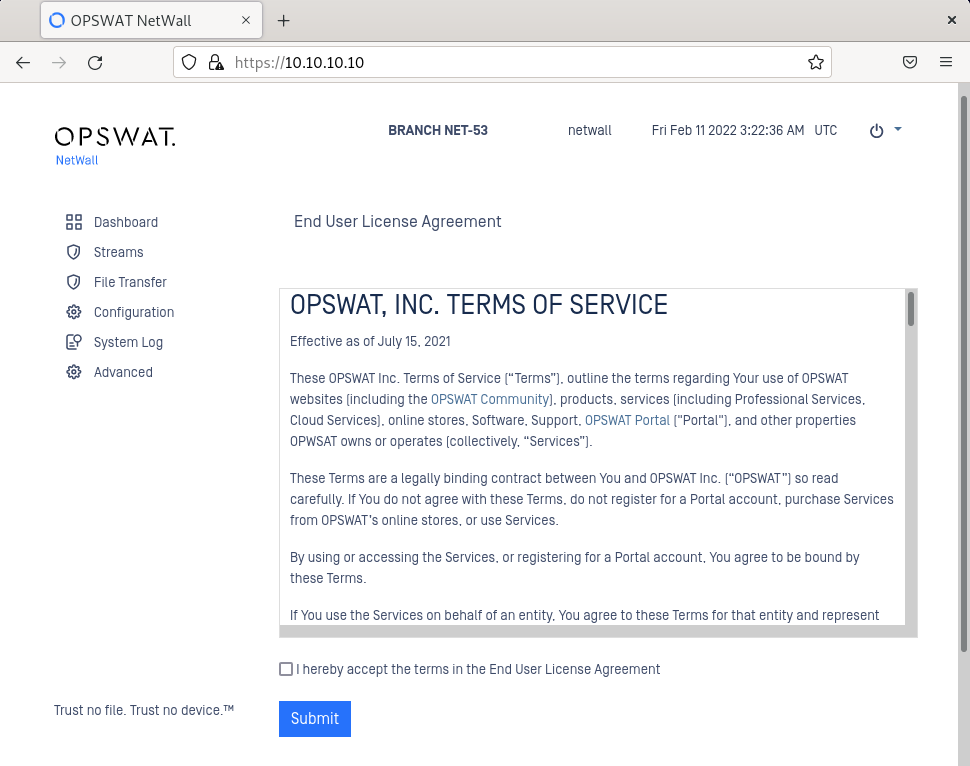
After login, user would need to accept the EULA.
IP Addresses
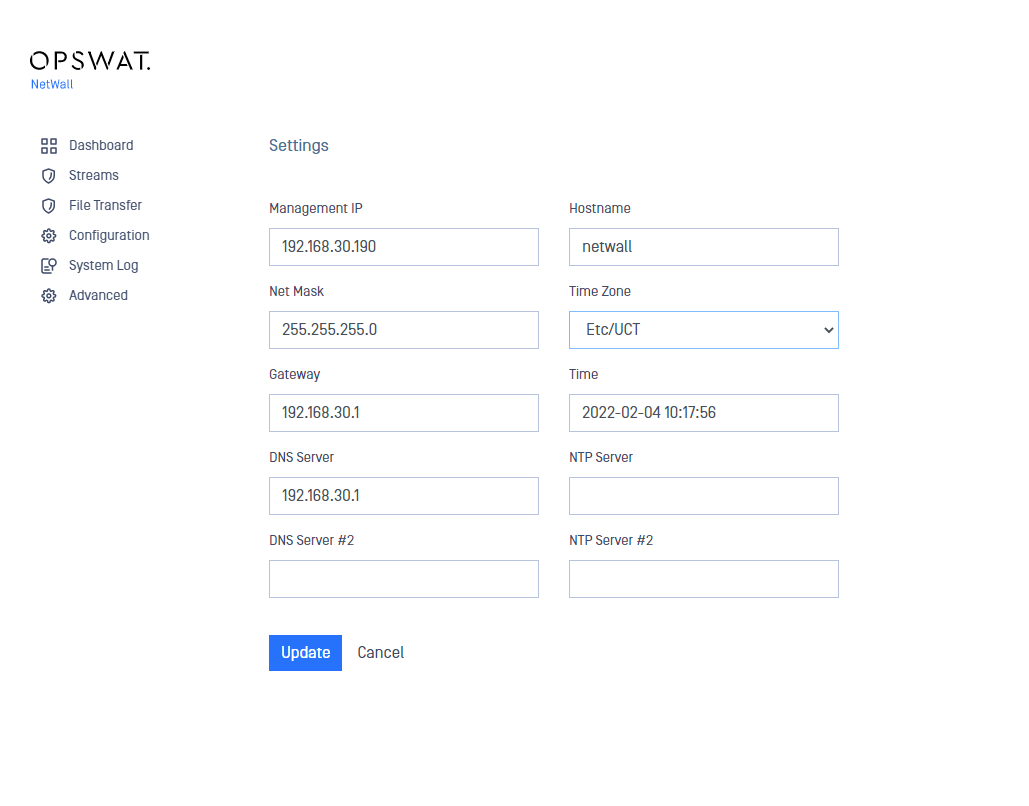
After accepting the EULA, user will be redirected automatically to Settings page, where he/she will be prompted to insert the management IP and other connection details.
Fill in Management IP (for instance 192.168.30.244).
Fill in Net Mask (for instance 255.255.255.0)
Fill in Gateway (for instance 192.168.30.1)
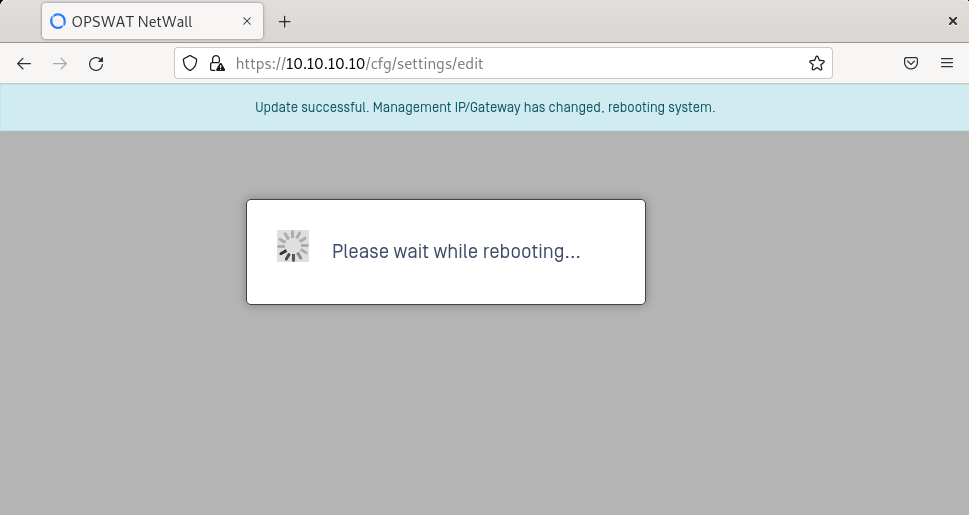
Click Update to save the changes.

When changing Management IP, the system will reboot. Simply wait until the device reboots.
NetWall Diode CLI
Alternatively, you can set up the Management IP and L3 Routes using NetWall Diode CLI connecting a monitor and a keyboard to each server, BLUE and RED.
Remember you can check available commands typing ?
Login with valid credentials and set up L3 route and management IP. After that, you can access to the management UI using the configured management IP and configure DNS and NTP servers.
Set up routes
eagle> config
eagle (config)> routes
eagle (config.routes)> add
eagle (config.routes.add)> gateway 192.168.X.X
eagle (config.routes.add)> target_range 0.0.0.0/0
eagle (config.routes.add)> save
Set up management IP and port
eagle> management
eagle (mgmt)> ipaddress 192.168.X.X/24 port X.
It will ask you to reboot, type 'y' and press 'enter'.
Set up DNS and NTP Servers
Once you have configured the management IP you can access the web UI to configure DNS and NTP servers.
DNS servers
Go to Configuration-> Settings
Click on Edit button
Type the IP address of the DNS server
Type the IP address of the DNS server 2 for an alternative DNS server
Click on Update button to save the changes
NTP servers
Go to Configuration-> Settings
Click on Edit button
Type the IP address of the NTP server. Network Time Protocol (NTP) lets the clocks synchronize between computer systems through packet-switched, variable-latency data networks
Type the IP address of the NTP server 2 for an alternative NTP server
Click on Update button to save the changes
Time manual configuration
There can be situations when configuring an NTP server is not possible (BLUE side with no Internet access, for instance). In this situations, admins can configure the Time manually:
Go to Configuration-> Settings
Click on Edit button
Select the time zone in the dropdown list
Click on Time field and select day and time in the deployed calendar, then Apply.
Click on Update button to save the changes