The FTP Server Connector allows the user to configure a built-in FTP Server on both the BLUE and RED sides. It provides users with the flexibility to determine how FTP transfers work, transferring files from the BLUE side (using a flanker or the built-in FTP server) to the RED side (using a flanker or the built in FTP server).
For this feature the user will need to configure a FTP File Transfer Connector on both BLUE and RED sides, .
The FTP Server Connector supports FTP, FTPS and FTPES.
A total of 20 simultaneous FTP sessions can be configured, one for each Virtual User created on the FTP Server.
Optical Diode BLUE
FTP Server Configuration
A security dongle must be inserted in the BLUE and RED servers to change configuration.
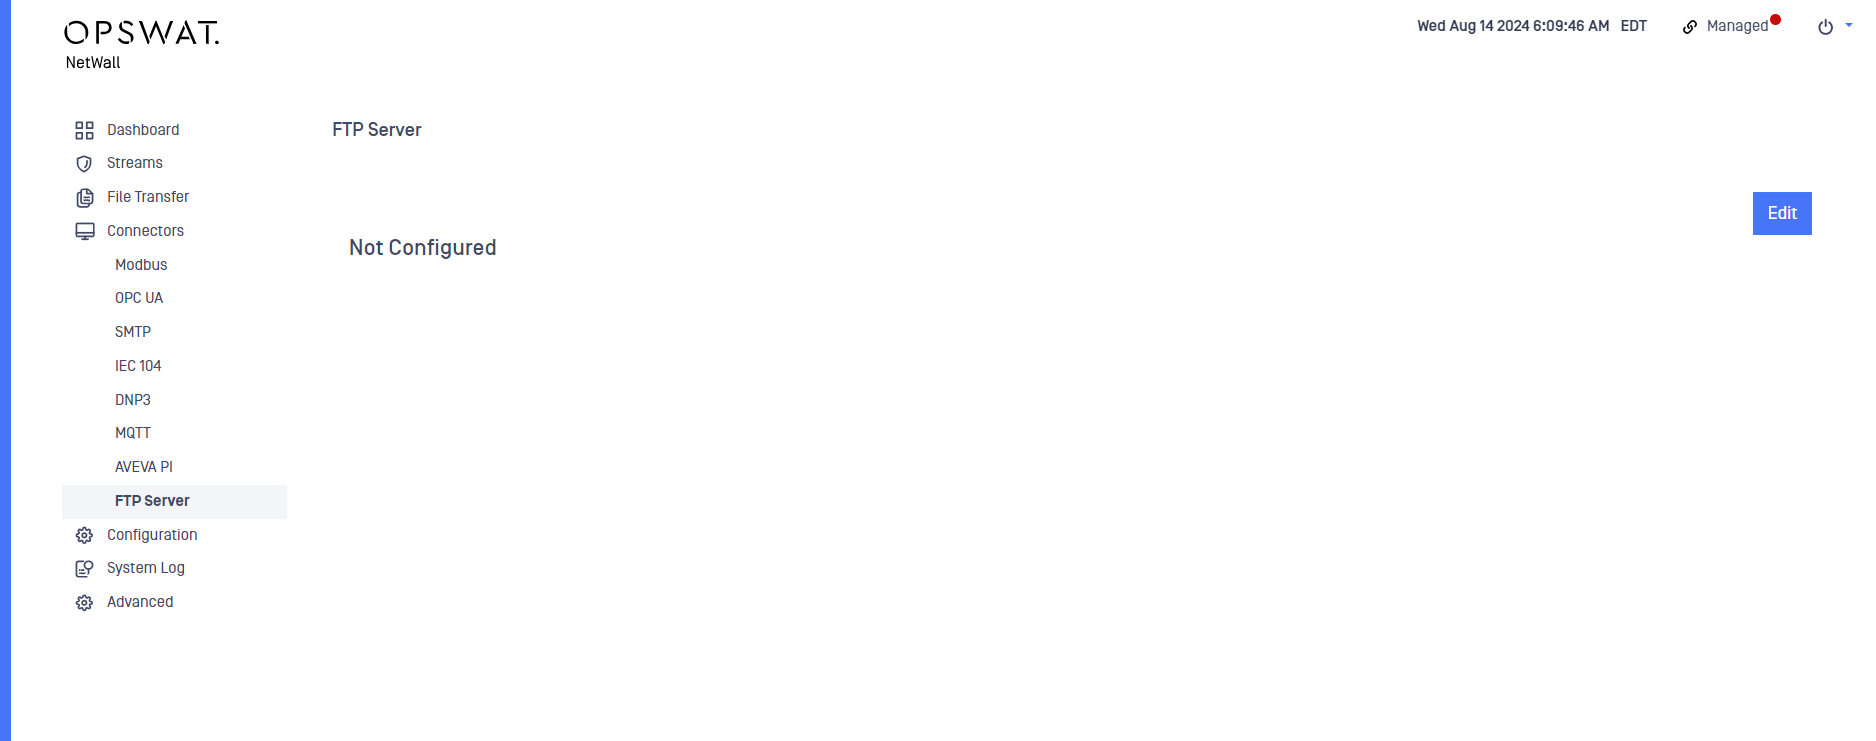
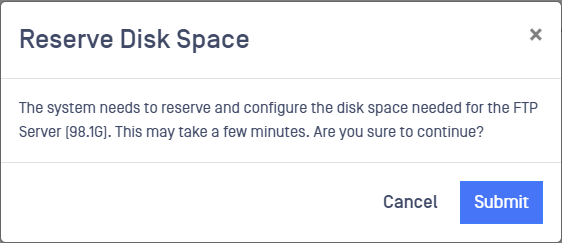
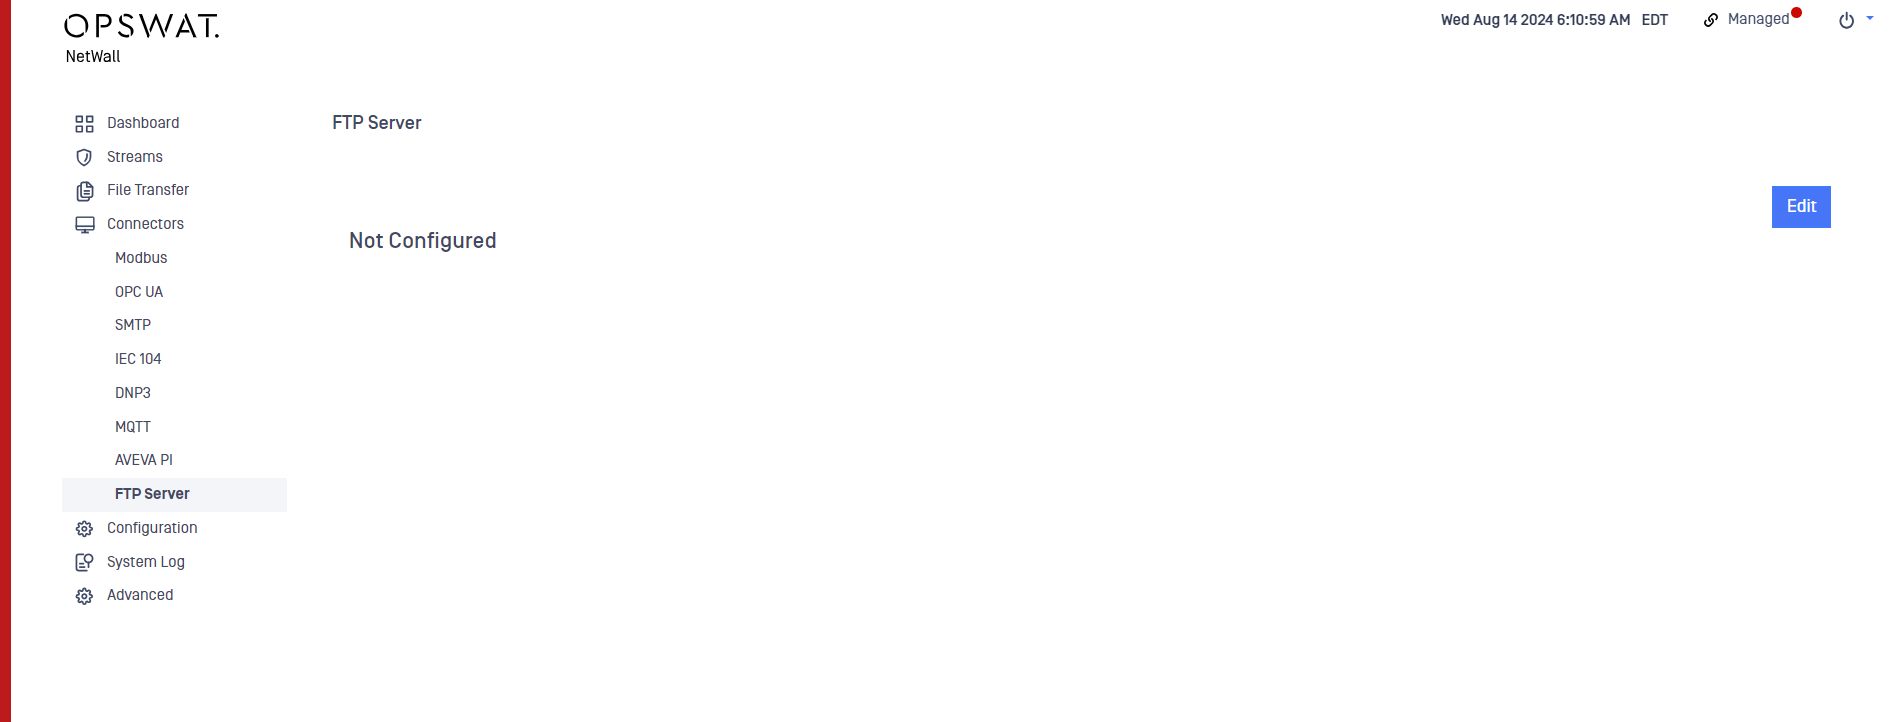
Login into the MetaDefender Optical Diode (hereinafter Optical Diode) BLUE. If the FTP Server has not been previously configured the user will see an Edit button to include a new FTP Server. This requires the user to reserve disk space to allow it to act as a FTP Server. Once the Edit button is selected, the user will be prompted by the message bellow.


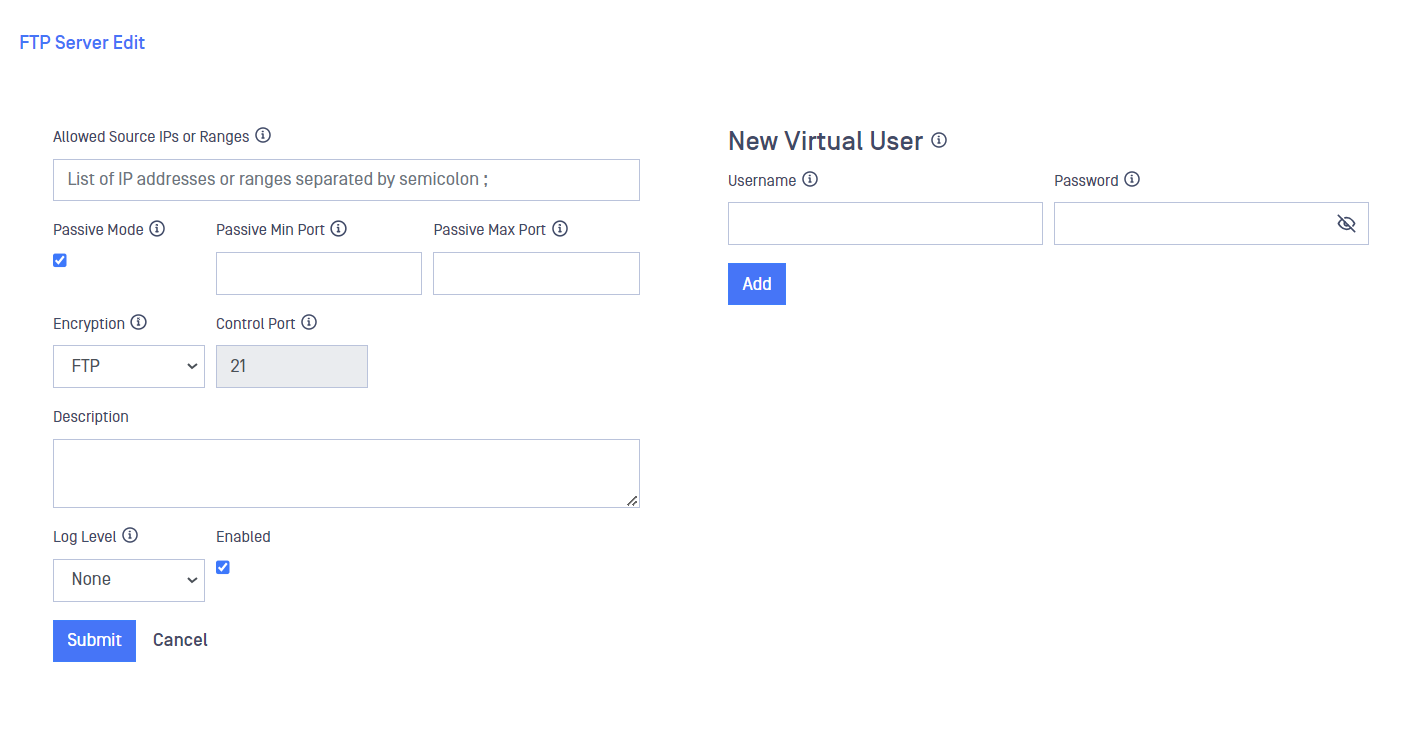
Once the needed space has been reserved the user should indicate the following information.
Type or select values in the following boxes:
Allowed Source IPs or Ranges: List of IP addresses allowed to connect to the FTP Server. User can enter several addresses or ranges separated by semicolon. Empty field means ANY IP will be allowed to connect.
Passive Min Port: Minimum port number that the FTP Server will use in passive mode. Range from 1024 to 65535.
Passive Max Port: Maximum port number that the FTP Server will use in passive mode. It must be higher than Passive Min Port field. The number of total ports should be higher than the number of concurrent FTP clients allowed. Range from 1024 to 65535.
Encryption: Select the preferred Encryption schema used by the FTP Server. Options are FTP (no encryption), FTPES (explicit) and FTPS (implicit).
Control Port: Port used by the server to listen to the FTP clients.
Log Level: Select the Log Level using the drop down list. Options are None, Basic and High.
Description: Free text field to include a description.
New Virtual User; Username: Configure a user that the FTP Clients connecting to the Server needs to use for authentication. Several virtual users can be created.
New Virtual User; Password: Configure a password that the FTP Clients connecting to the Server needs to use for authentication. Several virtual users can be created.
File Transfer, FTP Configuration
As mentioned before, to provide the system with more flexibility the user needs to configure a FTP File Transfer in both sides.
For more information about configuring File Transfer, please refer to File Transfer
To configure the FTP File Transfer, follow the instructions below for these specific fields:
Go to File Transfers-> FTP and click on Add FTP Share.
Server: Indicate the IP of the FTP Server in BLUE side (most times that would be the same as management IP).
Share Path: the share path for the built in FTP Server is /files.
User: Indicate the user configured in the FTP Server as Virtual User.
Password: Indicate the password configured in the FTP Server for the Virtual User.
Encryption: User needs to indicate the same encryption as the one configured in the FTP Server.
Optical Diode RED
FTP Server Configuration
A security dongle must be inserted in the BLUE and RED servers to change configuration.
If the FTP Server hasn't been previously configured the user will see a Edit button to include a new FTP Server. This feature requires to reserve disk space to allow it to act as a FTP Server so, once the Edit button is pushed user would be notify of this circumstance via the message bellow.


Once the needed space has been reserved the user should indicate the following information.
Type or select values in the following boxes:
Allowed Source IPs or Ranges: List of IP addresses allowed to connect to the FTP Server. User can enter several addresses or ranges separated by semicolon. Empty field means ANY IP will be allowed to connect.
Passive Min Port: Minimum port number that the FTP Server will use in passive mode. Range from 1024 to 65535.
Passive Max Port: Maximum port number that the FTP Server will use in passive mode. It must be higher than Passive Min Port field. The number of total ports should be higher than the number of concurrent FTP clients allowed. Range from 1024 to 65535.
Encryption: Select the preferred Encryption schema used by the FTP Server. Options are FTP, FTPES (explicit) and FTPS (implicit).
Control Port: Port used by the server to listen to the clients.
Log Level: Select the Log Level using the drop down list. Options are None, Basic and High.
Description: Free text field to include a description.
New Virtual User; Username: Configure a user that the FTP Clients connecting to the Server need to use for authentication.
New Virtual User; Password: Configure a password that the FTP Clients connecting to the Server need to use for authentication.
Click on Submit button.
File Transfer, FTP Configuration
As mentioned before, to provide the system with more flexibility user needs to configure a FTP File Transfer in both sides.
To properly configure the FTP File Transfer, follow the instructions below for these specific fields:
Go to File Transfers-> FTP and click on Add FTP Share.
Server: Indicate the IP of the FTP Server in RED side (most times that would be the same as management IP).
Share Path: the share path for the built in FTP Server is /files.
User: Indicate the user configured in the FTP Server RED as Virtual User.
Password: Indicate the password configured in the FTP Server RED for the Virtual User.
Encryption: User needs to indicate the same encryption as the one configured in the FTP Server.