User type: Both Personal and Organization users
In this article:
The Support Page is where users can efficiently find solutions to their issues. Whether through interacting with the AI chatbot, submitting a case, or tracking case statuses this feature of My OPSWAT is designed to streamline your support experience.
This guide walks you step by step through every feature so you can resolve issues and keep your operations running smoothly.
To access this page, click Support item on the left menu
Notes Information displayed on the Support Page may vary slightly depending on each user's organizational level and support tier
1. Your Organization Information
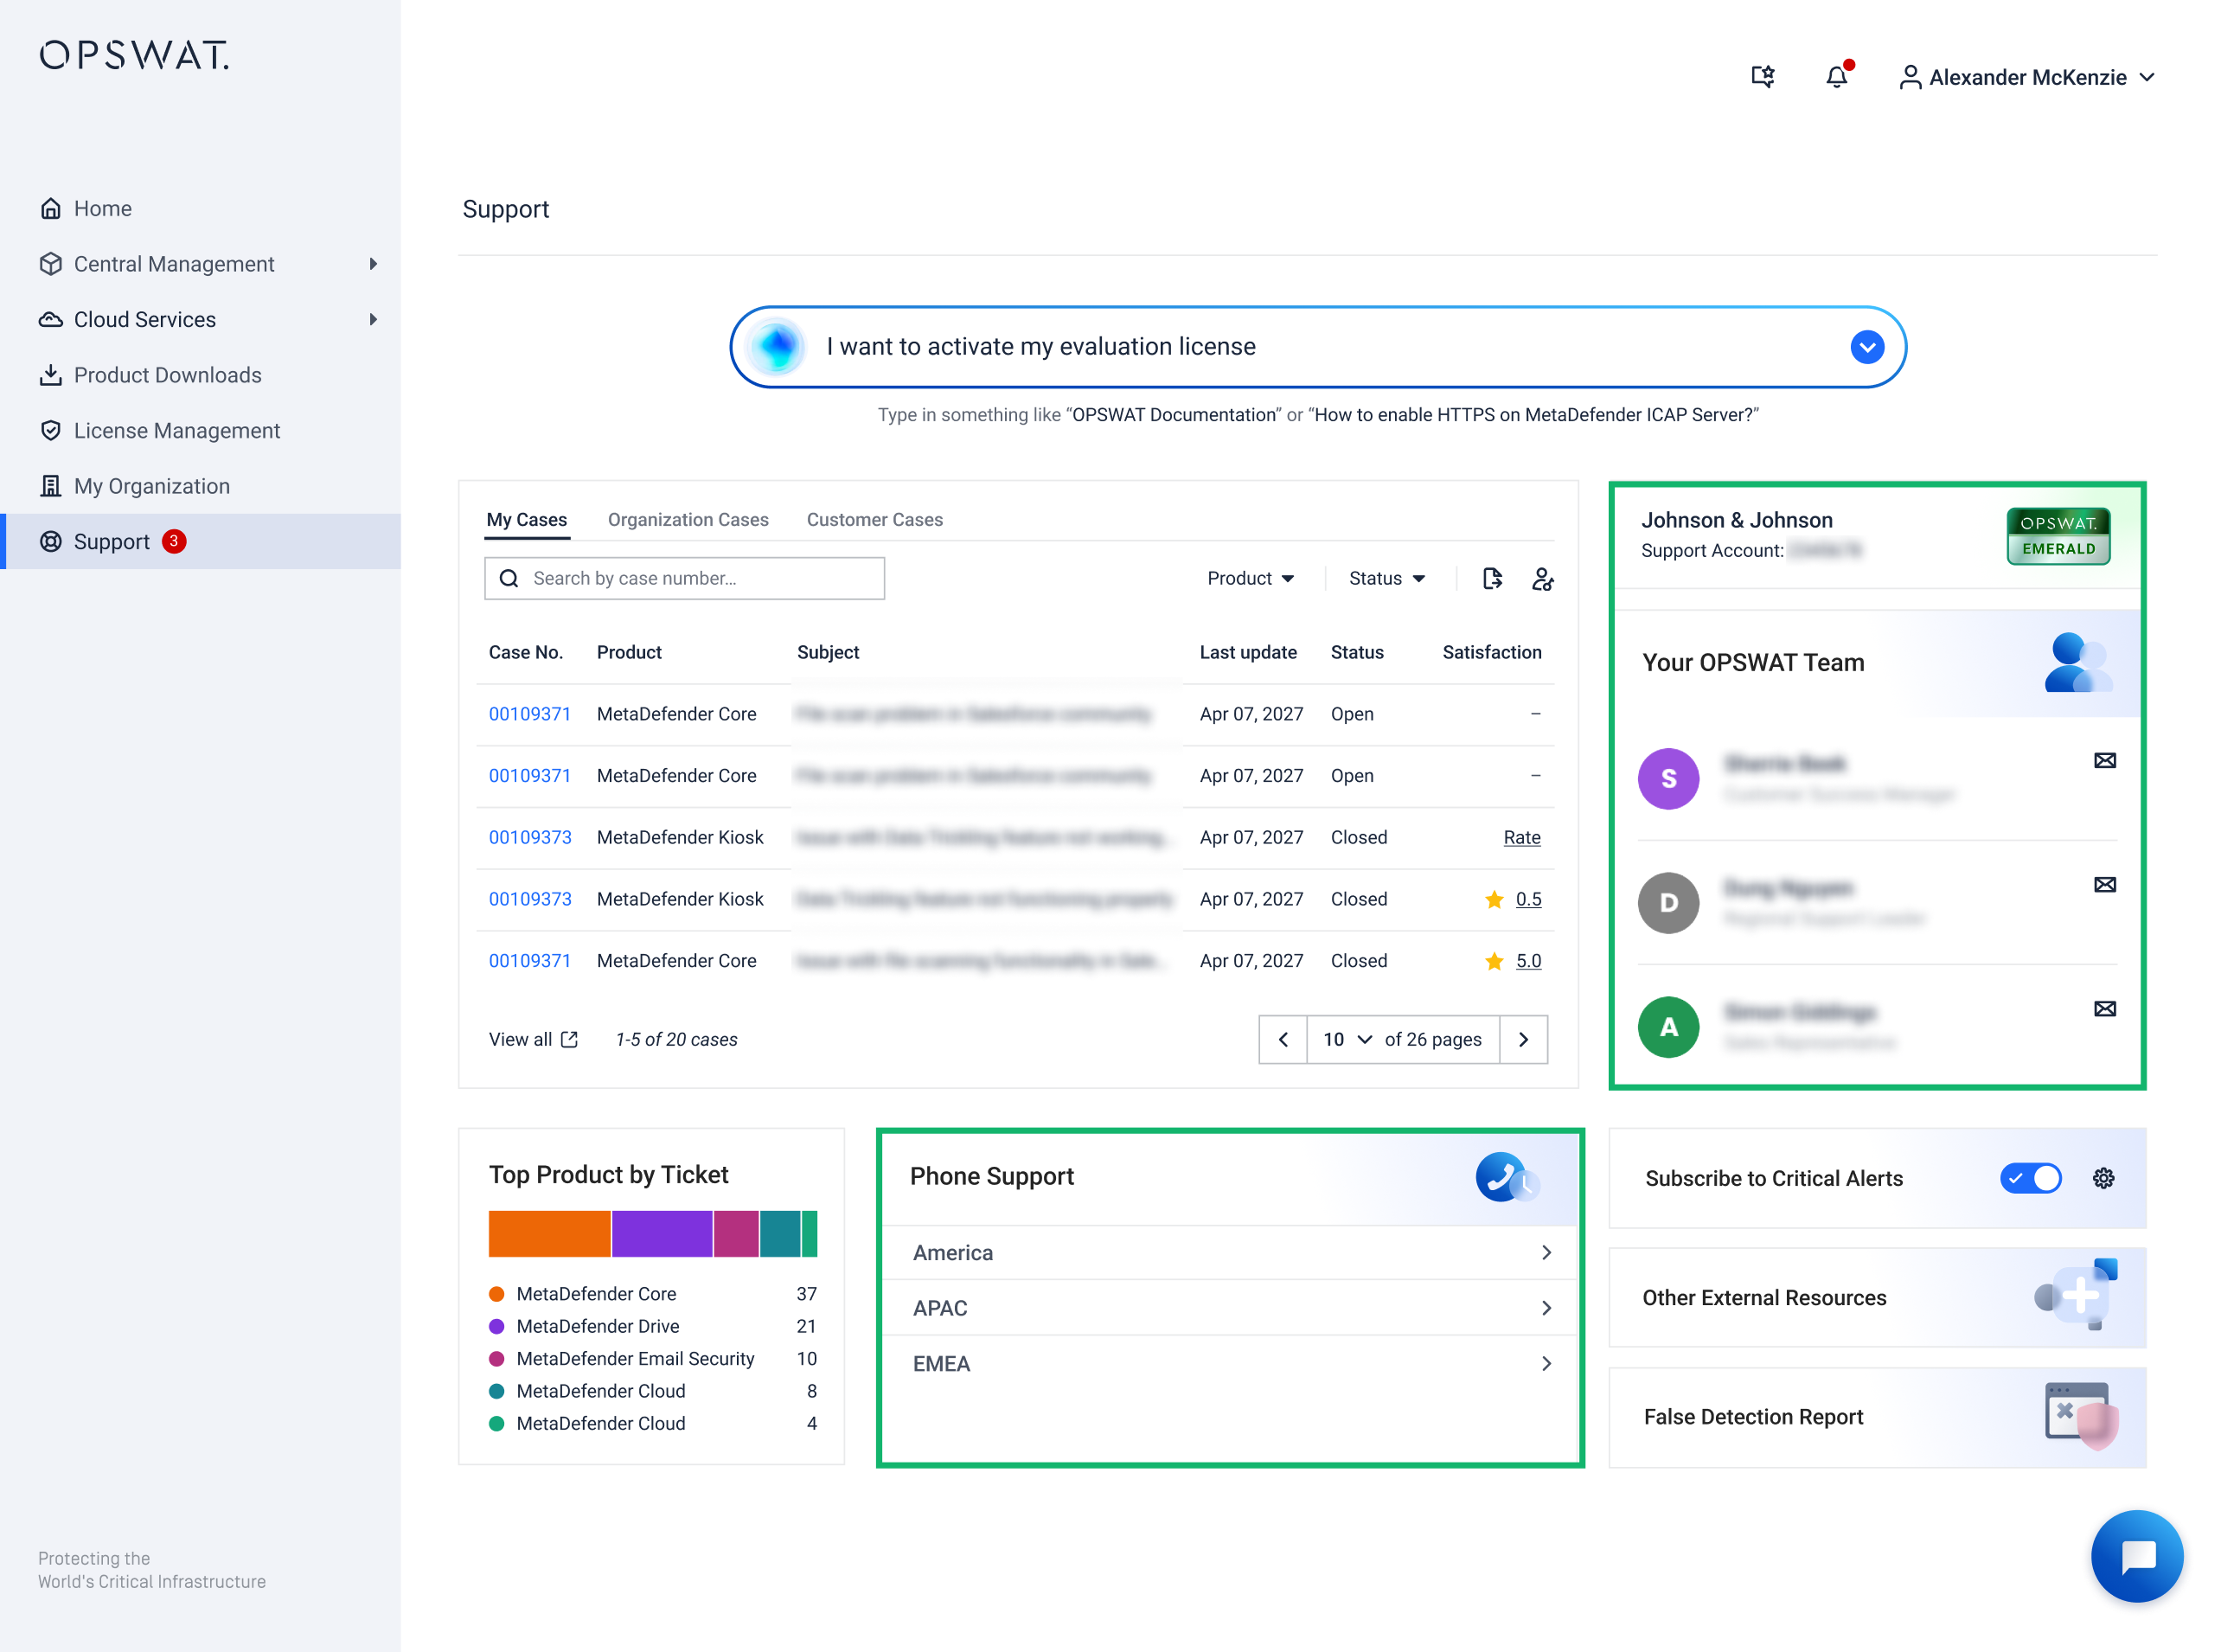
If you're belong to an organization with support level, this section displays key information about your organization:
Support Level Badge: Your organization's current support level (e.g., Silver, Gold). Details of different support levels please see here
Support account number: Unique account number of your organization.
Your OPSWAT Team: Key contacts from OPSWAT whom you can reach out for support.
Phone Support: A list of regional support phone numbers based on your organization's support level.
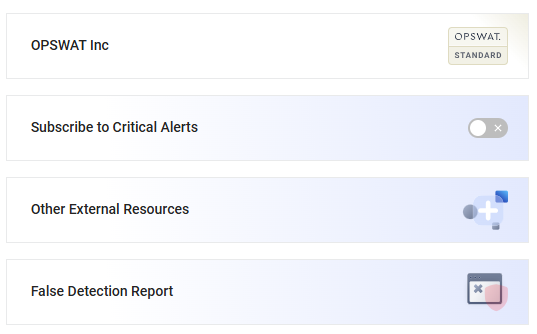
If you belong to an organization without a support level, this section will display as shown below.
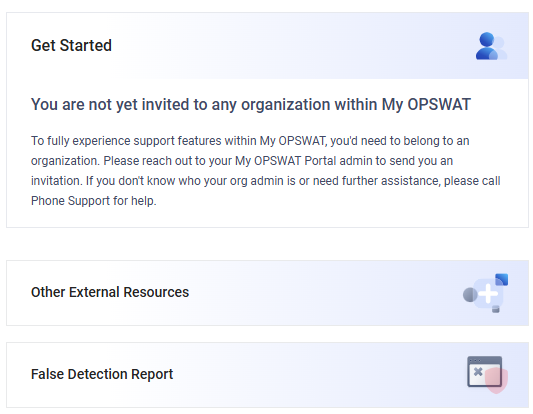
If you're not belong to any organization, this section will display as shown below.
2. Chat with AI-Powered Support Assistant
All users of My OPSWAT portal can go to Support page and get assisted with real-time, context-aware support by our AI-powered chatbot. Start a conversation with the chatbot by asking your first question into the search box.
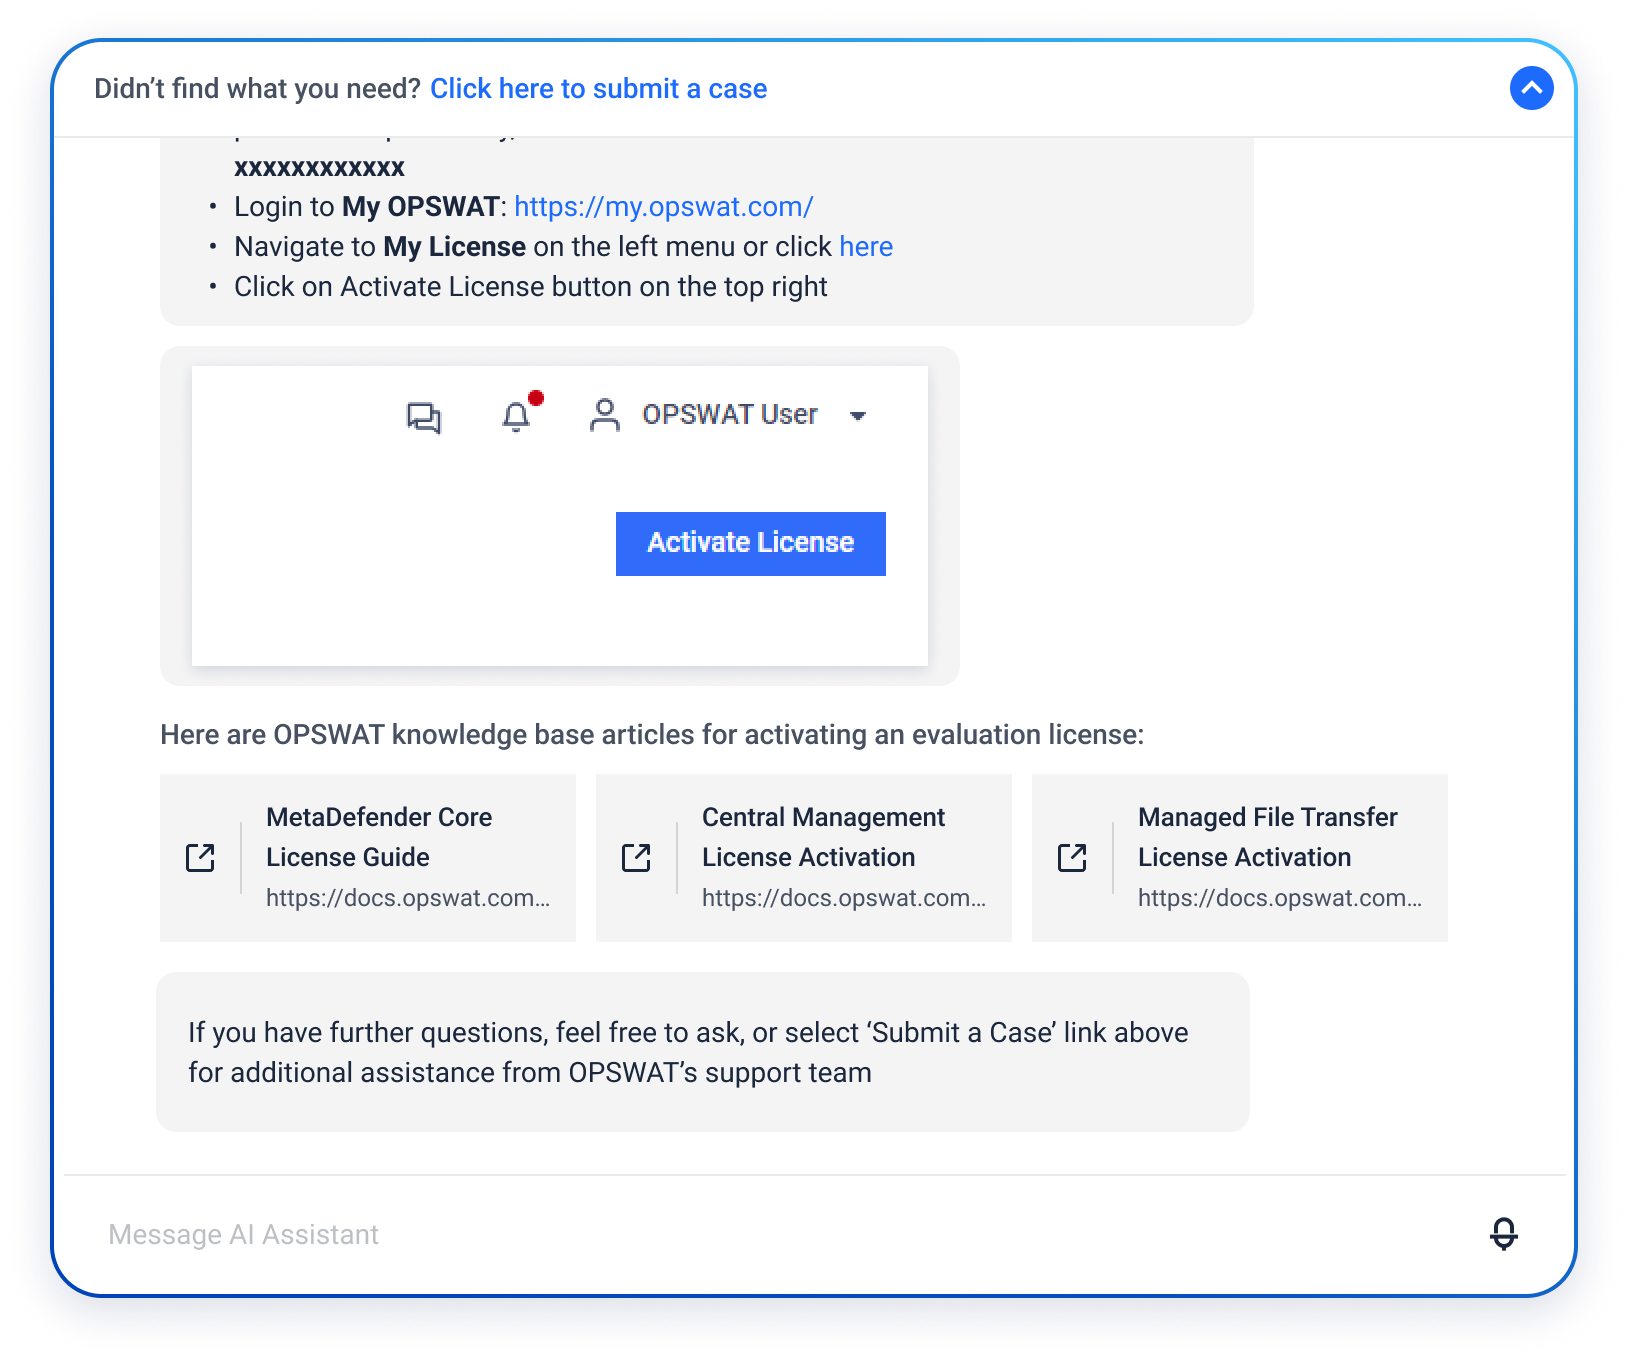
The AI assistant will provide answers and open a dialog where users can continue the conversation to find the information they need
Solutions to common issues.
Links to relevant resources, such as documentation or FAQs.
The option to escalate and Submit a case
Users can collapse the Chatbot dialog, a summary of the latest message from the conversation displayed in the search space.
3. Initial Response ETA
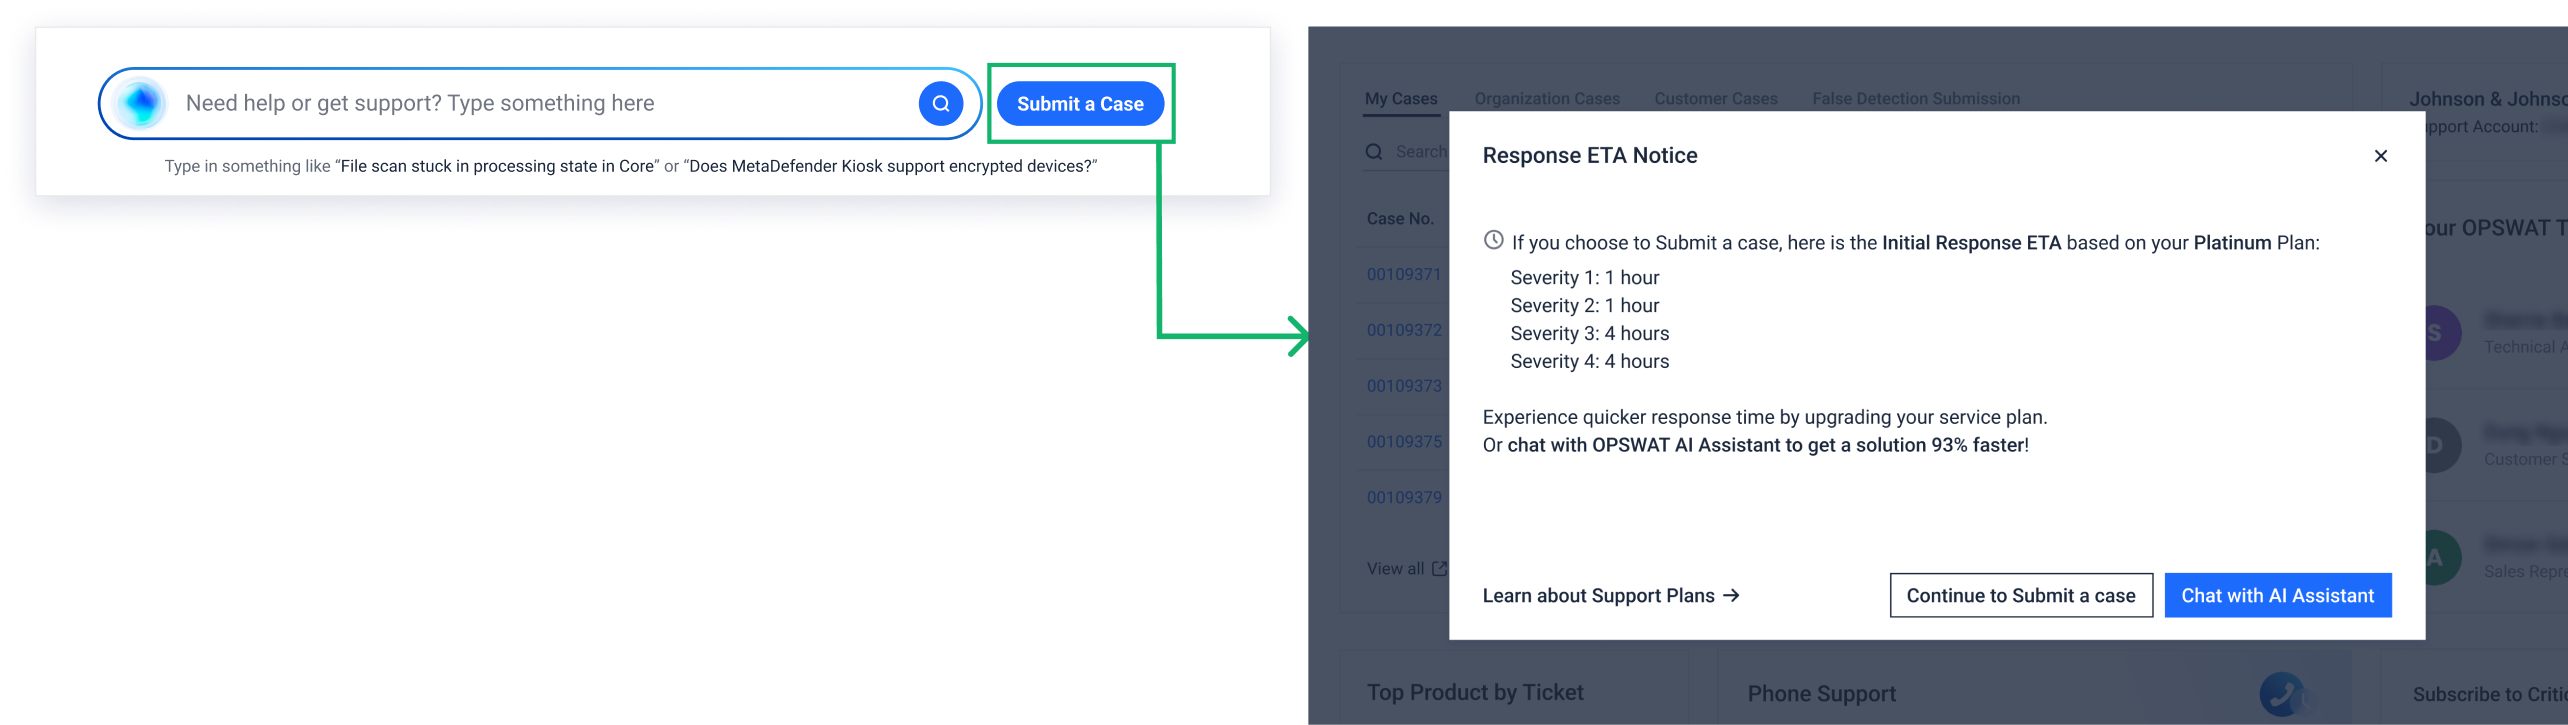
If you’re on a Silver support plans or higher OR your organization has OPSWAT licenses, you will see Submit a Case button next to AI search box.
When clicking "Submit a Case" button, you’ll see Initial Response ETA based on your support plan, allowing you to set clear expectations and manage issues effectively.
Chat or Case: Choose to continue the AI chat or click Submit a Case to open a ticket.
4. Submit a Case
Press Submit A Case button in the chatbot dialog, you can quickly create a case.
Step 1: Log on behalf of an Organization For Preferred Partners only
Note: This is a Conditional Field and is not displayed for all users.
If your organization has Preferred Partner relationship with at least one customer AND you have Full access on Support Service - Customer Organizations role object, you can choose the customer for which you are submitting the case in the dropdown list.
Info For more details on custom roles and permissions, please refer to this document

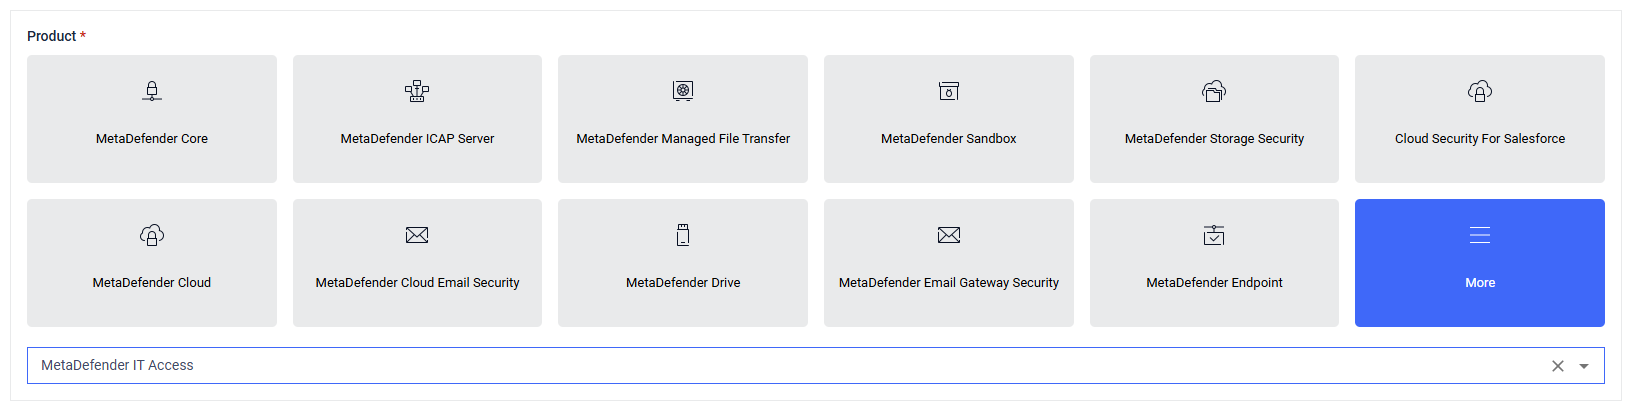
Step 2: Product
The product list is displayed with icons for easy identification.
More: Clicking the “More” option will load additional products beyond the initial view.
Step 3: Platform
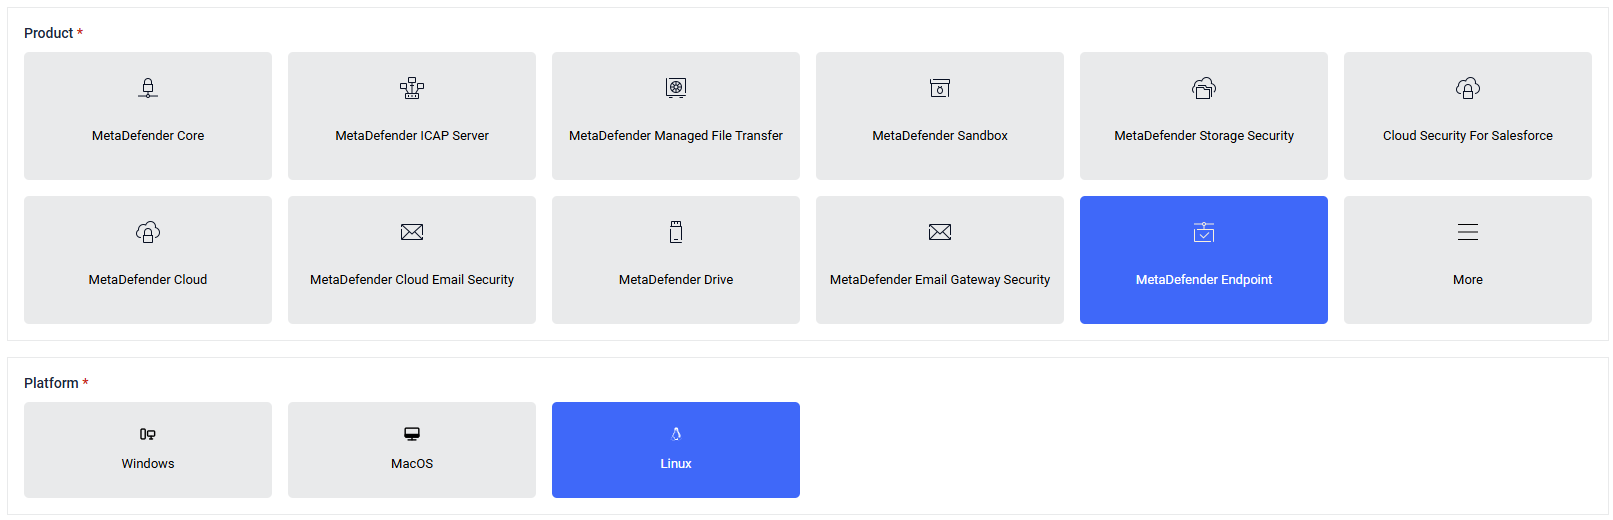
Note: This is a Conditional Field
A field for platform choosing will appear based on the product selected in the previous step. If applicable, it will display all supported platforms for the chosen product.
Step 4: Issue Type
Select from predefined issue categories such as configuration, installation, or unexpected behavior, ensuring clear and consistent reporting.

Step 5: Severity
Indicate how critical the issue is
Severity 1: Production server or other critical system is down with no immediate workaround.
Severity 2: Major functionality is severely impaired.
Severity 3: Partial, non-critical loss of functionality of the software.
Severity 4: General usage question or issue with minor business impact.

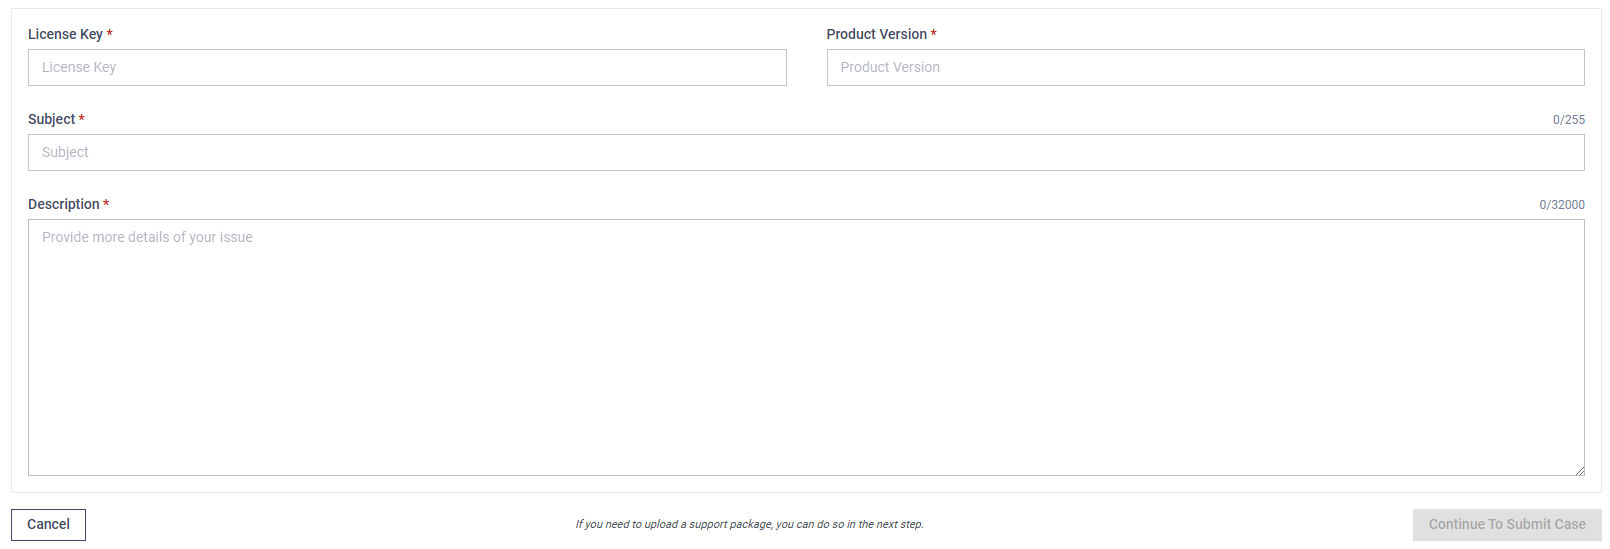
Step 6: License Key and Product Version
Use the dropdown menus to select the license key and product version or input manually if the desired option is not listed.
Step 7: Subject and Description
Enter a brief title summarizing the issue (maximum 255 characters) and provide a detailed explanation of the problem to help the support team understand and resolve it (maximum 32000 characters).
Step 8: Knowledge Base Suggestion
Note: This is a Conditional Field
After clicking the Continue to Submit Case button, the AI assistant will provide additional Knowledge Base suggestions based on the information entered in the form.
If no relevant articles are found, users are directed to the next step.
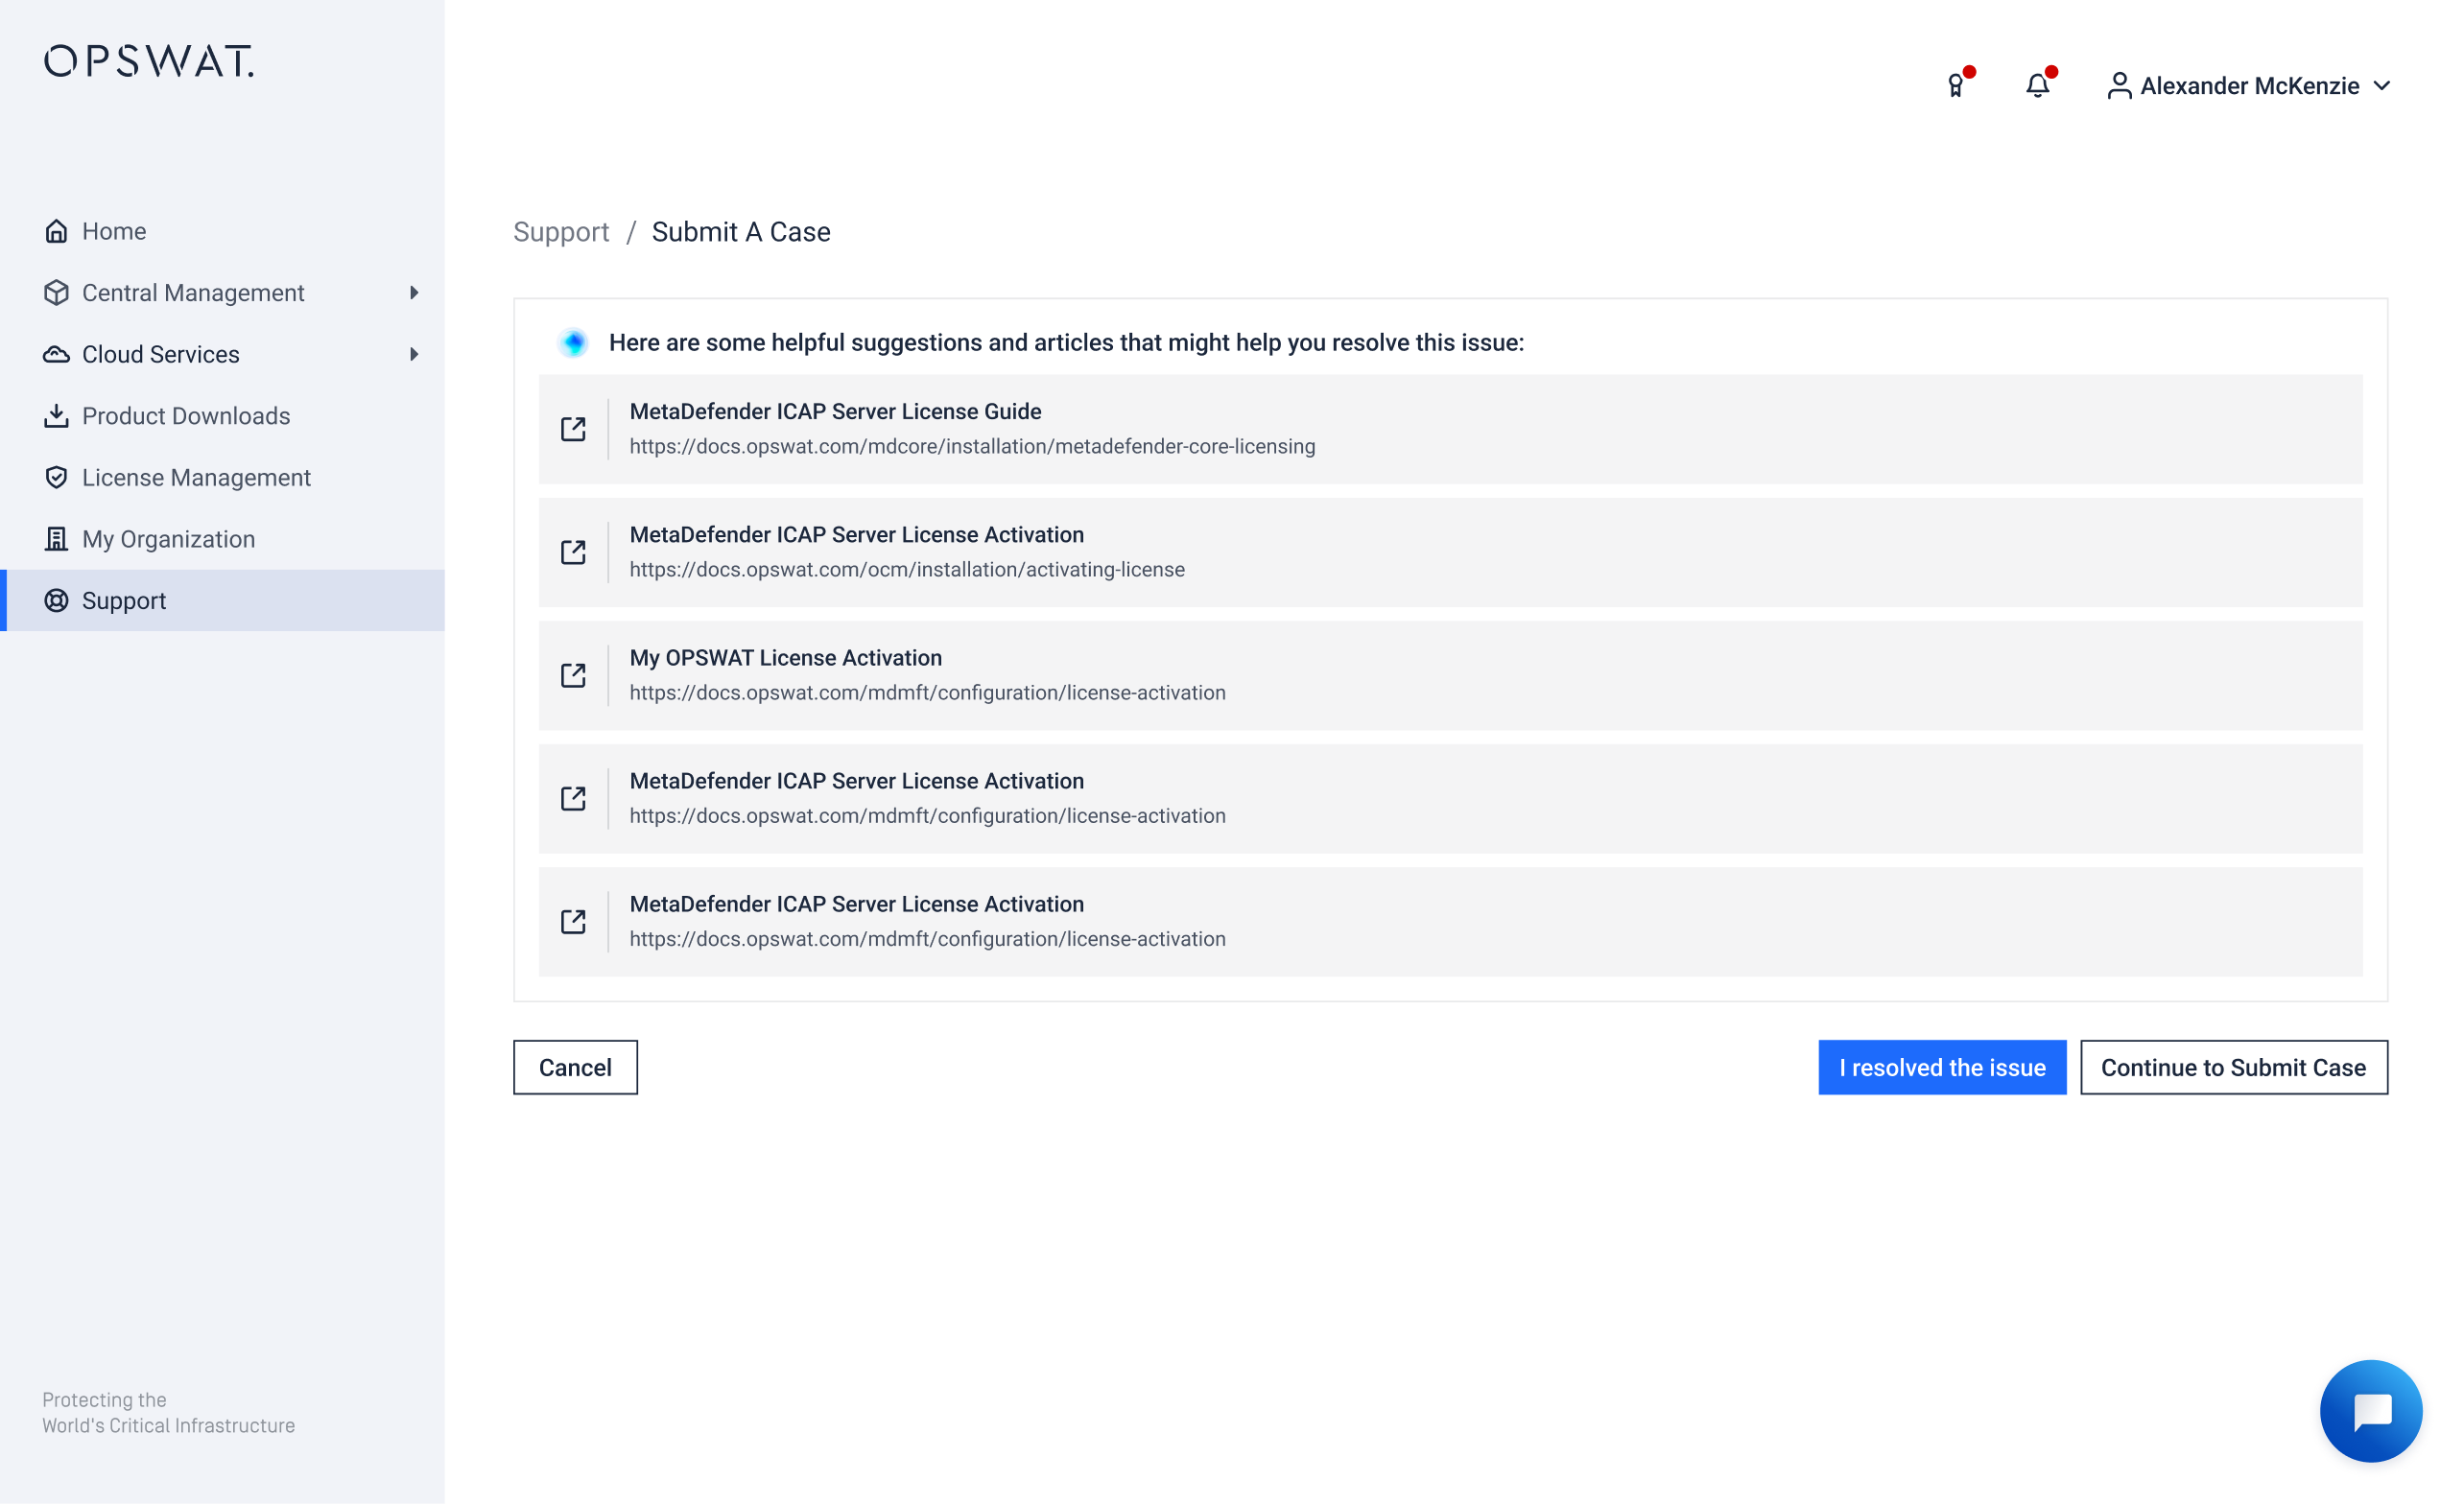
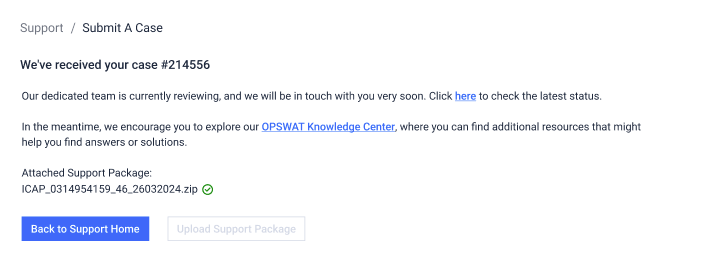
You then can decide to choose I resolved the issue or Continue to Submit Case. If you choose to continue submitting the case, we will display confirmation message with case number.
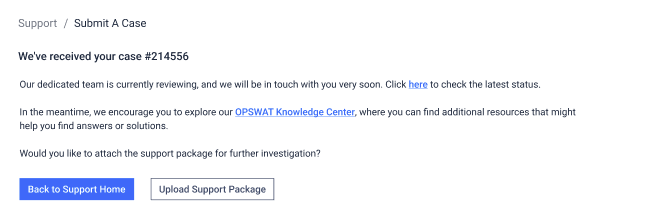
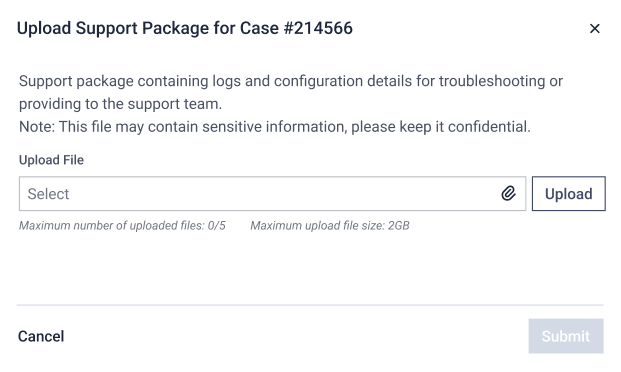
Step 9: Upload Support Package
By clicking the Upload Support Package, a popup dialog will allow you to attach up to 5 files with a maximum total upload size of 2 GB.
Step 10: Final Step
After submitting all supporting files, you will be directed to a final screen displaying a list of successfully uploaded files.
5. Case summary list
The Case Summary List provides users with an organized view of their support cases, organized into three tabs: My Cases, Organization Cases, Customer Cases, and False Detection Submission . The availability of these tabs is determined by the user's account type and assigned permissions.
Organization Cases and Customer Cases are displayed according to the organization the user is currently viewing. Cases submitted under other organizations will not be visible unless the user switches to that organization.
5.1 My Cases
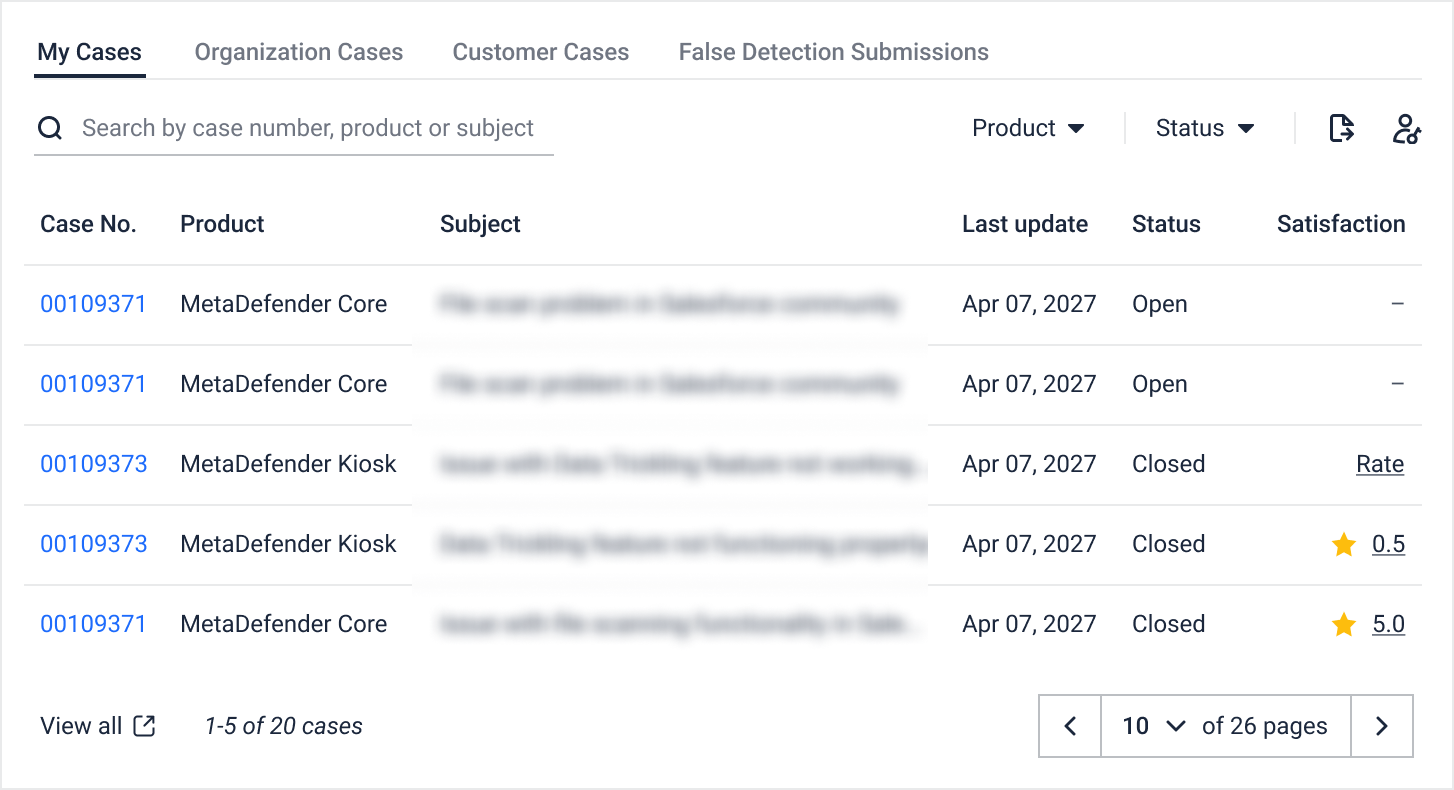
This tab is visible to all users, displaying all the cases user has submitted. In this tab, users can
Search by Case number, Product, or Subject
Filter cases by Product or Status (New/Open/Closed/Waiting on me/Waiting on OPSWAT/On-hold)
Export case details to CSV for offline use.
Access the full list of cases by clicking the View All button, which opens the comprehensive summary on another page.
5.2 Organization Cases
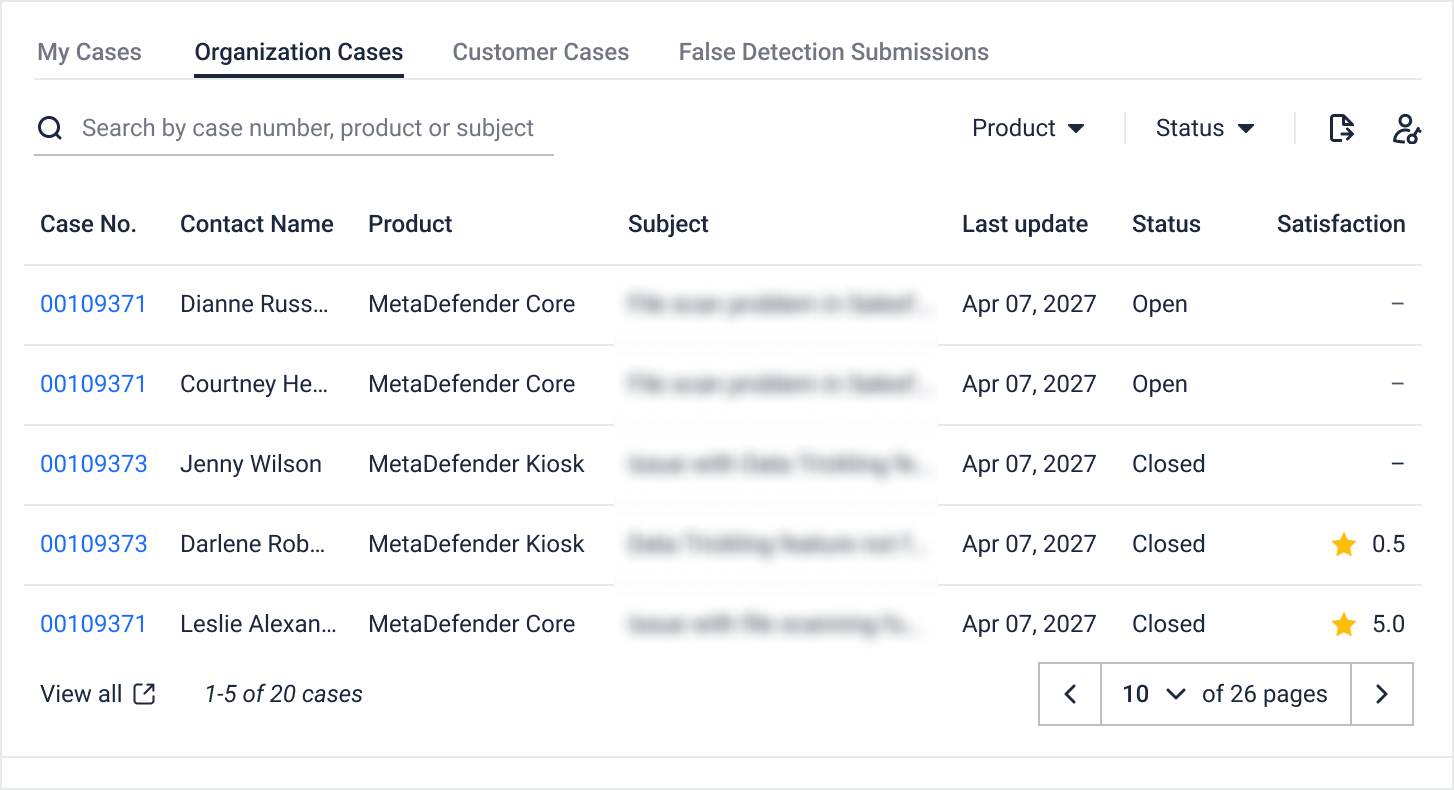
This tab displays all cases submitted by your organization's members and is only display if you are a part of an organization and you have Extend case view access. In this tab, users can
Search by Case number, Product, or Subject
Filter cases by Product or Status (New/Open/Closed/Waiting on me/Waiting on OPSWAT/On-hold)
Export case details to CSV for offline use.
See Extend Case View button
Access the full list of cases by clicking the View All button, which opens the comprehensive summary on another page.
5.3 Customer Cases
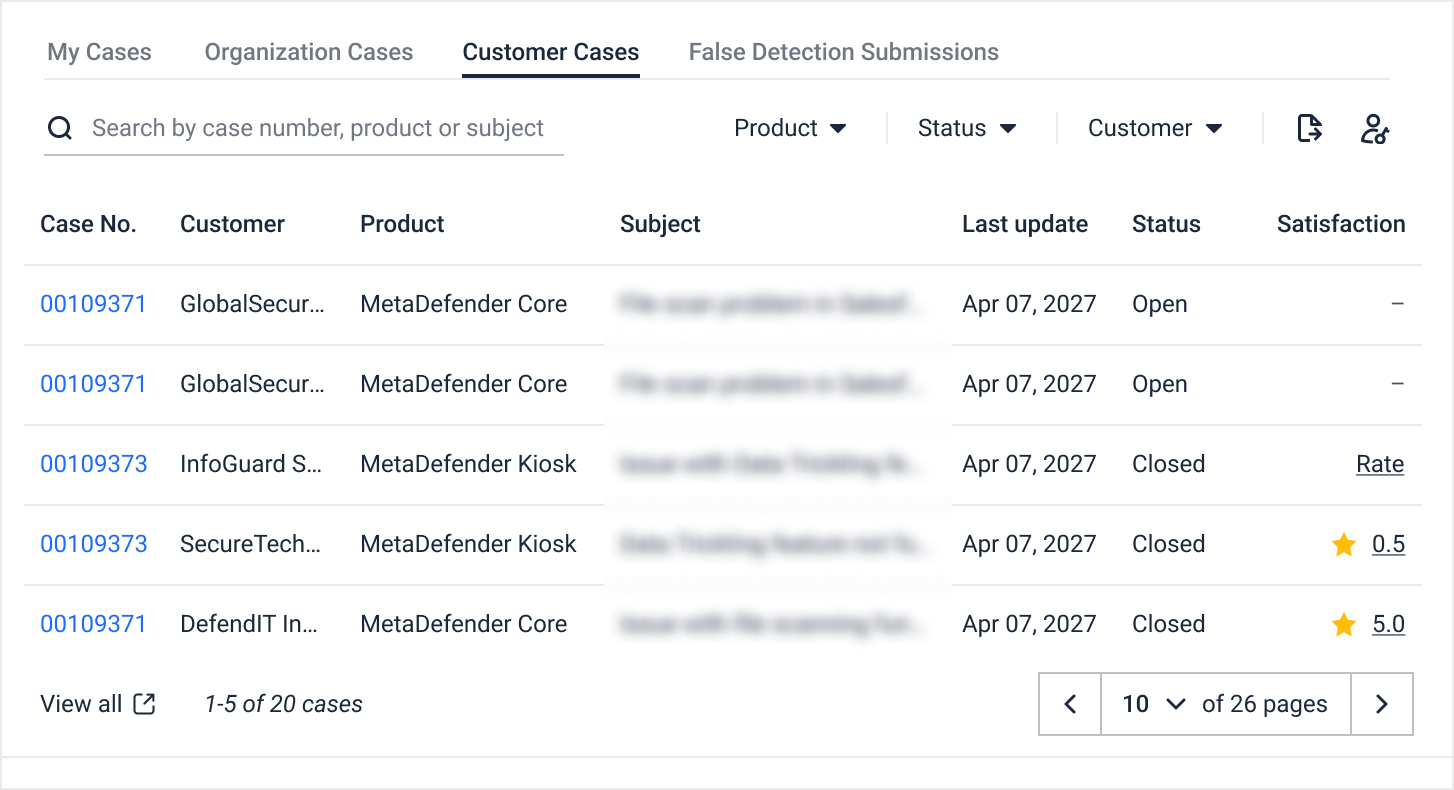
This tab displays cases submitted on behalf of customers and visible only if the following conditions are met
You have Full Access to Support Service - Customer Organizations role object AND Your organization has at least one linked customer with a Preferred Partner relationship
OR You have at least one customer case.
Learn more about granting user permission here.
If a user wants to view customer cases submitted by other members within the organization, they must also have Extend Case View Access permission.
In this tab, users can
Search by Case number, Product, or Subject
Filter cases by Product or Status (New/Open/Closed/Waiting on me/Waiting on OPSWAT/On-hold)
Export case details to CSV for offline use.
Access the full list of cases by clicking the View All button, which opens the comprehensive summary on another page.
5.4 False Detection Submission
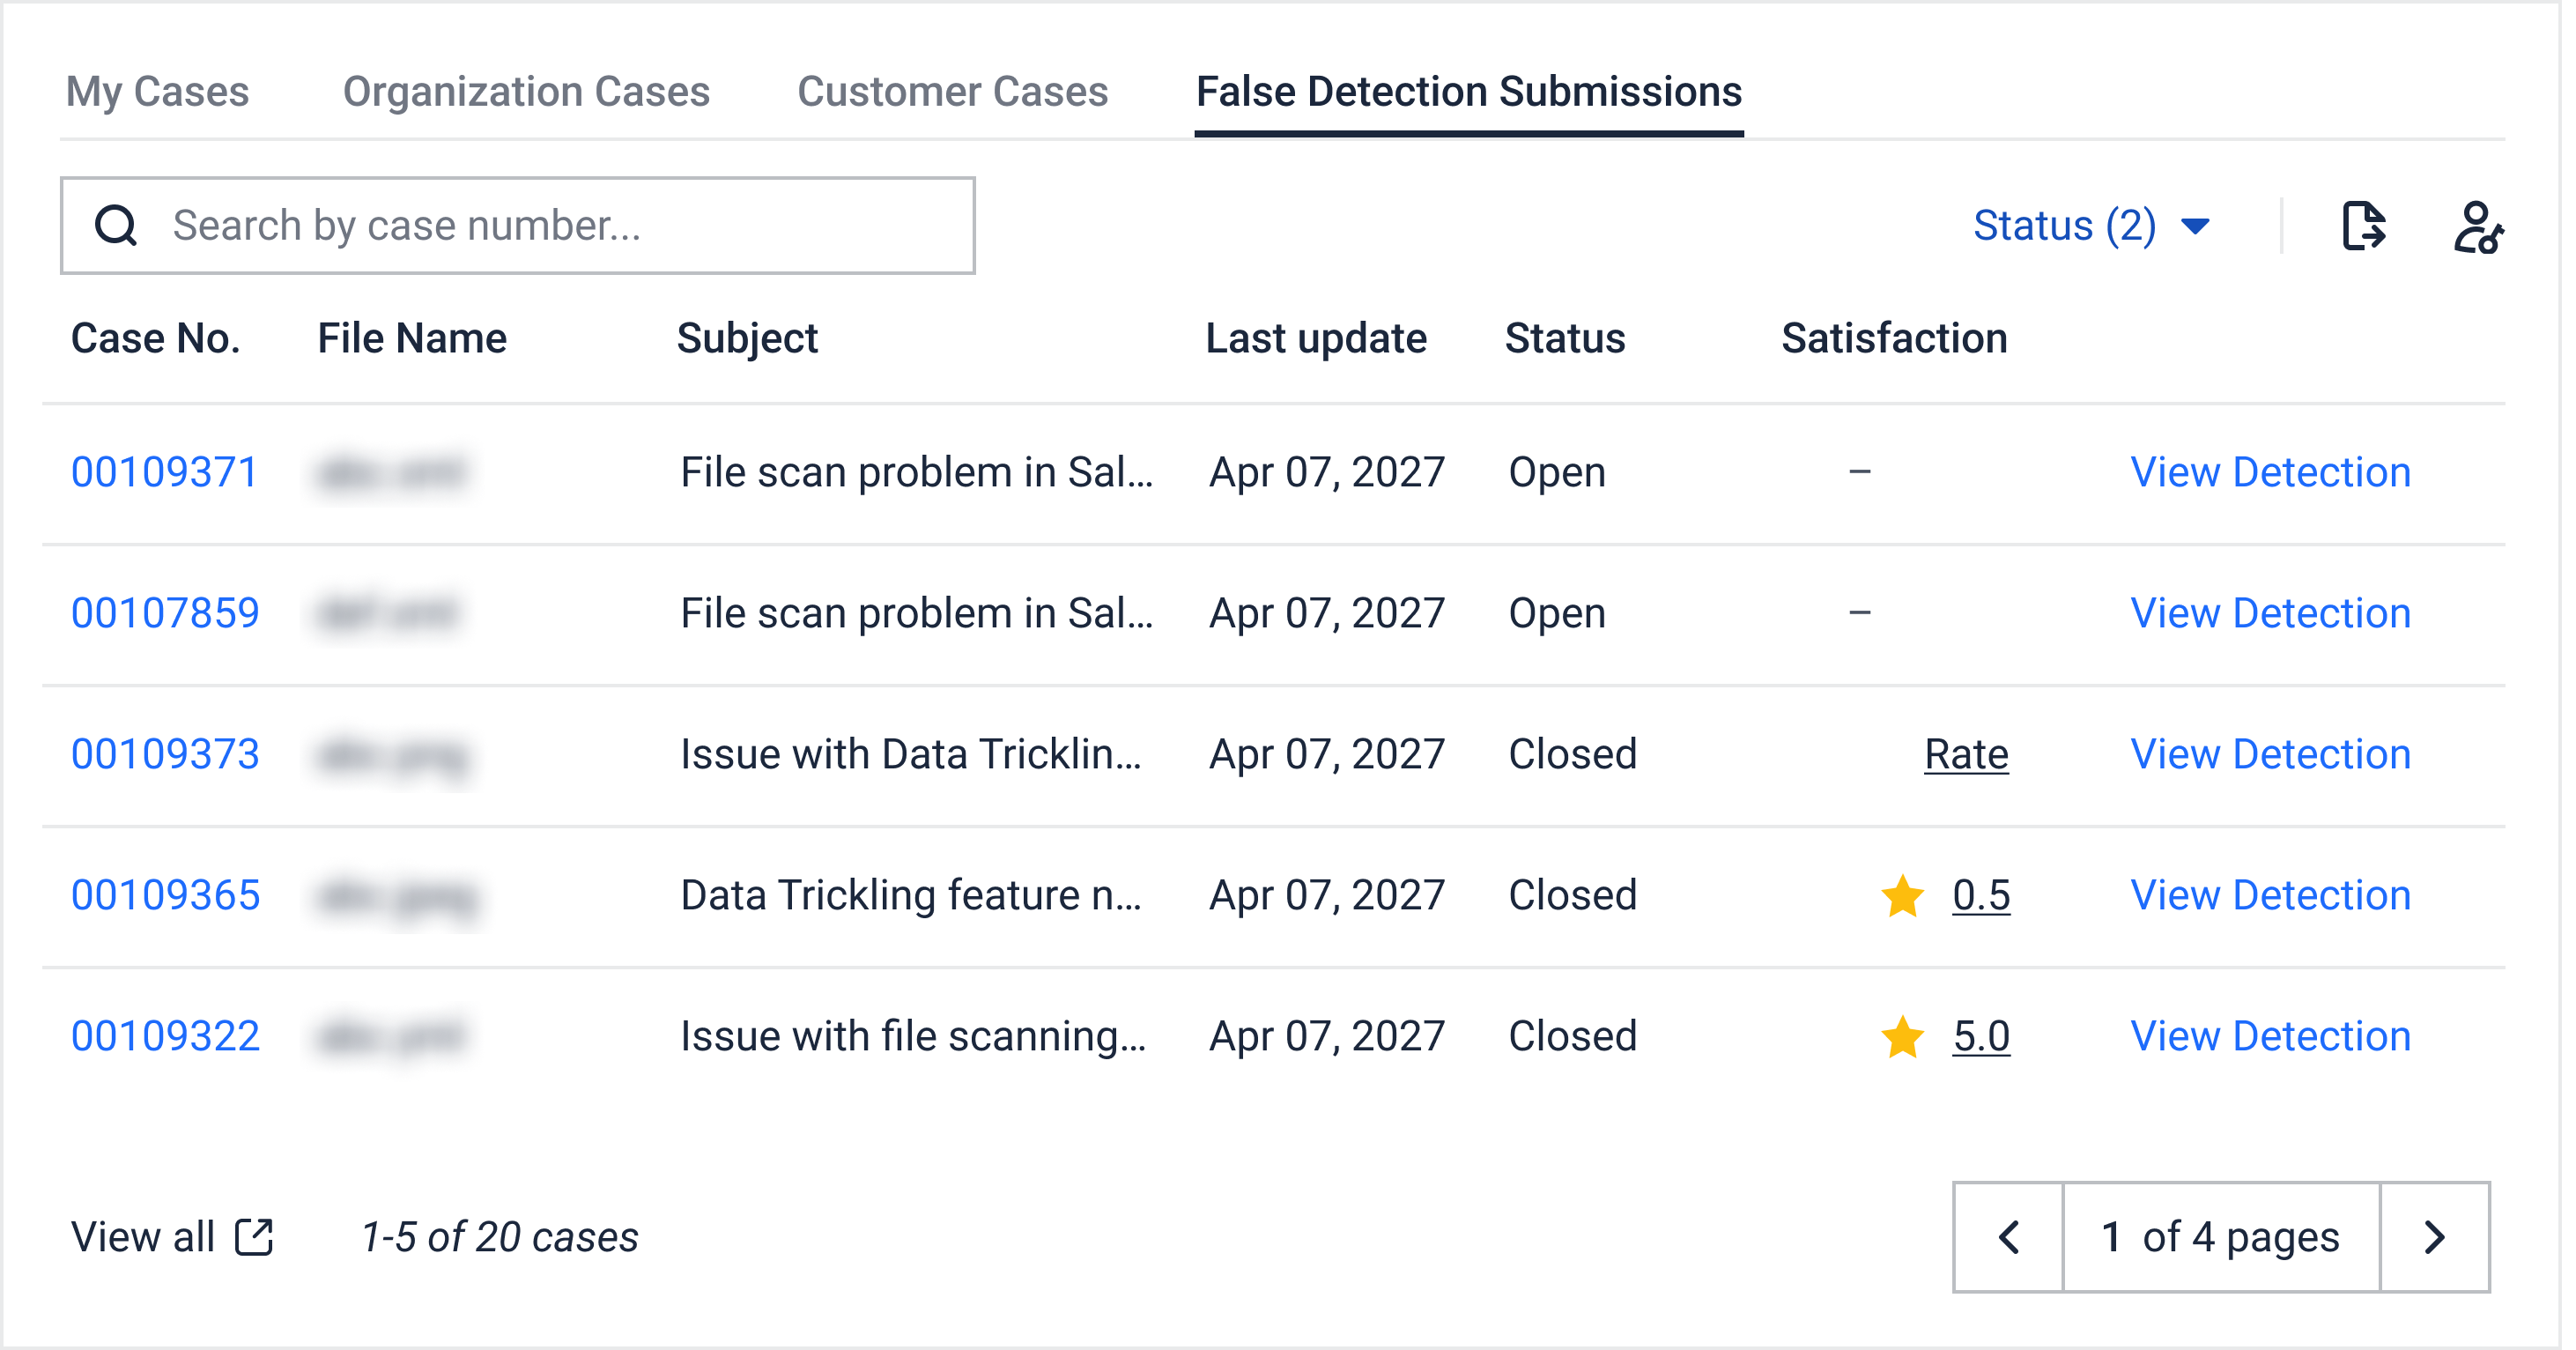
After reporting a false detection, a support case is automatically created. This tab is visible to all users, displaying all false detection cases that the user has submitted. In this tab, users can
Search by Case number and Subject
Filter cases by Product or Status (New/Open/Closed/Waiting on me/Waiting on OPSWAT/On-hold)
View details of False Detection - "View Detection"
Export case details to CSV for offline use.
Access the full list of cases by clicking the View All button, which opens the comprehensive summary on another page.
6. Extend Case View
The Extend Case View (previously known as Configure Organization Case Access) button allows authorized users to manage or review permissions for viewing organization-wide cases. Its availability and functionality depend on the user’s account and permissions:
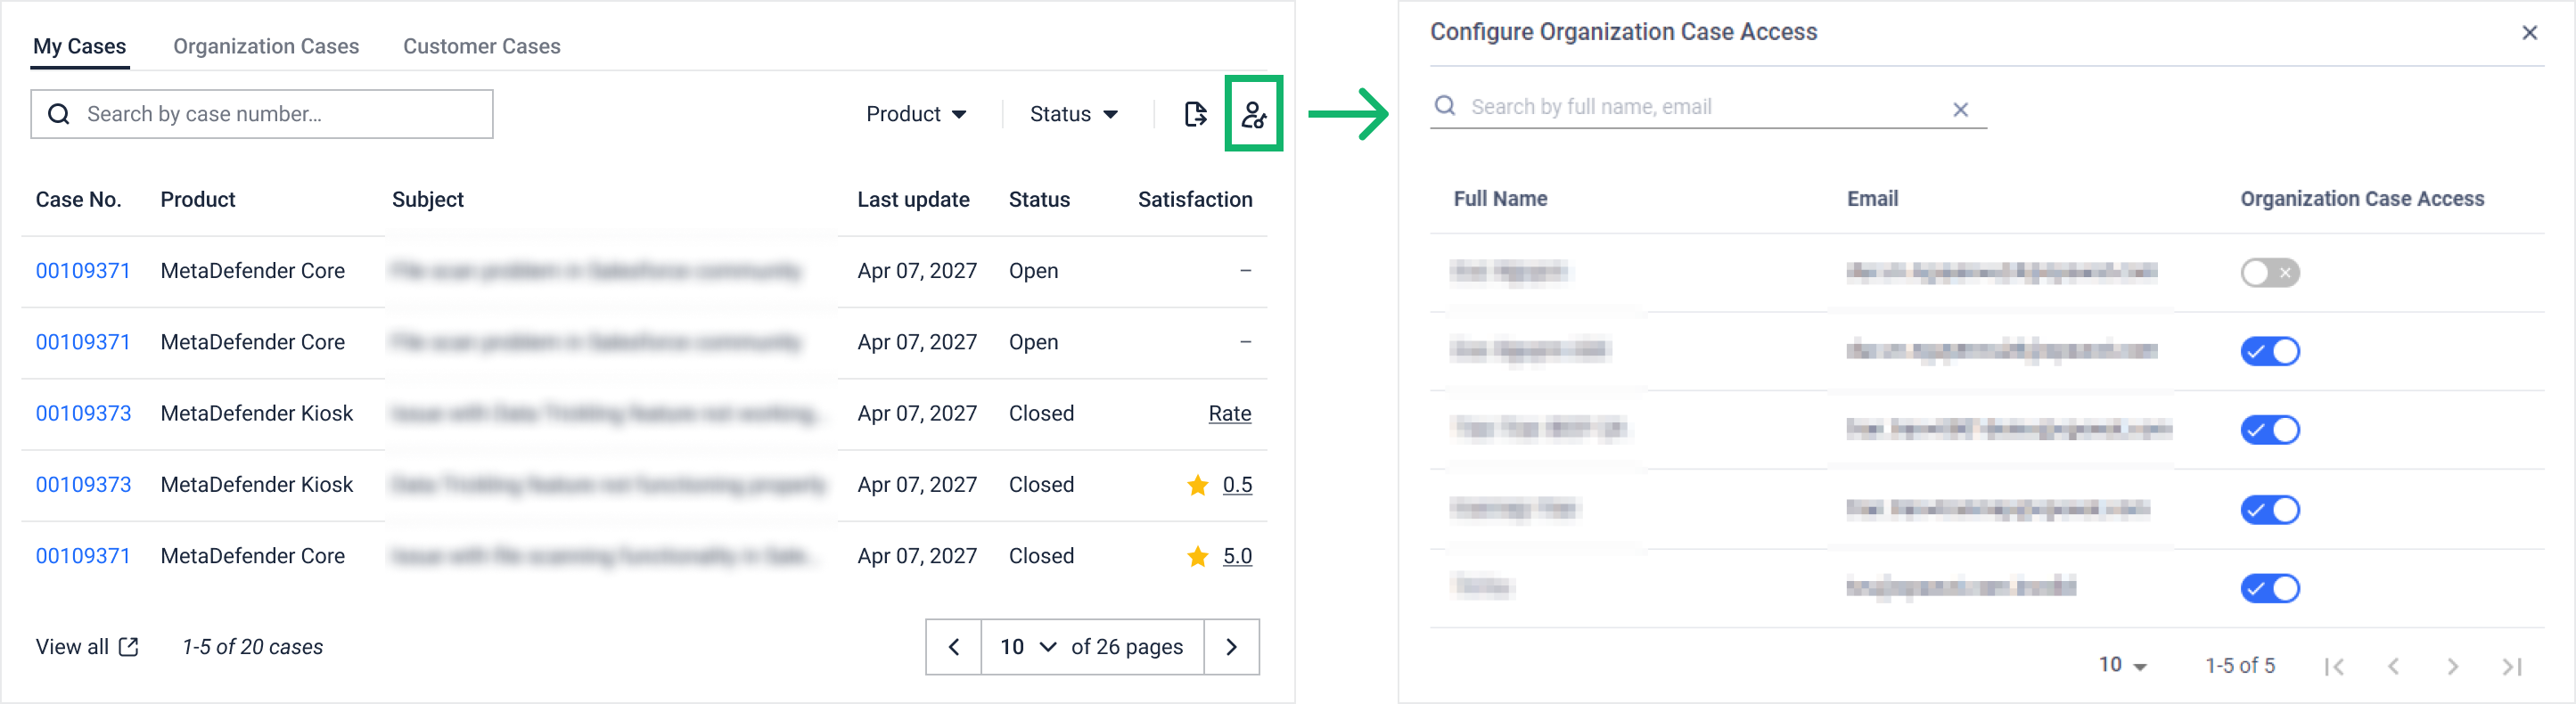
Users without an Organization:
The Extend Case View button will not be visible.
Users in an Organization having View only permission to "Support Services" Role object
The Extend Case View button is visible on the Support page. Clicking it allows users to view (but not edit) the list of users who have and don’t have Extend Case View Access.
Hovering over the toggle will show the message: "You don't have permission to configure Organization Case Access."
Users in an Organization having Full Access to "Support Services" Role object
Clicking the Extend Case View button opens a popup dialog displaying a list of the organization's users, including their full names and email addresses.
Authorized users can toggle Organization Case Access on or off for each user directly from this dialog.
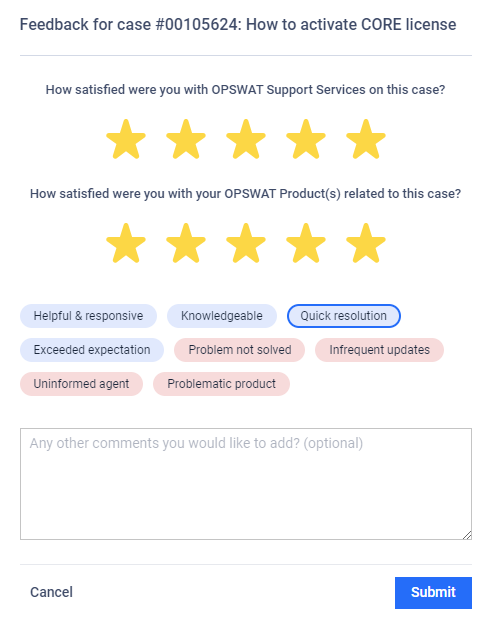
7. Satisfaction Rating
The Satisfaction Rating allows users to provide feedback for their closed cases, ensuring quality and continuous improvement in support services. Here's how the rating system works:
7.1 Icons and Their Meaning
Star Icon in Yellow:
Displayed for CLOSED cases where the user has already provided a rating.
Users can update their previous rating if needed.
Rate (Clickable Link):
Displayed for CLOSED cases where the user has not yet submitted a rating.
Allows users to provide feedback for the case.
“-” (Dash Icon):
Displayed for:
OPEN cases (ratings are not applicable until the case is closed).
CLOSED cases submitted by other users within the organization that haven't been rated yet.
7.2 Rating Rules
Users can only rate their own CLOSED cases.
Rating can be submitted or updated in any of the following tabs: My Cases; Organization Cases or Customer Cases.
8. Subscribe to Critical Alerts
The toggle allows users to subscribe/unsubscribe to the critical alert notification.
NoteThis toggle is only displayed for users that joined at least one organization.
Members of this list will receive important email alerts about:
License Expirations: Notifications are sent when on-premises product licenses are approaching their expiration dates, specifically at 60 days and 30 days prior to expiration.
Urgent Issues from OPSWAT: Immediate updates about critical problems or important announcements from OPSWAT.
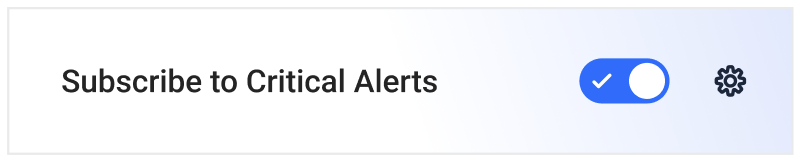
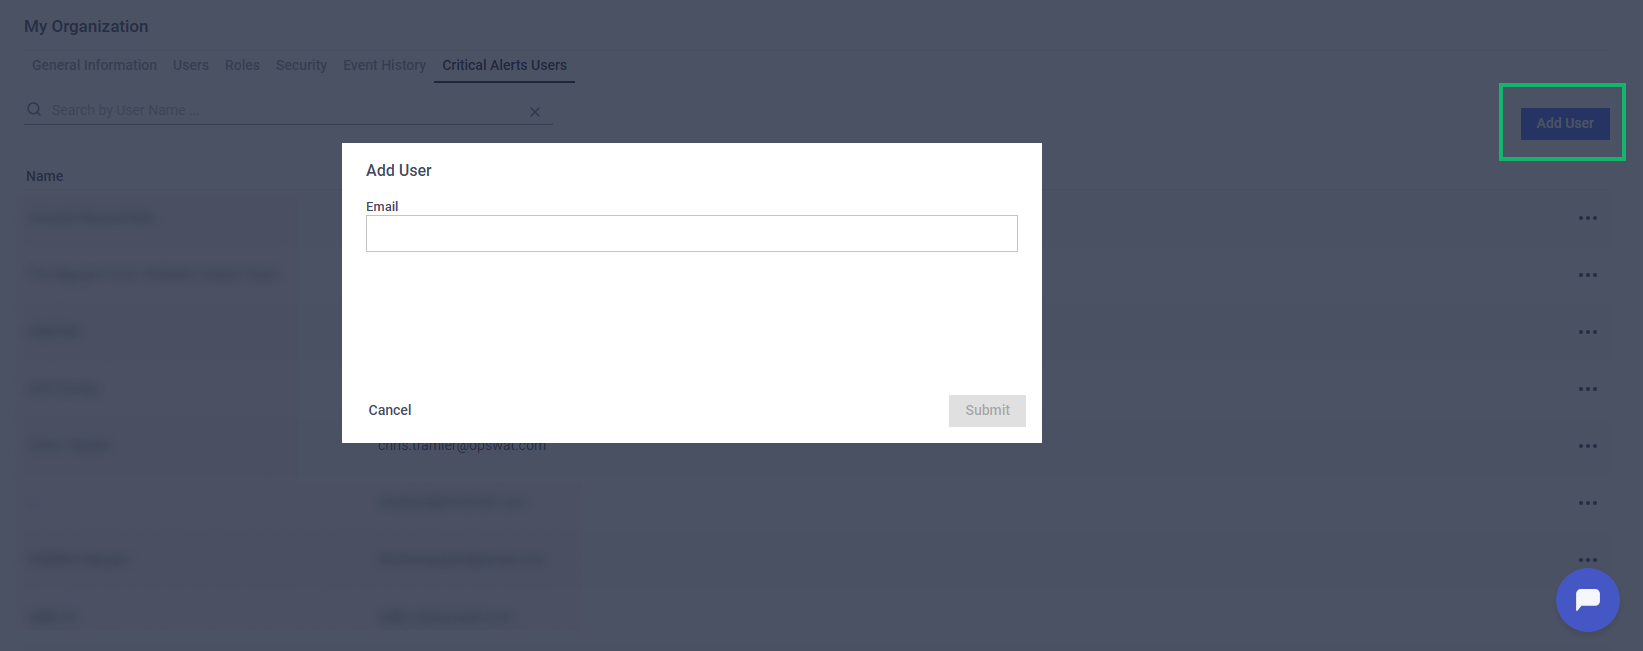
Or organization admins can add any email address to the list, even if it is not a registered user in My OPSWAT Portal by navigating to My Organization > Critical Alerts Users
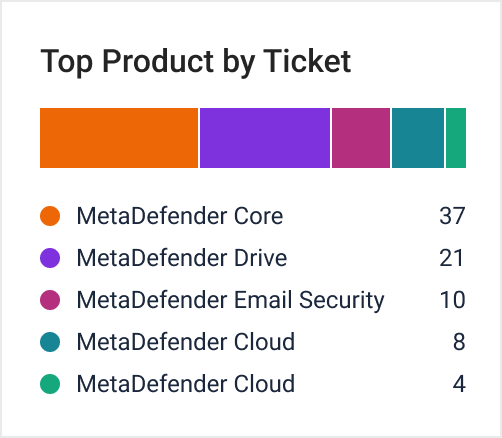
9. Top Product by Ticket
This chart visualizes the top 5 products by ticket volume from all your organizations over the past 12 months.
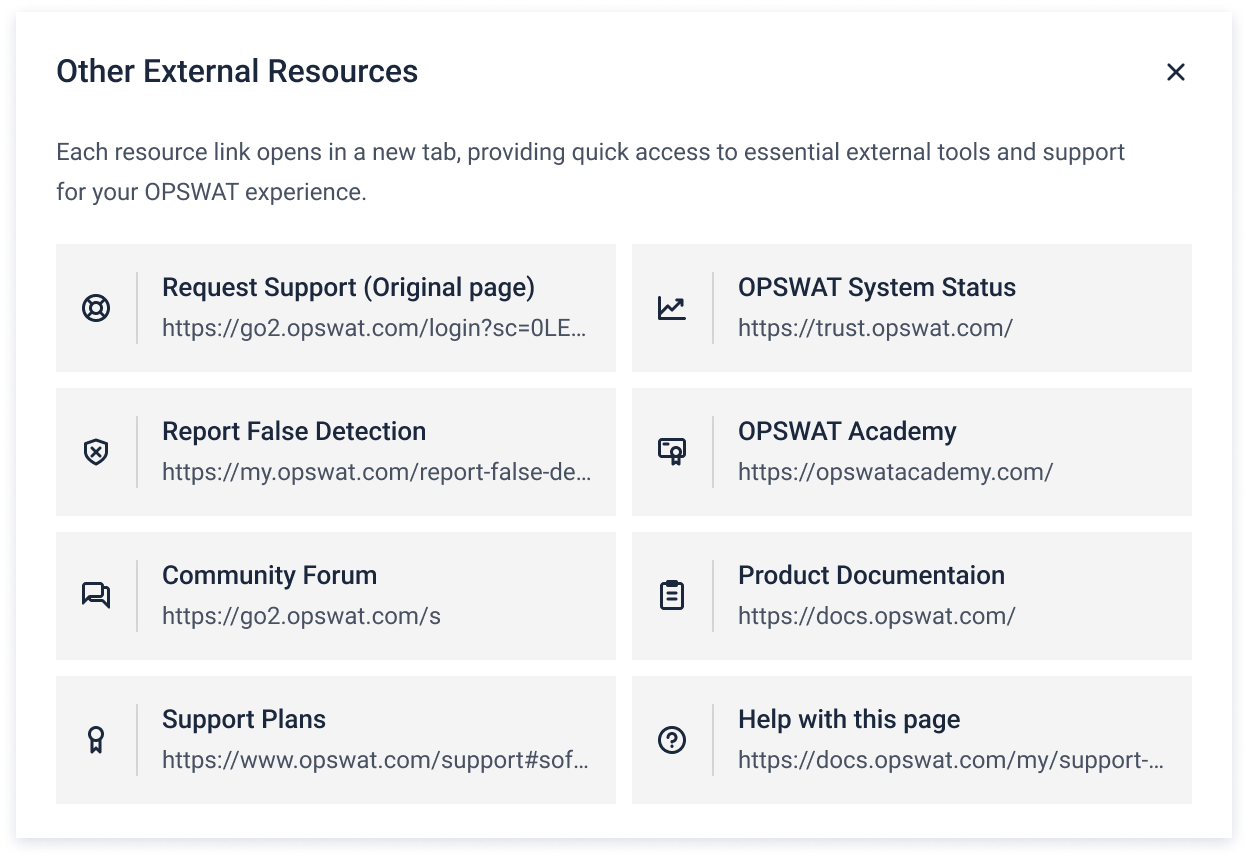
10. External Resources
Other External resources section provides links to various OPSWAT portals and tools, enabling users to access additional support and information.
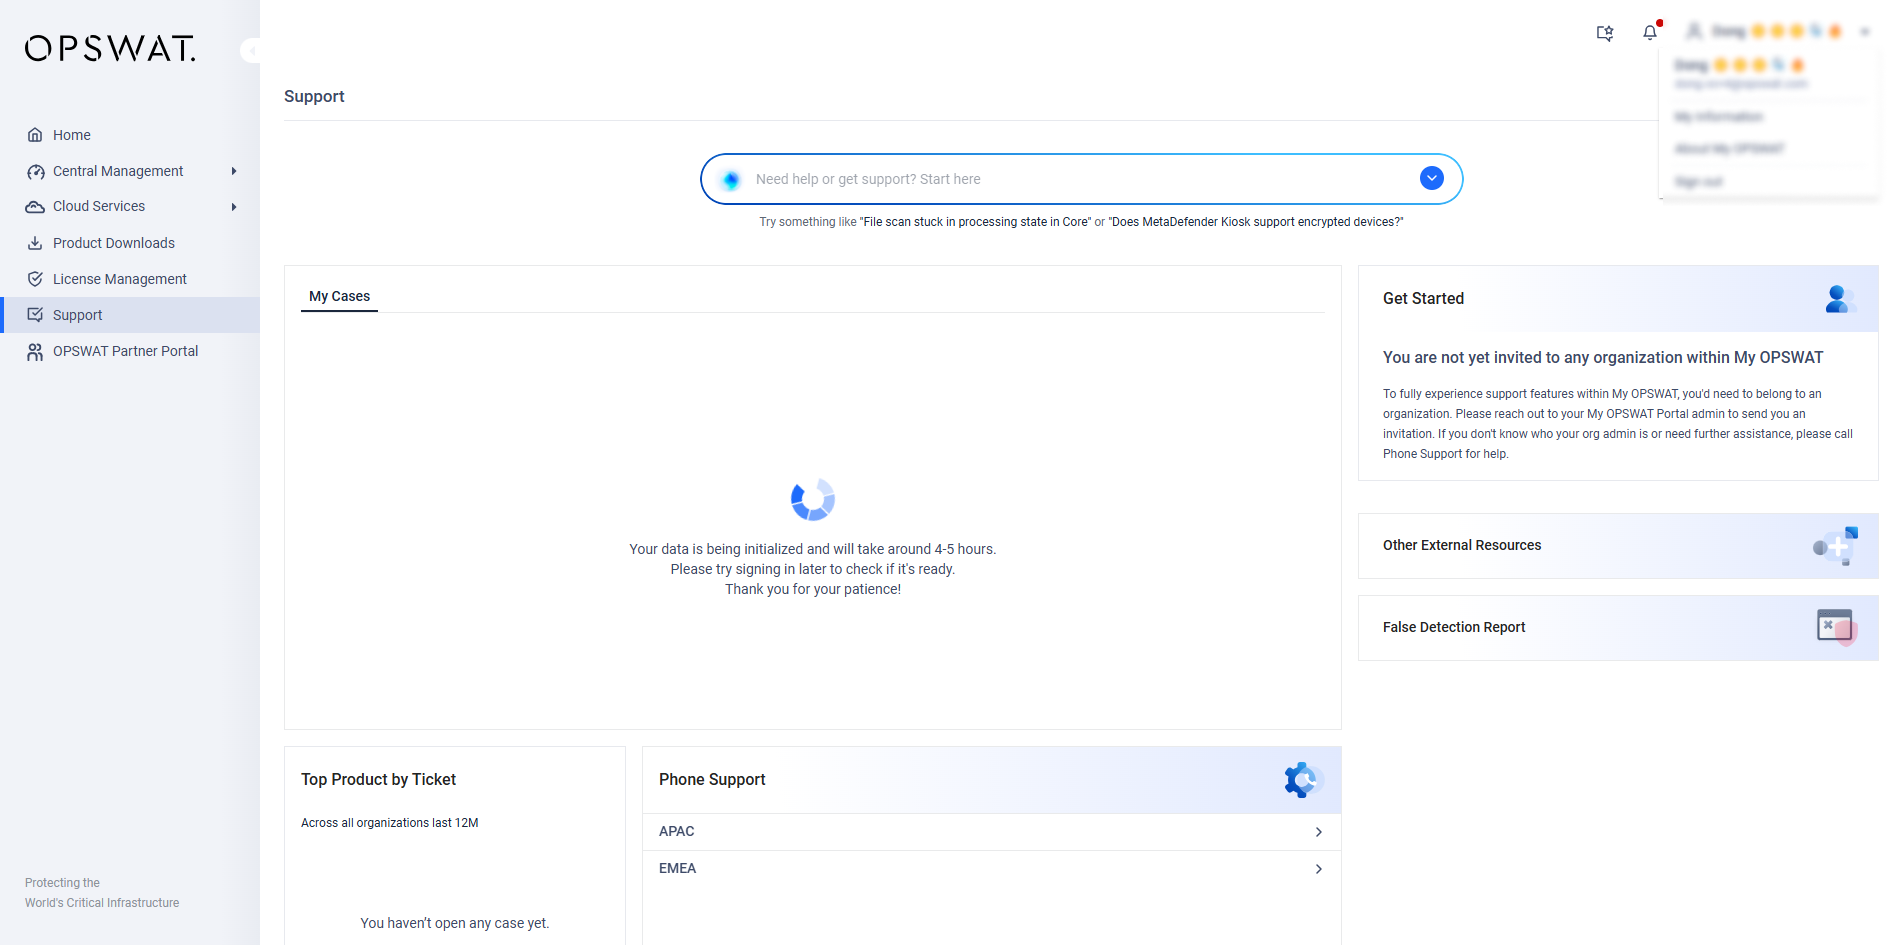
For newly registered accounts, it may take approximately 4–5 hours for the system to initialize your data. During this period, access to certain features in the Support Page may be temporarily unavailable. A message will display: "Your data is being initialized and will take around 4-5 hours. Please try signing in later to check if it's ready. Thank you for your patience."
We appreciate your understanding during this setup process.