
MetaDefender Managed File Transfer supports various types of storage (local, network, Amazon S3) for different purposes (temporary, sanitized, permanent). Configure these storage types by navigating to the "Settings" → "Storage" page.
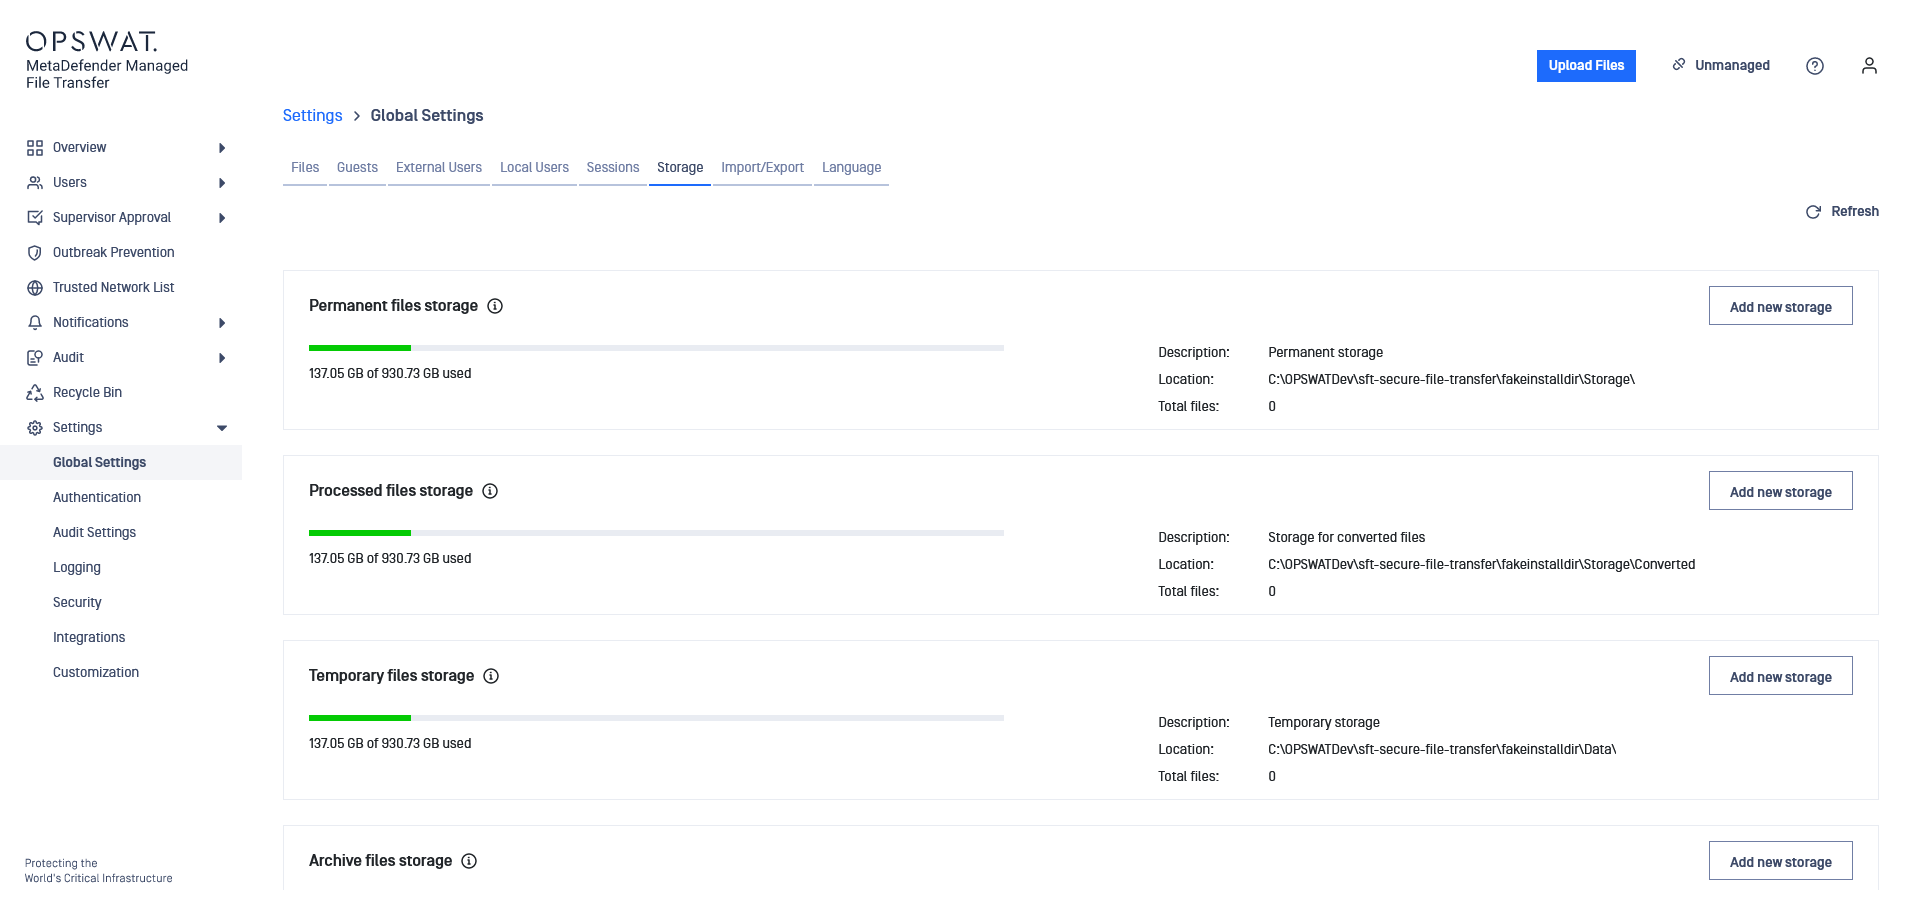
Storage types:
Type | Description | |
|---|---|---|
1 | Local | A storage represented by a local directory on the disk. |
2 | Network storage | A storage represented by a network location. Network paths requiring credentials are not supported. |
3 | Amazon S3 storage | A bucket or a directory inside a bucket on Amazon S3 for saving files in the cloud. |
4 | S3 Compatible Storage | A bucket or a directory inside a bucket on S3 compatible storage for saving files in the cloud. |
Storage Purposes:
Purpose | Description | |
|---|---|---|
1 | Temporary | Used to save files before processing and for files scheduled for reprocessing |
2 | Sanitized | Used to save files sanitized by MetaDefender Core |
3 | Permanent | Used to save fully processed files available for download |
4 | Archive | Used to save files no longer needed but kept for audit purposes |
Adding a New Local Storage
Add a new local storage:
Go to "Settings" → "Storage"
Choose the purpose (Permanent, Sanitized, Temporary) and click "Edit"
Fill out the required information
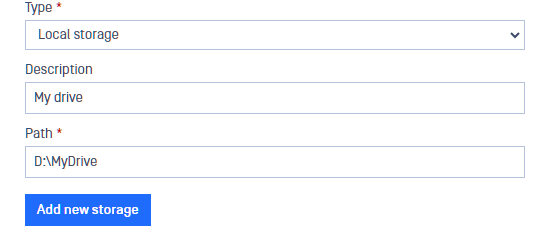
Click "Update"
Adding a New Network Storage
Samba is supported from protocol version SMB2_10.
Add a new network storage:
Go to "Settings" → "Storage"
Choose the purpose (Permanent, Sanitized, Temporary) and click "Edit"
Fill out the required information
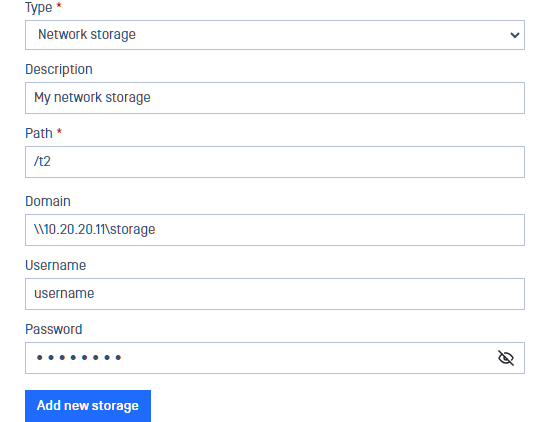
Click "Update."
Adding a New Cloud Storage in Amazon S3
Add a new cloud storage:
Go to "Settings" → "Storage"
Choose the purpose (Permanent, Sanitized, Temporary) and click "Edit"
Fill out the required information
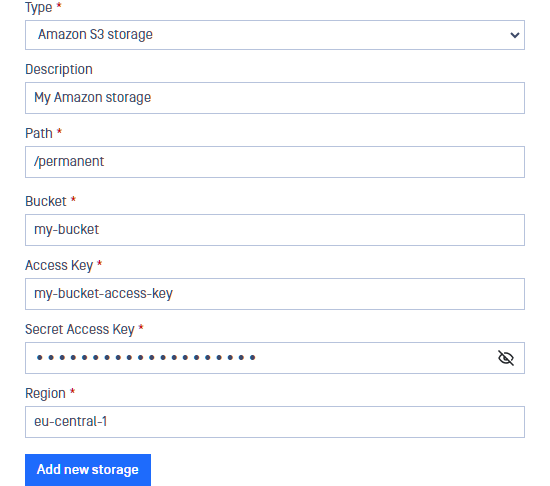
Click "Update."
Adding S3 Compatible Storage
Add a new S3 compatible storage:
Go to "Settings" → "Storage"
Choose the purpose (Permanent, Sanitized, Temporary) and click "Edit**"**
Fill out the required information (input values are case sensitive)
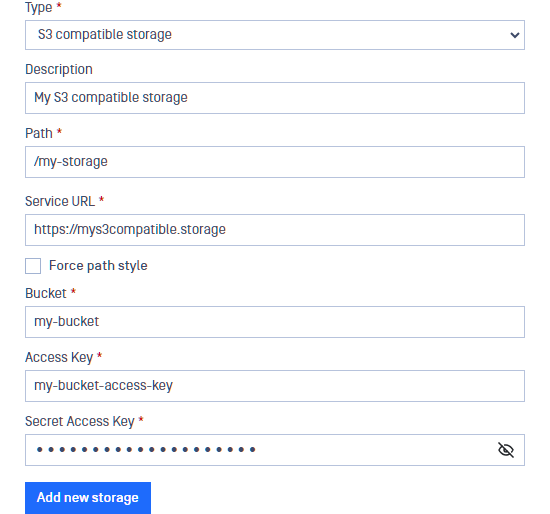
Click "Update"